
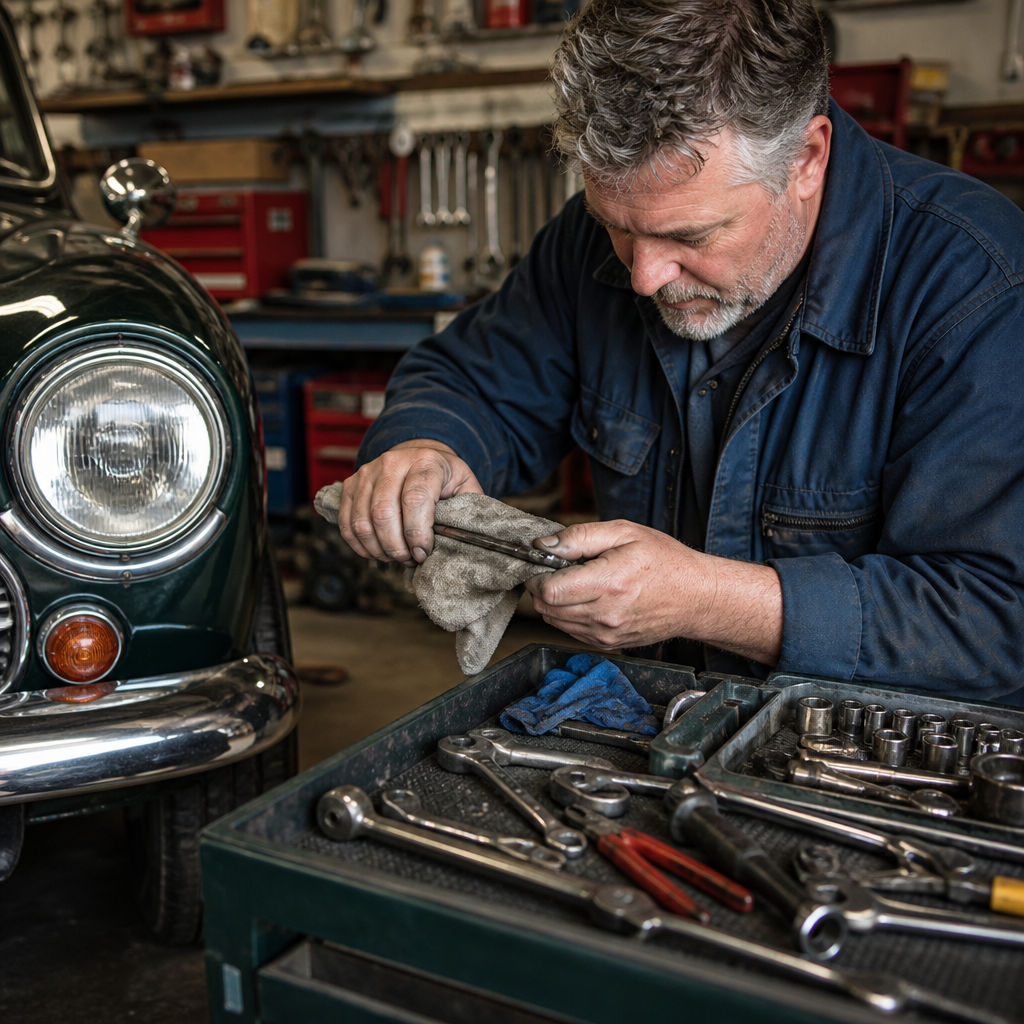
Tool maintenance is one of the least glamorous parts of classic car ownership, yet it directly affects restoration quality, safety, and long-term cost. If you own a vintage Mustang, Jaguar E-Type, air-cooled 911, or Chevrolet C10, your tools are not just accessories; they are part of the restoration system. Well-maintained hand tools, power tools, lifting equipment, measuring devices, and shop consumables deliver cleaner work, fewer broken fasteners, and more reliable results across every job in the garage.
In classic car work, tools and equipment cover a broad range: spanners, sockets, screwdrivers, torque wrenches, hydraulic jacks, axle stands, pullers, battery chargers, multimeters, air compressors, spray guns, welders, and storage systems. Maintenance means cleaning, lubricating, calibrating, inspecting, protecting, and storing each item according to its design and use cycle. Longevity means more than making tools last longer. It means preserving accuracy, preventing corrosion, avoiding failures under load, and ensuring you can trust the equipment when working on irreplaceable components.
I learned this the hard way restoring British and American classics where damaged tools caused avoidable problems: a sticky torque wrench led to over-tightened fasteners on an aluminum timing cover, a neglected jack seal leaked during a brake overhaul, and rusted pliers marked freshly replated trim. On older vehicles, replacement parts can be scarce and original metal is often softer than modern hardware, so tool condition matters even more. Proper tool maintenance protects the car as much as the tool itself.
This hub article covers the full tools and equipment landscape within restoration and maintenance. It explains how to care for core categories, what inspection routines matter most, how to organize a workshop, and where maintenance intersects with safety, precision, and preservation. If you want your classic car tools to last for decades and perform consistently on every repair, this is the foundation.
Why tool maintenance matters in classic car restoration
Classic car restoration puts unusual demands on equipment. Fasteners may be seized after fifty years, trim pieces may be fragile, and service procedures often require improvised setups when factory tools are unavailable. In that environment, a neglected tool becomes a liability. Rounded sockets slip off Whitworth or AF hardware, contaminated air lines ruin paint, and an uncalibrated torque wrench creates hidden engine and suspension risks.
Good maintenance improves three things immediately: accuracy, safety, and efficiency. Accuracy matters when setting bearing preload, tightening head studs, measuring charging voltage, or adjusting panel gaps. Safety matters whenever a car is lifted, compressed springs are involved, or fuel and electrical systems are open. Efficiency matters because hunting for a clean 10 mm socket, freeing a seized ratchet, or draining water from a compressor wastes hours across a project.
There is also a financial argument. Premium tools from Snap-on, Hazet, Stahlwille, Facom, Knipex, Gedore, and PB Swiss can serve for decades if cared for properly. Even mid-range tools from Tekton, GearWrench, or Draper perform reliably when kept clean and dry. Replacing neglected equipment is expensive; damaging rare original car parts with neglected equipment is often far more expensive.
Hand tools: cleaning, rust prevention, and edge care
Hand tools are the backbone of any classic car workshop, and their maintenance is straightforward if done regularly. After each major job, wipe down spanners, sockets, extensions, pliers, chisels, punches, and screwdrivers with a clean rag to remove oil, brake dust, coolant residue, and perspiration. Sweat contains salts that accelerate corrosion, especially on polished carbon steel tools stored in unheated garages.
For deeper cleaning, use mineral spirits or a mild degreaser, then dry thoroughly. Avoid soaking screwdrivers with acetate handles or rubber grips in harsh solvents because they can swell or crack. If surface rust appears, remove it with a nylon abrasive pad, fine oil-soaked steel wool, or a dedicated rust eraser. Follow with a thin coat of corrosion inhibitor such as Boeshield T-9, WD-40 Specialist Corrosion Inhibitor, or light machine oil. The goal is a protective film, not a sticky coating that attracts grit.
Cutting and gripping tools need special attention. Side cutters, tin snips, crimpers, and pliers should receive a drop of oil at the pivot after cleaning. Files should be brushed with a file card and stored so their teeth do not rub together. Chisels and punches should be inspected for mushrooming; dress damaged heads on a bench grinder before fragments break off under impact. Screwdriver tips must remain crisp. On slotted screws commonly found in classic interiors and carburetors, a poorly maintained driver causes cam-out and visible damage instantly.
| Tool category | Primary maintenance task | Recommended interval | Main risk if ignored |
|---|---|---|---|
| Spanners and sockets | Clean, dry, apply rust inhibitor | After heavy use / monthly | Corrosion, slipped fasteners |
| Pliers and cutters | Clean jaws, lubricate pivot, inspect edges | Monthly | Binding, poor grip, wire damage |
| Screwdrivers | Inspect tip shape, clean handle, prevent rust | Monthly | Fastener damage, loss of control |
| Chisels and punches | Dress heads, oil steel surfaces | Before major jobs | Metal fragments, inaccurate strikes |
| Files | Brush teeth, store separately | After each use | Clogging, reduced cutting action |
Torque wrenches, measuring tools, and calibration discipline
If one category deserves stricter handling than all others, it is precision tools. Torque wrenches, micrometers, vernier calipers, dial indicators, feeler gauges, straightedges, and multimeters influence decisions that affect engine life, brake performance, and drivability. Their maintenance is not cosmetic; it is functional.
Click-type torque wrenches should always be returned to their minimum setting, never stored under spring load, and never used as breaker bars. Keep them clean, avoid dropping them, and have them calibrated periodically. Many professional shops use annual calibration or every five thousand cycles as a practical benchmark. Beam torque wrenches need less calibration attention but still require inspection for bent pointers and scale readability. On classics with aluminum heads, wheel bearings, or delicate transmission cases, torque accuracy is non-negotiable.
Measuring tools need clean contact faces and protective storage. A micrometer with grit on the anvil and spindle will read falsely. Feeler gauges contaminated with oil varnish or burrs will mislead valve lash adjustments. Dial indicators should move smoothly with no sticking. I keep silica gel packs in drawers with measuring tools because condensation in older garages is common, particularly in shoulder seasons. For electrical tools, check multimeter leads for cracked insulation and verify battery condition before diagnosing charging or ignition faults.
Use simple references to verify accuracy between formal calibrations. Gauge blocks are ideal, but even a known drill shank or precision rule can reveal a gross error in calipers. The key rule is this: if a precision tool has been dropped, overloaded, or exposed to moisture, inspect it before trusting it on the car.
Power tools, air systems, and electrical equipment
Power tools save time on disassembly, fabrication, paint preparation, and underbody work, but they fail quickly when dust, moisture, and neglect build up. Electric drills, angle grinders, polishers, impact guns, sanders, and bench grinders all need periodic cleaning of vents and housings. Compressed air can blow out dust, but do it outdoors and wear eye protection. Check cords for cuts, plugs for looseness, and triggers for sticking. A damaged cord on a metal-bodied tool in a damp garage is a serious hazard.
Air tools require lubrication and clean air. Add a few drops of air tool oil before use unless your system has an inline lubricator, and drain the compressor tank regularly. Water in the tank promotes internal corrosion and sends moisture down the line. That matters for all tools, but especially for paintwork. Fish-eyes and blushing in paint often trace back to moisture or oil contamination in the air supply. Use a regulator, water separator, and desiccant dryer if you spray primer or topcoat.
Battery chargers, jump packs, welders, and diagnostic tools also deserve routine checks. Clean clamps and terminals, inspect ground leads, and keep cooling vents clear. With MIG welders, wire-feed issues are often caused by dust, liner contamination, or worn contact tips rather than major faults. Good maintenance keeps these systems reliable when fabrication or rust repair work must happen on schedule.
Lifting equipment, safety gear, and load-bearing inspections
No equipment category carries higher consequences than load-bearing gear. Floor jacks, bottle jacks, axle stands, wheel dollies, engine hoists, jack beams, and creepers must be inspected before and after use. A leaking ram, bent saddle, damaged caster, or missing retaining pin is not a minor issue. It is a stop-work issue.
Follow manufacturer guidance for hydraulic fluid type and service intervals. Keep jack rams clean so grit does not damage seals, and never store lifting equipment outside or directly on damp concrete for long periods. Inspect axle stands for cracked welds, distorted columns, and positive lock engagement. If a stand has been overloaded or knocked from height, retire it. Do not gamble with load-bearing steel.
Safety equipment needs the same discipline. Safety glasses with scratched lenses reduce visibility and encourage non-use. Welding helmets need clean sensors and intact headgear. Respirator maintenance is especially important in restoration work involving paint, solvents, filler dust, rust particles, and underseal removal. Replace cartridges to the manufacturer schedule and store the respirator in a sealed bag so the filters are not exhausted by ambient fumes in the workshop.
Storage, organization, and workshop environment control
The best tool maintenance program will fail in a badly managed environment. Most corrosion starts with moisture, dust, or contamination in storage, not during use. Organize tools by task and frequency: daily-use hand tools in drawer liners, precision tools in protective cases, electrical gear on shelves above floor level, and chemicals in dedicated cabinets. Foam shadowing helps inventory control, but even simple labeled drawers prevent loss and damage.
Humidity control is critical for classic car garages, particularly detached buildings without insulation. A dehumidifier, passive ventilation, or low-level background heat dramatically reduces rust on tools and vehicle components. Avoid storing tools in leather pouches long term because leather can trap moisture and tanning residues may encourage corrosion. Drawer liners, vapor corrosion inhibitor papers, and sealed boxes with desiccant are better options for precision items.
Clean benches matter too. Metal filings from fabrication can scratch polished trim tools, contaminate bearings, and embed in rags later used on painted surfaces. In my own shop, separating fabrication, assembly, and detailing areas reduced tool wear and prevented cross-contamination more than any single product purchase. A tidy tool system is not about appearance; it preserves function.
Building a maintenance routine that supports every restoration job
The most effective approach is a simple scheduled routine tied to actual shop use. After each job, wipe tools, return them to assigned storage, and note damaged items immediately. Weekly, inspect high-use hand tools, extension leads, air hoses, and lifting points. Monthly, lubricate pivots, drain the compressor, check torque wrench storage settings, and inspect rust-prone drawers or cabinets. Quarterly, review calibration dates, service jacks, replace worn consumables, and deep-clean the workspace.
This tools and equipment hub supports every article in a broader restoration and maintenance library because tool care affects mechanical repair, bodywork, paint preparation, electrical diagnosis, interior preservation, and detailing. A carburetor rebuild depends on clean screwdrivers and accurate measuring tools. Brake work depends on reliable flare tools, line wrenches, and safe lifting gear. Rust repair depends on maintained welders, grinders, clamps, and respirators. Detailing depends on clean polishers, lights, and contamination-free towels and brushes.
Start with an audit today. Inspect what you own, clean what you use most, replace what is unsafe, and build a written maintenance checklist for the workshop. That one habit will extend tool life, improve restoration results, and make every hour spent on your classic car more productive.
Frequently Asked Questions
Why is tool maintenance so important when working on a classic car?
Tool maintenance matters because classic cars demand precision, patience, and consistency in a way many newer vehicles do not. Whether you are adjusting carburetor linkage on a vintage Mustang, measuring valve clearances on an air-cooled 911, or removing aged hardware from a Chevrolet C10 chassis, the condition of your tools directly affects the quality of the work. Dirty, worn, rusty, or out-of-calibration tools increase the chances of rounded fasteners, uneven torque, inaccurate measurements, damaged finishes, and unnecessary parts replacement. On older vehicles, where original components may be hard to find or expensive to restore, one careless slip from a neglected tool can create a costly setback.
There is also a major safety factor. Weak jack stands, a sticky floor jack, cracked electrical cords, or dull cutting tools create hazards in the workshop. A classic car restoration environment often involves tight spaces, seized fasteners, delicate trim, and decades-old materials, so your equipment needs to function exactly as intended. Properly maintained tools help you work with confidence, reduce rework, and extend the service life of both the tools and the vehicle components you are handling. In practical terms, good tool care saves money, protects originality, improves workmanship, and makes every repair or restoration step more predictable.
What are the most important tool maintenance habits every classic car owner should follow?
The most effective approach is to build simple maintenance into your routine after every job and at regular intervals throughout the year. Start with cleaning. Wipe down hand tools after use to remove grease, brake dust, coolant residue, metal filings, and moisture. These contaminants accelerate corrosion and can affect grip, fit, and accuracy. Sockets and wrenches should be checked for wear at the contact points, screwdrivers for damaged tips, pliers for alignment and smooth hinge action, and hammers for secure handles and clean striking faces.
Lubrication is the next habit that pays off quickly. Ratchets, pliers, cutters, torque wrench mechanisms where appropriate according to manufacturer guidance, creepers, and tool chest slides all benefit from proper lubrication. Use the right lubricant in the right place rather than over-applying a general spray to everything. Storage is equally important. Keep tools dry, organized, and separated enough to avoid impact damage and corrosion transfer. A toolbox with drawer liners, desiccant packs, and a consistent storage layout helps prevent loss and wear.
Inspection should become second nature. Check power tool cords, air hose fittings, battery contacts, jack wheels, stand pins, and measuring tool zero points before beginning work. Schedule deeper monthly or seasonal checks for torque wrenches, multimeters, compression testers, and lifting equipment. Finally, do not ignore consumables. Replace worn wire wheels, abrasive discs, drill bits, gloves, shop towels, and fluids before they compromise the job. In a classic car workshop, disciplined habits matter more than expensive equipment. Clean, inspect, lubricate, store, and replace on time, and your entire restoration process becomes smoother and more reliable.
How should I maintain hand tools and specialty tools used on vintage vehicles?
Hand tools and specialty tools deserve extra attention because they are often the first point of contact with irreplaceable classic car hardware. Combination wrenches, flare nut wrenches, sockets, picks, trim tools, pullers, feeler gauges, and torque wrenches should be cleaned immediately after use, especially if they have been exposed to penetrating oil, fuel residue, brake fluid, or gasket material. Even a thin film of contamination can lead to rust spotting, poor grip, or inaccurate readings later. A basic wipe-down with a clean cloth is a good start, but stubborn grime should be removed with a suitable cleaner and dried thoroughly before storage.
Rust prevention is essential. A light coat of corrosion inhibitor on steel tools can make a major difference, especially in garages with fluctuating humidity. Cutting tools such as snips, taps, dies, and drill bits should be kept sharp, protected from impact, and stored so edges do not knock against one another. Dull cutting tools create heat, chatter, and poor results, which is especially problematic when fabricating patches, repairing brackets, or cleaning threads on aged parts.
For specialty tools, calibration and correct handling are key. Torque wrenches should be stored at their specified resting setting, never used as breaker bars, and periodically recalibrated according to frequency of use. Feeler gauges should be kept clean and straight. Dial indicators, micrometers, and calipers should be protected from dirt and drops, then checked for smooth movement and accuracy. Pullers, spring compressors, and bearing tools should be inspected for thread wear, cracks, or distortion before every use. These tools often face high loads, and failure can damage valuable components or cause injury. In short, treat hand and specialty tools as precision instruments, not just workshop accessories, and they will return better accuracy and safer results on every classic car job.
What is the best way to care for power tools, lifting equipment, and measuring devices?
These categories require a more structured maintenance plan because they affect both safety and accuracy. For power tools, begin with the basics: keep vents free of dust, inspect cords and plugs for damage, and check switches, guards, and moving parts before use. Grinders, drills, polishers, and impact tools commonly pick up metal dust, paint residue, and shop debris, all of which shorten motor life and affect performance. Pneumatic tools should receive the correct air tool oil if specified, and your air compressor system should be drained regularly to prevent moisture buildup that can damage tools internally.
Lifting equipment should be treated with the highest level of caution. Floor jacks need periodic inspection for hydraulic leaks, wheel condition, saddle integrity, and smooth lifting action. Jack stands should be checked for bent frames, worn ratcheting teeth, cracked welds, and damaged locking pins. Engine hoists, load levelers, and transmission jacks should be examined for chain wear, fastener tightness, and caster condition. Never assume a tool is safe because it worked fine the last time. A simple pre-use inspection can prevent catastrophic failure under a vehicle or drivetrain component.
Measuring devices are often overlooked, but they are critical in quality restoration work. Calipers, micrometers, dial gauges, timing lights, multimeters, and compression testers need clean storage, careful handling, and periodic verification. Dirt on measuring faces or weak batteries in diagnostic tools can lead to misleading readings. Keep these devices in protective cases when possible, avoid moisture and impact, and compare them against known standards or reference measurements from time to time. If you are tuning ignition, setting clearances, checking runout, or diagnosing electrical issues on a classic car, accuracy matters. Well-maintained measuring tools help you make confident decisions instead of chasing false readings.
How often should tools be serviced, replaced, or recalibrated in a classic car workshop?
The right schedule depends on how often you work, the environment of your garage, and the type of tools you use, but a layered maintenance schedule works best. After every use, clean and visually inspect the tools you handled. Weekly or biweekly, review your most-used tools for wear, lubrication needs, corrosion, and proper storage. Monthly, perform a more deliberate check of power tools, extension cords, air lines, battery chargers, shop lights, and frequently used sockets and wrenches. Seasonally, inspect lifting equipment, compressor systems, torque tools, and measuring devices more thoroughly, and address humidity control in the shop if needed.
Replacement should be based on condition, safety, and performance rather than sentiment. If a screwdriver tip is deformed, a ratchet skips, plier jaws no longer align, a wire brush is shedding excessively, or a jack leaks down under load, retire or repair the item immediately. For consumables such as abrasives, blades, shop rags, sealants, gloves, and drill bits, replacing them before they are fully spent often produces better work and reduces frustration. Calibration intervals for torque wrenches and precision measuring tools should follow manufacturer recommendations, but if they are used heavily or subjected to impact, recalibration should happen sooner.
A useful rule for classic car owners is this: any tool that affects torque, measurement, lifting, cutting quality, or electrical diagnosis deserves proactive attention. In restoration work, small errors compound quickly. A poorly calibrated torque wrench can affect engine assembly, a worn tap can damage threads in an irreplaceable part, and a weak jack stand can create a serious safety risk. Keeping a simple maintenance log for your key tools is an excellent professional habit. It helps you track lubrication, calibration dates, replacements, and recurring issues so your workshop stays dependable over the long term.




