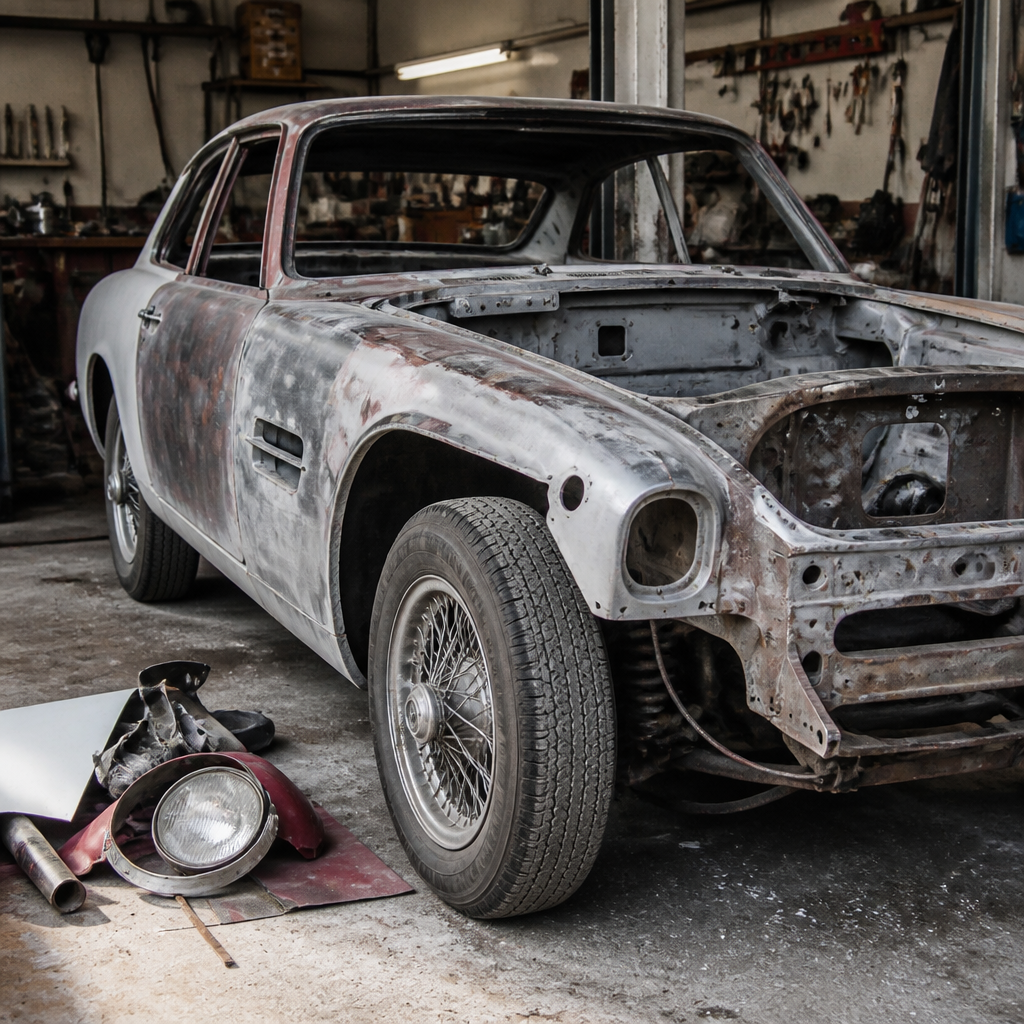
Classic car restoration basics start with a simple truth: every successful project depends more on planning, assessment, and disciplined execution than on enthusiasm alone. For beginners, restoration means returning an older vehicle to a safer, more reliable, and more authentic condition through repair, refurbishment, or replacement of worn components. A classic car is not just an old car; in practice, restorers usually use the term for vehicles with historical, collector, or enthusiast value, often at least twenty to thirty years old. The goal can vary widely. Some owners want a factory-correct restoration that matches original specifications. Others want a dependable driver-quality rebuild that preserves character while improving usability. Understanding that distinction early affects every budget, parts decision, and labor estimate.
In workshop terms, restoration basics cover six core areas: project selection, condition inspection, budgeting, disassembly, parts sourcing, and phased mechanical and cosmetic work. After helping first-time owners evaluate project cars, I have seen the same pattern repeatedly: the projects that succeed are rarely the cheapest cars bought at the start. They are the cars with the best structural integrity, the clearest paperwork, and the strongest parts support. A beginner can learn bodywork, brakes, wiring, and trim installation over time, but repairing severe rust, correcting a twisted chassis, or hunting unobtainable model-specific parts can derail a project for years. That is why restoration basics matter. They protect your money, your time, and your motivation.
This guide serves as a practical hub for restoration basics within the broader restoration and maintenance topic. It explains how to choose the right candidate, what tools and records you need, how to inspect common problem areas, and how to decide between preserving originality and making sensible upgrades. If you are asking, “Where do I begin with classic car restoration?” the direct answer is this: begin with research, a complete inspection, and a realistic plan. Those three steps turn a dream project into a manageable process. Everything that follows in a classic car restoration, from engine work to upholstery, becomes easier when those fundamentals are done correctly.
Choose the Right Project Car Before You Buy
The best beginner restoration project is not necessarily the rarest model or the cheapest listing. It is the car with the healthiest structure, the most complete trim, and the strongest aftermarket or club support. Start by researching models with widely available service manuals, reproduction panels, weatherstripping, glass, and mechanical parts. First-generation Ford Mustangs, Chevrolet Tri-Five models, MGBs, classic Beetles, and many 1960s and 1970s American coupes remain popular partly because parts catalogs are deep and knowledgeable communities exist. By contrast, low-production luxury models or obscure imports can be far more expensive to restore even when purchase prices seem attractive.
Always inspect title status and vehicle identification numbers before handing over money. A missing title, mismatched VIN tags, or signs of tampering can create registration problems that outweigh any bargain. I also advise beginners to buy the most complete car they can afford. Missing trim, seats, brackets, unique fasteners, and model-specific switches cost more time than buyers expect. Completeness matters because sourcing small original pieces often requires swap meets, specialist dismantlers, or donor cars. A complete but tired car is usually a better candidate than a cheaper incomplete shell. When comparing listings, ask for underbody photos, door-bottom images, trunk-floor pictures, and close-ups of known rust zones for that model.
Inspect Structure, Rust, and Mechanical Systems Methodically
Rust is the single biggest factor that determines restoration difficulty. Surface rust on bolt-on panels is manageable; structural corrosion in floor pans, frame rails, rocker panels, cowl sections, suspension mounting points, and trunk drop-offs is expensive and technically demanding. Use a magnet for filler detection, a bright inspection light, and if possible a lift. Look underneath for fresh undercoating hiding patchwork. Open doors, hood, and trunk and check panel gaps for signs of collision damage or body sag. Uneven gaps, cracked filler, and rippled inner aprons often indicate previous poor repairs. On body-on-frame cars, inspect frame horns, crossmembers, body mounts, and rear kick-up areas. On unibody cars, focus on torque boxes, pinch welds, strut towers, and spring perches.
Mechanical inspection matters too, even if you expect a full rebuild. Check whether the engine turns by hand, whether fluids show water contamination, and whether the transmission engages. Pull the dipstick, inspect the radiator neck, and remove spark plugs if allowed. Brake systems on stored cars commonly need complete renewal, including master cylinders, wheel cylinders or calipers, rubber hoses, hard lines, and hardware. Fuel tanks often contain varnish and rust scale after years of sitting. Wiring can be brittle, hacked, or rodent-damaged. The point of inspection is not to find a perfect car. It is to establish a truthful baseline so you can estimate labor, parts, and sequencing without surprises.
Set a Realistic Budget, Timeline, and Restoration Goal
Beginners often underestimate restoration costs because they focus on major parts and ignore the accumulation of smaller expenses. Abrasives, seam sealer, clips, grommets, hoses, bearings, weatherstripping, machine shop work, paint materials, and freight charges add up quickly. Before starting, define the finish standard you want. A concours-level restoration aims for factory-correct finishes, date-coded components, and accurate hardware markings, which can multiply costs. A driver-quality restoration prioritizes sound structure, reliable systems, and attractive cosmetics while allowing practical deviations. Neither approach is wrong, but they should not be mixed accidentally. A show-car paint job on a car with unrestored brakes and worn bushings is a poor sequence and weak value.
| Decision Area | Driver-Quality Restoration | Factory-Correct Restoration |
|---|---|---|
| Primary Goal | Reliability, usability, solid presentation | Historical accuracy and judging standards |
| Typical Budget Pressure | Mechanical and safety systems first | Rare finishes, original parts, date codes |
| Parts Strategy | Quality reproduction or upgraded replacements | Original, NOS, or exact-spec reproductions |
| Timeline Risk | Moderate, easier to phase | High, parts searches can delay completion |
| Best for Beginners | Usually yes | Only with strong budget and research discipline |
Build a spreadsheet that separates acquisition cost, parts, outside labor, tools, storage, and contingency. A contingency reserve of at least fifteen to twenty percent is prudent because machine work, rust discovery, and trim restoration routinely exceed first estimates. Timeline discipline is equally important. If the car must be back on the road by a specific date, scope the project accordingly. A full frame-off or rotisserie restoration can take years. A phased approach that makes the car safe and driveable first often keeps motivation high and reveals issues gradually under real use.
Organize the Disassembly and Documentation Process
Disassembly is where many beginner projects become boxes of unidentified parts. Avoid that outcome by documenting everything before and during removal. Photograph every assembly from multiple angles, including hose routing, wiring paths, clip placement, shims, and fastener types. Use labeled zip bags, plastic bins, and tags. Keep fasteners with their components whenever possible. I recommend creating sections by system: front suspension, interior trim, dash wiring, exterior stainless, glass hardware, and so on. A digital folder structure that matches your storage bins makes reassembly dramatically easier months later. If the car has shims on hinges, fenders, or alignment points, label their exact positions.
Buy the factory service manual, assembly manual if available, and parts catalog before heavy teardown. Factory torque specs, wiring diagrams, and exploded views prevent expensive mistakes. For American classics, original manuals, club publications, and vendor diagrams often clarify differences between model years, engine codes, and trim packages. During disassembly, assess whether parts should be restored, replated, rebuilt, or replaced. Original metal trim, gauge clusters, and hard-to-find brackets are often worth saving even when they look rough. Reproduction parts vary in fit and quality. Keeping usable originals gives you options, and in many cases original components fit better than new replacements.
Prioritize Safety-Critical Mechanical Work First
If you want a dependable classic, restore systems in a logical order: brakes, steering, suspension, tires, fuel, cooling, electrical charging, and only then cosmetic details. Brakes should be treated as a complete system, not a patchwork of isolated fixes. On drum-brake cars, that means inspecting drums for wear, measuring diameter, replacing shoes, springs, cylinders, hoses, and often the master cylinder. On disc systems, inspect rotor thickness, caliper condition, flexible hoses, and proportioning components. Old rubber hoses can collapse internally even when they appear sound outside. Steering linkage, ball joints, control arm bushings, idler arms, and wheel bearings should be checked for play and renewed where needed.
Fuel and cooling systems are equally important because stale fuel and overheating destroy reliability. Clean or replace the tank, flush lines, rebuild the carburetor, and inspect the pump. Ethanol-blended fuel can accelerate deterioration in old hoses and seals not designed for modern formulations, so use compatible materials. Cooling systems deserve new hoses, belts, thermostat, radiator inspection, and often a water pump depending on age and condition. In the electrical system, verify grounds, battery cables, charging output, and fuse protection. Many fire incidents in restored classics trace back to brittle insulation, poor crimping, unfused accessory circuits, or bargain wiring repairs. Reliability comes from systematic correction, not isolated shiny new parts.
Understand Bodywork, Paint, and Trim Realities
Body and paint work consume more money and time than most beginners expect. Good paint is expensive because preparation determines the result. Metal repair, filler shaping, block sanding, primer surfacing, panel alignment, and contamination control matter more than color choice. If rust repair is needed, welded metal patches are the correct standard; heavy filler over corrosion is not a restoration. Replacement panels can save time, but fit varies widely by manufacturer, and even quality panels often require trimming and adjustment. Test-fit doors, fenders, hood, grille, bumpers, and trim before final paint. I have seen many novices paint too early, then chip fresh finishes while correcting gaps that should have been solved in mock-up.
Trim restoration requires patience. Stainless moldings can often be straightened and polished. Pot metal parts may need specialist repair and rechroming, which is costly but sometimes necessary because reproductions are unavailable or inferior. Glass channels, weatherstripping, and window regulators affect fit, noise, and water leaks, so they should not be treated as afterthoughts. Interior restoration also deserves planning. Seat foam density, upholstery grain, carpet fit, and dash pad quality vary among suppliers. If originality matters, compare replacements against factory photos and club references. If practicality matters more, choose durable materials and correct fit over catalog claims. In both cases, fitment testing before final installation saves money and frustration.
Source Parts Carefully and Know When to Upgrade
Parts sourcing is where restoration basics become project management. Use reputable suppliers, marque specialists, owners’ forums, and local clubs to verify fit, finish, and reliability before ordering. New old stock can be ideal, but age alone does not guarantee serviceability; rubber and seals degrade on the shelf. Reproduction parts range from excellent to disappointing. Read return policies and inspect everything on arrival. For engines, transmissions, carburetors, and distributors, specialist rebuilders with test procedures usually provide better results than anonymous marketplace sellers. Machine shop work should include measurable standards such as cylinder bore sizing, crankshaft inspection, valve seat condition, and deck flatness. Ask for clear tolerances, not generic assurances.
Thoughtful upgrades can improve safety and drivability without harming a car’s character. Electronic ignition hidden inside a stock distributor, dual-circuit master cylinders, radial tires in period-correct sizes, improved cooling fans, and discreet relays for headlights are common examples. However, every modification has tradeoffs. Brake conversions may require wheel changes or alter pedal feel. Aluminum radiators can improve cooling but may look out of place in a highly original engine bay. Large aftermarket wheels can hurt steering feel and ride quality. The right approach is intentionality: preserve what makes the car distinct, upgrade what materially improves safety and reliability, and document every change for future maintenance or resale.
Know When to Do It Yourself and When to Hire Specialists
One of the smartest beginner skills is knowing your limits. Many owners can handle cleaning, cataloging, bolt-on mechanical work, interior removal, weatherstripping, and basic tune-up procedures with patience and the right manual. Brake service, suspension rebuilding, and wiring repairs are also manageable for careful beginners willing to learn proper methods. But structural welding, frame straightening, precision engine machining, transmission rebuilding, instrument restoration, and show-level paint often justify professional help. The reason is not just skill. Specialists bring measuring equipment, fixtures, paint booths, machining tolerances, and repeatable processes that are hard to replicate in a home garage.
When choosing outside help, ask for references, current project photos, and a written scope of work. Good shops will discuss turnaround times honestly and specify what is included. For example, an engine rebuild estimate should separate disassembly, cleaning, machining, parts, assembly, and dyno or bench testing if offered. Avoid vague verbal promises. Keep records of invoices, part numbers, paint codes, and alignment settings. A documented restoration is easier to maintain, insure, and sell. It also helps you track what was actually done instead of relying on memory years later. That discipline is what turns restoration from a hobby expense into a well-managed long-term asset.
Classic car restoration basics come down to informed choices made in the right order. Buy the most complete, structurally sound car you can afford. Inspect rust, paperwork, and mechanical systems before committing. Set a restoration goal that matches your budget and intended use, then document everything from teardown to final assembly. Put safety-critical systems first, approach body and paint work with patience, and source parts from trusted specialists rather than impulse listings. Most important, respect the difference between tasks you can learn at home and tasks that demand experienced professional hands.
For beginners, the main benefit of following restoration basics is not perfection. It is progress without chaos. A classic car project becomes rewarding when each phase builds logically on the last and when surprises are limited by good research. Whether you are reviving a family heirloom or buying your first vintage project, a methodical plan protects both the car and your enthusiasm. Start with a full inspection, create a written budget, gather the correct manuals, and tackle the work system by system. That is how a beginner builds a restoration that lasts.
Frequently Asked Questions
What does classic car restoration actually involve for a beginner?
For a beginner, classic car restoration means much more than cleaning up an old vehicle or installing a few new parts. It is a structured process of inspecting, repairing, refurbishing, and sometimes replacing worn or damaged components so the car becomes safer, more dependable, and closer to its intended original condition. That process can include bodywork, rust repair, paint correction, suspension rebuilding, brake and fuel system repair, electrical troubleshooting, engine service, interior refurbishment, and careful parts sourcing. In practical terms, restoration starts with understanding what you have before deciding what to change.
Beginners should also understand that restoration exists on a spectrum. Some projects focus on making a car mechanically sound and drivable, while others aim for factory-correct authenticity down to trim finishes, upholstery materials, and date-coded parts. Most first-time restorers are better served by a realistic middle ground: prioritize structural integrity, safety, and reliability first, then improve cosmetics and originality as time and budget allow. Approaching restoration this way helps prevent costly mistakes and keeps the project manageable.
Just as important, restoration is not driven by enthusiasm alone. The best outcomes come from disciplined planning, honest assessment, and patience. A beginner who documents the car thoroughly, creates a phased plan, sets a budget, and learns the difference between essential repairs and optional upgrades will usually make better progress than someone who tears the car apart on day one. In short, classic car restoration involves bringing an older, meaningful vehicle back to proper condition through careful decision-making, not just mechanical effort.
How do I know if a classic car is worth restoring?
Determining whether a classic car is worth restoring starts with evaluating the vehicle’s structure, completeness, and long-term value to you. Rust is often the single biggest factor. Surface rust, worn paint, and tired interiors can usually be addressed with time and money, but severe corrosion in the frame, floor pans, rocker panels, suspension mounting points, or other structural areas can quickly turn a promising project into an expensive and technically demanding rebuild. A beginner should inspect the car thoroughly, preferably with help from an experienced restorer, body technician, or marque specialist who knows where specific models commonly fail.
Completeness matters almost as much as condition. A car that is mostly complete, even if it is rough, is often a better candidate than one missing hard-to-find trim, glass, interior pieces, engine components, or model-specific hardware. Rare parts can be difficult and costly to replace, especially for limited-production vehicles or less-supported brands. It is also wise to research whether reproduction parts are available, how active the owner community is, and whether technical manuals and model knowledge are easy to find. Strong aftermarket and enthusiast support can make an enormous difference for a first-time restorer.
You should also consider your goals, budget, workspace, and emotional connection to the car. Not every restoration makes financial sense on paper, and many classics cost more to restore than they are worth in the market. That does not automatically make the project a bad choice. If the car has sentimental value or you specifically want the learning experience, it may still be worth restoring. The key is to separate personal value from market value and make the decision with open eyes. A solid, complete, common model with good parts support is usually the smartest choice for a beginner.
What should I do before taking the car apart?
Before disassembly begins, your first job is to assess, document, and plan. Start by inspecting the vehicle from front to back and noting its mechanical condition, structural condition, originality, and completeness. Check for rust, accident damage, fluid leaks, missing components, wiring issues, and signs of poor-quality previous repairs. If possible, perform compression testing, brake inspection, and basic electrical checks. Even if the car is not currently roadworthy, learning as much as possible about how it sits and functions before teardown will save time later.
Documentation is essential. Take extensive photos of every area of the vehicle, including engine bay routing, hose connections, wiring paths, fastener locations, trim alignment, interior hardware, and underbody details. Label parts as they come off, use bags and bins for hardware, and create a storage system that makes reassembly practical months later. Many beginners underestimate how quickly parts become difficult to identify once the car is in pieces. Good documentation acts like insurance against memory gaps and helps preserve originality where needed.
You should also build a clear restoration plan with priorities, timelines, and spending limits. Decide whether the project will be a driver restoration, a show-oriented restoration, or a partial refurbishment. Then break the work into stages such as structural repair, mechanical systems, body and paint, interior, and final assembly. Research parts availability before removing major components, and be honest about which jobs you can handle yourself versus which require professional help. Taking the car apart without a plan often leads to stalled projects, lost parts, and budget overruns. Preparation is what turns a restoration from chaos into progress.
Which parts and systems should beginners restore first?
Beginners should always start with safety-critical and structural systems before worrying about paint, chrome, or cosmetic upgrades. That means evaluating the frame or unibody structure, brakes, steering, suspension, tires, wheels, fuel system, and electrical basics. If the vehicle cannot stop safely, steer predictably, or support itself structurally, cosmetic improvements do not matter. Restoring these core systems first creates a stable foundation for everything that follows and reduces the risk of doing attractive but useless work on an unsafe car.
After safety and structure, attention usually shifts to mechanical reliability. This often includes servicing or rebuilding the engine, transmission, cooling system, ignition components, charging system, and exhaust. The goal at this stage is not necessarily peak performance; it is dependable function. Beginners often benefit from returning systems to near-stock specifications rather than immediately chasing modifications. Factory-style components are generally easier to fit, diagnose, and maintain, and they preserve the car’s character while simplifying the learning process.
Cosmetic restoration should come later, once the vehicle is fundamentally sound. Bodywork, paint, brightwork, weatherstripping, glass detailing, upholstery, carpets, and trim installation are best handled after major welding, mechanical work, and system testing are complete. This sequence protects your investment and prevents fresh paint or interior materials from being damaged during continued repairs. In restoration, the smartest order is usually structure first, safety second, reliability third, and appearance last. That order may not be the most exciting, but it is the most effective.
How can I keep a classic car restoration on budget and avoid beginner mistakes?
Keeping a restoration on budget starts with setting realistic expectations from the beginning. Nearly every project takes longer and costs more than a first-time owner assumes, so the best strategy is to create a budget with a contingency reserve for unexpected repairs, hidden rust, machine shop work, and replacement parts. Price major components early, including body panels, trim, weather seals, brake parts, engine work, upholstery materials, and paint supplies. Once you understand the likely costs, divide the project into phases so you can make progress without overcommitting financially.
One of the most common beginner mistakes is buying the wrong car. A cheap project can become very expensive if it has severe rust, missing rare parts, or evidence of poor prior repairs. Another common mistake is disassembling too much too quickly. When beginners strip a whole car without labeling, cataloging, and planning, momentum disappears and reassembly becomes intimidating. It is usually better to work methodically, complete systems in logical order, and maintain a record of what was removed, repaired, and replaced. Skipping research, ignoring factory manuals, and mixing incompatible aftermarket parts are also frequent sources of frustration.
You can control costs and reduce errors by being selective about what must be professionally outsourced. Jobs such as precision engine machining, structural welding, advanced paintwork, upholstery, and complex transmission rebuilding may be worth paying for if they exceed your current skill level. At the same time, cleaning, cataloging, basic mechanical service, interior removal, hardware restoration, and certain assembly tasks are excellent areas for a beginner to learn and save money. The most successful first restorations are not the ones completed fastest; they are the ones managed carefully, with patience, research, and consistent decision-making from start to finish.