
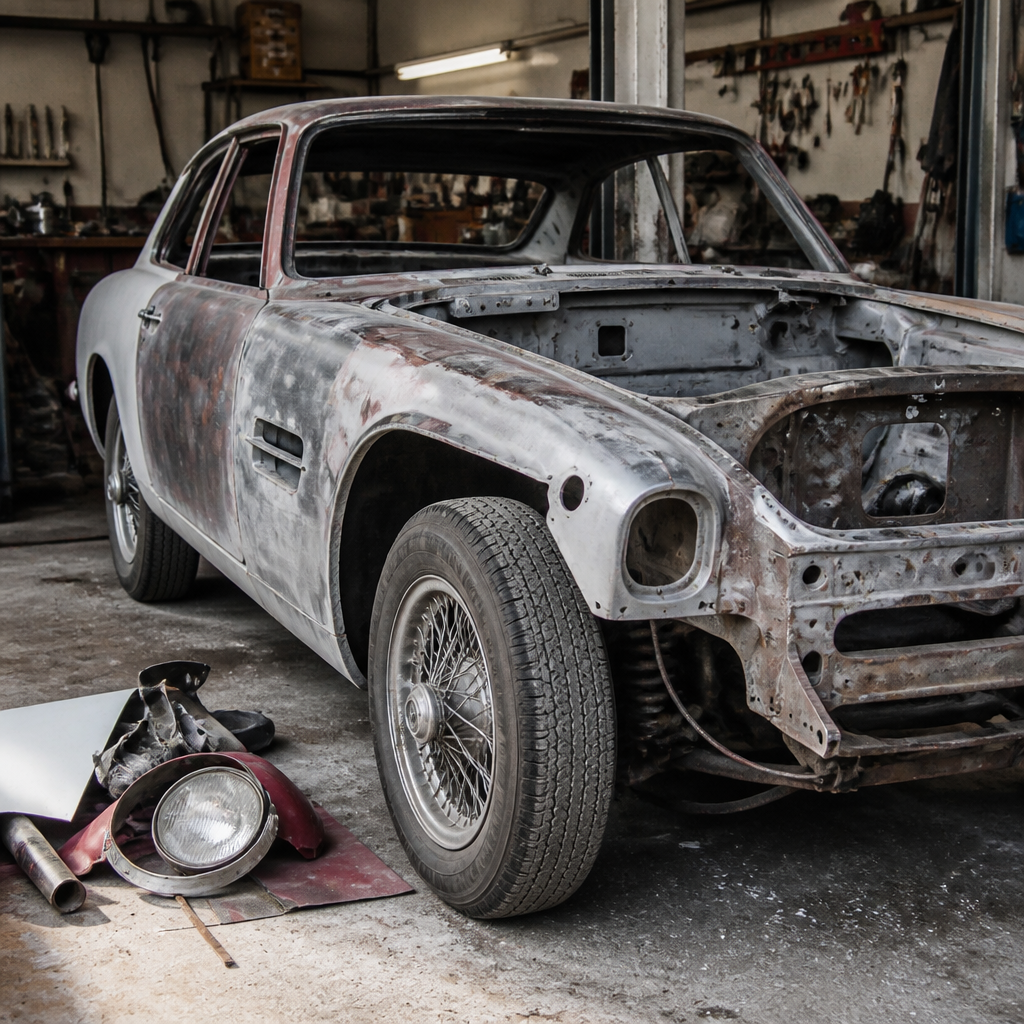
Classic car restoration is the process of returning an older vehicle to sound mechanical condition, correct appearance, and reliable drivability while preserving as much historical integrity as possible. In practice, that means far more than fresh paint and polished chrome. A proper restoration involves research, disassembly, structural repair, parts sourcing, machining, finishing, reassembly, tuning, and extensive testing. After years of working on American coupes, British roadsters, and postwar trucks, I have seen the same pattern repeatedly: owners start with enthusiasm, underestimate complexity, and make avoidable decisions that cost time, money, and originality. Understanding the most common mistakes in classic car restoration helps first-time builders create a plan, protect value, and avoid turning a promising project into a stalled shell.
Restoration basics begin with a few key terms. A driver-quality restoration focuses on safety, function, and clean presentation rather than concours perfection. A factory-correct restoration aims to match original specifications, finishes, trim, and materials as closely as possible. A restomod updates systems such as brakes, ignition, suspension, or drivetrain while keeping a vintage look. Patina preservation is different again: instead of refinishing everything, the owner stabilizes wear and retains the car’s aged character. Each approach is valid, but every approach requires clear goals from day one. Most mistakes happen when a project drifts between categories, such as a car being disassembled like a concours build but reassembled with random aftermarket parts and no documentation.
This matters because classic cars are expensive to restore and unforgiving of poor sequencing. Rust repair hidden under filler spreads. Missing tags and undocumented changes reduce resale confidence. Incorrect hardware, wiring shortcuts, and poor storage can create safety hazards years later. The financial side is just as serious. According to market observations from Hagerty and major auction houses, many restored cars sell for less than the total invested, especially when workmanship is inconsistent or originality has been compromised. The smartest owners accept a simple truth early: restoration is a project management exercise as much as a mechanical one. If you avoid the common mistakes in classic car restoration, you improve reliability, maintain authenticity, and finish with a car you can enjoy rather than regret.
Skipping Research and Buying the Wrong Project Car
The first major mistake happens before the first wrench turns: buying the wrong car. Beginners often purchase a vehicle based on style, rarity, or a low asking price without verifying structural condition, title status, parts availability, and restoration cost. I have inspected attractive “complete” project cars that hid rotten frame rails, patched floors, seized engines, and missing trim that was nearly impossible to replace. On a unibody car, extensive corrosion in rockers, torque boxes, cowl sections, or suspension pickup points can make the project economically irrational. On body-on-frame vehicles, a decent body over a deeply corroded frame is just as dangerous.
Good restoration basics start with identification and research. Confirm VIN, chassis numbers, engine codes, trim tags, and transmission numbers before money changes hands. Factory service manuals, parts books, marque forums, and club registries help determine what is original and what has already been modified. It is also important to understand year-specific differences. A 1967 model may look similar to a 1968 model but use different brackets, wiring, emissions equipment, or interior trim. Buying first and researching later usually leads to expensive surprises, especially when someone discovers the car is incomplete in ways that matter to value and assembly.
A practical evaluation framework keeps emotion under control:
| Inspection Area | What to Check | Why It Matters |
|---|---|---|
| Structure | Frame rails, floors, rockers, trunk, cowl, suspension mounts | Structural rust is costly and affects safety |
| Identity | VIN, trim tag, engine and transmission codes, title match | Documentation supports legality and value |
| Completeness | Glass, trim, seats, gauges, moldings, brackets, unique hardware | Rare missing parts often delay projects for months |
| Mechanical Core | Engine block condition, transmission type, differential, steering components | Correct major components reduce replacement cost |
| Parts Support | Reproduction panels, seals, wiring harnesses, interior kits, vendor depth | Strong aftermarket support lowers risk |
| End Goal Fit | Driver, show car, survivor, or restomod potential | The starting car should match the final vision |
The best project car is rarely the cheapest. It is the most complete, best documented, least rusty example that matches your intended outcome.
Failing to Define the Restoration Scope and Budget
Another common mistake in classic car restoration is beginning work without a written scope, realistic budget, and build sequence. Owners say they want “just a nice driver,” then strip the shell to bare metal, send the engine out for a full rebuild, replate hardware, upgrade suspension, and change color. Costs escalate because every system affects another system. Once a body is painted, you may realize the original wiring is brittle. Once the engine bay is detailed, leaking steering components suddenly look unacceptable. Scope creep is normal, but unmanaged scope creep kills projects.
A professional approach separates must-have items from nice-to-have items. Must-have work includes structural rust repair, brakes, fuel system integrity, steering, suspension wear items, cooling, wiring safety, and legal documentation. Nice-to-have items include date-coded clamps, NOS trim, factory chalk marks, upgraded audio, or concours-correct finishes on hidden components. Build the budget around the first group. Then add contingency. In restoration, a 20 percent reserve is modest; on rusty or incomplete cars, 30 percent is wiser. Machine work, upholstery labor, chrome plating, and bodywork consistently exceed first estimates because problems reveal themselves only after disassembly.
Scheduling matters too. Send work out in the right order. There is no point rebuilding an engine before confirming the radiator support and front suspension geometry are correct. Likewise, ordering a custom interior before welding seat mounts and repairing floors is premature. I advise owners to create a stage plan: assessment, disassembly, metal repair, trial fit, drivetrain rebuilding, paint prep, final finishing, systems installation, and road testing. That structure keeps restoration basics visible and makes decisions traceable when the project inevitably presents surprises.
Poor Documentation During Disassembly
Disassembly is where many promising restorations begin to fail. People assume they will remember how brackets, shims, clips, spacers, and routing paths fit months later. They will not. Even experienced restorers rely on obsessive documentation because memory is not a process. Every removed part should be photographed in place, labeled, bagged, and logged. Fasteners should stay with their assemblies whenever possible. Larger parts should be tagged with orientation notes, finish notes, and whether they are reusable, repairable, or patterns for replacement.
The reason this matters goes beyond convenience. Documentation preserves originality. Original hose routing, underhood decals, body shims, seam sealer patterns, and witness marks tell you how the factory assembled the car and how it evolved over time. They also help during judging, resale, and troubleshooting. For example, if door gaps change after paint, your earlier photographs may show that the body originally used three shims at the lower hinge and one at the top. Without that record, reassembly becomes expensive trial and error.
Use a simple digital system. Create folders by vehicle area: front suspension, dash, engine bay, doors, trunk, rear axle, and so on. Name photos descriptively instead of leaving random file numbers. Keep a spreadsheet for parts condition, vendor orders, and missing items. Restoration hubs work best when linked thinking is applied: your brake article, wiring guide, paint prep notes, and hardware plating checklist should all feed back into one master record for the car. The owners who finish projects are rarely the most talented at the start; they are the ones who document relentlessly and make later decisions easier.
Underestimating Rust, Metalwork, and Body Alignment
If there is one mistake that consistently destroys budgets, it is underestimating body and rust repair. Paint hides flaws. Undercoating hides flaws. Fresh carpet hides flaws. The real condition appears only after stripping, probing seams, media blasting carefully, and measuring the shell. Rust repair is not just cutting out a patch and welding in a panel. It involves understanding drainage paths, internal coatings, panel overlap, heat distortion, and load-bearing geometry. Replace metal badly and the doors stop closing properly, quarter panels ripple, and moisture returns inside a few seasons.
Classic car restoration basics demand that structural repairs happen before cosmetic work and that dimensions are checked throughout. On unibody cars, brace door openings before cutting major sections. Measure diagonals. Verify suspension mount locations against factory dimensions or a reliable body manual. Trial-fit fenders, hood, decklid, doors, grille, bumpers, and trim before final paint. This step is skipped constantly because it is tedious, but it prevents the misery of discovering that newly painted panels chip because gaps are wrong or mounting holes need adjustment.
Body filler is not the villain some hobbyists claim, but it must never substitute for proper metal finishing and rust elimination. Quality repairs use epoxy primer over clean metal, seam sealer in the correct areas, cavity wax inside enclosed sections, and coatings appropriate to the car’s intended use. A fair-weather show car and a regularly driven classic need different protection strategies. Anyone evaluating restoration basics should understand this clearly: the straightest paint job in the world means little if the shell underneath was not repaired, aligned, and sealed correctly.
Choosing Incorrect Parts, Finishes, and Upgrades
Parts selection is where originality, drivability, cost, and quality collide. New restorers often assume reproduction parts are identical to originals or that aftermarket upgrades automatically improve the car. Neither is true. Some reproduction trim fits poorly. Some imported rubber seals are too hard or incorrectly profiled. Some brake conversions solve one problem but create another, such as poor pedal ratio, wheel clearance issues, or changed front-to-rear balance. I have also seen restorations devalued because owners discarded date-coded glass, factory carburetors, original fasteners, and rebuildable cores that could have been restored.
The right decision depends on the build goal. For a concours-minded restoration, preserving and refurbishing original parts is usually preferable when possible. Original stampings, hardware markings, and castings carry credibility that reproduction parts cannot duplicate fully. For a reliable driver, selective upgrades make sense: radial tires, electronic ignition hidden in a stock distributor, dual-circuit master cylinders, improved cooling, and modern fuel-resistant hoses are common examples. The mistake is not upgrading; the mistake is upgrading without engineering awareness or recordkeeping.
Finishes matter too. Many cars leave the factory with a mix of phosphate, black oxide, cadmium, zinc, natural cast textures, semi-gloss paints, and body-color overspray patterns. Over-restored cars often look cleaner than original but less authentic. If resale, judging, or historical accuracy matters, study factory references and survivor cars before coating everything in glossy black powder. Restoration basics are not just about replacing old parts. They are about knowing what should be replaced, what should be rebuilt, and what should be preserved.
Neglecting Mechanical Systems Integration and Final Testing
Many owners focus heavily on appearance and treat mechanical work as a list of isolated tasks. In reality, a classic car is an integrated system. Rebuild the engine without cleaning the fuel tank and lines, and contamination ruins carburetors. Install fresh power without recoring the radiator, rebuilding the water pump, and confirming timing accuracy, and overheating follows. Refinish the dash without restoring grounds, connectors, and voltage regulation, and gauges behave unpredictably. A successful restoration basics mindset connects every system before the first startup.
Brake and fuel systems deserve special caution. Rubber hoses, steel lines, wheel cylinders, calipers, master cylinders, proportioning valves, and tanks all age, even on low-mileage cars. Ethanol-blended fuel is hard on old rubber compounds and stale tanks full of sediment. Likewise, original single-circuit brake systems may be acceptable for authenticity in some contexts, but many drivers choose dual-circuit conversions for a margin of safety. Those decisions should be made consciously and documented clearly for future service.
The final mistake is skipping disciplined road testing. A restored car should not go from garage to long highway drive in one jump. Heat-cycle the engine. Check torque values after initial miles. Bleed brakes again if pedal feel changes. Inspect for coolant seepage, fuel odor, charging issues, driveline vibration, and steering wander. Align the car only after ride height has settled and suspension components are confirmed tight. I tell owners to think like test engineers, not proud reveal hosts. The true finish line of classic car restoration is not the first photo. It is a car that starts reliably, stops straight, runs at temperature, and can be serviced confidently because every major decision was researched, documented, and executed in order. If you are planning a project, start with the car’s condition, define your goal, and build a restoration roadmap before buying parts.
Frequently Asked Questions
1. What is the most common mistake people make when starting a classic car restoration?
The most common mistake is beginning the project without a clear plan, realistic budget, and complete inspection of the vehicle. Many first-time restorers buy a car based on appearance alone, assuming the visible rust, faded paint, or worn interior represent the bulk of the work. In reality, the real expense and difficulty are often hidden in the floors, frame sections, suspension mounting points, wiring, engine internals, and missing trim or model-specific components. A car that looks complete can quickly become a far more demanding project once it is stripped down.
A proper restoration should start with research. That includes identifying the exact year, trim level, engine, transmission, factory options, and known weak points of that specific model. From there, the car needs a methodical assessment of body structure, driveline condition, electrical systems, glass, interior components, and parts availability. It is also wise to define the intended outcome early: concours restoration, period-correct driver, or reliable weekend cruiser. Each goal affects every decision that follows, from paint materials to engine machining to hardware finishes.
Without that planning stage, restorers often overspend, duplicate work, or make irreversible decisions too early. For example, sending a body to paint before test-fitting trim, chrome, weatherstripping, and glass can lead to expensive rework. Likewise, tearing everything apart without labeling parts or photographing assemblies can slow reassembly dramatically. The best restorations are not rushed; they are organized from the beginning, with documentation, a work sequence, and a contingency budget for the surprises that always appear once an old car comes apart.
2. Why is ignoring rust and structural damage such a serious restoration mistake?
Ignoring rust is one of the costliest and most dangerous mistakes in classic car restoration because corrosion is rarely limited to what is visible on the surface. Bubbling paint, rusty lower fenders, or soft floor pans often point to deeper issues inside rockers, trunk drops, cowl sections, inner fenders, door bottoms, quarter panel braces, and frame rails. On unit-body cars in particular, structural rust can affect alignment, door fit, suspension geometry, and overall safety. Even on body-on-frame vehicles, hidden corrosion can compromise mounting points and weaken critical support areas.
Some restorers are tempted to patch over rust with filler, undercoating, or cosmetic metalwork just to make the car look presentable. That may improve appearance temporarily, but it does nothing to address the underlying deterioration. Moisture remains trapped, corrosion continues, and the repair often fails quickly. Worse, if poor-quality patches are welded over weak metal instead of replacing it properly, the car may become harder to restore correctly later. Structural repairs require sound metal, accurate panel fitment, proper weld penetration, corrosion protection on both sides of the repair, and careful measurement to preserve original body dimensions.
The right approach is to fully expose the affected areas, assess the extent of corrosion, and repair the structure before cosmetic work begins. That may mean media blasting, spot-weld drilling, panel replacement, fabrication of repair sections, and treatment of internal cavities with epoxy primer, seam sealer, and cavity wax. It is not the most glamorous stage of the project, but it is foundational. Paint, upholstery, and chrome mean very little if the shell underneath is weak, misaligned, or actively deteriorating.
3. How can poor parts sourcing hurt the quality of a classic car restoration?
Poor parts sourcing can derail a restoration in ways that affect authenticity, reliability, fit, and long-term value. One of the biggest misconceptions is that all replacement parts are equal. In reality, reproduction parts vary widely in quality. Some are excellent and dimensionally accurate, while others require significant modification, fit poorly, or differ visibly from original equipment. Weatherstripping, chrome trim, emblems, wiring harnesses, sheet metal panels, rubber suspension components, and interior soft trim are especially prone to quality differences between suppliers.
Another major issue is buying parts too early or without confirming exactly what the car needs. Restorers often accumulate boxes of components before teardown is complete, only to discover later that the vehicle had a mid-year production change, a non-original engine, or a trim package that requires different pieces. That can lead to wasted money and delays. It also becomes a problem when low-cost parts are chosen for convenience rather than correctness. A cheap ignition component, brake cylinder, or carburetor kit may create drivability and safety issues that undo hours of careful work elsewhere.
The best practice is to source parts strategically. Compare original components against factory manuals, casting numbers, parts books, and known reference cars when possible. Buy from reputable specialists who understand the model, not just generic resellers. Preserve and restore original parts when practical, because factory pieces often fit better than aftermarket replacements. Even if a restoration is not intended to be concours-correct, quality and compatibility still matter. The difference between a car that feels carefully restored and one that feels assembled from random catalogs usually comes down to disciplined parts selection and a willingness to verify details before spending money.
4. Is it a mistake to focus too much on paint and appearance before the mechanical systems are sorted out?
Yes, that is a very common mistake, and it often creates both financial waste and frustration. Paint and cosmetics are highly visible, so owners naturally want to see fast progress in those areas. But a restoration that prioritizes shine before structure, mechanicals, wiring, and fitment are proven usually ends up backtracking. Fresh paint can be scratched or damaged during drivetrain installation, glass fitting, trim alignment, weatherstrip installation, or brake and fuel system work. Even something as simple as adjusting hood hinges or door gaps becomes more stressful once expensive finish work is already complete.
From a practical standpoint, the car should first be made structurally sound and mechanically coherent. That means confirming body alignment, rebuilding braking and steering systems, evaluating suspension wear, checking fuel delivery, sorting the cooling system, repairing wiring, and ensuring the engine and transmission are truly serviceable. It is also smart to dry-build major components before final paint. Test-fit bumpers, grille pieces, moldings, lamps, glass, and interior trim while the car is still in a stage where corrections are easier and less costly.
A restoration should move in logical phases. Mechanical access is easiest before final assembly. Electrical troubleshooting is simpler before interior trim is installed. Water leak testing should happen before carpets and insulation go in. Final paint should ideally come after the bodywork is complete, panel fit is confirmed, and the vehicle has been mocked up enough to prove that major components align correctly. Beautiful paint on a car that overheats, leaks, stops poorly, or has unresolved wiring faults is not a successful restoration. A classic car should not only look right; it should operate with confidence and consistency.
5. How important are documentation, labeling, and testing during a restoration?
They are absolutely essential, and overlooking them is one of the reasons so many restoration projects stall or lose quality during reassembly. When a classic car comes apart, hundreds or even thousands of individual pieces need to go back together correctly. Fasteners differ in length, thread pitch, finish, and application. Brackets often look similar but mount in very specific orientations. Wiring routes, shims, clips, spacers, and hardware stacks are easy to forget months later if they were not documented carefully at disassembly.
Good restorers photograph everything before and during teardown, label bags and boxes clearly, organize parts by system, and keep notes about original finishes, part numbers, and assembly order. That documentation is especially valuable when restoring cars that have already been altered by previous owners. It helps separate original features from later modifications and reduces guesswork during reassembly. Service manuals, parts books, factory assembly guides, and reference photos should all be part of the process, not afterthoughts.
Testing is just as important as documentation. A restored car should never go from final assembly straight to regular driving without staged checks. Brake systems need to be bled and verified for leaks. Fuel systems need pressure and seepage checks. Electrical systems should be tested circuit by circuit. Engines need proper startup procedures, timing adjustment, cooling verification, and break-in where applicable. Suspension and steering should be inspected under load, followed by alignment and careful road testing. Then come the smaller refinements: rattles, charging behavior, hot-start performance, gauge accuracy, idle quality, and drivability under varying conditions. Thorough testing is what turns a freshly assembled classic into a genuinely dependable one, and it is the final step that separates cosmetic completion from a true restoration.




