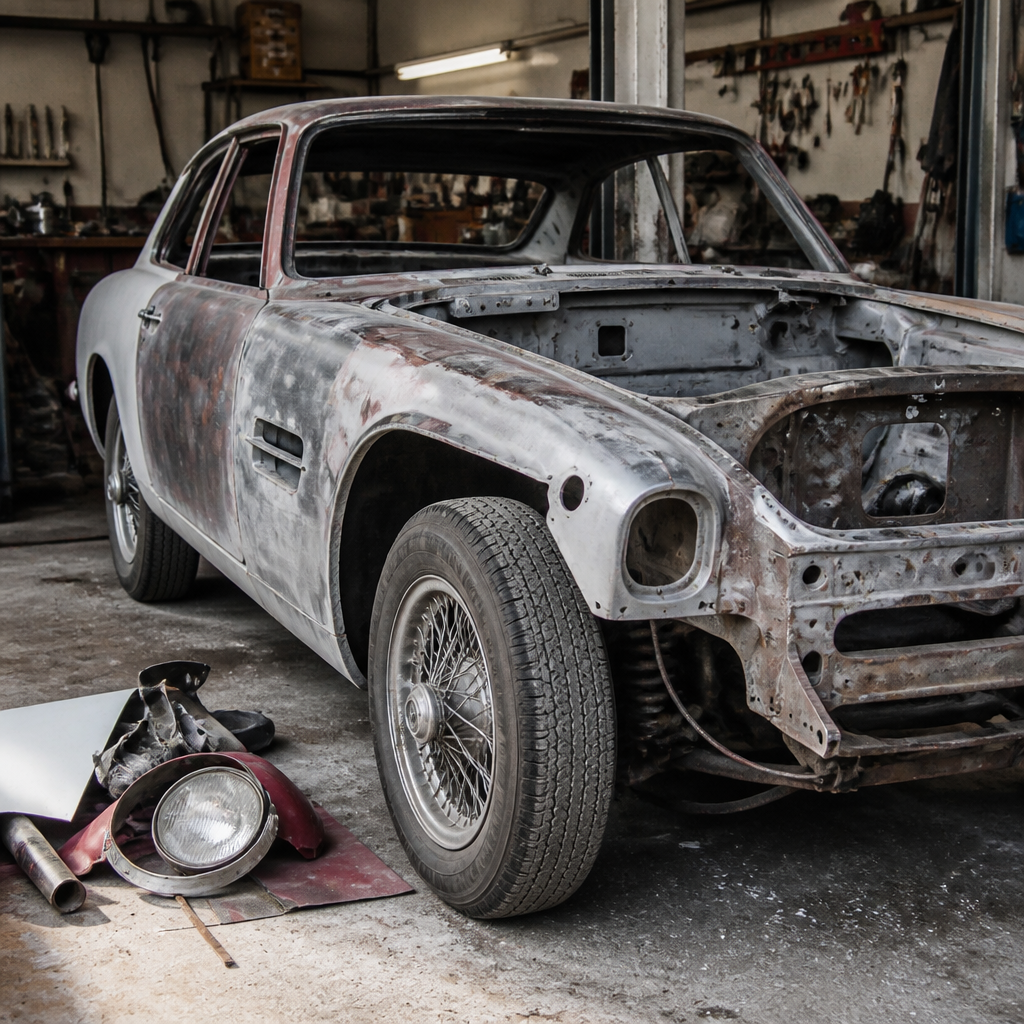
Planning a classic car restoration project starts long before the first bolt comes loose. A successful restoration is a disciplined process of evaluating the car, defining the finish line, budgeting money and time, sourcing parts, and deciding what work belongs in your garage versus a specialist shop. In practical terms, restoration basics means the foundational decisions that shape every later step: what vehicle to restore, what condition it is really in, what standard you want to reach, and how you will manage costs, labor, documentation, and quality control. I have worked with owners who rushed into teardown because enthusiasm was high, only to stall for years when hidden rust, missing trim, and unrealistic budgets caught up with them.
A classic car restoration project matters because old cars are complex systems, not decorative objects. Sheet metal, drivetrains, electrical circuits, glass, upholstery, weather seals, and plated trim all age differently, and each subsystem affects the others. Repainting a body before test-fitting chrome can damage fresh finishes. Rebuilding an engine without checking the cooling system can turn a clean startup into overheating trouble. For first-time restorers, the biggest misconception is that restoration is mainly mechanical. In reality, project planning is what protects value, preserves originality, and prevents avoidable rework. Whether your goal is concours accuracy, dependable weekend driving, or a sympathetic preservation build, the plan determines if the finished car meets expectations or becomes an expensive unfinished shell.
The best way to approach restoration basics is to treat the car like a controlled project with a clear scope. That means creating a condition assessment, a parts inventory, a phased budget, a timeline, and a decision framework for originality versus modification. It also means understanding the market for your specific make and model. A first-generation Ford Mustang, Chevrolet C10, or Volkswagen Beetle has deep aftermarket support, while low-production British, Italian, or orphan-brand cars often require custom fabrication and patient parts hunting. Good planning does not remove surprises, but it turns surprises into manageable line items instead of project-ending crises.
Choose the Right Car and Define the Restoration Goal
The first planning decision is choosing the right starting car, and this is where many restorations are won or lost. Buy the most complete, solid example you can afford. Completeness matters because missing trim, glass, brackets, date-coded components, and interior hardware can cost more and take longer to replace than major mechanical work. Structural condition matters even more. Rust in floors, quarter panels, and lower fenders is common; rust in frame rails, torque boxes, rocker structures, cowl areas, suspension pick-up points, or unibody rails is where budgets explode. I always advise owners to pay for the best body shell they can find because mechanical assemblies are generally easier to rebuild than corroded structure is to reconstruct properly.
Next, define the restoration goal with precision. There are four common paths. A driver restoration prioritizes safety, reliability, and visual appeal. A show restoration aims for high cosmetic standards and close factory-correct detailing. A concours restoration targets exacting originality, often including correct finishes, casting numbers, hose clamps, decals, and factory inspection marks. A restomod blends vintage style with modern upgrades such as disc brakes, electronic ignition, overdrive transmissions, fuel injection, or air conditioning. None is inherently better; each has a different cost structure and labor profile. Problems arise when goals shift midstream, such as starting with a driver budget and ending with concours expectations.
Value should inform your plan, but it should not be the only factor. Review auction results from Mecum, Barrett-Jackson, Bring a Trailer, or marque-specific registries to understand what finished cars actually sell for. Compare those values against realistic restoration costs in your region. Paint and body alone can exceed five figures. Chrome plating, upholstery, machine work, wiring harnesses, and weatherstripping add up quickly. If the fully restored market value is lower than the projected restoration spend, that does not automatically make the project a bad idea. It simply means you should enter with eyes open and a purpose rooted in enjoyment, preservation, or family history rather than profit.
Inspect the Car Methodically Before Any Disassembly
A proper inspection creates the baseline for the entire project. Start with documentation: title status, VIN tags, body plates, engine and transmission numbers, ownership records, service receipts, and any restoration history. Matching numbers can materially affect value on many American muscle cars, European sports cars, and limited-production classics. Then move to a full condition survey. Check panel gaps, signs of collision repair, filler thickness with a magnet or paint gauge, rust bubbles, glass date codes, and evidence of water intrusion. Underneath, inspect floors, frame rails, suspension mounts, brake lines, fuel lines, and differential housing. In the engine bay, look for fluid leaks, compression issues, broken mounts, non-original wiring, and prior modifications that may complicate parts selection later.
Photograph everything before disassembly. I mean everything: hose routing, fastener locations, shim stacks, wire colors, clip orientations, trunk board fitment, and under-dash connections. Modern phones make this effortless, and those images save countless hours during reassembly. Build a written inventory at the same time. Label what is present, damaged, missing, rebuildable, or unsuitable. Include part numbers where possible. For uncommon cars, factory service manuals, assembly manuals, and parts books are invaluable because they identify correct hardware, finishes, and subassemblies. This is also the stage to decide whether the car deserves a preservation approach. If it retains original paint, interior, and drivetrain with honest patina, over-restoration may destroy historical and market value rather than improve it.
Once the inspection is complete, write a scope document. Break the job into metalwork, paint, drivetrain, suspension, brakes, steering, electrical, interior, glass, trim, and final detailing. Note dependencies. For example, body alignment and panel fit should happen before final paint; wiring, sound deadening, and HVAC work should precede interior installation. This project map becomes your control document when costs rise or parts delays hit.
Build a Budget, Timeline, and Parts Strategy
Restoration budgets fail when they are based on optimism instead of categories. Use a line-item budget with separate columns for parts, outsourced labor, tools, materials, shipping, taxes, and contingency. A contingency reserve of 15 to 25 percent is realistic because hidden rust, unusable cores, cracked pot metal, and machine-shop findings are common. Time should be budgeted the same way. Weekend restorations often take years because owners underestimate prep, waiting periods, and rework. If you outsource paint, upholstery, machining, or plating, ask each vendor for estimated lead times before you commit to the sequence.
| Planning Category | What to Include | Typical Risk if Ignored |
|---|---|---|
| Body and rust repair | Panel replacement, metal fabrication, seam sealer, undercoating, alignment | Project cost doubles after hidden corrosion is discovered |
| Mechanical systems | Engine, transmission, cooling, fuel, brakes, steering, suspension | Freshly restored car is unreliable or unsafe to drive |
| Electrical and interior | Wiring harness, switches, gauges, seats, carpet, weather seals | Hard-to-diagnose faults and poor cabin fit after assembly |
| Parts sourcing | New old stock, reproduction parts, salvage pieces, rebuildable cores | Long delays or wrong components bought twice |
| Contingency and timeline | Reserve funds, vendor lead times, milestone dates, storage needs | Half-finished car sits for months or years |
Your parts strategy deserves as much attention as your budget. For popular models, reproduction catalogs from suppliers such as Classic Industries, YearOne, Moss Motors, or Wolfsburg West can cover much of the build. For rarer cars, rely on marque clubs, specialist dismantlers, owner forums, swap meets, and rebuild services. Not all reproduction parts are equal. I have seen trim pieces with incorrect profiles, weatherstrips that create fit issues, and wiring connectors with poor tolerances. Critical visible parts should be compared against originals whenever possible. For safety systems, buy from proven suppliers and verify compatibility rather than chasing the lowest price.
Set milestones that match the work flow: assessment complete, teardown complete, metalwork approved, body in primer, drivetrain assembled, chassis rolling, wiring tested, interior installed, road test complete. Milestones keep the project moving and help you make rational decisions when a part is backordered or a subcontractor slips. They also create natural checkpoints to review spend against scope before the next major phase starts.
Decide What to Do Yourself and What to Outsource
The smartest restoration plans are honest about skill level, workspace, and equipment. Owners often overestimate what can be done at home and underestimate the cost of correcting avoidable mistakes. Basic disassembly, labeling, cleaning, parts organization, bolt-on suspension work, and some interior tasks are usually manageable for careful hobbyists with a service manual, hand tools, torque wrench, jack stands, and storage systems. Bodywork, paint, upholstery, instrument restoration, chrome plating, and precision machine work usually benefit from specialists. Structural welding and frame alignment especially require experience and accurate measuring equipment, not guesswork.
When selecting shops, inspect completed projects in person if possible. Ask how they document hidden work, how they handle change orders, whether they media blast or chemically strip bodies, what primers and topcoats they use, and how they verify panel fit before paint. Reputable shops will explain processes clearly and identify likely risks early. They will also set expectations about cost creep when damage is uncovered after blasting or teardown. For mechanical shops, ask about machining tolerances, balancing, valve-train setup, break-in procedure, and whether they test components before delivery. A shop that speaks in specifics is usually safer than one selling a vague promise.
Organization is the bridge between home work and outsourced work. Use labeled bags, bins, shelves, and spreadsheets. Tag every harness connector, hinge shim, and bracket. Keep left and right side parts separated. Store plated trim carefully to avoid bends and scratches. If the car goes to a body shop partly disassembled, send it with photographs, hardware notes, and clear written goals. The more complete your documentation, the lower the chance of confusion, missing parts, or expensive duplicated effort.
Preserve Originality, Manage Reassembly, and Finish Strong
Originality decisions should be made before buying parts, not after the shell comes back from paint. Determine which features are essential to the car’s identity: factory color, trim level, wheel design, carburetion, radio type, seat upholstery pattern, or drivetrain specification. For many restorations, the best result is not absolute originality but period-correct character with discreet upgrades. Radial tires, dual-circuit master cylinders, electronic ignition modules, aluminum radiators painted black, and hidden battery cutoffs can improve drivability and safety without changing the car’s visual language. The key is consistency. Random modifications reduce coherence and can complicate maintenance later.
Reassembly is where planning pays off. Dry-fit trim, bumpers, lights, glass, and weatherstrips before final tightening. Test every electrical circuit before carpet and seats go in. Prime oil systems before first start, pre-fill filters where appropriate, and verify ignition timing, fuel delivery, cooling flow, and charging output. Use proper torque values and anti-seize or thread locker only where specified in the manual. Expect adjustments after initial startup and road testing. Carburetors need tuning, drum brakes need bedding and readjustment, door glass may need alignment, and suspension components may settle after the first miles. A restoration is not complete when the car moves under its own power; it is complete when the systems work together reliably.
Quality control should include a final punch list and a shakedown plan. Check for leaks, charging voltage, fluid temperatures, brake pull, steering play, driveline vibration, and rattles. Re-torque wheel fasteners and critical suspension points after initial miles. Keep records of part numbers, paint codes, machine work, and wiring changes for future maintenance. Planning a classic car restoration project is ultimately about reducing uncertainty. Start with a realistic goal, document the car thoroughly, budget with contingency, buy the best parts you can verify, and use specialists where accuracy matters most. Do that, and your restoration basics will support every deeper guide in this topic. The next step is simple: assess your car honestly and write the project plan before you pick up a wrench.
Frequently Asked Questions
What should I evaluate before choosing a classic car restoration project?
Before you commit to any project car, start with an honest evaluation of the vehicle’s condition, completeness, paperwork, and market support. The biggest mistake beginners make is buying with emotion first and facts second. A classic car may look solid in photos or from ten feet away, but restoration planning depends on what is really underneath the paint, upholstery, and undercoating. Inspect the frame, floors, trunk, rockers, suspension mounting points, and lower body panels for rust, previous collision repair, patchwork, or structural weakness. Rust repair can quickly become one of the most expensive and time-consuming parts of a build, especially if corrosion affects structural areas.
You should also evaluate whether the car is complete. Missing trim, glass, badges, interior hardware, brackets, model-specific fasteners, or original engine components can create long delays and unexpected expenses. In many classic restorations, sourcing rare parts is harder than performing the labor itself. Check identification numbers, title status, registration history, and originality if authenticity matters to your end goal. A car with paperwork problems can become a legal headache regardless of how good the body is.
Finally, look beyond the car itself and assess the restoration ecosystem around it. Ask whether reproduction parts are readily available, whether specialty suppliers support the model, and whether clubs, forums, and technical guides exist for that vehicle. A popular classic with strong parts availability is often a smarter first project than a rare model with almost no support. In short, the best project car is not always the cheapest one to buy. It is the one that matches your skills, budget, timeline, and access to parts and expertise.
How do I define the right restoration goal before any work begins?
Every successful classic car restoration starts with a clearly defined finish line. You need to decide early whether you are building a concours-level show car, a factory-correct restoration, a clean weekend driver, a restomod, or a mechanically refreshed survivor. That choice influences every later decision, from paint quality and interior materials to engine work, fastener selection, and how strictly you follow original specifications. Without a defined target, restorations tend to drift, budgets expand, and the project loses momentum.
A driver-quality restoration usually prioritizes safety, reliability, appearance, and enjoyment. That can mean modern tires, upgraded brakes, improved wiring, and practical paint quality rather than chasing every factory marking and date-coded component. A show-quality or numbers-correct build is much more demanding. It may require research into original finishes, trim details, upholstery patterns, hardware plating, assembly methods, and exact replacement parts. That level of restoration is rewarding, but it is also significantly more expensive and slower to complete.
It helps to write down your goal in plain language before turning the first wrench. For example: “I want a dependable weekend cruiser that looks period-correct from the outside but has upgraded brakes and ignition,” or “I want a factory-authentic restoration suitable for judged events.” Once that goal is defined, use it as a filter for every decision. If a step, part, or service does not move the car toward that specific outcome, it may not belong in the plan. Clear goals prevent wasted effort and make the entire project more disciplined from start to finish.
How should I budget for a classic car restoration project realistically?
A realistic restoration budget should cover far more than the purchase price and obvious parts. In practice, the cost of restoring a classic car usually includes bodywork, rust repair, paint, engine and transmission work, suspension, brakes, tires, glass, chrome, electrical repairs, interior restoration, weatherstripping, trim replacement, tools, shop supplies, transportation, and outsourced labor. Many owners underestimate not only the cost of major systems but also the cumulative effect of smaller items like clips, seals, gaskets, wiring ends, refinishing materials, and specialty fasteners.
The best approach is to build the budget in categories and assign a range to each one. Start with a condition assessment, then estimate the work required for structural metal, mechanical systems, cosmetics, and assembly. Get quotes from machine shops, body shops, upholstery specialists, and painters early, because these services often represent the largest expenses. Add a contingency fund of at least 15 to 30 percent, because hidden problems are normal in restoration work. Once disassembly begins, it is common to uncover corrosion, poor past repairs, damaged threads, cracked mounts, missing pieces, and worn components that were not obvious during the initial inspection.
Time should be budgeted just as carefully as money. A project that stretches over several years can create storage costs, parts price increases, lost motivation, and rework if items are misplaced or plans change. It is often smarter to restore in phases and finish one system completely before moving to the next. Above all, be realistic about the value of the finished car versus the total investment. Many restorations are passion projects, not profit opportunities. If you go in understanding that clearly, you can make better decisions and enjoy the process much more.
How do I decide what work I can do myself versus what should go to a specialist?
The answer depends on your skill level, equipment, workspace, safety awareness, and restoration goal. There is nothing wrong with doing a large portion of the work yourself, especially tasks like disassembly, cataloging parts, cleaning, basic mechanical repairs, interior removal, and some reassembly. These jobs can save substantial money and help you learn the car thoroughly. However, trying to do everything yourself without the right tools or experience can lead to expensive mistakes, safety issues, and lower-quality results that are harder to fix later.
As a general rule, jobs involving structural welding, advanced body alignment, precision machining, final paintwork, upholstery sewing, chrome restoration, and specialized transmission or differential rebuilding are often best left to professionals. These tasks require not only technical knowledge but also equipment and repeatable process control. For example, poor panel preparation can ruin an otherwise beautiful paint job, and incorrect machine work can shorten engine life dramatically. Brake systems, steering components, and fuel systems also demand careful attention because they directly affect safety and reliability.
A smart planning strategy is to divide the project into three categories: work you can confidently do yourself, work you can do with guidance, and work that belongs with a specialist. Be honest about where each task falls. If you want to learn a new skill, practice on a noncritical component first rather than on a rare original part. Also consider the value of your time. Sometimes paying an experienced shop for a difficult process is more economical than buying tools, spending months learning, and potentially redoing the job. The goal is not to prove you can do every step alone. The goal is to restore the car properly, safely, and in a way that keeps the project moving forward.
What is the best way to organize the restoration process so the project stays on track?
Organization is one of the most important restoration basics, because even a well-funded project can stall if parts, information, and decisions become chaotic. Begin by documenting everything before disassembly. Take detailed photos from every angle, including wiring routes, hose placement, brackets, fasteners, trim fitment, and underbody details. Label bags and bins clearly, group hardware by system, and create a written inventory as parts come off the car. This documentation becomes invaluable months later when reassembly begins and memory is no longer reliable.
Next, build a logical sequence for the work. In most projects, that means evaluating and repairing the structure first, then handling body and rust issues, test-fitting panels and trim, rebuilding major mechanical systems, addressing wiring and plumbing, and leaving final paint, interior installation, and delicate trim for the appropriate stage. Avoid random progress. Jumping between systems without a plan often results in duplicated labor, damaged finished parts, and missing components. If possible, create milestones such as “rolling chassis complete,” “drivetrain installed,” “bodywork finished,” or “electrical system tested.” Milestones make the project feel manageable and reveal delays before they become major setbacks.
It also helps to maintain a master spreadsheet or project binder with parts lists, supplier contacts, order dates, receipts, service manuals, torque specs, paint codes, and shop notes. Track what has been completed, what is waiting on parts, and what must be outsourced. If multiple shops are involved, communicate expectations clearly and confirm timelines in writing. The more disciplined your planning system is, the easier it becomes to control cost, avoid repeated work, and preserve momentum. In classic car restoration, good organization is not just administrative housekeeping. It is a practical tool that directly affects quality, efficiency, and whether the project actually gets finished.