
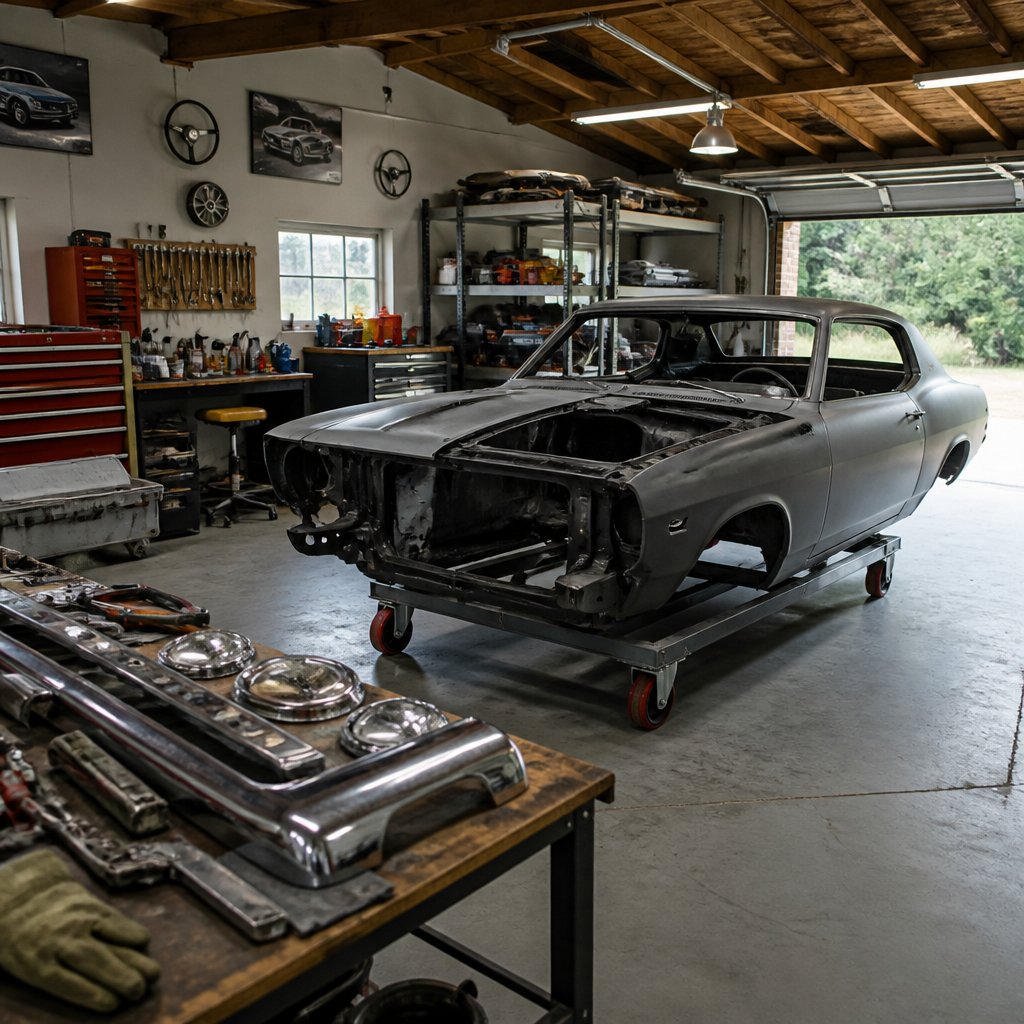
Garage setup for classic car restoration determines whether a project moves steadily from teardown to first drive or stalls under poor lighting, missing tools, and unsafe storage. In restoration work, “garage setup” means more than clearing floor space. It includes layout, electrical capacity, lighting quality, ventilation, lifting equipment, storage systems, cleaning gear, and the hand and power tools used daily. “Tools and equipment” covers everything from a basic socket set to an engine hoist, air compressor, welders, diagnostic meters, and labeling supplies. I have built and rebuilt project spaces for vintage Mustangs, British roadsters, and full-frame American sedans, and the same lesson repeats: the right environment saves time, protects parts, and reduces expensive mistakes.
This matters because classic car restoration is unusually demanding on a workspace. Unlike routine maintenance, restoration involves long disassembly periods, mixed materials, heavy components, hazardous chemicals, and hundreds of small parts that must return to the correct location months later. Older vehicles also vary widely in fastener standards, wiring condition, corrosion levels, and service access, so a generic home garage often falls short. A strong setup improves accuracy during metalwork, paint prep, engine assembly, brake rebuilding, upholstery removal, and electrical troubleshooting. It also supports internal linking paths across related restoration and maintenance topics such as bodywork, engine rebuilding, rust repair, wiring repair, detailing, and long-term storage. A well-planned garage is the operational foundation for every one of those jobs.
Plan the workspace around restoration stages
The best garage setup for classic car restoration starts with workflow, not shopping. Divide the space into zones that match the order of work: intake and inspection, disassembly, cleaning, fabrication, assembly, and storage. Even in a two-car garage, this zoning prevents constant reshuffling. I usually leave one side open for the chassis or body shell, place a heavy workbench on the longest wall, dedicate shelving to removed parts, and reserve a clean bench for carburetors, gauges, trim, and electrical work. If the car is a body-on-frame model, plan early for where the body, frame, drivetrain, and suspension assemblies will sit separately. Without that plan, progress slows as soon as major components come off.
Clear floor area matters, but wall use matters more. Install adjustable metal shelving rather than improvised stacks of boxes, because restoration parts vary from fragile emblems to cast-iron manifolds. Over-bench pegboards are useful for frequently reached tools, yet closed cabinets are better for precision measuring tools, adhesives, and electrical supplies that should stay dust free. Keep a rolling cart for active fasteners and small subassemblies. Label every bin with the vehicle, system, and orientation, such as “1967 coupe front suspension LH.” That sounds excessive until several months pass. During one Jaguar restoration, labeling by subsystem alone created confusion because left and right shims looked identical; labeling by side prevented an alignment headache later.
Door width, ceiling height, and access paths also affect equipment choices. A low ceiling may rule out a full-rise lift but still allow a mid-rise scissor lift. Narrow side clearance can make engine removal difficult unless the vehicle is centered precisely and the hoist can roll freely. Think about where sheet metal will be stored to avoid edge damage. If sanding or grinding will happen in the same room as final assembly, use curtains or temporary partitioning to isolate dust. Restoration is cumulative work, so setup decisions should favor repeatability and cleanliness rather than one-time convenience.
Core hand tools and measuring equipment
Every restoration shop needs a deep hand-tool inventory because classic cars respond poorly to improvised force. Start with high-quality socket sets in SAE and metric, plus 1/4-inch, 3/8-inch, and 1/2-inch drive ratchets, breaker bars, extensions, and universal joints. Many cars built during transition years contain mixed hardware, and imported classics may add Whitworth, BSF, JIS, or Pozidriv fasteners. Screwdrivers should include hollow-ground options for slotted trim screws, impact-rated bits for stubborn body hardware, and stubby drivers for interior work. Add combination wrenches, flare-nut wrenches for brake and fuel lines, locking pliers, snap-ring pliers, picks, gasket scrapers, body trim tools, and a dead-blow hammer. These are not optional extras; they prevent damaged hardware and crushed trim.
Measuring tools are equally important and often underbought. A 1/2-inch torque wrench handles lug nuts and suspension fasteners, while a smaller inch-pound wrench protects valve covers, carburetor screws, and transmission pans. Vernier or digital calipers, a micrometer set, feeler gauges, straightedges, thread pitch gauges, and a dial indicator with magnetic base support engine, brake, and drivetrain inspections. Compression testers, leak-down testers, vacuum gauges, and timing lights remain highly relevant on carbureted engines. For electrical work, use a quality digital multimeter with continuity, voltage drop, and amperage capability, plus back-probe pins and a 12-volt test light. When tracing brittle original wiring on a sixties coupe, voltage-drop testing identified a corroded bulkhead connector that looked acceptable visually but was costing almost two volts under starter load.
Tool quality matters most in the items used at high load or tight tolerance. Cheap chrome sockets can split under suspension work, and inaccurate torque wrenches can ruin aluminum threads or bearing preload. Proven brands vary by budget, but established lines from Snap-on, Mac Tools, Matco, Wright, Proto, GearWrench, Knipex, Lisle, and Tekton generally provide dependable geometry and replacement support. Buy specialized pullers and service tools as needed, especially for steering wheels, harmonic balancers, pitman arms, tie rods, and drum brake springs. A classic car project is won through control, not brute strength.
Lifting, power, air, and fabrication equipment
Heavy equipment expands what a home restorer can safely do. A hydraulic floor jack with at least a 3-ton rating, matched with quality jack stands, is the minimum standard. Stands should support the vehicle by structurally sound points, never sheet metal edges or weak axle tubes. Wheel chocks and drip trays belong beside them. If budget and ceiling height allow, a two-post lift dramatically improves underbody access for exhaust, brake lines, suspension, and fuel system work. A four-post lift adds storage advantages but is less convenient for wheel and suspension removal unless fitted with jacking accessories. Mid-rise lifts are a strong compromise in low garages.
Air systems still earn their place in restoration. A compressor in the 60-gallon class with around 10 to 15 CFM at 90 PSI can support impact wrenches, die grinders, cut-off tools, blow guns, and many HVLP paint guns. Smaller portable units work for tires and occasional fastener removal but struggle with continuous sanding or painting. Use moisture management: at minimum, a regulator, water separator, and desiccant or refrigerated dryer if painting is planned. Rust repair and panel fabrication also justify a welder. For most hobby restorers, a 220-volt MIG welder with shielding gas is the most versatile choice for floors, patch panels, brackets, and plug welds. A TIG welder offers better precision on thin sheet, stainless, and aluminum, but it demands more skill and setup discipline.
The following table covers the essential equipment categories for a restoration-focused garage and what each one should accomplish in practice.
| Equipment | Recommended baseline | Best use in classic restoration |
|---|---|---|
| Floor jack and stands | 3-ton low-profile jack, four rated stands | Suspension, brakes, exhaust, fuel tank removal |
| Vehicle lift | Two-post if ceiling allows, mid-rise if not | Undercar access, chassis inspection, drivetrain service |
| Air compressor | 60-gallon, 10–15 CFM at 90 PSI | Air tools, media blasting, paint preparation |
| MIG welder | 220-volt unit with gas shielding | Rust repair, patch panels, brackets, fabrication |
| Bench grinder and wire wheel | 6-inch or 8-inch with guards | Fastener cleanup, edge prep, bracket restoration |
| Engine hoist and stand | 2-ton folding hoist, rotating engine stand | Engine removal, teardown, cleaning, assembly |
| Workbench and vise | Heavy bench with 4-inch or larger vise | Disassembly, pressing, filing, precision handwork |
Do not overlook power distribution. Restoration garages need multiple 20-amp circuits, GFCI protection where appropriate, and enough outlets that extension cords are the exception rather than the rule. Welders, compressors, and heaters may require dedicated 240-volt service. Good power planning reduces nuisance trips and fire risk. If you expect to use a plasma cutter, curing lamps, or a large parts washer, size the electrical system before walls are finished.
Lighting, ventilation, and safety systems
Lighting changes restoration quality immediately. General overhead illumination should be bright, even, and high color accuracy so defects are visible during sanding, wiring, and fluid leak diagnosis. LED shop fixtures in the 4000K to 5000K range provide a neutral daylight effect that reveals paint imperfections and contamination better than warm bulbs. Aim for broad coverage, then add task lighting at the bench, underhood, and undercar areas. Rechargeable inspection lights, magnetic LED bars, and headlamps are invaluable when routing wiring behind dashboards or checking casting marks on engine components. In one trunk-floor replacement project, side-angle task lighting exposed low weld spots that overhead lights concealed.
Ventilation is nonnegotiable where fuels, solvents, paints, seam sealers, and welding fumes are present. At minimum, the space needs cross-ventilation with intake and exhaust airflow. For painting, dedicated filtered exhaust and fresh-air respiratory protection are ideal; a simple box fan is not a safe substitute around flammable vapors. Dust collection also matters. Sanding filler, primer, rust, and old undercoating creates particulate that settles into bearings, fresh paint, and interior fabrics. Portable extractors, shop vacuums with fine filters, and local source capture around grinders reduce cleanup and contamination. If the building is in a cold climate, choose heating methods that do not create open flame hazards near fuel systems or paint products.
Safety equipment should be visible, serviced, and easy to reach. Keep ABC extinguishers near exits and welding areas, stock a first-aid kit, and use nitrile gloves, face shields, hearing protection, welding PPE, and respirators matched to the task. A cartridge respirator suitable for organic vapors is common for solvents, while particulate filters are used for sanding dust; some painting operations require supplied-air systems. Also install carbon monoxide detectors if engines will run indoors, even briefly. Chemical storage cabinets are wise for brake cleaner, reducers, and paint materials. Restoration work is rewarding, but poor safety discipline turns minor incidents into major losses.
Storage, cleaning, and documentation that save projects
Classic car restoration creates a volume of parts that surprises first-time builders. Effective storage protects irreplaceable trim and keeps reassembly possible. Use clear bins for hardware sorted by assembly, padded shelves for brightwork, garment-style hanging storage for weatherstrips, and dedicated racks for doors, hood, and fenders. Keep bare metal parts lightly oiled or wrapped with vapor corrosion inhibitor paper. For glass, use vertical padded storage to reduce breakage. Heavy-duty drawer cabinets are excellent for sorted fasteners, clips, jets, electrical terminals, and grommets. The point is not tidiness for its own sake. The point is preserving context so each part remains identifiable, protected, and install-ready.
Cleaning equipment has a direct effect on quality. A solvent tank or water-based parts washer speeds degreasing of brackets, backing plates, and housings. A pressure washer helps with initial grime removal before disassembly. Media blasting cabinets are useful for small steel parts, though delicate castings and trim require caution. Ultrasonic cleaners excel with carburetor bodies, jets, and intricate hardware because they reach passages brushes cannot. Pair cleaning tools with consumables: brass brushes, Scotch-Brite pads used appropriately, lint-free wipes, absorbent mats, and dedicated drain pans. During engine assembly or brake hydraulic work, switch to a truly clean bench, separate from grinding dust and oily teardown parts.
Documentation is the most underrated tool in the garage. Factory service manuals, assembly manuals, wiring diagrams, and parts books should be within arm’s reach, not buried on a laptop across the room. Printed binders still outperform screens when hands are dirty. Photograph every stage before and during disassembly, especially hose routes, clip positions, shim stacks, and harness pass-through points. Bag and tag hardware with notes that include quantity and orientation. I also keep a restoration log with torque specs, machining measurements, paint codes, supplier details, and unresolved questions. When a project pauses for weeks, that log restarts momentum immediately. Good documentation turns the garage from a storage space into a controlled restoration environment.
Build the garage in phases and match tools to project scope
Not every restorer needs a fully equipped fabrication shop on day one. A smart approach is phased investment based on the actual car and restoration level. For a running driver needing mechanical sorting, brake work, and cosmetic improvement, prioritize hand tools, lighting, jack stands, a workbench, electrical test gear, and organized storage. For a car with structural rust, add welding capability, sheet-metal tools, dust control, and stronger ventilation. For full drivetrain and body-off restoration, the value of a lift, engine hoist, compressor, blasting equipment, and dedicated parts shelving becomes much higher. Match purchases to tasks you will perform repeatedly, and outsource occasional specialist operations such as crank grinding, align honing, or show-quality paint spraying if the learning curve or equipment cost is disproportionate.
Budget should account for consumables and infrastructure, not just headline tools. Cutoff wheels, drill bits, abrasives, welding gas, masking paper, zip bags, labels, lubricants, rust penetrants, degreasers, and fastener trays are used constantly. So are extension reels, battery maintainers, moving blankets, casters, and shop stools. If you are planning a sub-pillar hub under restoration and maintenance, this is the natural launch point into deeper articles on welding basics, compressor sizing, jack stand safety, parts cleaning methods, rust repair tools, paint prep equipment, engine stand use, and electrical troubleshooting kits. The hub exists to help readers make sound decisions before they buy.
A garage setup for classic car restoration should ultimately do three things well: protect the vehicle, support accurate work, and keep the project moving. Start with layout, lighting, power, and safety. Add dependable hand tools, measuring equipment, lifting gear, and cleaning systems. Then refine the space with better storage, ventilation, and documentation habits. You do not need every premium machine immediately, but you do need a garage that matches the demands of old cars and the realities of long projects. Review your current workspace, identify the next bottleneck, and upgrade that area first. Each improvement pays back in saved time, fewer damaged parts, and a more confident restoration process.
Frequently Asked Questions
What should a garage include to support a full classic car restoration from start to finish?
A restoration-ready garage needs to function as a workshop, storage area, and safe mechanical environment all at once. At minimum, it should provide enough floor space to move around the vehicle with doors open, room for parts carts and toolboxes, and clear zones for teardown, assembly, and storage. Good layout matters because restoration work creates constant movement between inspecting parts, cleaning components, test-fitting panels, and reinstalling systems. If the garage is cramped or disorganized, projects slow down quickly and the chance of damage to parts or paint goes up.
Strong electrical capacity is another essential piece. Classic car restoration often involves air compressors, welders, battery chargers, grinders, work lights, and bench tools operating in the same space. A garage should have multiple well-placed outlets, preferably on dedicated circuits for heavier equipment, so extension cords do not become permanent trip hazards. Lighting is equally important. Overhead lighting should be bright and even, with supplemental task lighting at benches, under the vehicle, and around bodywork areas. Poor lighting hides rust, bad welds, fluid leaks, and finish defects that are much easier to correct early than later.
Ventilation and safety infrastructure also belong on the must-have list. Fumes from fuel systems, solvents, paints, degreasers, and exhaust can build up in enclosed spaces, so fresh-air movement is critical. Depending on the work being done, this may mean exhaust fans, filtered airflow, openable doors and windows, and strict separation between grinding, painting, and general assembly areas. Fire extinguishers, first-aid supplies, eye-wash access, gloves, respirators, and proper chemical storage should be treated as standard equipment, not optional upgrades.
Finally, the garage should support efficient long-term project management. That means shelving for labeled parts, bins for fasteners, a solid workbench, cleaning supplies, rolling carts, and lifting equipment suited to the scope of the build. Even a modest home garage can work well if it is organized around workflow rather than just storage. The best setup is not necessarily the biggest one; it is the one that lets you work safely, find what you need quickly, and keep the project moving forward week after week.
How much lighting and electrical capacity do you really need in a restoration garage?
More than most people expect. Restoration work is detail-heavy, and both lighting and power directly affect the quality of the results. Lighting should not just make the garage look bright overall; it should eliminate shadows around the chassis, engine bay, interior, and lower body panels. General overhead LED lighting is usually the best foundation because it provides strong, efficient, low-heat illumination. From there, task-specific lighting is what makes the difference during real work. Adjustable bench lights, magnetic underhood lights, portable LED floodlights, and handheld inspection lights help you see corrosion, wiring routes, gasket surfaces, panel alignment, and paint flaws that overhead fixtures alone can miss.
Electrical planning should assume that several tools may run at the same time. An air compressor, charger, shop vacuum, work lights, and a power tool can quickly overwhelm a poorly planned circuit. If the garage is being upgraded, it is smart to install more outlets than you think you need and position them along walls, near the workbench, and at convenient points for vehicle access. Ceiling-mounted cord reels and outlets for retractable lights can also help keep the floor clear. If you plan to use a welder, larger compressor, or lift, make sure the electrical service actually supports those loads. In many restoration garages, adding dedicated circuits for major equipment is one of the best investments you can make.
Good electrical capacity is also a safety issue. Overloaded outlets, daisy-chained extension cords, and makeshift power distribution are common in hobby garages, but they raise fire risk and make work less efficient. Restoration often stretches over months or years, so the setup needs to be reliable for the long term. Ground fault protection, proper breakers, clean cable routing, and weather-resistant solutions for garages exposed to temperature swings or moisture all matter. In practical terms, if your lights flicker when the compressor starts or you constantly unplug one tool to run another, your garage needs an upgrade.
The goal is to create an environment where power and visibility never become the bottleneck. When lighting is strong and electrical access is abundant, diagnosing problems is easier, precision work improves, and jobs take less time. For classic cars, where every original bracket, fastener, and wiring path may require careful evaluation, that extra clarity pays off constantly.
Which tools and equipment are most important for someone setting up a classic car restoration garage?
The core tool list should cover disassembly, repair, cleaning, measuring, and reassembly. A quality set of hand tools comes first: sockets, ratchets, combination wrenches, screwdrivers, pliers, locking pliers, hammers, pry bars, torque wrenches, breaker bars, punches, picks, and hex or Torx bits where appropriate. Classic cars often involve stubborn, corroded fasteners, so durability matters more than bargain pricing. A restoration garage should also include measuring and inspection tools such as calipers, feeler gauges, a compression tester, multimeter, timing light, and straightedges. These are the tools that help you decide whether parts are reusable, repairable, or ready for replacement.
After the basics, support equipment becomes just as important. A sturdy workbench with a vise is one of the most useful pieces in the shop. A good floor jack, heavy-duty jack stands, wheel chocks, creeper, drain pans, and an engine hoist dramatically expand what you can do safely. If space and budget allow, a vehicle lift is a major upgrade for underbody work, exhaust, brake lines, suspension, and cleaning. An air compressor is also valuable because it supports impact tools, blow guns, tire work, and some painting or media-blasting tasks, though the right size depends on how intensively it will be used.
Cleaning and surface-prep tools should not be overlooked. Restoration work creates endless dirty jobs, from stripping grease off suspension parts to cleaning threads and removing scale. A shop vacuum, parts washer, wire wheels, brushes, scrapers, degreaser sprayers, and absorbent materials all earn their keep quickly. Depending on the project, you may also need grinders, sanders, polishers, a drill press, bench grinder, and welding equipment. For body restoration, specialty tools such as dollies, body hammers, clamps, sheet-metal tools, and sanding blocks become increasingly important.
Storage tools matter too. Tool chests, rolling service carts, labeled bins, hardware organizers, and shelving are part of the working tool ecosystem because they reduce lost time and protect parts. In a restoration, you are not just repairing a car; you are managing hundreds or thousands of individual components over a long timeline. The most effective garage setups combine dependable hand tools with lifting, cleaning, power, and storage equipment so work can progress smoothly without constant improvisation.
How should parts, hardware, and removed components be organized during a restoration?
Organization is one of the biggest predictors of whether a restoration stays manageable. As soon as disassembly begins, every removed part needs a storage plan. The best approach is to organize by system and location: front suspension, interior trim, dash wiring, fuel system, brakes, engine accessories, and so on. Small hardware should go into labeled bags or bins immediately, with notes identifying exactly where it came from. That extra minute during teardown saves hours of confusion later, especially when reinstalling brackets, shims, clips, and fasteners that may look similar but are not interchangeable.
Shelving and cabinet space make a major difference. Heavy parts such as cylinder heads, transmissions, and suspension assemblies need strong lower storage, while boxed trim pieces, weatherstripping, and cleaned hardware can go higher. Delicate parts should be wrapped or boxed to avoid scratches, corrosion, or accidental bending. If body panels, glass, or brightwork are removed, they should be stored upright or padded properly so they do not become secondary repair projects. A rolling cart can be especially useful for keeping the current phase of work close to the car while maintaining overall order in the garage.
Documentation is just as important as physical storage. Take photos before and during removal, label wiring connections, tag hoses, and keep a notebook or digital log for part condition, replacement needs, and missing items. Many restorers also separate parts into categories such as reuse, refurbish, replace, and outsource. That creates clarity when budgeting and prevents the project from stalling because components disappear into random piles awaiting a decision.
Cleanliness supports organization too. Oily hardware dumped into a single tray turns into a frustrating mess, while cleaned and sorted parts are easier to inspect and protect. The aim is to create a system where every component has a known status and location. In a classic car restoration, that discipline reduces mistakes, protects irreplaceable original pieces, and keeps reassembly from feeling like a second teardown.
What safety and ventilation features are essential in a garage used for classic car restoration?
Safety and ventilation are foundational because restoration work combines chemicals, dust, heat, electricity, heavy components, and frequent lifting. At the most basic level, the




