
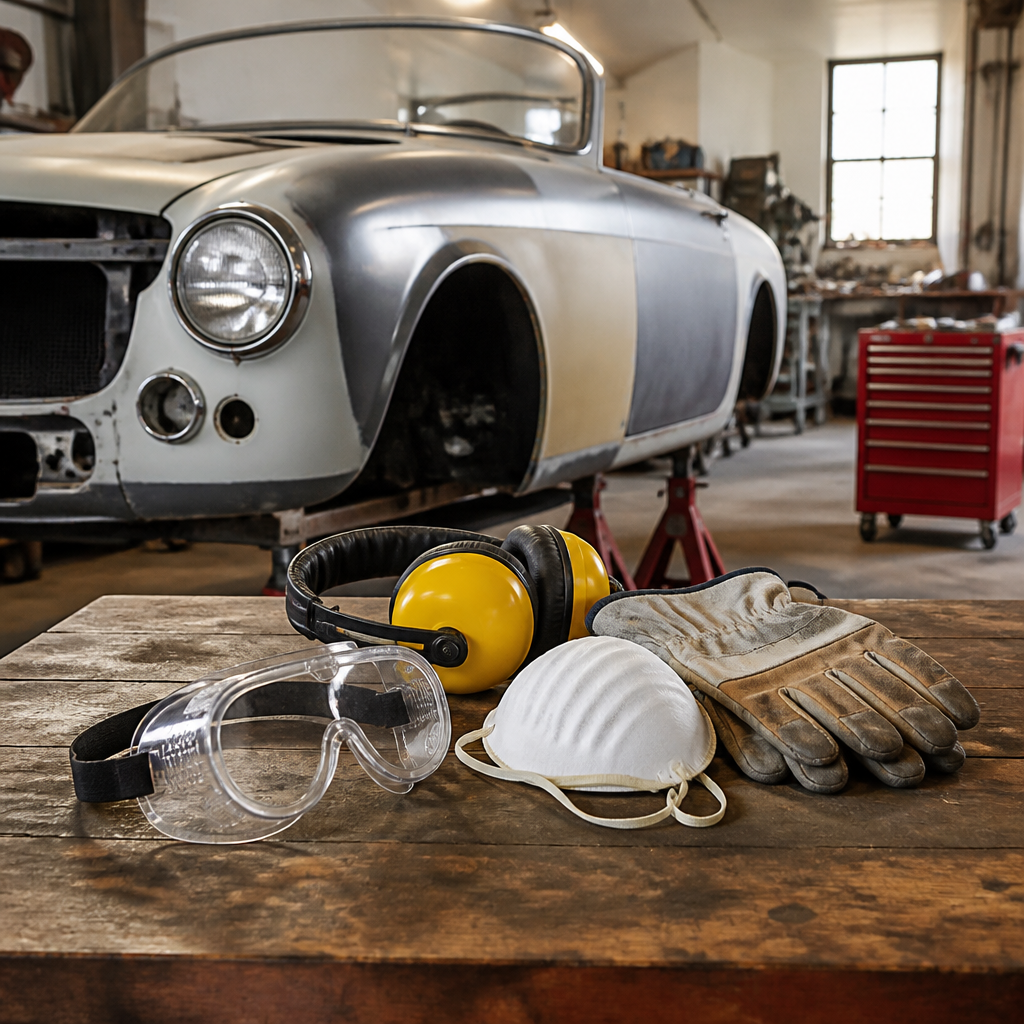
Safety equipment for classic car restoration is not optional gear you buy after the project starts; it is the foundation that lets you cut, strip, weld, lift, paint, and troubleshoot an aging vehicle without turning a rewarding rebuild into a preventable injury. In classic car work, safety equipment includes personal protective equipment, shop ventilation, fire prevention tools, lifting devices, electrical protection, and storage systems that control the hazards created by old steel, brittle wiring, rust scale, solvents, fuel residue, lead-based coatings, asbestos-containing friction materials, and heavy components. I have learned this the hard way on restoration floors where a simple wire-wheel session filled the air with fine rust and paint dust in seconds, and where a fuel tank that looked empty still held enough vapor to create real risk. Because restoration and maintenance overlap constantly, this hub article explains the tools and equipment that protect you through teardown, fabrication, refinishing, reassembly, and testing, while also helping you decide which specialized guides to explore next.
Classic car restoration creates a different risk profile than routine modern-car service. Many older vehicles predate current safety labeling, use degraded insulation and seals, and may have unknown repairs hidden beneath filler, seam sealer, or undercoating. A restorer may move from grinding suspension bolts to spraying epoxy primer, then to crawling under a shell supported on stands, all in one day. That mix of mechanical, chemical, respiratory, and fire hazards makes a deliberate safety setup essential. Good equipment does more than satisfy common sense. It reduces downtime, prevents contaminated work, improves finish quality, protects hearing and lungs over the long term, and gives you the confidence to work methodically. For anyone building out a restoration workspace, the right approach is to think in systems: protect the body, control the environment, secure the vehicle, and prepare for emergencies before the first fastener comes loose.
Personal protective equipment for grinding, welding, stripping, and painting
The core safety kit for classic car restoration starts with personal protective equipment matched to the task, not a one-size-fits-all box. Safety glasses with side shields are the baseline for all work, but they are not enough for wire brushing, cutoff wheels, or underbody scraping. For those jobs, use a full face shield over impact-rated glasses because wire-wheel bristles and rust flakes regularly bypass ordinary eyewear. Hands need similar task-specific protection. Nitrile gloves resist oils, grease, and many solvents during disassembly and cleaning, while mechanic’s gloves help with abrasion and sharp edges. For welding or handling hot metal, switch to leather gauntlet gloves designed for heat resistance and spatter protection. Hearing protection also matters more than many beginners expect. Die grinders, air hammers, compressors, and needle scalers often exceed 85 decibels, the threshold where prolonged exposure can cause hearing loss, so foam plugs or earmuff-style defenders should be standard kit.
Respiratory protection deserves the most careful attention because classic cars can expose you to paint dust, rust particulates, solvent vapors, and potentially toxic legacy materials. A simple dust mask is not adequate for paint stripping, media blasting, catalyzed coatings, or brake and clutch work on unknown parts. At minimum, use a NIOSH-rated half-mask respirator with properly selected cartridges and P100 filters for dust and particulate-heavy tasks. For organic vapors from reducers, cleaners, and many paints, use cartridges rated for those fumes and replace them on schedule rather than by smell. If you spray two-component urethanes containing isocyanates, a supplied-air system is the accepted standard because cartridge respirators are not considered sufficient protection in that application. Disposable coveralls, a hood, and chemical-resistant gloves also help keep contaminants off your skin and out of the house. In practice, the restorers who stay healthiest are the ones who treat respiratory protection as a primary tool, not an accessory.
Shop ventilation, dust control, and chemical handling
A safe restoration shop controls what enters the air and where it travels. Ventilation is not just opening a garage door; it is managing airflow so dust and vapors move away from the breathing zone and out of occupied space. I prefer local exhaust whenever possible: a fume extractor near the weld area, a downdraft or vacuum-assisted sander for bodywork, and a dedicated spray area with filtered intake and exhaust if refinishing is part of the operation. Even a small shop can improve safety with explosion-proof fans where flammable vapors may be present, sealed lighting in paint areas, and a clear separation between dirty grinding work and clean assembly space. A shop vacuum fitted with a HEPA filter is worth the money because sweeping old paint and rust simply redistributes hazardous dust. Wet methods also help. Mist surfaces before cleanup, and use approved absorbents for spills rather than pushing liquids toward a floor drain.
Chemical handling is where many otherwise careful restorers get casual, especially with cleaners, degreasers, fuel, seam sealer removers, and paint products. Every container should remain labeled, and every product should have an accessible Safety Data Sheet. Solvent transfer into drink bottles is a serious mistake because it invites accidental exposure and makes emergency response harder. Flammable liquids belong in an approved flammable storage cabinet, and oily rags should go into a self-closing metal waste can because oxidation can generate heat and cause spontaneous combustion. If you are stripping old coatings, assume some layers may contain lead until proven otherwise, particularly on pre-1980 vehicles and components refinished decades ago. Brake dust from older systems should also be treated carefully because asbestos may be present in legacy parts. The safe approach is simple: avoid compressed air blow-off, avoid dry brushing, use enclosed cleaning methods when possible, and isolate contaminated clothing from regular laundry.
Vehicle lifting, support equipment, and underbody safety
Many severe restoration injuries happen under a car, not during cutting or welding. Lifting equipment must be chosen and used with more discipline than hobby culture sometimes suggests. A hydraulic floor jack is for lifting only, not supporting the car while you work. Once raised, the vehicle should sit on appropriately rated jack stands placed under structurally sound points identified by a service manual or by experienced knowledge of the chassis design. On older unibody cars with rust in sills, torque boxes, or frame rails, support points should be verified carefully because corrosion can collapse areas that once carried load. Wheel chocks stay on the ground end, and the surface beneath the stands should be level concrete, never soil, gravel, or asphalt softened by heat. Before getting underneath, shake the vehicle firmly and confirm stability. If the shell is stripped, weight distribution can change dramatically, so reassess support each time major components come out.
For larger restorations, a two-post or four-post lift can improve both safety and productivity, but only if the installation, anchoring, and operating procedures follow the manufacturer’s requirements. A rotisserie is another valuable tool for body-off work because it reduces awkward overhead grinding and allows controlled access to floors, frame sections, and seams. However, rotisseries introduce their own hazards: balance errors, weak mounting points, and poor locking mechanisms can become dangerous quickly. Engine hoists, load levelers, transmission jacks, and lifting slings should be inspected before use, with attention to bent hooks, frayed chains, and leaking hydraulics. The rule in a professional-minded shop is to respect load ratings and eliminate improvised support. Cinder blocks, stacked lumber, and random scrap steel are not substitutes for engineered stands. If a tool supports thousands of pounds over your chest, buy the real version and maintain it.
Fire prevention, electrical safety, and emergency readiness
Classic cars combine old fuel systems, deteriorated wiring, and hot work, which makes fire prevention central to shop safety. Keep at least one multipurpose ABC extinguisher mounted near the exit and another within reach of welding or grinding operations, and inspect the gauges regularly. For flammable liquid areas, many shops also add a class B extinguisher or a clean-agent unit where residue could damage delicate components. Before welding, remove nearby trim, insulation, and fuel lines when possible, and assign a fire watch after the arc stops because sparks can smolder inside cavities or under seam sealer. Battery disconnection should be routine during teardown and electrical repairs. When reviving dormant cars, inspect harnesses for cracked insulation, rodent damage, and unfused accessory wiring added by previous owners. A fused jumper lead, quality multimeter, and insulated test tools reduce the chance of turning diagnosis into an electrical incident.
Emergency readiness extends beyond having an extinguisher on the wall. A real shop plan includes a stocked first aid kit, an eyewash bottle or station, burn dressings, emergency contact numbers, and a clear path to the exit that is not blocked by bumpers, fenders, or parts carts. Good lighting is an overlooked safety tool because it reduces mistakes with torque settings, fuel connections, and wiring colors. LED work lights that stay cool and resist shattering are better than old incandescent drop lights around fuel or solvents. Compressed air systems should have regulators, water separators, and hoses in good condition, since a burst line can whip hard enough to injure. Electrical circuits in the shop should be sized for welders, compressors, and heaters, with ground-fault protection where appropriate. If you run extension cords across the floor, protect them from abrasion and eliminate trip hazards. Safe restoration is rarely about one dramatic precaution; it is about dozens of small controls working together every day.
Core safety equipment hub for restoration and maintenance shops
The easiest way to build a safe classic car restoration shop is to treat equipment purchases in tiers: essential items for every workspace, specialized gear for metal and paint operations, and workflow tools that make safe habits easier to maintain. The table below organizes the core tools and equipment that belong in a restoration and maintenance hub. Each category supports the others. For example, buying a quality respirator without adding ventilation leaves exposure too high, and owning jack stands without wheel chocks or proper lighting still leaves preventable risk. As you expand your shop, this framework also helps you prioritize future articles on respirators, welding safety, paint booth setup, lifting equipment, fire protection, and hazardous material handling.
| Category | Essential equipment | Primary hazard controlled | Typical restoration tasks |
|---|---|---|---|
| Eye and face protection | Safety glasses, full face shield, welding helmet with proper shade | Flying debris, UV and IR radiation, sparks | Grinding, cutting, welding, rust removal |
| Respiratory protection | Half-mask respirator, P100 filters, organic vapor cartridges, supplied-air system for isocyanates | Dust, fumes, solvent vapors, toxic coatings | Sanding, stripping, painting, brake service |
| Hand and body protection | Nitrile gloves, mechanic’s gloves, welding gloves, coveralls, leather apron | Cuts, chemical exposure, burns | Disassembly, cleaning, fabrication, refinishing |
| Vehicle support | Floor jack, jack stands, wheel chocks, lift or rotisserie | Crush injuries, instability | Suspension, exhaust, underbody repair, body restoration |
| Fire and emergency | ABC extinguisher, first aid kit, eyewash, flammable storage cabinet, oily rag can | Fire spread, burns, delayed emergency response | Welding, fuel work, solvent handling, shop cleanup |
| Environmental controls | HEPA vacuum, exhaust fan, fume extractor, spill absorbents, sealed waste containers | Air contamination, slip hazards, improper disposal | Bodywork, cleanup, painting, degreasing |
What matters most is not owning the longest tool list, but building a safety system that matches the actual phases of restoration. If you mostly handle mechanical recommissioning, prioritize lifting stability, eye protection, gloves, lighting, and fire readiness around fuel and electrical work. If your projects include body and paint, invest earlier in serious respiratory protection, dust extraction, skin coverage, and controlled ventilation. If you send paint or machine work out, you still need the equipment that protects you during teardown, blasting prep, rust remediation, and reassembly. The benefit of this hub approach is practical: it gives you a clear map for outfitting the shop, maintaining standards across every task, and identifying the next specialized tool or procedure to study before a risk turns into a setback.
Safety equipment for classic car restoration protects far more than the person holding the tool. It protects the project timeline, the quality of the finished car, the condition of the workspace, and the long-term health needed to enjoy the hobby or business for years. The essentials are straightforward: wear task-specific eye, hand, hearing, and respiratory protection; control fumes, dust, and chemicals with proper ventilation and storage; support vehicles with rated lifting equipment; and prepare for fire and medical emergencies before work begins. Older cars add uncertainty through hidden rust, contaminated dust, degraded wiring, and fuel residue, so disciplined safety practices matter even more than they do in routine service work.
As the hub for tools and equipment within restoration and maintenance, this guide should help you set priorities and evaluate every future purchase by one standard: does it reduce real risk during a specific restoration task? Start with the basics if your shop is still growing, then add specialized systems as your work expands into welding, paint, and structural repair. Review your current setup, replace any improvised solutions, and build each job around the right protective equipment before you pick up the next wrench.
Frequently Asked Questions
What safety equipment should I buy before starting a classic car restoration?
Before you remove a single bolt, you should have the core safety basics in place. Start with personal protective equipment: safety glasses, a full-face shield for grinding and cutting, mechanic’s gloves, heavy-duty work gloves, hearing protection, and durable work boots with slip-resistant soles. Add a properly fitted respirator with the correct cartridges for dust, fumes, paint vapors, and chemical exposure, because old cars often involve rust dust, stripping products, fuel residue, and coatings you do not want in your lungs. Welding work also requires a welding helmet, flame-resistant clothing, and welding gloves.
Beyond what you wear, your shop needs protective equipment too. A quality fire extinguisher rated for automotive and electrical fires should be easy to reach, not buried in a corner. Good ventilation is essential, especially if you are sanding, painting, welding, or using solvents. Stable jack stands, wheel chocks, and a reliable hydraulic jack are mandatory for lifting tasks, but the stands are what keep the vehicle safely supported. Proper lighting matters more than many beginners realize, because poor visibility leads to bad cuts, missed leaks, and preventable hand injuries. Finally, organize your space with secure storage for chemicals, fuel containers, sharp tools, and loose parts. The safest restoration shops are not just equipped for the work; they are arranged to reduce mistakes before they happen.
Why is a respirator so important when restoring a classic car?
A respirator is one of the most important pieces of safety equipment in any classic car project because restoration work creates a mix of airborne hazards that are often invisible. Sanding old paint, stripping rust, cleaning undercoating, spraying primers, and working around aged insulation can release fine particles and vapors that linger in the air long after the task appears finished. Dust masks may help with large nuisance particles, but they are not enough for serious restoration work involving paint fumes, solvents, metal dust, or chemical strippers.
The key is using the right respirator for the task and making sure it fits correctly. A half-face or full-face respirator with replaceable cartridges is common for garage restoration work, but the cartridge type must match the hazard. Particulate filters are useful for sanding and grinding dust, while organic vapor cartridges are needed for many paints, cleaners, and solvents. In some cases, combined cartridges are the right choice. A poor seal around the nose or beard line can dramatically reduce protection, so fit matters just as much as filter selection. If you are spraying finishes or working with stronger coatings, especially in enclosed spaces, upgraded respiratory protection and proper ventilation become even more important. Protecting your lungs is not just about comfort in the moment; it is about avoiding long-term health problems that can come from repeated exposure during months or years of restoration work.
How can I safely lift and support a classic car during restoration?
Safe lifting starts with understanding that the jack raises the car, but the jack stands keep it from crushing you. Never rely on a hydraulic jack alone while working underneath a vehicle. Use a jack with enough capacity for the vehicle’s weight, and place it on a hard, level surface. Once the car is raised, support it with high-quality jack stands positioned at proper structural lift points. If you are not sure where those points are on a classic car, consult a factory manual or a trusted restoration source, because older frames, pinch welds, and suspension mounting areas may not tolerate incorrect support placement.
Wheel chocks should be used on the wheels that remain on the ground, and the parking brake should be applied when appropriate. Before crawling underneath, give the vehicle a careful stability check. If it rocks, shifts, or settles, stop and correct the setup. For longer projects, many restorers also use secondary safety measures such as leaving the removed wheels under the frame rails where possible, not as a substitute for stands, but as an extra margin of protection. Keep the work area free of oil, tools, and extension cords that could cause slips while you are positioning lifting equipment. With classic cars, corrosion and weakened metal can complicate support points, so cautious lifting is especially important. A few extra minutes spent securing the vehicle is always worth more than the risk of a catastrophic collapse.
What fire safety precautions are most important in a classic car restoration shop?
Fire prevention in a restoration shop has to account for a dangerous combination of fuel, sparks, heat, old wiring, oily rags, paint products, and compressed time. Cutting, grinding, and welding can throw sparks farther than many people expect, and those sparks can ignite vapors or smolder in rags, cardboard, insulation, and dust. That is why a fire extinguisher should be visible, accessible, and appropriate for flammable liquids and electrical fires. Many restorers keep more than one extinguisher so they can reach one quickly from different parts of the garage.
Good fire safety also depends on shop habits. Store gasoline, solvents, paints, and thinners in approved containers away from ignition sources. Keep oily rags in a proper metal safety container rather than piled on a bench or tossed into open trash. Before welding or grinding, inspect the area for fuel leaks, exposed lines, dry debris, and nearby chemicals. If you are working on a vehicle with an old fuel system, assume there may be hidden residue even if the tank seems empty. Disconnecting the battery when appropriate can reduce the risk of accidental electrical sparks. Ventilation is equally important because flammable vapors can collect in enclosed spaces. A clean, well-organized shop is one of the best fire prevention tools you can have, since clutter gives sparks more opportunities to become emergencies.
How do I create a safer workspace for electrical, chemical, and tool hazards during restoration?
A safer workspace is built by controlling the common risks that pile up during restoration: damaged wiring, chemical exposure, poor storage, and tool misuse. Classic cars often come with brittle insulation, corroded connectors, and improvised repairs from previous owners, so electrical safety starts with caution. Disconnect the battery before major disassembly, inspect cords and power tools regularly, and use grounded outlets and appropriate circuit protection. Avoid overloading extension cords or power strips, especially when using welders, compressors, heaters, or high-draw equipment.
Chemical safety is just as important. Label everything clearly, keep cleaners and solvents in their original or approved containers, and never mix products unless the manufacturer specifically says it is safe. Use gloves that match the chemicals you are handling, because not all glove materials resist solvents equally well. Ventilation should be planned, not improvised, particularly for degreasers, adhesives, paint products, and rust treatments. Tool safety comes down to maintenance and discipline: use guards, replace damaged abrasive wheels, secure workpieces before cutting or drilling, and choose the right tool for the job instead of forcing a bad setup. Finally, give every item a storage place. Loose parts, sharp sheet metal, coiled hoses, and cluttered walkways create trip hazards and rushed decisions. In practice, the safest restoration spaces are not the most elaborate; they are the ones where hazards are anticipated, equipment is maintained, and every task starts with control rather than improvisation.




