
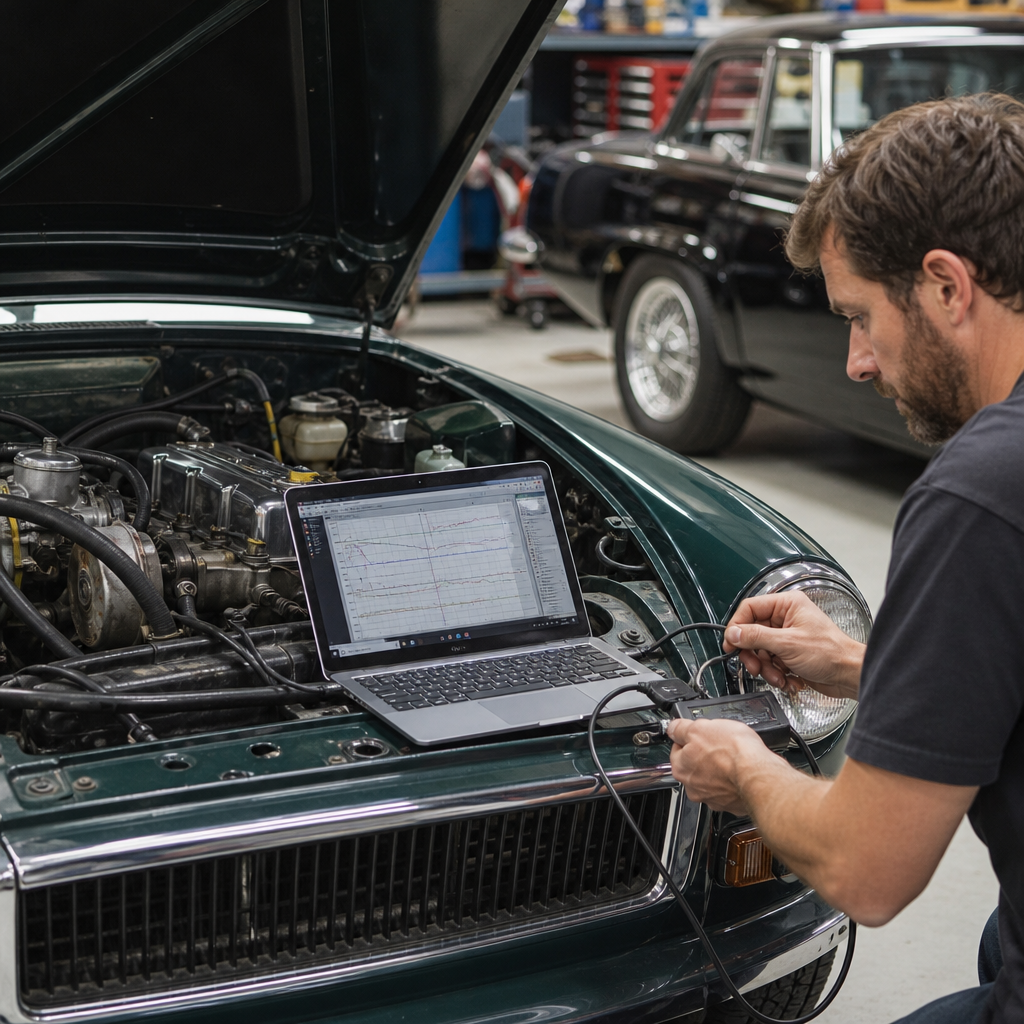
Classic car diagnostics used to mean a timing light, a vacuum gauge, and enough experience to hear a miss before a tachometer confirmed it. That is still partly true, but the best diagnostic tools for classic cars now span both old-school mechanical instruments and selective modern equipment that helps owners troubleshoot faster without changing the character of the vehicle. In restoration and maintenance work, diagnostics is the difference between replacing parts at random and identifying the real cause of poor starting, overheating, weak charging, brake pull, driveline vibration, or unstable idle.
For classic cars, diagnostic tools are not just electronic scanners. They are any instruments that measure condition, performance, or faults in a repeatable way. On carbureted, points-ignition, and early electronic-ignition vehicles, the essential toolkit includes electrical test gear, engine condition testers, fuel and vacuum measuring tools, ignition setup equipment, brake and chassis inspection tools, and a few specialty devices for drivability complaints. I have used all of these during restorations and seasonal recommissioning, and the pattern is consistent: the owners who document voltage drop, compression readings, manifold vacuum, dwell, and fuel pressure solve problems quickly and spend less money.
This topic matters because classic cars hide faults well. Corroded grounds can mimic a bad starter. A weak condenser can look like carburetor trouble. A dragging rear brake can be mistaken for a transmission problem. Unlike modern vehicles, many classics lack self-diagnostic systems, so the technician has to build evidence manually. A strong tools and equipment strategy turns this subtopic into the backbone of restoration and maintenance. It also supports related work such as tune-ups, charging system repairs, cooling system service, pre-purchase inspections, winter storage wake-up procedures, and road-trip reliability checks.
This hub article covers the best diagnostic tools for classic cars by function, explains what each tool tells you, and shows where each one belongs in a serious restoration and maintenance workflow. If you are building a garage around tools and equipment, start here, then expand into more specialized articles on electrical troubleshooting, carburetor tuning, ignition setup, compression testing, brake diagnostics, and cooling system analysis.
Electrical Diagnostic Tools Every Classic Car Owner Should Own
The digital multimeter is the single most useful diagnostic tool for classic cars. Choose one with DC voltage accuracy, resistance, continuity, and a 10-amp fused current range from a reputable maker such as Fluke, Klein, or Ideal. On six-volt systems, meter quality matters because tiny losses have larger effects. A fully charged six-volt battery should read about 6.3 volts at rest; a healthy twelve-volt battery about 12.6 volts. During cranking, voltage should not collapse excessively. More important than static readings is voltage-drop testing. When a starter drags, I measure from battery positive to starter terminal while cranking, then from battery negative to engine block. High drop identifies resistance in cables, terminals, grounds, or switches faster than any parts-swapping approach.
A test light is still indispensable, especially on simple circuits. An incandescent test light places a real load on the circuit, which helps expose weak connections that a high-impedance meter can miss. Use it for checking power at fuse blocks, coil feed, brake light switches, and lamp sockets. Pair it with a long jumper wire and alligator clips to bypass suspect grounds temporarily. A dedicated continuity tester, fused jumper leads, and a battery load tester also belong in the same drawer. For charging system work, a carbon-pile load tester or modern conductance tester can confirm battery condition, but on classics I still verify charging performance at the posts and at the generator or alternator output under different engine speeds.
Wiring diagrams are diagnostic tools too. Factory service manuals, colorized reproduction diagrams, and terminal identification guides save hours when tracing modified harnesses. Many recurring faults on vintage cars come from accessory installations done decades ago: electric fans tied into ignition feed, stereo amplifiers grounded poorly, and crimp connectors hidden behind dash panels. The best electrical kit therefore combines measuring tools with documentation and labeling supplies so each test result can be recorded and compared later.
Engine Condition Tools That Prevent Guesswork
If an engine smokes, misfires, idles unevenly, or lacks power, start with mechanical condition before adjusting carburetors or timing. A screw-in compression tester is fundamental. Testing dry and wet compression across all cylinders reveals ring wear, valve sealing issues, and head-gasket problems. Absolute numbers vary by engine design, but cylinder-to-cylinder consistency matters most. A spread greater than roughly 10 to 15 percent deserves investigation. I log readings with throttle wide open and battery fully charged so repeat tests months later are comparable.
A cylinder leak-down tester gives even better insight. By pressurizing each cylinder at top dead center on the compression stroke, it tells you where the air escapes: intake valve, exhaust valve, rings, or cooling system. This is one of the most useful tools during a restoration because it helps decide whether an engine needs a top-end refresh or complete rebuild. A borescope extends that logic. Through a spark plug hole, a quality borescope can reveal carbon buildup, washed cylinders, scored walls, piston crown damage, and valve condition without teardown.
Vacuum gauges remain among the best low-cost diagnostic tools ever made. A steady manifold vacuum reading in the expected range usually indicates an engine in reasonable tune. Fluctuating, drifting, or low readings can point to late ignition timing, vacuum leaks, valve issues, or exhaust restriction. On carbureted engines, I use a vacuum gauge both to diagnose faults and to set idle mixture for highest steady vacuum, then verify idle speed and exhaust quality. The gauge provides immediate feedback that “seat-of-the-pants” tuning cannot match.
| Tool | Primary Use | What It Reveals | Best Time to Use It |
|---|---|---|---|
| Digital multimeter | Voltage, resistance, continuity | Bad grounds, cable loss, charging faults | No-start, weak crank, dim lights |
| Compression tester | Cylinder pressure check | Worn rings, sealing imbalance | Misfire, smoke, low power |
| Leak-down tester | Pressurized sealing test | Valve leakage, head-gasket leaks | Pre-rebuild evaluation |
| Vacuum gauge | Manifold vacuum measurement | Leaks, timing issues, restriction | Idle tuning, drivability diagnosis |
| Timing light | Ignition timing verification | Incorrect advance, slipped marks | Tune-up and pinging complaints |
| Fuel pressure gauge | Pump output measurement | Starvation, flooding causes | Hard start, stumble, vapor lock symptoms |
Ignition and Fuel System Tools for Carbureted Classics
Ignition faults account for a large share of classic car complaints, and the best tools here are simple. A dial-back timing light or standard inductive timing light is essential for setting base timing and confirming centrifugal and vacuum advance operation. I do not rely on distributor position by eye. Timing marks can be dirty, harmonic balancers can slip, and rebuilt distributors can have incorrect advance curves. A timing light shows what the engine is actually seeing. On points systems, a dwell meter is equally important. Dwell affects coil saturation and ignition timing, so setting point gap with a feeler gauge alone is often not accurate enough. Dwell must be correct before final timing is adjusted.
An adjustable spark tester helps verify ignition strength under load. Pulling a plug wire and looking for any spark is not enough. A system may fire in open air yet fail under cylinder pressure. Spark plug reading tools, including a magnifier and proper plug wrench, also matter. Sooty plugs suggest rich mixture or weak ignition; chalky white deposits can indicate lean operation or overheating. Heat range and plug reach must match engine specification, particularly on modified heads.
For the fuel side, use a low-pressure gauge matched to carbureted systems, often in the 0 to 15 psi range. Many carburetors want only 4 to 7 psi, and too much pressure can overpower the needle and seat, causing flooding that resembles poor tuning. A hand vacuum pump is another versatile tool. It can test vacuum advance diaphragms, heater controls, vacuum-operated accessories, and some fuel shutoff devices. Fuel-safe clear line sections, when used carefully and temporarily, can help identify air intrusion, contamination, or poor pump delivery. For recurring contamination problems, inspecting the tank with a borescope and cutting open old fuel filters often reveals rust or deteriorated hose liner that would otherwise be missed.
Brake, Chassis, and Cooling System Diagnostic Equipment
Classic car safety depends on diagnostics as much as performance does. For brake work, a drum brake gauge, brake spoon, line pressure awareness, and a solid infrared thermometer are more useful than many owners realize. After a road test, I compare rotor or drum temperatures side to side. A hotter corner usually confirms drag, a collapsed hose, a sticking wheel cylinder, or an over-tight shoe adjustment. A vacuum bleeder or pressure bleeder improves brake service consistency, especially on vehicles with long line runs. When pedal feel remains poor, line inspection mirrors and flare-seat checks often uncover seepage too small to drip yet large enough to draw air back during release.
On steering and suspension, dial indicators, pry bars, grease pencils, and magnetic bases help quantify play instead of describing it vaguely. Wheel bearing end play, axle shaft runout, brake rotor runout, and driveshaft movement can all be measured. Chassis ears or electronic listening devices are useful for tracking road-speed noises, though a careful road test and systematic isolation still matter more. Tire pressure gauges and tread depth gauges count as diagnostic tools too because many handling complaints begin with old tires, mismatched sizes, or flat-spotted bias-ply sets after storage.
Cooling system diagnostics deserve dedicated equipment. An infrared thermometer quickly maps temperature across the radiator core, thermostat housing, heads, and heater hoses. Cold spots in the core suggest blockage; excessive outlet temperature spread may indicate restricted flow. A cooling system pressure tester helps find leaks at hoses, heater cores, freeze plugs, and intake gaskets without waiting for a fully hot engine. A block-test kit for combustion gases in coolant is valuable when overheating persists and a head-gasket breach is suspected. In my experience, these tools prevent unnecessary water pump and thermostat replacements by identifying whether the true fault is airflow, combustion leakage, sediment-filled passages, or an inaccurate dash gauge.
How to Build a Practical Diagnostic Hub in Your Garage
The smartest way to buy classic car diagnostic tools is by symptom frequency, not by novelty. Start with a multimeter, test light, battery charger, timing light, dwell meter if applicable, vacuum gauge, compression tester, fuel pressure gauge, cooling system pressure tester, infrared thermometer, and a factory service manual. That kit covers most no-start, poor-running, overheating, charging, and brake-drag complaints. Next add a leak-down tester, borescope, hand vacuum pump, load tester, and dial indicator for deeper restoration and maintenance work.
Organization matters as much as tool quality. I keep electrical, engine, fuel, brake, and cooling tools in separate labeled cases with adapters, spare leads, and notepads. Every test gets a baseline reading. For example, I record hot idle vacuum, cranking voltage, charging voltage at 1,500 rpm with lights on, compression values, and normal operating temperatures. On seasonal classics, those baselines become powerful trend data. A charging system that produced 14.2 volts last summer but only 13.4 this year is telling you to inspect belt tension, grounds, regulator behavior, and generator or alternator output before a roadside failure occurs.
Tool selection should match the vehicle generation. A 1930s six-volt sedan, a 1960s muscle car with points ignition, and a late-1980s fuel-injected classic need different adapters and procedures. Buy quality where accuracy matters, avoid cheap gauges with questionable calibration, and verify any unusual result with a second method. The best diagnostic tools for classic cars are the ones that turn symptoms into evidence, support restoration and maintenance decisions, and help you preserve originality while improving reliability. Build your tools and equipment hub deliberately, use it on every inspection, and let measured data guide the next repair.
Frequently Asked Questions
What are the most essential diagnostic tools every classic car owner should have?
The best basic diagnostic kit for a classic car starts with a mix of simple mechanical tools and a few reliable electrical testing devices. At the top of the list are a timing light, a vacuum gauge, a compression tester, a multimeter, and a test light. Those five tools alone can help diagnose a large percentage of common running, starting, charging, and drivability issues on older vehicles. A timing light lets you verify ignition timing rather than guessing at distributor adjustment. A vacuum gauge is especially valuable on carbureted engines because it can quickly reveal intake leaks, late timing, valve issues, or exhaust restrictions through the way the needle behaves. A compression tester helps determine the mechanical health of the engine before you spend time chasing fuel or ignition problems that are really caused by worn rings, leaking valves, or head gasket issues.
For electrical troubleshooting, a good digital multimeter is indispensable. It allows you to measure battery voltage, charging system output, continuity, resistance, and voltage drop across cables and connections. Since many classic car problems are caused by corrosion, poor grounds, old wiring, or weak connections, this matters far more than many owners first realize. A simple test light is also useful because it gives fast, practical confirmation of whether power is present in a circuit under real-world conditions. Beyond those essentials, many enthusiasts also benefit from a dwell meter for point ignition systems, a fuel pressure tester for mechanical or low-pressure fuel delivery checks, and an infrared thermometer to compare cylinder temperatures or identify hot electrical components. The key is not buying every tool available, but building a toolkit that helps you systematically separate ignition, fuel, mechanical, and electrical faults without replacing parts blindly.
Are modern diagnostic tools useful on classic cars, or should owners stick to old-school equipment?
Modern diagnostic tools can be very useful on classic cars, but they need to be chosen carefully and used with an understanding of how older vehicles are designed. A fully mechanical or carbureted classic car will not benefit from the same type of scan tool used on a late-model vehicle with extensive onboard diagnostics, but that does not mean modern equipment has no place. In fact, selective use of newer tools often speeds up diagnosis while preserving the originality and character of the car. For example, a modern digital multimeter is more accurate and versatile than many older analog meters for checking voltage, resistance, and continuity. A portable battery tester can quickly evaluate battery condition and cranking performance. An infrared thermometer can help identify uneven cylinder temperatures, sticking brakes, or a clogged radiator. Even a modern borescope can be extremely helpful for inspecting cylinders, fuel tanks, behind dashboards, or hard-to-reach areas without unnecessary disassembly.
That said, old-school tools remain central because classic cars communicate their problems differently. A vacuum gauge tells a story that many owners of newer cars never learn to read. A timing light, dwell meter, and compression tester are still among the most relevant instruments for older ignition and engine systems. The best approach is not old versus new, but appropriate versus inappropriate. Use modern tools where they improve accuracy, speed, or access, and use traditional tools where they match the vehicle’s design. On classics with early electronic fuel injection or more advanced ignition systems, period-correct scan tools or specialized adapters may also be worth considering, but for many vintage vehicles the most effective diagnostic setup is still a thoughtful combination of mechanical gauges, electrical test gear, and experience.
How does a vacuum gauge help diagnose problems in a classic car engine?
A vacuum gauge is one of the most informative and underrated diagnostic tools for classic cars, especially those with carbureted engines. When connected to a proper intake manifold vacuum source, it gives immediate insight into how efficiently the engine is breathing and how well it is sealed. A healthy engine at idle will usually show a steady vacuum reading within a range appropriate for its design and camshaft profile. If the reading is low but steady, that may point to late ignition timing, a vacuum leak, or possibly a camshaft-related characteristic. If the needle fluctuates rapidly, it can indicate ignition misfire, valve sealing problems, or inconsistent combustion. A slow, wandering needle may suggest a mixture issue or unstable idle. If the reading drops under throttle and then does not recover correctly, that can hint at an exhaust restriction.
What makes the vacuum gauge so useful is that it allows you to diagnose patterns rather than symptoms alone. Instead of simply noticing that an engine idles poorly or hesitates, you can begin to narrow down whether the cause is likely fuel delivery, ignition timing, internal engine condition, or air leakage. It is particularly valuable on classic cars because many of them rely heavily on manifold vacuum for distributor advance, power brakes, transmission modulation, HVAC controls, and emissions-era accessories. A small leak can create several symptoms at once, and the vacuum gauge can help uncover that relationship. In practical terms, it is a low-cost tool that rewards patience and interpretation. Once an owner learns to read it well, it often becomes one of the fastest ways to assess engine condition before touching the carburetor screws or swapping ignition parts.
What is the best way to diagnose ignition problems on a classic car?
The best way to diagnose ignition problems on a classic car is to work step by step through the entire system rather than jumping straight to the coil, points, or distributor cap based on guesswork. Start with the basics: confirm battery voltage and inspect all primary connections, especially grounds. Many ignition issues begin with low system voltage, corroded terminals, or poor engine grounding. From there, verify whether the coil is receiving proper power during cranking and with the key in the run position, because some classics use ballast resistors or resistance wires that can create different voltage readings depending on operating mode. A test light or multimeter is useful here. If the car has breaker points, inspect point condition, gap, and dwell. A dwell meter is particularly valuable because it shows whether the points are operating consistently, which directly affects ignition timing and spark quality.
Next, use a timing light to confirm that spark timing is present, stable, and advancing correctly with engine speed and vacuum input. An erratic timing mark may indicate distributor shaft wear, sticking advance mechanisms, weak point spring tension, or ignition component inconsistency. Check spark plug wires for resistance and routing, inspect the cap and rotor for carbon tracking or cracks, and examine spark plugs for evidence of fouling, overheating, or mixture imbalance. If the car uses an early electronic ignition conversion, follow the same logic but include module power supply and trigger signal checks. The goal is to verify the health of the primary and secondary ignition systems before blaming the carburetor or mechanical engine condition. On classic cars, ignition faults often mimic fuel problems, so disciplined testing is the difference between a quick fix and an expensive cycle of unnecessary parts replacement.
Can diagnostic tools help avoid unnecessary parts replacement during classic car restoration and maintenance?
Yes, and that is one of their greatest benefits. In classic car work, replacing parts at random can become expensive, time-consuming, and sometimes counterproductive. Older replacement parts are not always as durable or as precisely made as original components, so changing parts without proof can introduce new problems. Diagnostic tools help you determine whether the issue is truly mechanical, electrical, fuel-related, or adjustment-related before you disturb components that may still be serviceable. For example, a compression test can tell you whether an engine has a healthy foundation before you invest time rebuilding a carburetor to solve what is actually a valve sealing problem. A multimeter can expose a bad ground or voltage drop issue that would otherwise lead someone to replace a perfectly good starter, alternator, or ignition coil. A fuel pressure tester can confirm whether a hesitation is caused by weak delivery instead of incorrect ignition timing.
During restoration, diagnostics also help establish a reliable baseline. Before disassembly, recording compression numbers, charging voltage, vacuum readings, and timing behavior gives you reference points that can guide decisions later. After reassembly, those same tools let you verify improvements and catch mistakes early. That matters because classic cars often have layered histories of previous repairs, modifications, aging components, and undocumented changes. A systematic diagnostic approach cuts through that uncertainty. It lets you prioritize repairs, preserve original parts when appropriate, and spend money where it will make a real difference. In other words, the right tools do more than identify faults. They support better judgment, better restoration outcomes, and more confidence every time the car is started, tuned, or driven.




