
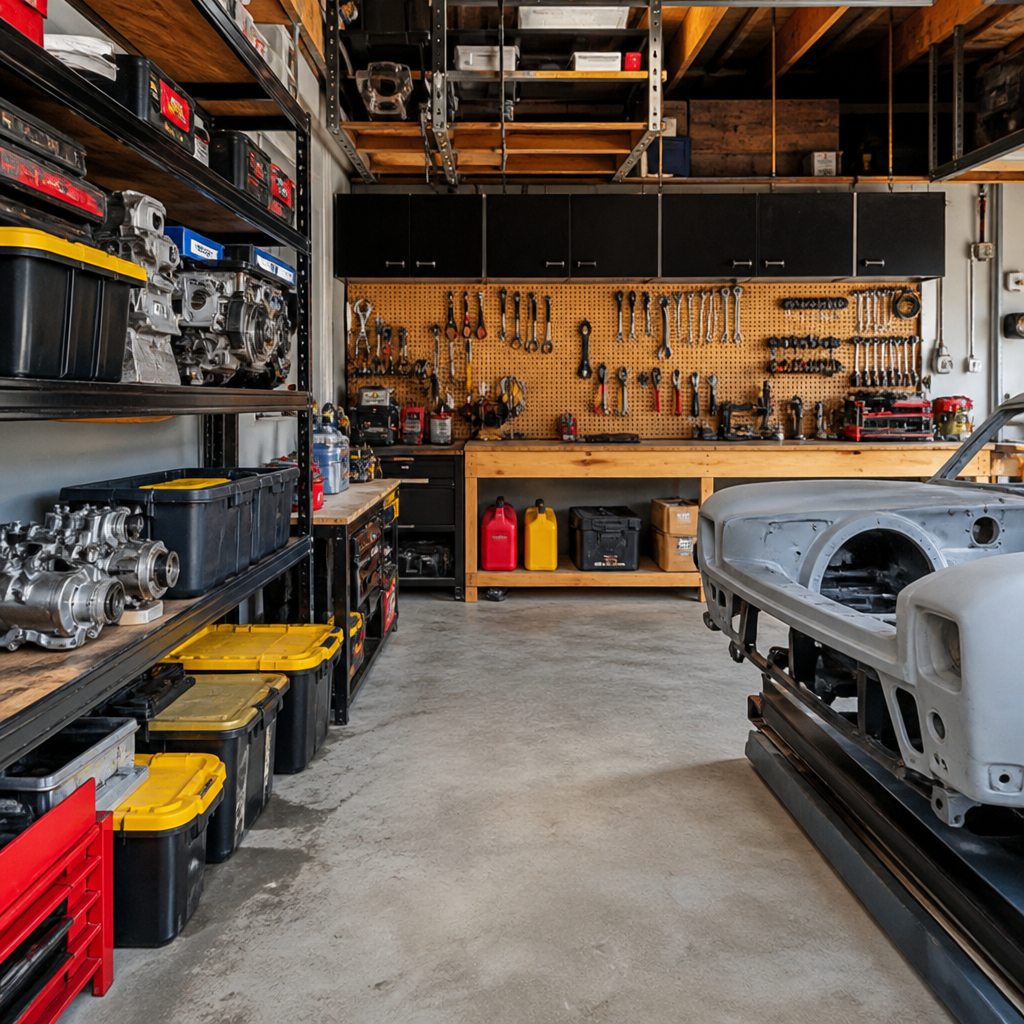
A well-organized garage is the foundation of efficient, safe, and enjoyable restoration work, especially when projects involve disassembly, cleaning, repair, fabrication, and careful reassembly over weeks or months. In restoration and maintenance, garage organization is not simply about tidiness. It is a system for controlling tools, preserving parts, protecting finishes, managing hazards, and reducing the time lost searching for equipment. When people ask how to organize a garage for restoration projects, they usually mean something more specific: how to create a workspace that supports real mechanical and cosmetic work without constant clutter, damaged components, or stalled progress.
In my own project spaces, the difference between a frustrating build and a smooth one has almost always come down to layout and tool control rather than square footage alone. A two-car garage can support serious restoration work if zones are clearly defined and equipment is chosen with purpose. Key terms matter here. Tools and equipment refers not only to hand tools and power tools, but also storage systems, workbenches, lifting gear, lighting, air systems, cleaning stations, safety supplies, and documentation methods. Restoration projects may include vehicles, motorcycles, furniture, machinery, or architectural elements, yet the organizational principles remain consistent.
This matters because restoration work generates complexity fast. A simple brake overhaul turns into labeled hardware bags, dirty removed parts, specialty pullers, torque specs, solvents, and replacement components arriving on different days. Paint correction adds buffing pads, compounds, masking materials, inspection lights, and contamination risks. Electrical troubleshooting adds meters, wiring diagrams, terminals, and soldering tools. Without a structured garage, projects expand into every surface, mistakes increase, and expensive parts get lost or damaged. Good organization improves accuracy, workflow, safety, and motivation. It also protects your investment in tools and helps every future restoration project start faster.
Design the Garage Around Work Zones
The most effective way to organize a garage for restoration projects is to divide it into work zones based on task type. I recommend at least five: teardown, clean assembly, dirty cleaning, tool storage, and materials storage. If space allows, create a sixth zone for finishing work such as polishing, paint preparation, or upholstery tasks. Zoning prevents cross-contamination and reduces wasted motion. For example, greasy suspension components should not share a bench with rebuilt carburetors or refinished trim.
The teardown zone should sit closest to the vehicle or primary project footprint. This area needs a rolling cart, impact tools, magnetic trays, drain pans, and immediate access to commonly used sockets, ratchets, pry bars, pliers, and lighting. The clean assembly zone belongs on a stable bench with bright task lighting, soft bench covering, torque tools, measuring equipment, and small-parts organizers. In a well-run shop, rebuilt components move one direction only: from dirty removal, to cleaning and inspection, to repair, to protected storage, to final installation.
The dirty cleaning zone requires special planning because it introduces risk. Solvents, degreasers, rust removal chemicals, wire wheels, compressed air, and wash tubs should be kept together and separated from electrical work and parts waiting for paint or assembly. If you use an aqueous parts washer or evaporative solvent tank, place it near ventilation and spill control supplies. Flooring under this area should be easy to clean, and absorbent pads should be nearby. Clear zoning does more than improve convenience. It creates discipline, which is what long restoration projects demand.
Choose Storage That Matches the Tool Set
Tool storage should reflect how restoration work actually happens, not how a garage looks in a catalog. The core setup usually includes a roller cabinet, wall storage, drawer organizers, and mobile secondary storage. A quality tool chest with ball-bearing drawers allows dense storage of hand tools while keeping them visible. Deep drawers should hold pullers, specialty service kits, air tools, and heavier electrical equipment. Shallow drawers are best for sockets, ratchets, screwdrivers, picks, and precision tools. Foam shadowing can help, but simple labeled drawer dividers often provide more flexibility as your collection changes.
Wall systems work best for frequently used items that benefit from immediate visibility. Pegboard is affordable, but slatwall and steel panel systems carry more weight and stay tidier over time. I prefer mounting dead-blow hammers, pry bars, clamps, extension cords, and measuring tools on the wall while keeping calibrated tools in drawers. Torque wrenches, micrometers, dial indicators, and test instruments should always be stored in protected cases away from impact and moisture. That single choice extends tool life and preserves accuracy.
Small parts storage deserves the same attention as tool storage. Use stackable bins, compartment organizers, and labeled zip bags for clips, fasteners, seals, and removed hardware. One common failure point in restoration garages is mixing old and new hardware or combining project parts from different assemblies. Avoid that by assigning each project a dedicated shelving bay and numbering its containers. Label shelves by subsystem such as front suspension, interior trim, cooling system, or engine top end. When parts are indexed this way, reassembly becomes a controlled process rather than a memory test.
Build a Reliable Tool and Equipment Hub
Because this page is the hub for tools and equipment within restoration and maintenance, it helps to think in categories rather than isolated purchases. Every garage should be organized around six equipment groups: general hand tools, power tools, lifting and support gear, diagnostic equipment, cleaning equipment, and environment control. These groups support nearly every restoration task, from disassembly to finishing.
| Equipment group | What it includes | Best storage approach | Why it matters in restoration |
|---|---|---|---|
| General hand tools | Sockets, ratchets, wrenches, screwdrivers, pliers, picks, hammers | Top chest or roller cabinet with labeled drawers | Used daily for removal, fitting, adjustment, and assembly |
| Power tools | Impact wrench, drill, angle grinder, polisher, oscillating tool | Charging shelf or deep drawer with battery rotation | Speeds teardown, fabrication, surface prep, and finishing |
| Lifting and support gear | Floor jack, jack stands, wheel dollies, creeper, engine hoist | Low wall parking zone with floor markings | Improves access and safety during underbody or drivetrain work |
| Diagnostic equipment | Multimeter, test light, compression tester, scan tool, calipers | Padded case storage in dry cabinet | Prevents guesswork and supports accurate troubleshooting |
| Cleaning equipment | Parts washer, shop vacuum, steam cleaner, brushes, blow gun | Dedicated dirty-work zone | Clean parts are easier to inspect, repair, and finish correctly |
| Environment control | LED lighting, fans, dehumidifier, extension reels, air filtration | Mounted or fixed-position installation | Protects tools, finishes, and working conditions year-round |
Organizing by category simplifies buying decisions and maintenance schedules. For example, all cordless tools should have one charging station with labeled batteries and a rotation policy. All lifting gear should be inspected on a calendar. All diagnostic tools should be stored clean, dry, and together with adapters, leads, and manuals. This hub approach keeps your restoration garage scalable as projects become more advanced.
Set Up the Workbench for Precision and Repeatability
A restoration workbench should support precise work, not act as overflow storage. Bench depth between 24 and 30 inches works well for most garages because it leaves room for tools without forcing you to reach too far. A hardwood or laminated top handles mechanical work, while a replaceable mat protects finished parts. If you restore painted panels, trim, or instruments, keep a secondary soft-surface bench or portable padded table to prevent scratches.
Lighting at the bench is non-negotiable. High color rendering LED lighting, ideally 90 CRI or above, reveals contamination, paint defects, cracks, and wiring colors more accurately than cheap fixtures. Under-cabinet task lights reduce shadows during carburetor work, soldering, or gasket scraping. Electrical outlets should be mounted above bench height with surge protection, and if you use grinders or compressors, circuits should be sized appropriately. In many home garages, poor outlet placement causes cords to drape across work surfaces and floors, which slows work and adds hazards.
Keep only current-task tools on the bench. Everything else should return to assigned storage at the end of each work session. That reset routine is one of the highest-value habits in any restoration shop. It keeps documentation visible, prevents parts from getting buried, and lets you resume work the next day without re-sorting chaos. Add a small whiteboard or clipboard at the bench for torque values, missing parts lists, and next steps. Organization is strongest when it supports memory under interruption.
Control Parts, Consumables, and Documentation
Most restoration delays are not caused by major failures. They come from missing clips, duplicate purchases, mixed fasteners, forgotten measurements, and poor records. The fix is a parts control system. Every assembly removed from a project should receive a label, a container, and a status note. Use durable tags for large items and heavy zip bags for hardware. Write the part name, orientation, date removed, and any observations such as damaged threads or shims present. If a bolt length or washer stack matters, photograph it before removal and store that image in a project folder.
Consumables need their own storage plan because they multiply quickly. Keep abrasives, masking tape, shop towels, lubricants, anti-seize, threadlocker, adhesives, primers, and rust converters grouped by use. Separate chemicals by compatibility and fire risk. Flammable liquids should be stored according to local code, ideally in a rated cabinet if quantities justify it. Do not scatter half-used products around the garage. Consolidation makes inventory visible and prevents buying the same item three times while the needed product expires in a back corner.
Documentation ties the entire garage together. Service manuals, wiring diagrams, torque charts, paint codes, and supplier receipts should be accessible both physically and digitally. I have found that a tablet in a rugged stand paired with a binder for printed essentials works better than either format alone. When restoration projects span months, clear records preserve continuity and reduce costly rework.
Make Safety, Cleanliness, and Climate Part of the System
Garage organization for restoration projects must include safety infrastructure, because serious tools and chemicals are part of the work. Fire extinguishers should be placed near exits, not buried deep inside the garage. Eye protection, gloves, hearing protection, and respirators need visible storage close to the tasks that require them. First-aid supplies should be easy to reach with one hand. If welding, grinding, painting, or solvent cleaning is part of your process, ventilation becomes equipment, not a luxury.
Dust and humidity control are also organizational issues. Bare steel, interior fabrics, electrical contacts, and precision tools all degrade faster in damp garages. A dehumidifier, weather sealing, and air circulation protect both the project and the tool investment. For paint and finishing work, cleanliness matters as much as technique. Sweep less and vacuum more to avoid stirring abrasive dust onto fresh surfaces. If possible, keep polishing and sanding away from clean assembly areas. Cross-contamination can ruin hours of careful work.
Finally, schedule maintenance for the garage itself. Inspect jack stands, replace cracked air hoses, calibrate torque tools as needed, clean battery contacts, and purge duplicate junk quarterly. A restoration garage is never finished, but it can remain controlled. Start by zoning the space, matching storage to tool categories, and building repeatable habits around parts handling and cleanup. Do that, and every project moves faster, safer, and with far less frustration. Review your current setup this week, identify one bottleneck, and reorganize that area first.
Frequently Asked Questions
What is the best way to set up a garage layout for restoration projects?
The best garage layout for restoration work starts with dividing the space into clear functional zones rather than treating the entire garage as one open work area. A restoration project usually moves through stages such as teardown, inspection, cleaning, repair, parts storage, fabrication, painting or finish protection, and reassembly. When your garage is organized around that workflow, the project becomes easier to manage and much less stressful. At minimum, you should create a main vehicle or project bay, a sturdy bench area for disassembly and small-part work, dedicated shelving or cabinet space for organized parts storage, a tool wall or toolbox zone, and a cleaning station for degreasing and washing components. If possible, also separate grinding, sanding, or fabrication work from any area where finished or freshly cleaned parts are stored.
Leave enough open floor space around the vehicle to move jacks, creepers, carts, and shop equipment safely. Good access on all sides prevents clutter from gathering around the project and reduces the temptation to stack parts in unsafe places. Vertical storage is especially valuable in a garage because it preserves floor space while keeping tools and supplies visible. Wall-mounted cabinets, pegboards, slatwall systems, heavy-duty shelving, and ceiling storage can all work well, but frequently used tools should stay at waist to eye level for convenience. Heavy items such as jacks, vises, brake parts, and power tools should be stored lower for safety.
Lighting is another major part of layout planning. Restoration work depends on seeing surface flaws, fastener sizes, fluid leaks, corrosion, and finish quality clearly. Overhead lighting should be bright and even, and it should be supported by focused task lighting at the bench and around the vehicle. Power access also matters. Place extension cord reels, outlets, battery charging stations, and air hose management where they support the work without crossing walkways. A smart garage layout is not just neat; it supports efficiency, protects parts, and helps you move from one phase of the restoration to the next without constantly reorganizing the room.
How should I organize tools so they stay easy to find during a long restoration?
The most effective way to organize tools for a long-term restoration is to group them by function, frequency of use, and where they are used in the garage. In practice, that means keeping daily-use hand tools such as ratchets, sockets, screwdrivers, pliers, hammers, picks, and measuring tools together in your primary toolbox or on a well-labeled tool wall near the main work zone. Specialty tools such as pullers, compression testers, electrical diagnostic tools, bodywork hammers, torque angle gauges, and fabrication tools should have designated locations in separate drawers, cabinets, or labeled bins. The goal is to build a repeatable system so every tool has one home and is returned there immediately after use.
Drawer liners, foam cutouts, socket organizers, wrench racks, magnetic strips, and labeled drawer fronts can make a major difference. In restoration work, time is often lost not during difficult repairs, but in the repeated searching for the same few tools across weeks or months. Visual organization reduces that problem. If you can open a drawer and immediately see whether a tool is missing, cleanup becomes faster and inventory control improves. It is also smart to keep duplicate “grab tools” in high-use locations. For example, one set of common screwdrivers and pliers at the bench and another mobile set on a cart can reduce unnecessary walking.
Another best practice is to separate clean assembly tools from dirty teardown tools whenever possible. Tools used for greasy disassembly, rust removal, and underbody work can quickly contaminate freshly cleaned parts, painted surfaces, or interior components. Even a simple division into “dirty work” and “clean work” tool sets can help preserve finishes and improve assembly quality. Finally, review your system at regular intervals. Long restorations evolve, and the tools you use most heavily during disassembly may not be the ones you need during electrical repair or reassembly. A tool organization system works best when it adapts to the project while still staying disciplined and easy to maintain.
What is the best way to store labeled parts, hardware, and removed components during restoration?
Proper parts storage is one of the most important aspects of garage organization for restoration projects because disassembly often stretches across weeks or months. The best method is to store parts in logical groups that match the vehicle systems or the sequence in which they were removed. For example, suspension components, brake hardware, engine accessories, trim pieces, interior fasteners, and electrical connectors should each be stored separately rather than mixed together in a general pile. Use durable bins, stackable containers, drawer cabinets, compartment organizers, and shelves to create a structured storage system that can expand as the project grows.
Labeling is essential. Every bin, bag, tray, and box should be clearly marked with both the part description and the location it came from. Instead of writing only “bolts,” write something like “front fender bolts, driver side” or “water pump pulley hardware.” Small hardware should be bagged immediately after removal and stored with the larger component or in a clearly referenced hardware bin. Many restorers also include brief notes such as bolt length, orientation, shim placement, torque reminder, or whether replacement is needed. This can save a huge amount of time during reassembly and reduce the risk of mistakes. Photos taken during disassembly should be treated as part of the storage system as well, especially for wiring, brackets, hose routing, and fastener order.
Protection matters just as much as identification. Fragile trim, glass-adjacent parts, polished surfaces, upholstery pieces, and freshly painted components should be wrapped and kept away from heavy parts that can scratch or crush them. Shelving should be stable, dry, and not overloaded. If your garage experiences temperature swings or moisture, use sealed containers where appropriate and consider rust inhibitors, desiccant packs, or light oil coatings for bare metal pieces. Large removed panels such as hoods, doors, bumpers, or fenders should be stored upright in padded racks or secure wall-mounted systems, never left leaning in unstable corners where they can warp or fall. Good parts organization protects your investment and keeps reassembly manageable, accurate, and far less frustrating.
How can I keep a restoration garage clean and safe without slowing down the project?
A clean and safe restoration garage is not separate from productivity; it is one of the main reasons a project stays on track. The key is to make cleanup and hazard control part of the workflow instead of treating them as occasional chores. Start by giving all common waste and hazard categories a designated place. You should have separate containers for general trash, recyclable packaging, scrap metal, oily rags, used abrasives, and hazardous materials such as solvents, old fluids, and chemical containers. Spills should be handled immediately with absorbent materials kept within easy reach, and floors should be swept regularly to prevent slips, embedded metal shavings, and contamination of parts.
Fire safety and air quality deserve special attention in any restoration garage. Many projects involve flammable cleaners, paints, fuel system work, batteries, welding, grinding, and dust-producing operations. Store flammables in approved containers and away from ignition sources. Keep at least one accessible fire extinguisher rated for garage use, and make sure everyone using the space knows where it is and how to use it. Ventilation is equally important. If you are cleaning parts, applying chemicals, sanding filler, or running engines, you need appropriate airflow and, where necessary, personal protective equipment such as gloves, eye protection, respirators, and hearing protection. Extension cords, hoses, and welding leads should be routed to avoid creating trip hazards across walkways.
To maintain cleanliness without losing momentum, use short reset routines. A 10- to 15-minute cleanup at the end of each work session is usually enough to return tools, empty waste, wipe down the bench, and restore safe access around the vehicle. Rolling carts can help contain the day’s active tools and parts so they can be cleared quickly when you stop. It is also wise to quarantine dirty work. Grinding, wire-brushing, sanding, and rust removal produce debris that can ruin fresh finishes and contaminate clean assemblies, so those tasks should happen in a defined area with easy cleanup surfaces. A garage that stays clean and safe is easier to work in, easier to think in, and much less likely to suffer lost parts, damaged finishes, or preventable accidents.
What storage solutions work best in a small garage used for restoration projects?
In a small garage, the best storage solutions are the ones that maximize vertical space, minimize floor clutter, and keep active project items separated from long-term supplies. Start by identifying what truly needs to be in the garage during the restoration. Seasonal household items, duplicate equipment, and unrelated storage often consume the very space needed for project movement and parts management. Once unnecessary items are removed, use the walls aggressively but intelligently. Tall shelving units, wall cabinets, pegboards, slatwall panels, and fold-down work surfaces can transform a cramped garage into a functional restoration space. The goal is to keep the floor as open as possible for the vehicle, rolling equipment, and safe walking paths.
Stackable clear bins with labels are especially useful in a small garage because they let you see contents quickly while using shelf depth efficiently.




