
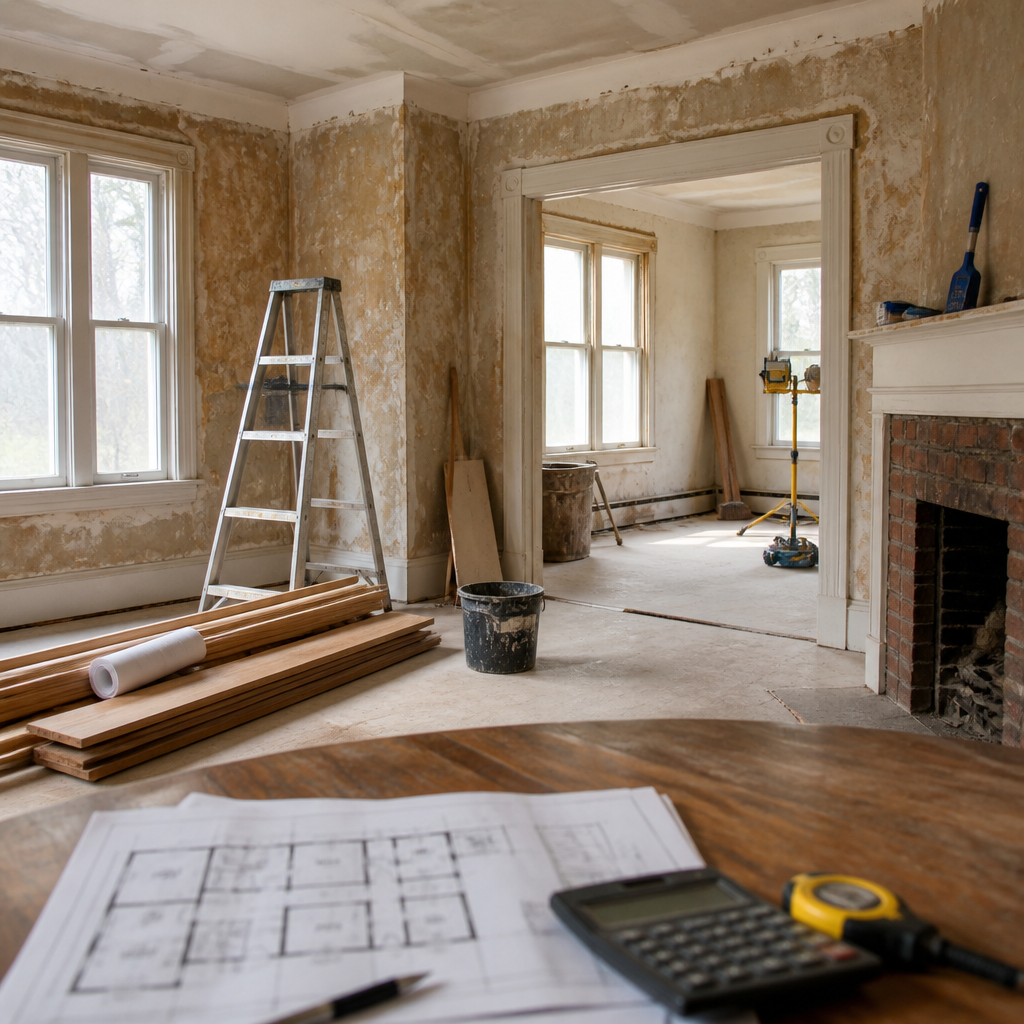
Interior restoration costs vary widely, but most projects become easier to budget when you understand the scope, the materials involved, and the labor standards that drive pricing. Interior restoration refers to repairing, renewing, or historically preserving indoor spaces after age, damage, neglect, or previous poor workmanship has reduced function or appearance. That can include plaster repair, drywall replacement, flooring refinishing, trim restoration, painting, insulation upgrades, cabinetry repair, odor removal, and rebuilding after water, smoke, or mold events. In practice, I have seen homeowners confuse restoration with remodeling, yet the difference matters because restoration aims to recover existing character or safe usability, while remodeling often changes layout, finishes, or style. Cost expectations also shift based on whether the goal is simple cosmetic recovery, code-compliant repair, or full historic preservation using period-correct methods.
Why does this matter? Interior work tends to reveal hidden conditions once walls, ceilings, or floors are opened. A room that looks like a straightforward repaint may also need subfloor drying, lead-safe preparation, electrical updates, or replacement trim milled to match original profiles. That is why national averages are useful only as starting points. A small patch-and-paint job may stay under a few thousand dollars, while a multi-room interior restoration after water or smoke damage can climb into the tens of thousands. Historic homes, custom woodwork, and premium finishes push costs higher because labor becomes more specialized and materials harder to source. Permits, testing, containment, and insurance coordination can add more than many owners expect.
For a hub page on interior restoration, the most useful approach is to break costs into the components contractors actually estimate: assessment, demolition, drying or remediation, structural and surface repair, finish restoration, and final cleaning. Understanding those categories helps you compare bids and decide where to preserve, where to replace, and where to phase the work over time. It also prevents one of the most common mistakes I see: approving a low estimate that excludes prep, disposal, specialty trades, or matching existing finishes. The sections below explain the major cost drivers, typical price ranges, and practical choices that influence what you should expect to spend on interior restoration.
What Drives Interior Restoration Costs
The biggest pricing factor is the cause of damage or deterioration. Wear-and-tear restoration is usually less expensive than restoration after water intrusion, fire, smoke, mold, or structural movement because the latter requires diagnosis, containment, and code-focused rebuilding. For example, restoring a living room with cracked plaster, worn paint, and damaged baseboards might involve patching, skim coating, priming, and repainting. Restoring that same room after a roof leak could also require moisture mapping, insulation replacement, drying equipment, mold prevention, and ceiling reframing. The room size has not changed, but the cost profile has changed completely.
Material type is another major factor. Plaster walls cost more to repair than standard drywall because matching texture, thickness, and lath conditions takes skill. Hardwood refinishing generally costs less than full replacement, but deep pet stains, warped boards, or obsolete strip flooring dimensions can force selective patching with reclaimed wood. Original millwork often deserves repair because it adds value and character, yet stripping, filling, sanding, and repainting elaborate trim takes many labor hours. Even paint affects price. Low-VOC premium coatings, stain-blocking primers, and specialty finishes for kitchens and baths cost more than contractor-grade products, but they usually perform better and reduce callbacks.
Labor conditions inside the home can raise or lower the estimate dramatically. Empty rooms are cheaper to restore than occupied spaces because crews spend less time moving furniture, masking belongings, and returning spaces to daily use each night. Access matters too. Tight staircases, high ceilings, downtown parking restrictions, and occupied multifamily buildings all create inefficiency. If trades need to protect adjacent historic finishes or work around residents, pets, or business operations, the labor rate effectively increases. In my experience, these practical jobsite constraints explain many price differences between two estimates that look similar on paper.
Typical Cost Ranges by Project Type
Small interior restoration projects often start around $1,500 to $5,000 when the work is limited to localized wall repair, repainting, trim fixes, and minor finish touch-ups. A bedroom with settlement cracks, nail pops, chipped casing, and faded paint may fit this range if no hidden moisture, asbestos, or electrical issues are present. Mid-range projects commonly run from $5,000 to $20,000 and may cover one or two rooms needing drywall or plaster work, flooring repair, repainting, new trim sections, light fixture replacement, and moderate carpentry. Kitchens and bathrooms trend higher because cabinets, tile, ventilation, and plumbing increase complexity.
Larger interior restoration projects can range from $20,000 to $75,000 or more, especially after water damage, smoke damage, or prolonged neglect. For example, restoring a first floor after a dishwasher line failure may involve demolition of wet drywall, dehumidification, insulation replacement, cabinet toe-kick repair, flooring replacement or refinishing, repainting, and odor treatment. If moisture reached subfloors or wall cavities, costs rise quickly. Whole-home interior restoration after severe smoke damage or inherited property cleanout can exceed six figures once contents handling, duct cleaning, sealing primers, electrical replacement, and multiple finish trades are involved.
| Project type | Typical range | What is usually included |
|---|---|---|
| Minor cosmetic restoration | $1,500-$5,000 | Patch repair, paint, trim touch-ups, small carpentry fixes |
| Single-room restoration | $5,000-$12,000 | Wall or ceiling repair, flooring work, repainting, moderate finish replacement |
| Multi-room restoration | $12,000-$35,000 | Drywall or plaster repair, trim, flooring, paint, lighting, cleanup |
| Damage-driven restoration | $20,000-$75,000+ | Mitigation, demolition, rebuild, specialty cleaning, finish restoration |
| Historic interior restoration | $30,000-$100,000+ | Plaster, custom millwork, period materials, preservation-focused labor |
These ranges are broad because local labor markets vary. A project in a high-cost metro can run 20 to 40 percent above the same scope in a lower-cost region. The cleanest way to use averages is to treat them as a screening tool, then validate them with a line-item estimate tied to your specific rooms, materials, and site conditions.
Room-by-Room Expectations
Living rooms, bedrooms, hallways, and dining rooms are usually the most straightforward spaces to restore because the trades are predictable: wall and ceiling repair, paint, flooring, trim, and lighting. Costs rise when there are decorative ceilings, built-ins, wallpaper removal, or hardwood lacing around patches. Basements are different. Even when the finishes look simple, basement restoration often requires moisture control, insulation strategy, and mold vigilance. Replacing lower drywall cuts and flooring without solving humidity or seepage almost guarantees repeat damage.
Kitchens and bathrooms cost more because they combine finishes with mechanical systems. In kitchens, cabinet restoration may be more economical than replacement if boxes are sound and layouts still function, but veneer delamination, smoke saturation, or swollen particleboard can make replacement the better long-term choice. Bathrooms frequently involve tile substrate repair, exhaust ventilation correction, and hidden plumbing leaks. A bathroom that needs only grout repair and repainting is one budget category; a bathroom with rotten subfloor around a toilet flange is another entirely.
Entryways and stairwells deserve special mention because they are labor-intensive. Stair trim, balusters, handrails, and runners require detailed work, and high stairwell walls increase setup time for scaffolding or specialized ladders. If your interior restoration includes doors and windows, remember that stripping, reglazing, weathersealing, and repainting interior sash components can cost more than owners expect, especially in older homes where lead-safe practices are mandatory under the EPA Renovation, Repair and Painting Rule.
Materials, Methods, and the Preservation-versus-Replacement Decision
One of the most important budget decisions is whether to restore existing elements or replace them. Restoration is often less wasteful and more architecturally appropriate, but it is not always cheaper. Refinishing original hardwood usually costs less than installing new premium wood floors, yet repairing ornate plaster cornices can cost more than replacing plain drywall ceilings. The correct decision depends on value, durability, and how much original character you want to keep. I generally advise clients to preserve features that are visible, structurally sound, and difficult to replicate, such as solid-wood doors, old-growth trim, and true plaster details.
Matching existing materials also affects price. A contractor can install standard MDF baseboard quickly, but matching a historic knife-cut casing profile may require custom millwork. Likewise, patching lime plaster with modern setting compound may be cheaper in the short term, yet incompatible materials can crack or telegraph at joints. In older homes, proper methods matter. Lime-based plasters, shellac primers, and breathable finishes are not old-fashioned quirks; they are often the reason a repair lasts. Good restoration estimates explain these material choices instead of burying them in allowances.
Paint and coatings deserve close attention because they represent a visible outcome and a hidden risk. Stain-blocking products, encapsulants, and specialty odor-sealing primers add cost, but they are essential after smoke, nicotine, or water staining. Bargain paint systems fail most often in restored interiors because the substrate is already compromised. A durable finish depends on prep: cleaning, sanding, filling, priming, caulking, and curing time. If one estimate seems much cheaper, check whether it reduces preparation steps. That shortcut frequently shows up later as flashing, peeling, or recurring stains.
Hidden Costs, Insurance, and How to Control the Budget
The hidden costs in interior restoration are usually testing, containment, and corrections to systems behind the finishes. Older homes may require lead paint precautions or asbestos testing before demolition. Water-damaged interiors may need infrared inspection, moisture readings, air scrubbing, or mold remediation. Once walls open, electricians may need to replace unsafe wiring, plumbers may need to correct failed venting or old supply lines, and insulation may need to be upgraded to meet current energy expectations. None of those items are optional if the goal is safe, durable restoration.
Insurance can offset costs when damage comes from a covered event such as a sudden pipe burst or appliance leak, but policy language matters. Insurers typically distinguish between sudden accidental damage and long-term maintenance issues. They may pay for tear-out, drying, and restoration to pre-loss condition, yet exclude upgrades you choose for aesthetic reasons. Documentation helps. Contractors who use moisture logs, photo records, and Xactimate-based estimating often make the claims process smoother because they speak the same pricing language many adjusters use. Even then, homeowners should expect negotiation over scope, matching of finishes, and whether code upgrades are covered.
To control the budget, start with a prioritized scope. Separate essential stabilization from elective finish upgrades. Get detailed bids that identify quantities, prep standards, material brands, disposal, and exclusions. Ask how change orders are handled and what hidden conditions commonly appear in similar homes. Keep a contingency reserve of 10 to 20 percent for straightforward projects and more for older properties or damage-related work. Most importantly, hire restoration-minded professionals, not just the cheapest general painter or handyman. Interior restoration succeeds when the contractor understands building science, sequencing, and finish matching as well as appearance.
How to Plan an Interior Restoration That Lasts
A durable interior restoration begins with diagnosis rather than decoration. Before choosing paint colors or replacement flooring, identify why the damage happened and whether moisture, movement, ventilation, or poor prior repairs are still active. Sequence matters. Drying and remediation come first, then rough repairs, then finish restoration, then final punch work. Skipping that order leads to rework. I have walked into projects where beautiful new trim was installed before humidity problems were solved, and the trim failed within a season. Good planning protects both the result and the budget.
Homeowners should also think in phases when funds are limited. It is often smarter to complete one room correctly than to spread money thinly across the house. For example, fully restoring a smoke-damaged primary living area, including odor sealing and HVAC cleaning, will usually outperform a superficial whole-house repaint. Similarly, saving original flooring and millwork in high-visibility spaces can preserve character while allowing secondary rooms to use simpler materials. This phased approach is common in older homes and lets you align spending with use, value, and urgency.
The clearest expectation to set is that interior restoration costs are shaped less by square footage alone than by condition, craftsmanship, and risk. When you understand the drivers—damage source, material choice, labor access, code issues, and finish quality—you can read estimates intelligently and avoid false savings. Interior restoration is worth doing well because it improves safety, comfort, appearance, and long-term property value at the same time. Start with a thorough inspection, request itemized proposals, and compare methods as carefully as prices. That simple process will help you invest confidently and restore your interior the right way.
Frequently Asked Questions
What factors have the biggest impact on interior restoration costs?
Interior restoration costs are driven primarily by scope, condition, materials, and labor. In simple terms, the more damaged, outdated, or historically sensitive a space is, the more time and skill it takes to restore properly. A straightforward cosmetic refresh, such as patching minor drywall damage, repainting, and refinishing trim, will usually cost far less than a project involving water damage, structural corrections, old plaster stabilization, custom millwork repair, or code-related upgrades hidden behind walls.
Material selection also changes pricing significantly. Standard drywall, builder-grade trim, and common paint systems are typically more affordable than true plaster restoration, hardwood floor repairs, stain-matched woodwork, specialty coatings, or historically accurate finishes. Labor standards matter just as much. Restoration work often requires more preparation, more careful demolition, and more skilled craftsmanship than new installation. Matching textures, preserving original architectural details, correcting prior poor workmanship, and blending new materials into old surfaces all take time, which directly affects the final cost.
Other major variables include room accessibility, project size, regional labor rates, permit requirements, and whether mechanical, electrical, or insulation upgrades are needed at the same time. Homeowners are often surprised that “hidden conditions” can become one of the biggest cost drivers. Once a contractor opens walls, lifts flooring, or removes damaged finishes, they may discover mold, rot, outdated wiring, settling cracks, or subfloor damage that must be addressed before restoration can continue. That is why accurate budgeting usually starts with a detailed site evaluation rather than a simple price-per-square-foot estimate.
How much should I expect to pay for a typical interior restoration project?
There is no single universal price because interior restoration can range from limited repairs in one room to full-scale rehabilitation of multiple finished spaces. As a general rule, smaller projects with mostly surface-level work tend to be easier to estimate and control, while whole-home or historically sensitive restorations require a wider budget range. If the work involves only patching, painting, light trim repair, and minor flooring touch-ups, costs may remain relatively moderate. If it includes plaster replacement, moisture remediation, insulation upgrades, custom cabinetry repair, floor leveling, or specialty finish matching, the total can rise quickly.
A practical way to think about cost is by dividing the project into categories: demolition and prep, repairs, finish materials, specialty restoration, and labor. Demolition and prep can include protection of surrounding areas, removal of damaged materials, debris disposal, and cleaning. Repairs may cover framing corrections, wall restoration, subfloor work, or replacement of damaged finishes. Finish materials include paint, flooring products, trim, hardware, and cabinetry components. Specialty restoration applies when original materials must be preserved, replicated, or blended carefully rather than replaced with modern stock products.
For budgeting purposes, homeowners should also include a contingency fund, often around 10% to 20%, especially in older properties or homes with previous renovation issues. This reserve helps cover conditions that were not visible during the initial walkthrough. The best way to avoid unrealistic expectations is to request a line-item estimate that separates labor, materials, and allowances. That level of detail makes it easier to compare bids, understand where the money is going, and decide where upgrades are worth the extra investment.
Why does labor make up such a large portion of interior restoration costs?
Labor is often the largest part of an interior restoration budget because restoration is rarely a simple remove-and-replace process. Unlike new construction, where installers work with clean, level, and predictable surfaces, restoration contractors usually have to diagnose existing problems first. They may spend hours protecting adjacent finishes, removing damaged materials carefully, documenting underlying conditions, checking moisture levels, and preparing uneven or compromised surfaces before any visible improvement begins. That preparation is necessary to achieve a durable result, but it adds time and cost.
Specialized labor also costs more because it requires higher skill. Repairing original plaster, blending drywall patches so they disappear, restoring old trim profiles, refinishing floors without over-sanding, and matching paint or stain across aged materials all demand experience. The same is true when correcting previous poor workmanship. Fixing misaligned cabinets, uneven wall surfaces, bad patch jobs, or improperly installed trim usually takes longer than doing the work correctly from the start. In older homes, contractors may also need to work around delicate materials or preserve original details, which slows production and increases labor intensity.
Another reason labor matters so much is sequencing. Interior restoration often involves multiple trades, such as demolition crews, carpenters, drywall specialists, plaster experts, painters, flooring installers, electricians, and insulation professionals. Coordinating them efficiently is part of the project cost. A lower bid is not always a better value if it overlooks preparation time, finish quality, or proper supervision. In most cases, paying for qualified restoration labor reduces the risk of visible mismatches, premature failure, and expensive rework later.
Can I lower interior restoration costs without sacrificing quality?
Yes, but the key is to reduce unnecessary scope, not essential craftsmanship. One of the smartest ways to control costs is to decide early which features must be fully restored, which can be repaired rather than replaced, and which cosmetic upgrades can wait for a later phase. For example, preserving sound trim, refinishing existing wood floors, or repairing selected plaster areas may be more cost-effective than full replacement, provided the materials are still structurally viable. A contractor experienced in restoration can help identify where repair offers real savings and where replacement is the better long-term choice.
Material selection is another major opportunity to manage the budget. You can often save money by choosing durable, readily available finish materials in less prominent areas while reserving premium or historically accurate materials for focal points. It also helps to finalize decisions before work begins. Last-minute design changes, upgraded finishes after ordering, and shifting the scope mid-project often lead to extra labor, material waste, and scheduling delays. Good planning protects both quality and budget.
That said, there are areas where cutting corners usually backfires. Moisture problems, insulation gaps, damaged subfloors, failing wall systems, and poor surface preparation should not be ignored just to save money upfront. Those items directly affect the durability of the finished work. Homeowners should also be cautious about choosing the cheapest bid if it is vague or unusually low. The best cost-saving strategy is a clear scope of work, realistic allowances, and a contractor who understands how to balance preservation, performance, and appearance.
How can I get an accurate estimate for interior restoration work?
An accurate estimate starts with a thorough on-site assessment. Interior restoration is too condition-dependent for a meaningful quote based only on photos or rough square footage. A qualified contractor should inspect visible damage, ask about the history of the space, identify signs of moisture or movement, and determine whether there may be hidden issues behind walls, under flooring, or around trim and cabinetry. The more complete the inspection, the more reliable the estimate will be.
Homeowners should ask for a written proposal that clearly explains what is included and what is excluded. A strong estimate typically breaks down demolition, repairs, materials, labor, finish work, and any allowances for items not yet selected. It should also address whether permits, debris removal, protection of occupied areas, and touch-up painting are included. If the project involves historic features or custom matching, the estimate should note that those tasks require additional time and specialized methods. Transparency is essential because two bids that look similar at first glance may cover very different levels of work.
It is also wise to ask how change orders will be handled if hidden damage is uncovered. In restoration, surprises are common, and a professional contractor should have a clear process for documenting new conditions, pricing additional work, and getting approval before moving forward. Comparing estimates is most useful when each contractor is bidding on the same clearly defined scope. If possible, provide the same project notes, finish expectations, and priorities to every bidder. That approach gives you a much better chance of receiving realistic numbers and choosing a contractor based on value, not just the lowest starting price.




