
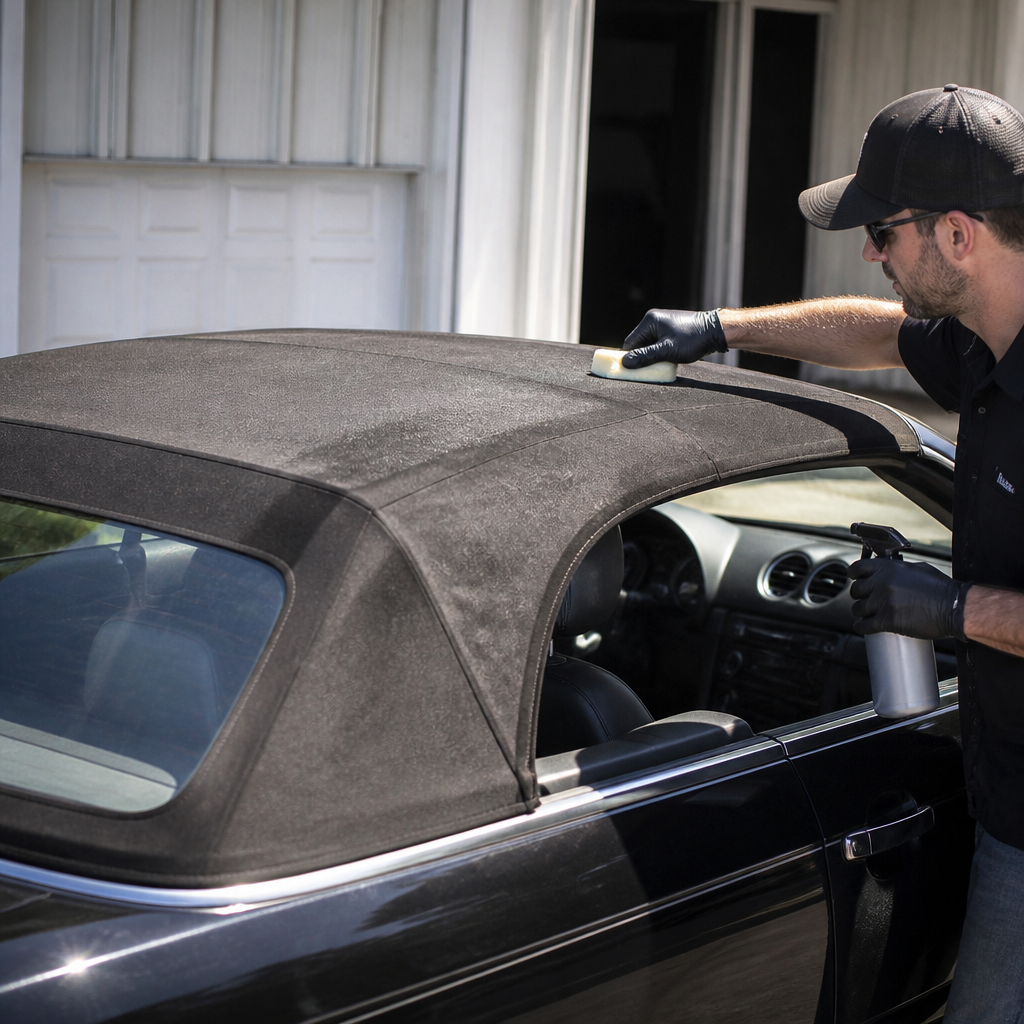
Convertible top restoration sits at the intersection of bodywork, upholstery, weather sealing, and interior preservation, which is why it deserves a central place in any serious restoration and maintenance plan. When owners ask how to restore convertible tops, they usually mean more than replacing fabric. They want to stop leaks, reduce wind noise, revive the frame, protect the cabin, and return the car to a factory-correct appearance. In practice, convertible top restoration includes inspecting the folding mechanism, evaluating the top material, repairing or replacing pads and cables, restoring the headliner and rear window, renewing seals, and addressing the interior damage caused by water and sunlight. I have worked through these jobs on vinyl domestic cruisers, canvas European roadsters, and newer power-top cars, and the lesson is always the same: the top is not an isolated part. It is a system tied directly to interior restoration.
That systems view matters because a neglected top can ruin carpets, seat foam, dashboard trim, quarter panels, and electrical components hidden under rear side panels. Moisture trapped under sound deadening creates corrosion from the inside out. UV exposure fades leather, cracks vinyl, and weakens stitching long before the top tears open. A proper restoration plan therefore starts with diagnosis. You need to identify what can be cleaned, adjusted, repaired, or re-dyed, and what must be replaced. You also need to know the key materials involved. Vinyl tops are durable and affordable but can shrink and harden with age. Cloth tops, often acrylic canvas such as Haartz Stayfast, look richer and breathe better, but they require specific cleaners and protectants. Tension cables keep the top skin aligned, pads control contour, weatherstrips seal the perimeter, and the well liner protects the folded top from abrasion. Understanding those terms helps you make good decisions and avoid buying the wrong parts.
For an interior restoration hub, convertible tops matter because they dictate the environment inside the car. A beautiful upholstery job will not last if the roof leaks or dumps debris into the cabin each time it folds. Restoring the top correctly improves comfort, resale value, and structural longevity. It also brings back the driving experience the car was designed to deliver: a quiet cabin with the top up, a tidy stack with the top down, clear sightlines through a wrinkle-free rear window, and trim that no longer smells damp after rain. Whether you are preserving an original car, freshening a driver, or completing a concours-level restoration, the process begins with inspection, continues through material selection and careful installation, and ends with routine maintenance that protects both the roof and the interior beneath it.
Inspect the convertible top as a complete interior system
The first step in restoring a convertible top is a structured inspection, not a shopping spree. Start with the top raised, latched, and dry. Check the outer skin for tears, seam separation, shrinkage at the front header, frayed stitching, and abrasions above the bows. Then inspect the inside. Staining on the headliner, rust on bow hardware, mildew odor, brittle tack strips, and wet insulation all indicate water entry. Open and close the top slowly while watching the frame geometry. A top that twists, hesitates, or stacks unevenly usually has worn pivot points, bent side rails, stretched cables, or failing hydraulic components on power systems. Those issues must be corrected before a new skin goes on, or the replacement top will wear prematurely.
Look next at the interior areas directly affected by the top. Remove rear seat cushions or trim panels where possible and check for damp jute, rusty seat frames, or corroded harness connectors. Inspect the package shelf, rear quarter trim, and carpet edges for tide marks. Use a hose only after the dry inspection is complete, and apply water methodically: header first, side glass next, then quarter windows and rear bow. One person stays inside with a bright light while another runs low-pressure water outside. This reveals whether leaks come from weatherstrips, glass adjustment, stitched seams, or body drains. On many classics and modern convertibles alike, clogged drain channels are the hidden cause of wet carpets, not the top fabric itself.
Because this article serves as an interior restoration hub, document everything you find. I typically divide defects into four groups: top skin and window, frame and mechanism, seals and drainage, and interior water damage. That framework keeps the work scoped correctly and helps determine whether the project is a cosmetic refresh or a full restoration. It also supports better budgeting. A top replacement alone may seem manageable, but once you add side cable kits, pads, weatherstrips, carpet underlayment, and electrical cleanup, the job changes significantly. Accurate inspection is what keeps the restoration honest.
Choose the right materials before disassembly begins
Material choice determines appearance, service life, and installation difficulty. For many American cars from the 1950s through the 1980s, vinyl remains historically correct and cost-effective. For European sports cars and many premium modern convertibles, cloth canvas is closer to factory specification and usually delivers a tighter, more upscale finish. The best-known supplier in the restoration market is Haartz, whose Stayfast canvas and pinpoint vinyl products are widely used by professional trimmers. Matching original grain, color, and window style matters if authenticity is the goal. For drivers, durability and parts availability may matter more.
Restoring the top also means buying the supporting parts that make the finished job fit properly. New pads establish the roof profile, listing sleeves attach the top at the bows, tension cables keep the side edges from ballooning, and a well liner prevents the folded assembly from chafing. Weatherstrips, header seals, and side rail seals are just as important as the outer skin. If the rear window is plastic, choose a replacement of the correct gauge and stitch pattern. If it is glass, inspect defroster connections and frame bonding. Adhesives matter too. Professional installers rely on high-heat trim adhesive, contact cement where specified, stainless staples where the design uses tack strips, and butyl or body seam sealer in selected water-management areas. Using general hardware-store glue is one of the fastest ways to create a short-lived restoration.
| Component | What to Inspect | Typical Restore or Replace Decision |
|---|---|---|
| Top material | Tears, shrinkage, seam failure, fading | Replace if brittle, shrunken, or split at stress points |
| Pads and cables | Stretching, broken stitching, side looseness | Replace during any full top installation |
| Frame | Bent rails, worn pivots, rust, poor stack alignment | Repair, refinish, and lubricate before new top goes on |
| Weatherstrips | Compression set, cracks, wind noise, leaks | Replace if hardened or misshapen |
| Interior trim | Water stains, mildew, warped panels, rust beneath carpet | Dry, clean, repair, or replace after leak source is fixed |
If you are planning connected interior work, align materials across the cabin. A new canvas top beside faded quarter trim and a stained headliner looks unfinished. This is the right stage to source matching windlace, rear trim fasteners, carpet insulation, and seat upholstery samples. Coordinating all materials before teardown prevents delays and ensures color consistency under natural light.
Remove the old top carefully to protect reusable interior parts
Disassembly is where many restorations become more expensive than necessary. Before removing anything, photograph every bow, staple line, cable route, shim location, and weatherstrip joint. Mark left and right hardware in labeled bags. Older convertibles often contain spacers, tack strips, and improvised repairs from previous work; those details explain fitment issues later. Remove interior trim panels and rear seat sections as needed to access mounts without cracking brittle panels. If the vehicle has a headliner or inner curtain, separate it gently and note how it indexes to each bow.
As the old top comes off, inspect hidden structure. This is the moment when rotten tack strips, cracked webbing, rust scale on the frame, and worn pivot bushings reveal themselves. I usually strip the frame completely enough to clean and refinish the visible sections, then test-fit it through its full motion before any new fabric is attached. Light surface corrosion can be removed mechanically and sealed with epoxy primer and topcoat. Severely weakened components should be welded, straightened on a jig, or replaced. Convertible frames operate under tension, so small bends create large alignment problems at the windshield header and side glass.
Protect the interior during this phase. Vacuum out debris trapped in the top well, treat any mildew with an appropriate biocide safe for automotive interiors, and dry the car thoroughly. If carpets or underlayment are wet, pull them back. Trapped moisture beneath modern sound deadening can linger for weeks. On classics, it often sits against bare steel or minimal factory primer, causing floor corrosion. Top removal is therefore not just a roof task; it is a chance to stop hidden interior deterioration before fresh materials cover it again.
Restore the frame, seals, and drainage before installing new fabric
A new convertible top only performs well when the frame beneath it moves smoothly and seals correctly against the glass and body. Begin by checking pivot rivets, hinge points, and side rail alignment against service manual dimensions where available. Many manufacturers specify header latch preload, quarter window height, and side glass inboard angle for leak control. On power tops, inspect hydraulic cylinders for seepage, hoses for cracking, and pump operation under load. On late-model cars, scan body control modules if top position sensors are involved. Mechanical correction comes first, because fabric cannot compensate for geometry that is out of specification.
Weatherstrips deserve equal attention. Old seals flatten over time and lose the elasticity needed to conform to glass. That is what causes wind whistle at highway speed and water migration into quarter trim. Replace seals with model-specific profiles whenever possible; universal extrusions rarely fit compound curves well. Clean drain troughs and body channels with compressed air and flexible line, not hard wire that can puncture hoses. Test drainage by pouring measured water into channels and confirming that it exits where the manufacturer intended. I have seen beautifully trimmed tops still soak carpets because blocked drains sent water into rocker cavities and back into the cabin.
This is also the stage to restore adjacent interior parts. Refinish or replace stained well liners, install fresh sound insulation if the original is moldy, and repair warped rear trim boards before they are trapped behind new fabric. If seatbelt retractors or amplifier modules live near the quarter panels, inspect them for past water exposure. The best convertible top restoration is invisible in the sense that nothing around it looks neglected. That requires treating seals, drains, and interior support pieces as primary work, not side tasks.
Install and finish the new top with attention to fit, tension, and interior appearance
Successful installation depends on sequence and controlled tension. Most tops are attached at the front header, rear tack area, and specific bows using listings or staples, with side cables and pads establishing shape. Follow the pattern instructions from the top manufacturer and compare constantly to your disassembly photos. Warm material stretches more predictably, so installers often work in a heated shop or use gentle ambient warmth rather than forcing cold vinyl or canvas. Center the top carefully, tension side to side evenly, and check window alignment before making final rear attachments. If a wrinkle appears, do not assume it will disappear in sunlight. Persistent diagonal wrinkles usually indicate mis-centering or uneven bow tension.
The interior finish matters as much as the exterior skin. A properly restored headliner should sit smooth at the bows, the well liner should fold without bunching, and the rear window area should not distort when the top cycles. Reinstall trim panels only after water testing confirms the seals are doing their job. Use talc or the manufacturer’s approved lubricant on weatherstrips where specified, and adjust side glass to meet seals without excessive pressure. Too much glass preload can strain regulators and still fail to stop leaks if the angle is wrong. Final quality checks should include road testing for wind noise, a controlled hose test, and several complete open-close cycles to verify stack height and fabric clearance.
After installation, maintenance protects the investment and the rest of the interior. Clean canvas with the correct fabric cleaner, vinyl with a non-petroleum protectant, and plastic windows with polish made for flexible clear vinyl. Keep drains clear, avoid lowering the top when temperatures are low enough to stiffen the material, and never fold a plastic-window top without the protective boot or separator recommended by the manufacturer. If you are building out a full interior restoration plan, use the restored top as the starting point for carpets, upholstery, and trim. Once the cabin is dry, sealed, and shaded properly, every other interior upgrade lasts longer and performs as intended.
Restoring a convertible top is really about restoring the car’s entire upper environment. The visible fabric is only one layer. Underneath it are the frame, pads, cables, seals, drains, headliner, and trim pieces that determine whether the cabin stays quiet, dry, and protected. When you inspect the top as a system, choose materials that match the vehicle and its intended use, repair the frame before stretching new fabric, and address water damage inside the car, you get results that look right and endure. That is why convertible top work belongs at the center of interior restoration rather than at the edge of it.
The practical benefit is straightforward: a correctly restored top preserves everything below it. Seats remain dry, carpets stay odor-free, electronics avoid corrosion, and the cabin feels finished instead of compromised. Owners also gain easier operation, better visibility, and stronger resale confidence because buyers can tell when a convertible has been restored thoroughly rather than cosmetically. If your top shows leaks, wrinkles, noise, or mildew, start with a full inspection and build the project from there. Treat the roof and interior as one restoration job, and every mile with the top up or down will confirm you made the right decision.
Frequently Asked Questions
What does convertible top restoration usually include?
Convertible top restoration usually involves far more than simply installing new fabric or vinyl. A proper restoration starts with a full inspection of the top covering, padding, rear window, weatherstripping, seals, cables, tack strips, well liner, drains, and the folding frame itself. The goal is to identify every issue contributing to leaks, wind noise, poor fit, difficult operation, interior moisture, or an incorrect appearance. In many cases, the visible top material is only one part of the problem, while the underlying frame alignment or aged seals are the real cause of recurring trouble.
From there, the work often includes cleaning or replacing the outer top material, repairing or refinishing the frame, replacing worn weather seals, checking tension cables, adjusting latches, and confirming that side windows meet the seals correctly. If the top has a glass rear window, restorers also inspect the defroster connections and the condition of the bonding area. If it has a plastic rear window, yellowing, cracking, and shrinkage are common concerns. A thorough restoration may also involve rust treatment around frame mounts and body contact points, because water intrusion often leads to corrosion in hidden areas.
Just as important, a quality restoration aims to restore factory-correct shape and function. That means the top should fold properly, seal consistently, sit evenly over the frame, and match the original style of stitching, grain, color, and window configuration. In short, convertible top restoration is a combination of upholstery work, body alignment, weather sealing, and interior protection. Done correctly, it improves appearance, comfort, and durability all at the same time.
How can I tell if my convertible top needs restoration instead of simple cleaning or minor repair?
Minor issues can sometimes be handled with cleaning, reproofing, or a small seal repair, but there are several signs that point to the need for a more complete restoration. If you notice persistent leaks after seal treatment, excessive wind noise at highway speeds, sagging fabric, loose edges, a cloudy or cracked rear window, or difficulty latching and folding the top, the problem likely goes beyond surface care. Visible wear such as fraying seams, shrinking material, separated stitching, or hardened weatherstripping also suggests the top system is aging as a whole rather than suffering from one isolated defect.
You should also pay attention to what is happening inside the car. Damp carpets, musty odors, fogging on the interior glass, stained headliners, or rust beginning around floor pans and trim panels are strong indicators that the top and its seals are no longer protecting the cabin effectively. Sometimes owners clean the top repeatedly, only to find that water intrusion continues because the side windows are out of adjustment, the frame is slightly bent, or the drain paths are blocked. Those are restoration issues, not detailing issues.
A good rule is this: if the top still fits tightly, seals well, and only looks dirty or lightly faded, maintenance may be enough. If the top has begun to lose shape, leak regularly, make noise, or show structural wear, restoration is the better long-term answer. Addressing the system early can prevent bigger problems such as interior damage, mold, electrical issues, and corrosion in the body structure. That is why a careful inspection is often the smartest first step before spending money on piecemeal fixes.
Can I restore a convertible top myself, or is it better left to a professional?
That depends on the scope of the work and your experience level. Basic maintenance tasks such as cleaning the top material, applying the correct protectant, lubricating hinges, clearing drains, and inspecting seals are realistic do-it-yourself jobs for many owners. Small repairs like replacing a few fasteners or conditioning weatherstripping may also be manageable if you use the right products and follow model-specific guidance. These tasks can meaningfully extend the life of the top when done carefully and consistently.
Full restoration, however, is usually more demanding than it first appears. Replacing top material requires precise stretching, alignment, and fastening to avoid wrinkles, uneven tension, premature wear, or leaks. The frame must open and close squarely, side glass must meet the seals properly, and the rear window area must be installed without distortion. Even small errors can create major fitment problems, especially on older cars where the frame may already be slightly bent or the body may have shifted over time. If hydraulic or electric top components are involved, diagnosis adds another layer of complexity.
For that reason, professional restoration is often the better choice when the job includes new top installation, major seal replacement, frame repair, tack strip replacement, or water leak correction. An experienced trim or restoration shop will know how to set tension correctly, adjust the frame, and reproduce an original look. If you do choose the DIY route, begin with inspection and maintenance rather than complete replacement, and use factory service information whenever possible. With convertible tops, careful workmanship matters more than speed, because appearance and weather protection depend on exact fit.
What materials and components should be replaced during a proper convertible top restoration?
The answer depends on condition, but a proper restoration often includes more than the outer skin. The main top material may be fabric, canvas, vinyl, or another original-style covering, and if it has shrunk, cracked, faded unevenly, or split at the seams, replacement is usually justified. Under that layer, padding and listing materials may also need attention because they help define the shape of the roof and prevent a thin, collapsed appearance. Ignoring the layers underneath can leave a new top looking poor even when the outer material is brand new.
Weatherstripping is another major category. Side rail seals, header seals, quarter window seals, and trunk or well-area seals can all harden with age, flatten out, or tear. If those parts are reused when they are no longer compliant, leaks and wind noise often remain. Tension cables and hold-down straps should also be checked, because they help keep the top pulled into the correct contours. Worn tack strips or attachment points deserve special attention as well, since they are essential to secure installation. Rear windows, whether plastic or glass, may need replacement if visibility is poor or the surrounding material has failed.
The frame and its hardware are just as important as the soft components. A quality restoration may involve replacing bushings, pivots, worn latch parts, and hydraulic cylinders or hoses if the top is power-operated. Rust removal and refinishing of the frame can protect the structure and improve operation. In some cases, window adjustment, drain cleaning, and liner replacement are necessary to complete the job correctly. The best results come from treating the top as a system, not just a piece of fabric, because every component affects fit, sealing, and long-term durability.
How do I maintain a restored convertible top so it lasts as long as possible?
Long-term durability starts with routine, material-specific care. Fabric tops and vinyl tops require different cleaners and protectants, so it is important to use products intended for your exact material. Gentle cleaning removes dirt, airborne contaminants, tree sap, and environmental residue before they can grind into the surface or encourage staining. Avoid household detergents, stiff brushes, and harsh solvents, because they can strip protective coatings, weaken stitching, or discolor the top. For many owners, regular light cleaning is better than occasional aggressive scrubbing.
You should also make a habit of inspecting seals, drains, stitching, and the rear window several times a year. Water often enters through small failures that are easy to miss early on. If the car is stored outside, keeping the top free of standing water, leaves, and debris is especially important. If possible, park in covered areas and avoid folding the top when it is wet or dirty. Lowering a damp top can trap moisture, promote mildew, crease the material, and damage the inside surfaces. Likewise, never force a top that feels stiff in cold weather, since low temperatures can make some materials more prone to cracking or shrinking.
Mechanical upkeep matters too. Hinges, pivot points, and latches should be inspected and lubricated according to the vehicle’s requirements, and power top systems should be operated periodically so components do not seize from disuse. If you notice a change in fit, new wind noise, or the first signs of a drip, address it quickly rather than waiting for a major failure. The best way to protect a restored convertible top is to treat it as part of the car’s weatherproofing system and interior preservation plan. Consistent care not only keeps it looking sharp, but also helps prevent leaks, mold, rust, and expensive rework later on.




