
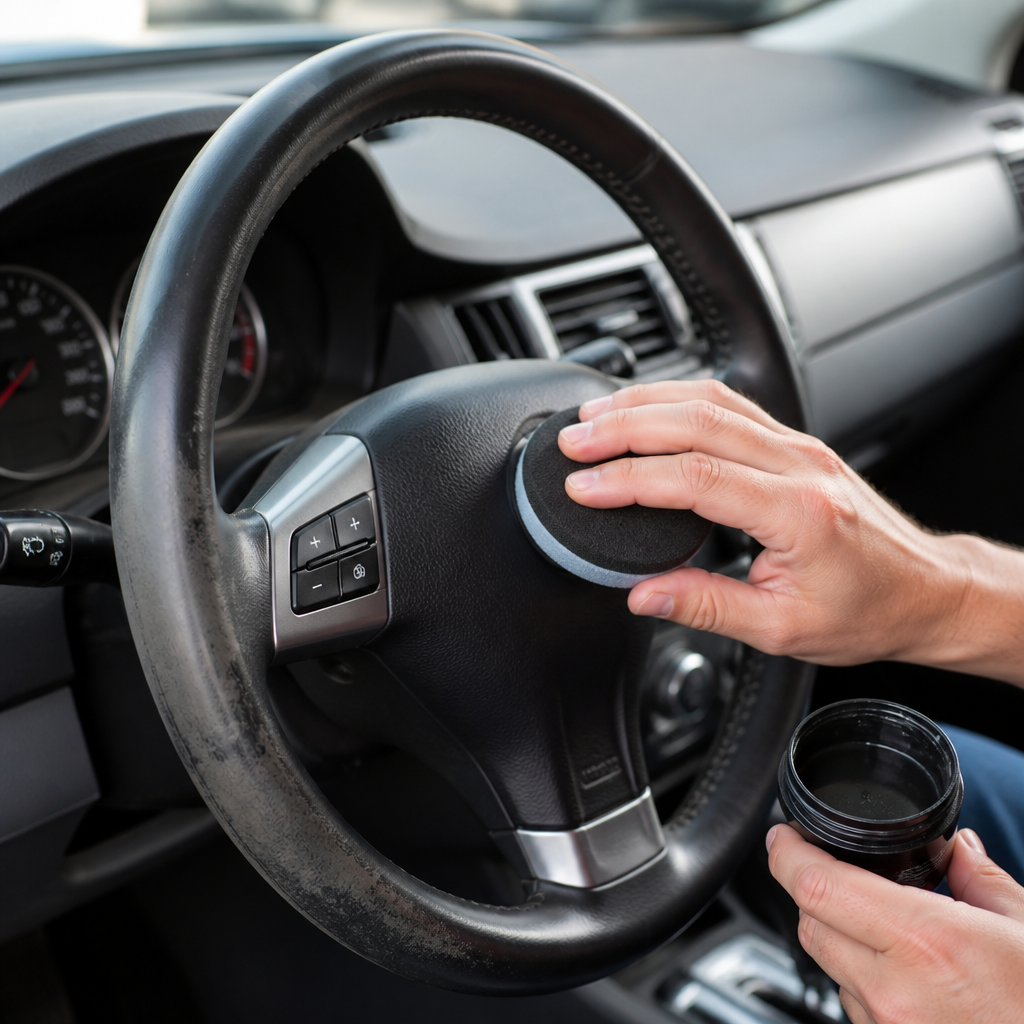
Restoring steering wheels and interior trim is one of the highest-impact jobs in classic and modern vehicle preservation because these are the surfaces drivers see, touch, and judge first. In restoration shops, I have learned that worn paint, cracked plastic, faded woodgrain, and loose brightwork can make an otherwise solid car feel neglected, while a correctly restored cabin instantly changes how the whole vehicle is perceived. Interior restoration, in practical terms, covers the repair, refinishing, replacement, and protection of visible cabin materials, with steering wheels and trim acting as the focal points that tie dashboards, consoles, door panels, and garnish moldings together.
A steering wheel restoration usually involves structural inspection, cleaning, crack repair, filling, sanding, priming, color coating, and protective finishing, while trim restoration can include polishing stainless, repainting molded plastics, reapplying simulated woodgrain, recoloring vinyl, and replacing damaged clips or adhesives. The exact method depends on material type: thermoplastic, thermoset resin, Bakelite, urethane, painted metal, anodized aluminum, stainless steel, or real wood all respond differently to heat, solvents, abrasives, and coatings. Getting this wrong causes common failures such as fisheyes in paint, delamination, loss of gloss, brittle repairs, or incorrect texture that looks obvious under daylight.
This matters for more than appearance. Safe interior restoration protects structural integrity in the steering wheel hub, maintains horn ring and switch operation, prevents sharp edges on broken trim, and preserves originality where collector value is tied to factory-correct finishes. It also supports drivability. A wheel with a smooth but not slippery finish reduces fatigue, and trim that is secured with correct clips will not rattle or interfere with controls. As the hub page for interior restoration, this guide explains the materials, workflow, tools, and decision points that govern successful steering wheel and trim restoration, so you can plan individual repairs or map out a full cabin refurbishment with confidence.
Assessing Materials, Damage, and Original Finish Before You Start
The first rule of interior restoration is to identify exactly what you are working on before touching sandpaper or solvent. A 1960s steering wheel may be cast plastic over a steel armature, an older wheel may be hard phenolic resin, and a later wheel may be polyurethane over a metal frame. Interior trim can be injection-molded ABS, PVC-coated plastic, painted die-cast zinc, stainless brightwork, or veneer over substrate. Each material has a different failure pattern. ABS often splits at screw bosses, urethane wheels become tacky or chalky, phenolic wheels crack radially, and plated die-cast parts pit under failing chrome.
Inspection should be systematic. Remove loose dirt with a mild interior cleaner, then examine the wheel and trim under bright diffuse light and again under a focused inspection lamp. Look for stress cracks around spokes, separation at seams, previous filler repairs, signs of silicone contamination from dressings, UV bleaching, worn-through color on rim contact points, and missing mounting hardware. If the wheel is still installed, verify that the hub is tight, the horn contact works, and there is no movement between outer rim and spoke structure. Structural looseness means cosmetic work alone is not enough.
Original finish documentation is just as important as damage assessment. Before disassembly, photograph gloss level, grain pattern, edge profiles, paint breaks, emblem placement, and fastener orientation. Factory interiors rarely use one universal black; many use warm charcoal, blue-black, saddle, parchment, or low-gloss metallic accents. Matching the wrong sheen is one of the easiest ways to make a restoration look amateur. I rely on hidden reference areas such as the backside of garnish molding, screw-covered edges, and sections shielded from sunlight to identify original color density and texture. Service manuals, trim codes, and paint supplier interior color decks are useful, but the part itself remains the most reliable standard.
Tools, Cleaners, and Work Area Standards That Prevent Rework
Successful steering wheel and trim restoration depends as much on preparation tools as on coatings. At minimum, you need wax and grease remover safe for plastics, dedicated plastic cleaner, lint-free towels, scuff pads, precision files, flexible sanding blocks, wet-or-dry paper from roughly 180 through 2000 grit, plastic adhesion promoter, high-build primer where appropriate, topcoat matched for interior use, and suitable fillers or epoxy compounds. For brightwork, add metal polish, buffing compounds, micro-abrasives, and masking tape that lifts cleanly. For disassembly, trim tools, clip pliers, labeled storage bags, and a steering wheel puller prevent breakage that improvisation often causes.
Work area control matters because interior parts reveal contamination faster than body panels do. Silicone from tire dressings, household aerosol products, and oily compressed air lines can ruin coating adhesion. In shop practice, I isolate interior refinishing from detailing work, wipe surfaces repeatedly with clean towels instead of moving contamination around, and use nitrile gloves after final cleaning to avoid skin oil transfer. Temperature and humidity also affect results. Most interior coatings flow and cure best around standard room temperature with moderate humidity; cold parts trap moisture and increase dullness, while excessive heat can soften some plastics or accelerate solvent flash before a wet edge forms.
Product compatibility is another nonnegotiable standard. Not every primer works over every substrate, and not every filler remains stable on a steering wheel that flexes in service. For example, rigid body filler on a flexible urethane wheel often prints through or cracks later. Reputable systems from SEM, PPG, Dupli-Color, ColorBond, and specialty steering wheel repair suppliers publish substrate recommendations for a reason. When in doubt, do a test panel on the backside of a trim piece or on a hidden damaged section before committing to a visible face. That small step saves hours of stripping and refinishing later.
Steering Wheel Restoration: Cleaning, Crack Repair, and Refinishing Workflow
A proper steering wheel restoration starts with removal using the correct puller and careful indexing so the wheel returns to the same orientation. Once off the car, strip away dressings and embedded grime with plastic-safe cleaner and repeated degreasing. Deep contamination in hand-contact areas often requires scrubbing with a soft brush and detergent before solvent cleaning. If the wheel has chrome horn rings, emblems, or inserts, remove them where practical rather than masking around complex edges. Clean separation lines produce a sharper, more factory-like result.
Crack repair is where many restorations succeed or fail. Surface cracks must be opened slightly with a fine rotary bit, V-groove tool, or file so repair material bonds below the surface rather than bridging over it. If the crack reaches a steel core and rust is present, treat the corrosion first; otherwise expansion can telegraph back through the finish. For hard plastic wheels, two-part epoxy formulated for plastic repair is usually more durable than generic fillers. For urethane wheels, use a flexible repair compound that sands smoothly and retains some elasticity. Build in thin layers, let each cure fully, then block sand to preserve the original rim contour. Flat spots and asymmetric finger grooves are immediately noticeable in use.
After structural and cosmetic repairs, apply an adhesion promoter if the substrate requires it, followed by primer suited to the repair material and topcoat system. High-build primer can help level minor imperfections, but it should not be used to bury poor prep. Guide coating between sanding rounds helps reveal low spots. Once the wheel is uniformly smooth and clean, apply color in several light coats rather than one heavy pass. Interior steering wheels usually look best in low-sheen or satin finishes, not high gloss, unless the original design specifically used a polished hard-plastic appearance. Allow proper cure time before handling, reinstall carefully to avoid marking fresh finish, and verify horn contact, turn-signal cancel function, and steering alignment before the job is considered complete.
Restoring Interior Trim: Plastic, Metal, Woodgrain, and Decorative Surfaces
Interior trim restoration requires separating parts by material and finish rather than treating everything as one repaint project. Plastic dash bezels and console pieces typically need cleaning, minor plastic welding or epoxy repair, texture preservation, and color refinishing. Stainless steel strips often respond to careful straightening and polishing. Painted metal moldings may need rust removal and epoxy primer. Simulated woodgrain can demand an entirely different process involving either hydrographic transfer, printed appliqué replacement, hand-applied grain techniques, or specialist reproduction parts if the original pattern is too degraded to preserve.
Plastic trim deserves restraint during sanding because many parts carry molded grain that disappears quickly. When a part has light scratches but intact texture, a gray scuff pad and plastic prep can be enough before coating. If gouges require filling, use only as much filler as necessary and feather carefully into surrounding grain. Some restorers recreate texture by stippling a compatible coating or using texture products before final color. The goal is not to make every surface glass-smooth; the goal is to reproduce the original visual language of the cabin. On late twentieth-century interiors, that often means controlled low gloss and intentional grain.
Metal trim restoration varies sharply by alloy and finish. Stainless is forgiving and can usually be sanded progressively and polished to remove light scratches, though deep dents may require specialist metal finishing. Anodized aluminum is less forgiving because polishing can remove the anodized layer and change color. Pot metal with failing chrome usually needs professional replating, especially on high-visibility pieces. Decorative wood surfaces range from real veneer needing lacquer repair to plastic inserts with printed grain that should be preserved rather than stripped. In all cases, the best interior restorations respect material authenticity instead of forcing every trim piece into the same uniform shine.
Choosing Repair, Refinish, Replace, or Replate
One of the most useful decisions in interior restoration is knowing when not to restore a part cosmetically. Some pieces are safer, cheaper, or more correct to replace. Others are so rare that even imperfect originals deserve careful conservation. I use a simple framework based on structural integrity, originality, visibility, and replacement availability. If a steering wheel has a loose core, severe rim separation, or missing segments, specialist rebuilding may be the only reliable option. If a plastic vent is inexpensive and reproduced accurately, replacement can beat hours of repair that still leaves weak mounting tabs.
| Part condition | Best option | Why |
|---|---|---|
| Minor wheel cracks, sound core | Repair and refinish | Maintains original fit and usually restores appearance fully |
| Wheel loose on core or heavily missing material | Professional rebuild | Structural repair must be reliable under driving load |
| Lightly scratched stainless trim | Polish and preserve | Original material often outperforms reproductions |
| Pitted pot metal with failed plating | Replate or replace | Paint cannot duplicate proper plated depth and durability |
| Common broken plastic trim tabs | Replace if available | New parts can save labor and reduce future failure |
Cost and authenticity often pull in opposite directions. Collector-grade restoration usually favors retaining date-coded or model-specific originals when possible, while driver-quality builds may prioritize durability and budget. There is no universal answer, but there is a correct process: evaluate each part individually, estimate labor honestly, and reserve expensive specialist work for parts that materially affect safety, value, or visual correctness. That approach keeps interior restoration focused and prevents overspending in areas passengers will never notice.
Color Matching, Texture Control, and Reassembly Without Damage
The final stage of steering wheel and trim restoration is where craftsmanship becomes obvious. Color matching should account for adjacent materials, cabin lighting, and original sheen. A trim piece can match perfectly under booth light and still look wrong next to aged vinyl in daylight. For that reason, I compare spray-out cards inside the vehicle before final coating whenever possible. Many professionals use spectrophotometer-assisted mixing for body colors, but interiors often still require visual tinting because texture and gloss affect perceived color as much as pigment does.
Texture control is equally important. Heavy coatings can fill grain, soften emblem edges, and make parts look dipped rather than restored. Several thin coats are almost always better than one wet coat on interior components. Once parts cure, reassembly should use fresh clips, correct screw lengths, and anti-rattle pads where originally fitted. Over-tightening is a common mistake that cracks refinished plastic around mounting holes. I prefit difficult parts before final installation, protect edges with low-tack tape during maneuvering, and keep hardware organized by location so garnish moldings and lower dash trims return exactly where they belong.
Long-term durability depends on aftercare. Avoid silicone-heavy dressings, aggressive solvent cleaners, and direct sun exposure during the first curing period recommended by the coating manufacturer. Use pH-balanced interior cleaners and microfiber towels, and consider windshield UV protection for vehicles stored outside. Done correctly, restored steering wheels and trim do more than improve appearance: they restore touch, function, and confidence throughout the cabin. If you are planning a broader interior restoration, start by assessing materials, documenting original finishes, and deciding which parts should be repaired, refinished, replaced, or professionally rebuilt. A disciplined process produces an interior that looks right, lasts, and elevates every mile.
Frequently Asked Questions
What is the best way to restore a worn or cracked steering wheel?
The best approach depends on the steering wheel material, the severity of the damage, and whether the goal is a clean driver-quality result or a factory-correct restoration. Start by identifying whether the wheel is painted plastic, hard rubber, Bakelite-style material, wood-rimmed, or leather-wrapped, because each one responds differently to repair products and refinishing methods. For most painted plastic or hard rubber wheels, the process begins with a thorough cleaning using wax and grease remover to strip away hand oils, silicone dressings, and old residue that can ruin adhesion. After cleaning, inspect the wheel closely for hairline cracks, deep splits, missing chunks, and loose spokes or trim.
Minor surface cracks can often be opened slightly, cleaned out, and filled with a quality two-part epoxy or specialty steering wheel repair compound. Deeper damage usually requires more careful shaping and sometimes reinforcing before filling. Once the repairs cure fully, the wheel should be block sanded by hand to preserve the original contours, finger grooves, and spoke transitions. This is where many DIY restorations go wrong: too much sanding can flatten details and make the wheel look obviously repaired. After shaping, apply a suitable primer for the substrate, sand again as needed, and then refinish with a durable interior-grade coating in the correct color and sheen.
If the wheel has structural damage, missing sections, severe warping, or valuable original construction, professional restoration is usually the better choice. A specialist can rebuild the wheel accurately, color match it, and preserve original design lines that are difficult to reproduce at home. The key is patience and compatibility: use repair materials, primers, and topcoats designed to work together, and never rush curing times. A properly restored steering wheel should not only look right but also feel smooth, solid, and natural in the driver’s hands.
Can interior trim pieces like plastic, painted panels, and brightwork be restored instead of replaced?
Yes, in many cases interior trim can and should be restored rather than replaced, especially on classic vehicles where original fit and grain are often better than what reproduction parts offer. Plastic trim panels, dash bezels, painted garnish moldings, and decorative brightwork can frequently be saved if they are cleaned, stabilized, and refinished correctly. Replacement is usually reserved for parts that are badly warped, broken beyond repair, missing large sections, or so degraded that they will not hold a finish.
The restoration process starts with careful removal so clips, tabs, and hidden edges are not damaged. Once off the car, each piece should be cleaned thoroughly to remove dust, dressing residue, nicotine, adhesive, and skin oils. Plastic parts often need a dedicated plastic prep solution and sometimes a light scuff to promote adhesion. If the trim has scratches, gouges, or small cracks, these can typically be repaired with flexible fillers or plastic repair compounds before primer and color. Painted metal trim may need rust removal, small dent correction, epoxy primer, and a topcoat matched to the original interior finish.
Brightwork is a category that deserves special care. Some trim that appears to be chrome is actually vacuum-metalized plastic, anodized aluminum, or polished stainless, and each requires a different strategy. Stainless can often be straightened and polished. Anodized or plated finishes may need specialist refinishing if they are badly worn. The most important rule is to avoid aggressive sanding or harsh chemicals until you know what material you are working with. Restoring original trim preserves authenticity, usually fits better, and often gives the cabin a more correct, cohesive look than mixing old components with lower-quality replacements.
How do you restore faded woodgrain trim and make it look original again?
Restoring woodgrain trim requires understanding whether the surface is real wood veneer, simulated woodgrain over metal or plastic, or a modern printed finish under clear coat. The restoration method changes completely based on that construction. Real veneer can sometimes be carefully stripped, repaired, stained, and recleared. Simulated woodgrain, common on many classic and later interiors, may need repainting, hydrographic transfer, specialty film application, or expert hand-finishing to recreate the original pattern.
Begin with a close inspection in good light. Look for peeling clear coat, lifting veneer edges, faded color, cracks in the substrate, water damage, and previous refinishing attempts. If it is genuine veneer, repairs often involve regluing loose sections, filling damaged substrate, lightly sanding only as much as necessary, and applying stain or toner to bring back depth and warmth before sealing with an automotive-grade clear suited for interior use. The finish needs to match the original gloss level; too glossy or too flat can immediately make the piece look incorrect.
For faux woodgrain trim, the challenge is duplicating the pattern, color tone, and transparency of the original design. Some restorers use specialty kits or printed films, while others airbrush grain effects by hand. The best results come from matching not just the brown tone but the full layered appearance, including lighter highlights and darker figuring. Once the grain effect is complete, a protective clear coat helps lock in the finish and improve durability. Because woodgrain is highly visible and easy to judge, test panels and color comparisons are worth the extra time. A successful restoration should blend naturally with the rest of the cabin and look intentional rather than freshly overdecorated.
What materials and tools are most important for steering wheel and trim restoration?
The most important materials are the ones that support proper cleaning, repair, adhesion, shaping, and finishing. At minimum, a solid restoration setup includes wax and grease remover, mild cleaners, lint-free towels, assorted sandpaper in appropriate grits, scuff pads, quality masking materials, plastic or epoxy repair compounds, flexible filler where needed, adhesion promoter for plastics, primer suited to the substrate, and a durable interior topcoat in the correct color and sheen. For brightwork or polished trim, you may also need metal polish, micro-abrasives, and specialized buffing supplies.
Useful tools include small spreaders for filler, detail sanding blocks, fine files, hobby picks for cleaning cracks, a heat gun used carefully on some plastics, polishing tools, and spray equipment or aerosol products from a reputable refinishing system. Good lighting is critical because flaws in texture, gloss, and color are much easier to correct before final assembly than after the parts go back in the car. If color matching matters, and it usually does, reference chips or a custom-matched coating can make a huge difference in the final appearance.
Just as important as the products themselves is choosing materials that are compatible. Problems like lifting, fisheyes, soft finishes, or peeling usually come from contamination or mismatched products layered on top of each other. It is also wise to keep test pieces or spray-out cards so you can confirm color and sheen before committing to a visible part. In restoration work, expensive tools help, but careful prep and disciplined product choice matter even more. Even a modest setup can produce excellent results when the process is methodical and the materials are used correctly.
How can you make a restored steering wheel and interior trim last as long as possible?
Longevity comes from three things: proper preparation, correct product selection, and sensible long-term care. A restored steering wheel or trim piece will only last if the surface was thoroughly cleaned, the substrate properly repaired, and the coatings applied over stable, compatible materials. Shortcuts in prep usually show up later as peeling paint, reopened cracks, dull spots, or soft finishes that wear quickly under normal use. That is why experienced restorers spend so much time on cleaning, test fitting, and surface correction before any color goes on.
Once the parts are refinished, cure time matters. Fresh coatings may feel dry to the touch long before they have reached full hardness. Reinstalling too early, gripping the wheel constantly, or cleaning aggressively in the first days can mark the finish and reduce durability. After full cure, routine care should be gentle. Avoid harsh solvents, abrasive pads, strong degreasers, and greasy shine products that attract dirt or soften certain finishes over time. Instead, use mild interior-safe cleaners and a soft microfiber cloth. On vehicles exposed to sun, heat, or humidity, UV protection and covered storage can dramatically extend the life of the restoration.
It also helps to address the reasons the original parts failed. If bright trim loosened because fasteners were damaged, repair the mounting points. If the wheel cracked from heat cycling, reduce future sun exposure when possible. If woodgrain faded, improve sealing and environmental protection. A lasting restoration is not just cosmetic; it corrects the underlying problems that caused wear in the first place. When done properly, restored steering wheels and trim can hold up for years while preserving the look, feel, and value of the vehicle’s interior.




