
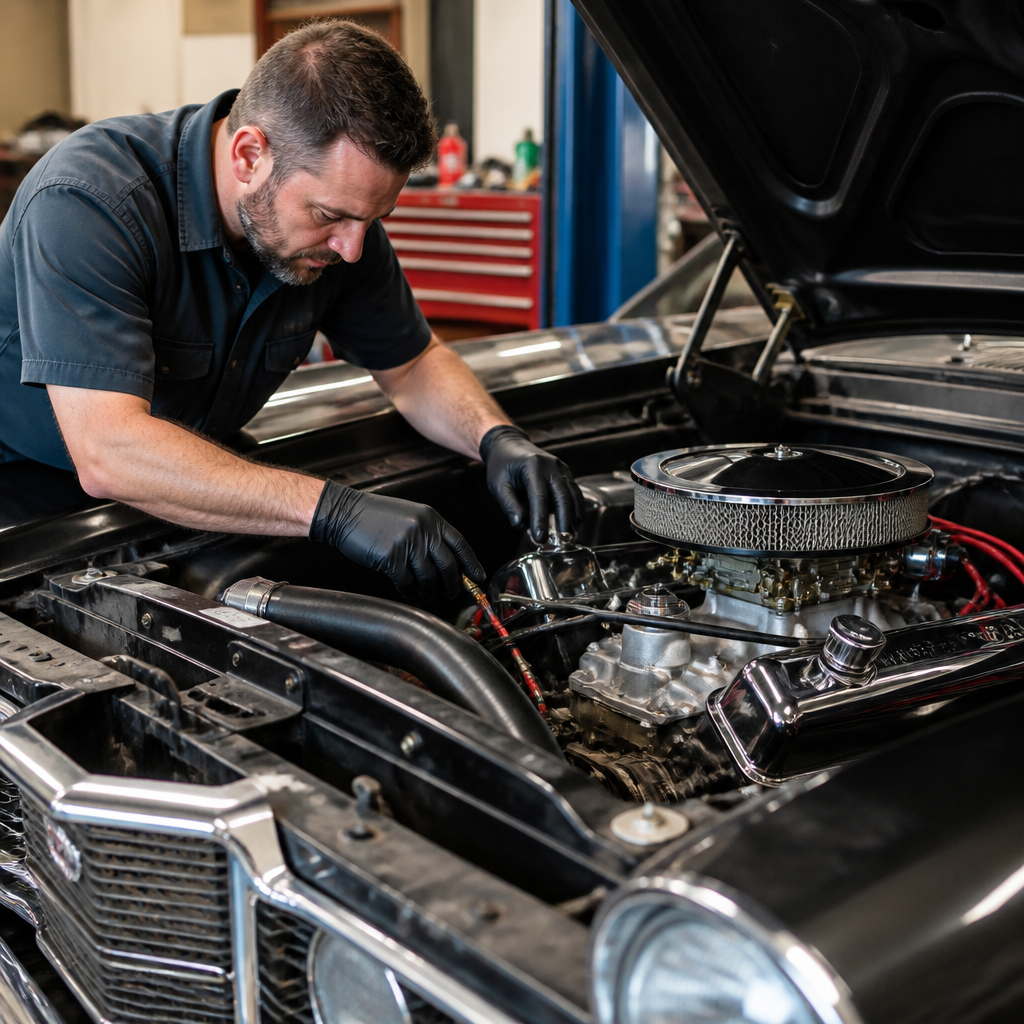
Upgrading a classic car engine safely starts with understanding that “safe” means more than preventing a dramatic failure on first startup. It means preserving structural integrity, matching power to braking and cooling capacity, protecting originality where it matters, and making every change reversible or well documented. In restoration and maintenance work, engine and mechanical upgrades sit at the point where reliability, drivability, value, and legality meet. A thoughtful upgrade can make a vintage car easier to start, cooler in traffic, cleaner running, and more enjoyable on modern roads. A rushed one can create overheating, detonation, driveline breakage, poor handling, insurance problems, and expensive rework.
Classic car engine upgrades cover a wide spectrum. Some owners keep the original block and improve breathing, ignition, and lubrication. Others build a period-correct performance engine, swap in a later factory unit, or install a fully modern crate engine. Mechanical work also extends beyond the engine itself to the fuel system, transmission, differential, driveshaft, suspension, steering, brakes, exhaust, and electrical charging. I have seen the best results come from treating the vehicle as a system, not a collection of parts. More power only helps when the rest of the car can support it consistently.
This hub article explains how to upgrade a classic car engine safely, with the broader engine and mechanical work in view. It defines the main decisions, shows where owners get into trouble, and outlines the supporting modifications that turn an ambitious build into a dependable one. If you are planning a mild tune-up, a stroker build, a V8 swap, or a reliability-focused refresh, the same principles apply: inspect first, set a clear target, choose compatible components, measure carefully, and validate every change with testing. That approach protects both the car and the budget.
Start with a clear goal and a complete inspection
The safest engine upgrade begins before any parts are ordered. Define the car’s intended use in plain terms: weekend cruiser, long-distance tourer, local show car, occasional drag car, autocross build, or daily driver. That single choice determines compression ratio, camshaft profile, gearing, cooling demands, fuel octane needs, idle quality, and transmission selection. A 1960s muscle car that sees highway trips needs different mechanical priorities than a lightly used concours restoration or a stoplight-to-stoplight street machine.
Inspection comes next. Perform a compression test and, ideally, a leak-down test to evaluate ring seal and valve condition. Check oil pressure hot and cold, inspect spark plugs for mixture and combustion clues, and verify timing stability with a light. Pull coolant samples if the car has sat for years, inspect for rust scale in the radiator, and look for signs of head gasket seepage. On the chassis side, inspect engine mounts, crossmembers, steering linkage, ball joints, bushings, wheel bearings, brake lines, hoses, and frame rails. Many classics hide corrosion around suspension pick-up points and boxed sections. More torque will expose those weaknesses immediately.
Documentation matters as much as wrenching. Confirm casting numbers, stamped engine codes, transmission type, rear axle ratio, and whether the car still has its original driveline. Matching-numbers cars often justify a more conservative approach because resale value may depend on originality. In those cases, owners frequently preserve the factory engine and make bolt-on changes that can be reversed later. If originality is already gone, the upgrade path broadens. Either way, baseline records, photos, and measured data prevent confusion once the project expands.
Choose the right upgrade path for the car
There is no single best classic car engine upgrade. The right path depends on the car’s value, intended use, budget, parts availability, and your willingness to modify surrounding systems. For most owners, the choices fall into three categories: restore and optimize the original engine, build a stronger version of the original architecture, or swap to a different engine. Each has mechanical and financial tradeoffs.
Restoring and optimizing the original engine is often the safest route. A rebuilt stock or near-stock engine with improved ignition, a modern aluminum radiator, hardened valve seats for unleaded fuel where appropriate, and a well-calibrated carburetor or discreet fuel injection can transform a tired classic. This route usually preserves fitment, keeps accessory alignment simple, and avoids cutting the car. It is especially effective for cruisers where reliability matters more than dyno numbers.
Building a stronger version of the original engine suits owners who want more torque without changing the car’s character. Common examples include a small-block Chevrolet with better heads and a hydraulic roller cam, a Ford FE with improved oiling attention, or a B-series or A-series British engine with upgraded carburation and balanced rotating assembly. Safe gains come from airflow, compression matched to fuel, and precise machining, not from oversized claims on parts boxes.
Engine swaps deliver the largest performance gains but introduce the most complexity. A later LS, Ford Modular or Coyote, Gen III Hemi, or modern four-cylinder may offer power, efficiency, and parts support, but fitment, wiring, emissions compliance, cooling, and driveline geometry become critical. In my experience, swap problems usually come from underestimating packaging and support systems, not from the engine itself.
| Upgrade path | Best for | Main benefits | Main risks |
|---|---|---|---|
| Stock rebuild with selective upgrades | Touring, originality-conscious owners | Reliability, value retention, simpler fit | Limited peak power, hidden wear if inspection is rushed |
| Performance build of original engine family | Drivers wanting period character with more output | Better torque, familiar appearance, broad parts support | Heat, fuel sensitivity, driveline stress if overbuilt |
| Modern or different-engine swap | Restomod projects, frequent driving | Power, efficiency, aftermarket support | Fabrication demands, legal issues, integration failures |
Build the engine around durability, not just horsepower
Safe power comes from balanced components and precise machine work. Start with block integrity. Have the block cleaned, magnafluxed, and measured for bore wear, deck flatness, and main housing alignment. Crankshafts should be checked for cracks, journal taper, and proper fillet condition. Rods need resizing and bolt evaluation. Pistons must match intended compression ratio, quench distance, and fuel quality. On vintage engines, poor machine work ruins more builds than ambitious camshafts do.
Compression ratio should match combustion chamber design and the fuel you can actually buy. Many owners read old magazine combinations that assumed leaded premium or ideal weather. Today, tight quench, efficient chambers, correct ignition timing, and realistic dynamic compression matter more. If the car will run on pump fuel in traffic, a conservative compression target and careful tune are safer than chasing a high static number that rattles under load.
Camshaft choice should support the car’s gearing, converter or clutch, intake design, and intended rpm range. A cam that sounds aggressive at idle can make a heavy classic miserable in real traffic by reducing vacuum, softening low-speed torque, and hurting brake booster performance. I routinely advise owners to choose the smallest cam that meets the goal. The result is easier tuning, better throttle response, lower heat, and longer valvetrain life.
Do not ignore oiling and lubrication. Classic engines often benefit from improved oil pumps, baffled pans, windage control, and modern bearing materials, but these upgrades require clearances to be measured correctly with micrometers and bore gauges, not guessed with broad assumptions. Pre-lubricate before startup, use assembly lube where appropriate, and prime the oiling system. Flat-tappet engines demand compatible oil chemistry with adequate zinc and phosphorus, especially during break-in. That detail alone has saved countless camshafts.
Support the upgrade with cooling, fuel, ignition, and exhaust systems
Most engine upgrades fail in traffic, not on a dyno. Cooling system capacity must rise with output, compression, and vehicle use. A clean radiator with sufficient core area, proper fan shrouding, a tested thermostat, good hoses, and a water pump matched to pulley ratio are essential. Electric fans can help, but they are not a cure for poor airflow management. In many classics, a properly shrouded mechanical fan and a healthy radiator outperform a generic electric setup.
Fuel delivery must be sized for both demand and control. Carbureted engines need the correct fuel pressure, float level, jetting, and heat management to prevent percolation. Return-style fuel systems reduce vapor issues in hot weather. Electronic fuel injection offers excellent cold starts and altitude compensation, but retrofit systems still depend on proper sensor placement, fuel pump wiring, return plumbing, and ignition signal quality. Whether carbureted or injected, use quality hose rated for modern ethanol-blended fuel.
Ignition upgrades are among the best reliability improvements. Recurving a distributor, replacing worn advance mechanisms, using a stable ignition module, and selecting the correct coil and plug heat range can improve starting, drivability, and engine safety immediately. Detonation often comes from timing errors, lean mixtures, or excessive heat, so ignition work should always be paired with fuel and cooling checks. “Set it by ear” is not an acceptable method on a valuable classic; use timing lights, vacuum gauges, and, where possible, wideband oxygen data.
Exhaust design affects power and temperature. Tube size, header length, collector design, crossover balance, and muffler restriction all matter. Oversized exhaust systems can reduce velocity and hurt low-end response. Tight engine bays also create starter heat soak and brake line exposure, so use shielding and routing discipline. A safe upgrade leaves room for service access and does not cook nearby components.
Upgrade the rest of the drivetrain, chassis, and controls
A stronger engine will quickly reveal weak links downstream. The clutch, torque converter, transmission, driveshaft, U-joints, differential, and axle shafts must be assessed as a set. If you add 150 horsepower to a car with a tired three-speed automatic, glazed clutch packs, and original universal joints, the engine will not be the first thing to fail. Gear ratio changes can also improve drivability more than peak horsepower can. A numerically lower highway gear paired with overdrive may make a touring classic quieter, cooler, and more efficient.
Brakes and suspension are safety items, not optional “later” upgrades. More speed requires better repeated stopping power. At minimum, ensure the drum or disc system is fully rebuilt, flexible hoses are new, hard lines are sound, wheel cylinders or calipers are fresh, and the master cylinder is appropriate for the setup. Many classics benefit from front disc conversions, dual-circuit master cylinders, and modern friction materials. Suspension bushings, shocks, springs, sway bars, and alignment settings should support the added performance without making the car harsh or twitchy.
Steering and tires deserve equal attention. Wider, stickier tires increase grip but also expose worn steering boxes, idlers, tie rods, and alignment problems. Tire diameter affects gearing and speedometer accuracy, while wheel offset influences scrub radius and clearance. Engine swap projects often require revised weight distribution planning, spring rates, and corner-weight checks to avoid a car that feels nose-heavy and inconsistent.
Electrical systems are the final integration point. Higher-output ignition, electric fans, fuel pumps, and EFI all demand adequate alternator output, relay control, proper grounds, and protected wiring. Brittle original harnesses are a fire risk. Safe builds use fused circuits, secure routing, abrasion protection, and voltage-drop testing.
Test methodically, document everything, and know the legal limits
Final assembly is only the midpoint. Safe engine and mechanical work ends with staged testing. Use a pre-start checklist covering fluid levels, fuel leaks, ignition timing, throttle return, cooling fan operation, and charging voltage. On first start, watch oil pressure immediately, verify coolant circulation, and check for leaks under load and heat. If the engine is new, follow the correct break-in procedure for the valvetrain type, rings, and oil specification. Then retorque and recheck as required by the component manufacturer.
Road testing should progress from low-load neighborhood driving to full operating temperature, then highway speeds, then sustained load. Listen for detonation, driveline vibration, brake pull, temperature creep, and fuel starvation. Use objective tools: infrared thermometers, wideband oxygen sensors, vacuum readings, and data logging where available. Chassis dyno tuning is often money well spent because it reveals air-fuel and timing issues that seat-of-the-pants impressions miss.
Keep thorough records of part numbers, clearances, torque values, tune settings, and wiring changes. This is the foundation of future maintenance and protects the car’s value. Also verify emissions rules, engine swap regulations, noise laws, and insurance requirements in your area before the build starts. Legal compliance is part of doing the job safely and properly.
Classic car engine upgrades succeed when every decision supports the whole vehicle. Define the goal, inspect honestly, choose a realistic upgrade path, prioritize machine work and tuning, and reinforce the systems around the engine. That is how you gain reliability, usable performance, and confidence on modern roads without sacrificing the character that made the car worth saving. Use this hub as your starting point for every engine and mechanical work decision, then plan the next step before buying the first part.
Frequently Asked Questions
What does “safely” upgrading a classic car engine actually mean?
Safely upgrading a classic car engine means looking beyond simple horsepower gains and treating the car as a complete mechanical system. A safe upgrade should protect the vehicle’s structural integrity, maintain predictable drivability, and ensure that added power does not overwhelm the brakes, suspension, steering, cooling system, transmission, or rear axle. In practical terms, that means evaluating whether the chassis can handle the extra stress, whether the cooling system can control additional heat, and whether the fuel and ignition systems are appropriate for the new setup. It also means avoiding modifications that create hidden weaknesses, such as poor engine mount geometry, inadequate wiring, or mismatched driveline angles.
Safety also includes preserving what makes the car valuable and usable over time. For many owners, that means choosing upgrades that are reversible, minimally invasive, and well documented. A carefully planned engine build with clear records, original parts retained, and visible changes kept tasteful can improve reliability without permanently diminishing originality. Finally, “safe” includes legal and insurance considerations. Depending on where the car is registered, emissions, inspection, and registration rules may apply even to older vehicles. The smartest upgrades improve reliability, drivability, and confidence while keeping the car compliant, insurable, and easy to maintain in the future.
How much power can a classic car safely handle without causing problems elsewhere?
There is no universal number because safe power limits depend on the specific car’s weight, chassis design, brake capacity, suspension geometry, axle strength, transmission, tire quality, and intended use. A modest power increase in a light classic with weak drum brakes and a flexible chassis can create more real-world risk than a larger increase in a better-engineered platform with factory disc brakes and a stronger driveline. That is why experienced builders usually start by assessing the car’s weakest links before deciding on an engine upgrade path. The goal is not to find the biggest engine that fits, but the most balanced combination the entire vehicle can support reliably.
As a rule, incremental upgrades are much safer than dramatic jumps. A well-tuned engine with improved ignition, a mild camshaft, better carburetion or fuel delivery, and sensible compression can often transform drivability without overstressing the rest of the car. If power climbs significantly, supporting systems should be upgraded at the same time. That typically includes better brakes, modern tires in appropriate sizes, improved cooling, stronger engine and transmission mounts, and close inspection of the driveshaft, differential, and suspension bushings. A classic car that starts easily, runs cool, stops straight, and behaves predictably is almost always a better result than one with impressive peak power but poor manners and compromised reliability.
Which supporting systems should be upgraded along with the engine?
The most important supporting systems are cooling, braking, fuel delivery, ignition, drivetrain, suspension, and electrical. Cooling is often the first area that gets overlooked. More power creates more heat, and older radiators, water pumps, fan systems, and hoses may already be operating near their limits. A safe engine upgrade should include a realistic heat-management plan, which may involve a recored radiator, shroud, properly matched fan, fresh hoses, correct thermostat selection, and confirmation that ignition timing and air-fuel ratios are not contributing to excess heat. Overheating is one of the fastest ways to shorten the life of a newly upgraded engine.
Brakes are equally critical. If acceleration improves but stopping distances do not, the car becomes less safe immediately. Depending on the vehicle, that may mean rebuilding the existing braking system to factory-new condition, converting to front discs, improving pad or shoe material, replacing old rubber lines, and ensuring the master cylinder and proportioning are correct. Beyond that, the fuel system must supply the engine consistently and safely, the ignition system must provide stable spark without fragile wiring, and the transmission, clutch, differential, and axle shafts must be capable of handling the new torque load. Suspension and steering should not be ignored either. Worn bushings, tired shocks, loose steering components, and poor alignment can make a newly powerful car feel unstable. The best engine upgrades are supported by a full-vehicle approach rather than a dyno-focused parts list.
How can I upgrade the engine without hurting the classic car’s originality and value?
The safest approach for value preservation is to make upgrades that are either invisible, period-appropriate, or easily reversible. That often means avoiding irreversible cutting, welding, or bracket changes unless absolutely necessary. If the car has a rare, numbers-matching engine or historically important configuration, many owners choose reliability-oriented improvements rather than major performance modifications. Examples include better internal balancing, improved cooling, upgraded ignition components hidden in stock housings, carefully selected cam profiles, or carburetor recalibration that preserves the original appearance. Even when more substantial changes are made, keeping the factory intake, exhaust manifolds, air cleaner, carburetor, distributor, and other removed parts can protect future resale options.
Documentation matters almost as much as the hardware itself. Keep receipts, part numbers, dyno sheets if applicable, photographs of the process, machine shop specifications, and notes explaining why each change was made. Future buyers and appraisers respond much better to a classic car with a transparent, professionally thought-out upgrade path than to one with undocumented modifications. It is also wise to avoid trends that may age poorly and instead focus on upgrades that improve reliability and drivability in a way that respects the car’s era. A classic that retains its identity while benefiting from better starting, cooler running, smoother power delivery, and easier maintenance often holds appeal better than one heavily modified beyond recognition.
What is the safest way to plan and test a classic car engine upgrade before regular driving?
The safest process begins with a written plan. Before buying parts, define the car’s purpose: weekend cruiser, touring car, show car, or occasional spirited driver. From there, confirm compression goals, fuel requirements, camshaft characteristics, cooling needs, transmission compatibility, rear gearing, and brake capacity. Measure everything, especially engine bay clearances, mount locations, exhaust routing, hood clearance, and driveline angles. It is also smart to inspect the car thoroughly for rust, cracked mounts, weak crossmembers, old fuel hoses, degraded wiring, and worn steering or suspension parts. Many problems blamed on “the new engine” are really old vehicle issues exposed by increased performance.
Once assembled, testing should be methodical rather than rushed. Prime the oiling system, verify fuel pressure, check timing, confirm there are no leaks, and use correct break-in procedures where applicable. Monitor oil pressure, coolant temperature, charging voltage, and air-fuel behavior from the first startup onward. After initial running, recheck fasteners, belts, hose clamps, ignition timing, and fluid levels. Begin road testing with short, low-load drives close to home, focusing on cooling performance, braking behavior, vibration, steering response, clutch or shift feel, and any signs of detonation or driveline stress. If possible, tune on a chassis dyno or with professional instrumentation so the engine is not guessed into a safe state. A careful step-by-step testing process reduces the chance of damaging parts, improves reliability, and gives you confidence that the upgraded classic is truly safe to enjoy on the road.




