
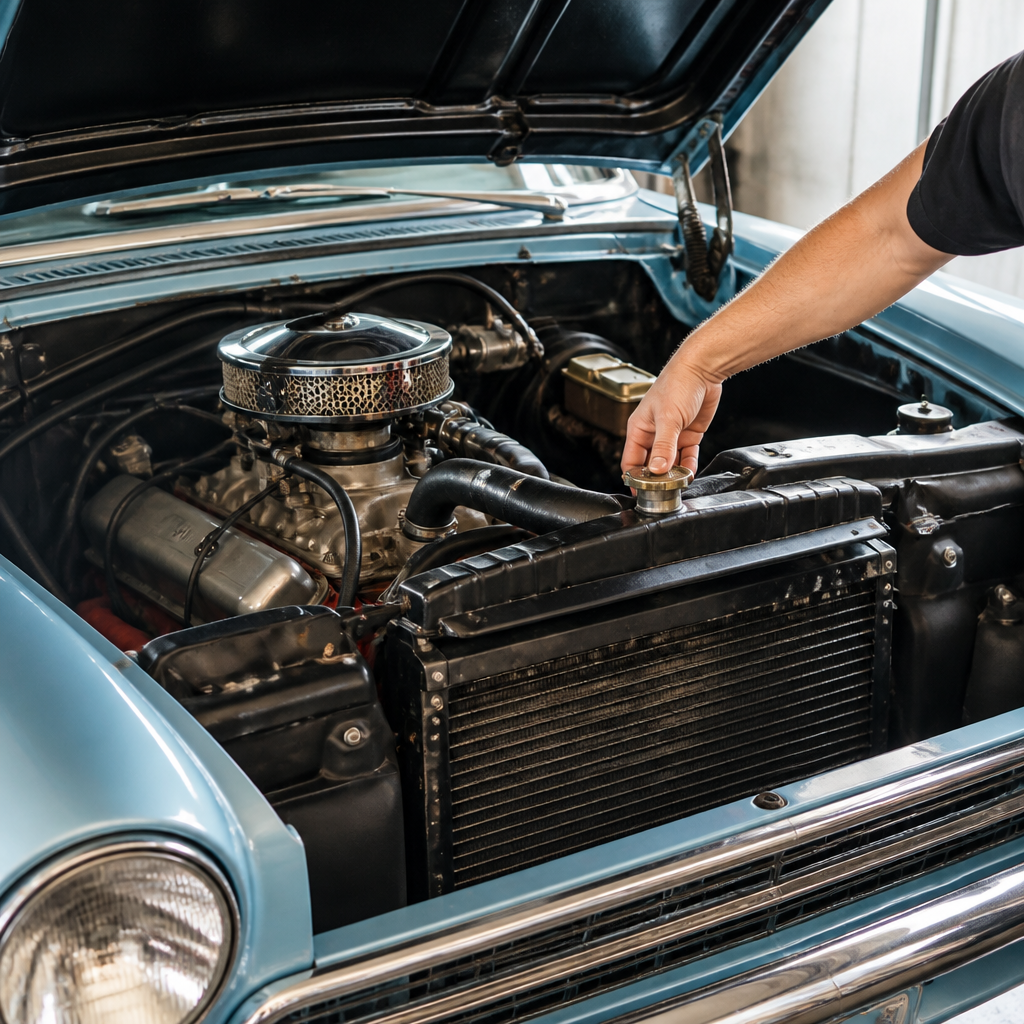
Cooling systems in classic cars demand more attention than modern drivers usually expect, because older engines, materials, and underhood packaging were designed around different fuels, traffic patterns, and service habits. In restoration shops and long-term maintenance programs, I have seen overheating blamed on radiators when the real cause was timing, lean carburetor calibration, a slipping fan belt, or rust packed deep inside a block water jacket. Understanding how a classic car cooling system works is the foundation for preserving drivability, protecting engine components, and planning smart engine and mechanical work across a broader restoration project.
A classic car cooling system is the network of parts that controls engine temperature by moving coolant through the block, heads, radiator, hoses, heater core, and in many cases a thermostat, fan, water pump, and pressure cap. Its purpose is not to keep the engine as cool as possible. Its purpose is to keep the engine within a stable operating range where oil lubricates correctly, fuel vaporizes predictably, metals expand as intended, and detonation risk stays under control. On most vintage street engines, that practical operating range is typically around 180 to 205 degrees Fahrenheit, though the right target depends on combustion chamber design, ignition settings, compression ratio, and local climate.
This matters because heat is one of the main reasons restored engines fail early. Chronic overheating can warp cylinder heads, weaken head gaskets, accelerate oil oxidation, damage pistons, and create hot-start issues that owners often mistake for ignition faults. Running too cold is not harmless either. Engines that never reach temperature can suffer sludge formation, poor fuel atomization, increased cylinder wear, and weak cabin heat. For anyone working through restoration and maintenance, cooling system care sits at the center of engine and mechanical work. It connects directly to belts, pulleys, ignition timing, radiator support alignment, heater function, freeze protection, and the long-term health of cast iron, brass, aluminum, solder joints, and gasket materials.
As a hub topic, cooling systems also serve as the practical link between related engine and mechanical work tasks. If you are rebuilding a small-block V8, diagnosing an inline-six that runs hot at idle, replacing a heater core on a muscle car, or deciding whether to retain a stock fan shroud, you are dealing with a system rather than a single component. The best maintenance approach is to inspect, test, and service every part as a matched package. That method saves money, reduces repeat labor, and prevents the familiar cycle where one new part is installed into a neglected system and then blamed when temperatures still climb.
How a Classic Car Cooling System Works
Every liquid-cooled classic engine follows the same basic path. The water pump circulates coolant through passages in the block and heads, where heat transfers from metal into the coolant. The thermostat regulates flow to the radiator. Once the thermostat opens, hot coolant moves to the radiator, air passes through the fins, and heat leaves the system. The pressure cap raises boiling point by pressurizing the system, while hoses, clamps, and the heater circuit complete the loop. In many older vehicles, fan airflow at low road speed is handled by a belt-driven mechanical fan, often supported by a shroud. Some later classics and modified restorations may use electric fans, but airflow management remains just as important as coolant flow.
That simple description hides important differences among older vehicles. Many prewar and early postwar cars used low-pressure systems. Some engines have bypass-style thermostat arrangements that require the correct thermostat design, not just the correct temperature rating. Reverse-rotation water pumps on serpentine conversions can cause immediate overheating if installed incorrectly. Copper-brass radiators behave differently from aluminum replacements, particularly in repairability and original appearance. Even the coolant path through certain V8 intake manifolds can influence warm-up speed and hot-spot control. Knowing the architecture of your specific engine family is essential before ordering parts or making modifications.
Common Cooling Problems in Classic Cars
The most common problems fall into five groups: restricted coolant flow, inadequate airflow, poor pressure control, incorrect tune, and internal contamination. Restricted flow usually comes from scale in the radiator, rust sediment in the block, collapsing lower hoses without internal springs, or worn water pump impellers. Inadequate airflow often traces to missing fan shrouds, incorrect fan spacing, clogged radiator fins, bent core supports, or debris between the condenser and radiator on air-conditioned cars. Poor pressure control comes from the wrong radiator cap, damaged sealing surfaces, or leaks that prevent pressure from building. Incorrect tune includes retarded ignition timing, lean mixtures, vacuum leaks, and sometimes an over-advanced curve that creates detonation heat. Internal contamination includes oil in coolant, combustion gases entering the system, and old coolant that has lost corrosion inhibitors.
A useful pattern appears in diagnosis. If a car runs cool at highway speed but hot in traffic, suspect airflow first. If it runs hot at speed, suspect restricted coolant flow, tune, or radiator efficiency. If it pushes coolant out after shutdown, consider cap issues, overfilled non-recovery systems, or combustion leakage. If the gauge swings suddenly, think thermostat, sender, grounding, or low coolant level. These distinctions matter because they keep you from replacing good parts. I have tested many original radiators that were still serviceable after proper cleaning, and I have also seen shiny new aluminum radiators fail to cure an engine with late ignition timing and a weak vacuum advance unit.
Inspection Checklist for Reliable Cooling Performance
A proper inspection starts cold. Check coolant level, color, smell, and signs of oil contamination. Look for white or rusty deposits around hose connections, pump weep holes, freeze plugs, intake manifold corners, and radiator seams. Squeeze hoses to feel for softness, cracking, or internal separation. Verify clamp type and placement. Inspect the fan belt for glazing and confirm pulley alignment. On mechanical fans, check blade condition, fan-to-shroud placement, and clutch resistance where fitted. On electric fans, confirm relay operation, sensor placement, fuse sizing, and airflow direction. Then inspect the radiator externally for blocked fins, damaged tubes, and evidence of previous repair.
Next, test the system. A cooling system pressure tester quickly reveals external leaks and weak cap performance. An infrared thermometer helps compare inlet and outlet temperatures across the radiator and identify cold spots that suggest plugged tubes. A block tester can detect combustion gases in the coolant. On engines with a temperature sender in the intake manifold or cylinder head, compare dash gauge readings to measured surface temperatures before trusting the instrument panel. Many classic car overheating stories begin with inaccurate gauges or poor grounds. Finally, inspect related mechanical settings. Confirm ignition timing with the vacuum advance disconnected when required by the factory procedure, check dwell on point-triggered systems, verify carburetor mixture and idle speed, and make sure the heat riser is not stuck in a position that adds excessive intake heat.
Maintenance Intervals and Service Priorities
Classic cars often accumulate low annual mileage, but low mileage does not reduce cooling system aging. Coolant chemistry degrades with time, rubber hardens, solder joints fatigue, and corrosion continues while the car sits. A sensible baseline is to inspect the system at the start of every driving season, pressure test it before long trips, and change coolant every two to five years depending on coolant type, water quality, and storage conditions. Belts and hoses should be replaced based on age and condition, not just miles. Thermostats and radiator caps are inexpensive enough to renew during major service if their history is unknown.
| Component | What to Check | Typical Service Timing | Why It Matters |
|---|---|---|---|
| Coolant | Freeze protection, pH, contamination, color | Every season; replace every 2–5 years | Maintains corrosion protection and boiling margin |
| Hoses and clamps | Cracks, swelling, softness, clamp tension | Inspect annually; replace by age or damage | Prevents leaks and suction collapse |
| Radiator cap | Correct pressure rating, seal condition | Test annually; replace if doubtful | Controls boiling point and coolant recovery |
| Thermostat | Opening temperature, correct design | Test during service; replace when history is unknown | Stabilizes warm-up and coolant circulation |
| Water pump and belt | Bearing play, seepage, belt wear and tension | Inspect every service interval | Ensures dependable coolant flow |
| Fan, shroud, and radiator fins | Clearance, damage, airflow obstruction | Inspect annually and after body work | Critical for idle and low-speed cooling |
When bringing a newly purchased classic into your maintenance program, assume nothing. Drain the system, remove the thermostat housing, inspect the thermostat type, flush the block, and verify the cap rating against factory specifications or a well-engineered upgrade plan. If the car has been modified with aftermarket heads, intake, air conditioning, or a transmission cooler, review the whole cooling strategy rather than treating the radiator as a universal fix.
Choosing Coolant, Thermostats, Radiators, and Fans
The right coolant choice starts with material compatibility and intended use. For many classics with cast-iron blocks, cast-iron heads, and copper-brass radiators, a high-quality ethylene glycol coolant mixed with distilled water remains the standard choice. Distilled water matters because mineral-rich tap water can leave deposits that reduce heat transfer. A 50/50 mix is suitable for most street cars, though very warm climates and storage patterns may justify slight adjustments within safe corrosion-protection limits. Extended-life coolants can work, but mixing incompatible chemistries is a common mistake. If the system’s history is uncertain, a complete drain and flush is safer than topping off with whatever is on the shelf.
Thermostat selection is often misunderstood. A cooler thermostat does not cure an overheating car. It only changes the opening point. If the system cannot reject heat, the engine will still overheat, sometimes more slowly. Use the correct physical design and temperature range recommended for the engine’s intended service. In many vintage V8s, a 180-degree thermostat is an effective street compromise. Radiator decisions require similar discipline. A properly rebuilt original copper-brass radiator with correct tube count and fin density can cool very well while preserving factory appearance. Aluminum radiators can offer excellent performance, but fitment, fan shroud compatibility, and hose neck placement must be right. More rows do not automatically mean better cooling if airflow suffers. Fan upgrades also need context. A stock seven-blade mechanical fan with the proper shroud can outperform a poorly mounted electric fan setup, especially in heavy cars with tight engine bays.
How Cooling Systems Connect to Broader Engine and Mechanical Work
Cooling systems do not operate in isolation, which is why this subject belongs at the center of engine and mechanical work. Ignition timing directly affects combustion heat. Fuel mixture changes exhaust gas temperature and chamber temperature. Compression ratio, quench distance, and spark curve shape influence detonation tendency. Belt routing affects pump speed. Pulley diameter changes can improve or hurt idle cooling. Automatic transmission heat enters the radiator through integrated coolers, and dragging brakes can make a car appear to have a cooling problem when the engine is actually working against excess load.
During restorations, I treat cooling system planning as part of the whole powertrain package. If an engine is rebuilt with higher compression, a more aggressive camshaft, air conditioning, and taller rear gearing for highway cruising, the original cooling margin may disappear. The answer may involve recoring the radiator, restoring fan shroud geometry, calibrating ignition advance, confirming vacuum advance operation, and ensuring the lower hose contains the proper anti-collapse spring. This systems view also guides internal linking across a restoration and maintenance content hub: radiator service, water pump replacement, heater core repair, ignition timing setup, carburetor tuning, fan clutch diagnosis, freeze plug replacement, and engine break-in all connect naturally because each affects operating temperature and reliability.
Practical Troubleshooting and Long-Term Preservation
The most effective troubleshooting sequence is orderly and evidence-based. First confirm that the engine is truly overheating with a reliable thermometer. Second verify coolant level and cap function. Third inspect airflow, including shroud coverage, fan spacing, and fin cleanliness. Fourth test thermostat operation and radiator temperature drop. Fifth check timing, advance mechanisms, and fuel mixture. Sixth investigate internal blockage or combustion leakage if symptoms persist. This order prevents expensive guessing. It also mirrors how experienced shops protect customer budgets: measure before replacing.
Long-term preservation depends on use as much as parts. Cars that sit for months should be started and brought to full operating temperature only when they can be driven long enough to evaporate moisture. Storage areas should protect against freezing if coolant strength is uncertain. Any engine with plain water left in the block, even briefly, is at risk from corrosion and freeze damage. Keep maintenance records showing coolant type, thermostat rating, cap pressure, service dates, and any non-stock components. Those notes become valuable when diagnosing future issues or handing the car to another technician. For owners building a durable restoration and maintenance plan, the payoff is straightforward: a sound cooling system protects the engine, improves confidence in traffic, supports every other area of engine and mechanical work, and makes a classic car far more enjoyable to drive. Inspect it thoroughly, service it methodically, and use this hub as the starting point for deeper work across the rest of your project.
Frequently Asked Questions
Why do classic cars overheat even after the radiator has been repaired or replaced?
That is one of the most common and most misunderstood cooling complaints in older cars. A radiator can absolutely be part of the problem, but in many classic vehicles it is only one piece of a larger system that has to work in balance. If the ignition timing is too far retarded, combustion heat rises and the engine runs hotter than it should. If the carburetor is calibrated too lean, cylinder temperatures increase and the cooling system ends up trying to manage heat it was never meant to absorb. A loose or glazed fan belt can reduce water pump speed and fan efficiency, especially at idle, where many classic cars struggle the most. Internal rust and scale in the block water jackets can also restrict coolant flow so badly that even a clean radiator cannot do its job.
It is also important to remember that many classic cars were engineered for a different era. They were built around lower average road speeds, less stop-and-go traffic, and regular service routines that owners followed more closely than many people do today. Underhood temperatures can rise significantly in modern driving conditions, especially with ethanol-blended fuel, hot ambient temperatures, and extended idling. That means a car can have a “good” radiator and still overheat because the thermostat is incorrect, the fan shroud is missing, the hoses are collapsing internally, or the engine tune is off. The right approach is to diagnose the system as a whole instead of assuming the radiator is always the culprit.
How often should the cooling system in a classic car be serviced?
Classic car cooling systems should be inspected more often than those in modern vehicles, even if the car is driven only occasionally. At a minimum, coolant level, hose condition, belt tension, and visible leaks should be checked several times during the driving season. A more complete inspection once a year is a smart baseline, especially before summer use. That inspection should include testing coolant strength, checking the radiator cap, inspecting the water pump for seepage or bearing play, making sure the thermostat is operating correctly, and confirming that the fan, clutch, or mechanical drive components are functioning as intended.
Coolant itself should not be left in the engine indefinitely simply because the car has low mileage. In collector vehicles, time often matters more than miles. Corrosion inhibitors in coolant break down with age, and older cast-iron blocks, brass radiators, and soldered joints are particularly vulnerable when coolant chemistry is neglected. In many cases, changing coolant every two to three years is a sensible interval, though the exact schedule depends on coolant type, component materials, and how the car is stored and used. If the vehicle has an unknown maintenance history, flushing and inspecting the system early is usually the safest move. Preventive service is far less expensive than repairing freeze damage, internal corrosion, or chronic overheating later.
What is the best coolant to use in a classic car?
The best coolant for a classic car is not always the newest or most heavily marketed formula. What matters is compatibility with the engine and cooling system materials. Many classic cars use cast iron, copper, brass, and soldered components that may not respond well to every modern extended-life coolant chemistry. In most cases, a high-quality ethylene glycol antifreeze mixed with distilled water in the proper ratio works very well, provided it is suitable for older systems and changed on a realistic service schedule. Distilled water is important because tap water can introduce minerals that promote scale buildup inside the radiator and block.
Owners should also be cautious about mixing different coolant types unless the product specifically allows it. Mixing formulations can reduce corrosion protection or create sludge in neglected systems. If the car is undergoing a restoration or major service, it is a good idea to choose one coolant type, flush thoroughly, and stay consistent. In moderate climates, a 50/50 mix is common and effective, but some applications benefit from adjusting the ratio slightly depending on freeze protection needs and heat transfer priorities. Supplemental additives can help in some engines, but they are not substitutes for proper cleaning, correct mixture, and sound mechanical condition. When in doubt, the safest path is to match the coolant choice to the vehicle’s materials and the advice of a trusted specialist familiar with vintage cooling systems.
How can I tell if rust and scale inside the engine are causing cooling problems?
Internal rust and scale are extremely common in classic engines, especially those that sat for years, ran on neglected coolant, or were filled with plain water at some point in their lives. One warning sign is a cooling system that seems to have adequate coolant level and an apparently serviceable radiator but still runs hot, particularly under load. Another clue is discolored coolant, recurring sediment in the radiator neck, or a system that clogs radiators and heater cores repeatedly. Uneven engine temperatures can also point to restricted water jackets, where some areas of the block transfer heat poorly because rust deposits have built up deep inside passages.
Diagnosis usually requires more than a quick look from the top of the radiator. A professional may inspect flow, remove drain plugs from the block to check for packed debris, use an infrared thermometer to identify hot spots, or evaluate what comes out during a flush. In more severe cases, the engine may need thorough chemical cleaning or even disassembly to remove hardened scale. This is why flushing alone does not always “fix” an old cooling system. If rust has compacted in low areas of the block, coolant can circulate around the problem without truly clearing it. Long-term reliability comes from restoring flow through the entire system, not just making the coolant look cleaner in the radiator.
What maintenance steps make the biggest difference in preventing overheating in a classic car?
The most effective strategy is to treat the cooling system as part of the engine’s total operating condition rather than as an isolated set of hoses and a radiator. Start with the basics: keep the coolant fresh and properly mixed, use distilled water, inspect belts and hoses regularly, and make sure the radiator cap holds the correct pressure. Verify that the thermostat is the proper temperature rating and that it actually opens when it should. Confirm that the fan, fan clutch if equipped, and shroud are correct for the application and in good condition. A missing shroud or incorrect fan spacing can hurt low-speed cooling far more than many owners realize.
Just as important, keep the engine in proper tune. Set ignition timing accurately, including checking advance function, because poor timing can create excess heat very quickly. Make sure the carburetor is not running lean and that the fuel system is delivering properly under load. Check for exhaust restrictions, slipping belts, collapsing lower radiator hoses, and water pump issues. Also pay attention to the outside of the radiator and condenser area if the car has air conditioning, since dirt, bugs, and debris can restrict airflow. When all of these factors are addressed together, most classic cars become far more predictable and dependable in warm weather. Consistent inspection and small corrections early are what prevent major overheating episodes later.




