
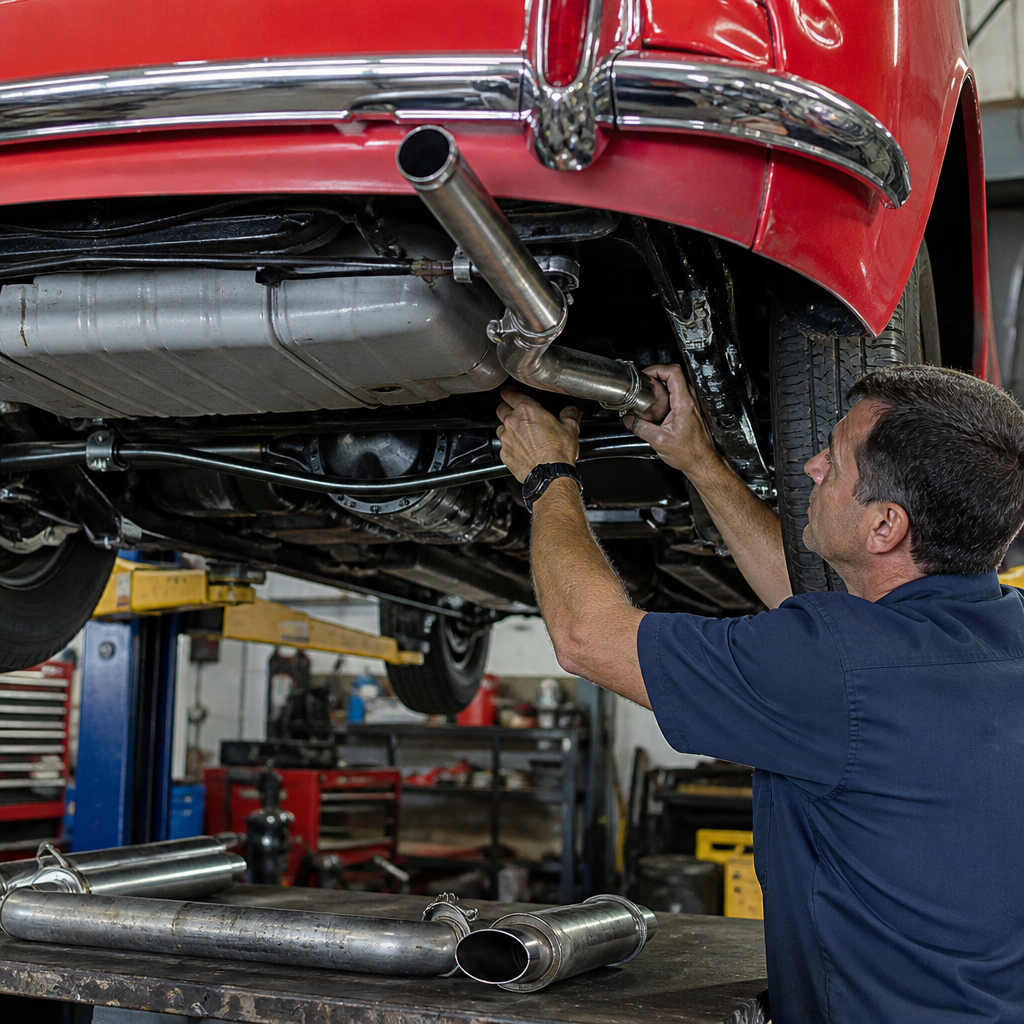
Replacing a classic car exhaust system is one of the most practical upgrades in restoration and maintenance because it affects power delivery, cabin comfort, emissions behavior, and long term engine health. In my own shop work, exhaust replacement often reveals hidden issues elsewhere: cracked manifolds, weak hangers, stripped studs, leaking gaskets, poor carburetor tuning, and heat damage around brake or fuel lines. For owners focused on engine and mechanical work, understanding the exhaust system is not just about swapping pipes. It is about diagnosing how the engine breathes, how gases leave the combustion chambers, and how every connected part performs under heat, vibration, and age.
A classic car exhaust system typically includes exhaust manifolds or headers, head pipes, intermediate pipes, a crossover or resonator on some models, mufflers, tailpipes, hangers, clamps, heat shields, and sealing gaskets. On later classics, especially from the mid 1970s onward, it may also include catalytic converters, air injection fittings, and oxygen sensor bungs. The exact layout depends on whether the vehicle uses a straight six, V8, or V12, as well as whether it was built for performance, luxury, towing, or emissions compliance. Factory single exhaust systems prioritize quiet operation and cost, while dual systems often improve flow and sound but demand tighter fitment tolerances.
This guide serves as a hub for engine and mechanical work within a restoration and maintenance plan. It explains how to replace a classic car exhaust system safely, how to choose correct parts, and how exhaust work connects to broader mechanical tasks such as engine tuning, ignition timing, fuel mixture adjustment, manifold service, cooling system protection, and underbody corrosion repair. If you are planning a full restoration, exhaust replacement sits at the intersection of drivability and reliability. If you are maintaining a running survivor, it is one of the clearest opportunities to reduce leaks, improve throttle response, and preserve originality where it matters most.
The reason this job matters is simple: an exhaust leak can cause carbon monoxide intrusion, false tuning symptoms, burned valves, warped flanges, and needless noise. A poorly fitted system can knock against the axle, leaf springs, floorpan, or transmission crossmember. An oversized system can reduce low end torque on mild street engines, while an undersized one can choke a rebuilt small block or big block. Done correctly, replacing the exhaust restores intended flow, protects surrounding components from heat, and creates a solid foundation for the rest of your engine and mechanical maintenance schedule.
How to inspect the existing exhaust system before removal
Start with a cold vehicle on level ground and inspect from the manifolds backward. Look for black soot around flange joints, crushed pipes, loose clamps, split seams on mufflers, rust pinholes, and hanger failure. Tap suspicious areas with a small hammer; thin, weakened steel often changes tone or punctures easily. I also check for witness marks where the pipes have been contacting the body or suspension under load. On many American classics, especially full size cars with long overhangs, tailpipes can shift dramatically when rear springs sag.
Inspection should also include engine behavior. A ticking sound on cold start often points to a manifold leak. A hollow chuffing noise under throttle may indicate a cracked pipe or collector gasket failure. If the car smells rich, do not assume the carburetor is the only problem. Restricted mufflers or collapsed internal baffles can increase backpressure and alter mixture readings. Vacuum gauge testing, spark plug inspection, and tailpipe condensation patterns can all support diagnosis. Before ordering parts, confirm whether the car still carries its original manifold configuration, because decades of repairs often produce mixed systems with aftermarket adapters.
Study the mounting path and note heat sensitive nearby parts. Brake hoses, fuel lines, parking brake cables, transmission cooler lines, and underfloor insulation must remain protected. Photograph every hanger, clamp orientation, and bracket. On concours restorations, these details matter. On driver quality projects, the photos save time during installation. If the system includes catalytic converters, verify legal requirements before replacing them. In the United States, emissions obligations vary by state, model year, and registration category, and noncompliant modifications can create inspection and resale problems.
Choosing the right replacement exhaust system for a classic car
The best replacement exhaust system matches the car’s purpose. For an original restoration, use factory diameter pipes, stock style mufflers, correct exit routing, and OE type hangers. For a street driven restomod, aluminized steel offers a useful balance of cost and durability, while 409 stainless steel resists corrosion far better and is now common from suppliers such as Walker, MagnaFlow, and Pypes. Show cars in wet climates or near the coast benefit most from stainless, but polished 304 stainless may look too modern if period correctness matters.
Pipe diameter should be chosen from engine output and intended rpm range, not guesswork. A mostly stock small block V8 often performs well with a 2.25 inch dual system, while stronger builds may want 2.5 inch pipes. Going larger without enough airflow demand can slow gas velocity and soften low speed response. Muffler choice affects more than sound. Chambered mufflers create a distinct tone and compact packaging but can drone. Turbo style mufflers are usually quieter and street friendly. Straight through perforated core mufflers flow well but may overwhelm the cabin on long trips.
Headers versus manifolds is another major decision. Factory cast manifolds are durable, quiet, and usually fit without steering or starter interference. Tube headers can improve scavenging and top end power, especially with a healthy camshaft, but they add heat, clearance issues, and gasket maintenance. For many classic street cars, high quality reproduction manifolds are the best compromise. When selecting a full kit, verify wheelbase, transmission type, body style, and whether the vehicle has manual or automatic column linkage, because one wrong bend can turn a straightforward installation into a fabrication job.
Tools, safety equipment, and preparation
Exhaust work is simple only when the car is supported correctly and the hardware cooperates. Use a quality floor jack and heavy duty jack stands placed under the frame or approved lift points, leaving the suspension loaded enough to judge final clearances. Wheel chocks are mandatory. Eye protection, mechanic’s gloves, hearing protection for cutting tools, and a respirator when dealing with rust scale are sensible precautions. A creeper helps, but on uneven floors I prefer thick cardboard because it slides under grit without tipping.
Useful tools include a penetrant such as Kroil or PB Blaster, six point sockets, deep sockets, box end wrenches, breaker bars, locking pliers, a reciprocating saw, a small cutoff wheel, pry bars, exhaust hanger pliers, anti seize compound, a torque wrench, and a thread chaser or tap set for manifold studs. An induction heater can save irreplaceable fasteners on valuable cars, and an oxygen sensor socket is necessary on later models. Keep replacement clamps, rubber isolators, and extra hardware on hand because old pieces rarely survive removal in reusable condition.
Before removal, spray all threaded joints repeatedly over a day or two if possible. Disconnect the battery if your tools may contact the starter cable or solenoid, particularly on cars where the head pipe passes close to the starter. If the car has a fuel leak or brittle undercoating soaked with oil, stop and correct that first. Cutting and heating near combustible residue is unnecessary risk. Preparation is part of engine and mechanical work discipline: if access is blocked by a seized manifold bolt, a worn engine mount, or a sagging transmission mount, address those causes now instead of forcing the new exhaust to fit around deeper problems.
Step by step removal and installation process
Remove the old exhaust from rear to front whenever possible. Supporting the tailpipe and muffler first reduces strain on the front joints. Cut rusted sections into manageable pieces rather than fighting fused clamps for an hour. If the system attaches to manifolds with studs and springs, preserve the original hardware pattern so the flanges can float and seal as designed. Once the old system is down, clean all sealing surfaces with a gasket scraper and inspect the manifold outlets with a straightedge. Warped flanges are common and will defeat even a perfectly new exhaust.
Test fit the new system loosely before tightening anything. Start at the front pipes, then hang the mufflers, then route the tailpipes. This sequence lets the system find its natural path. Leave every clamp and hanger slightly loose until all parts are in place. Check clearance at the transmission crossmember, driveshaft, differential, shocks, brake lines, rear valance, and fuel tank. On leaf spring cars, cycle the suspension if possible or at least compare loaded and hanging positions. Heat expansion and drivetrain torque will move the pipes more than a static garage view suggests.
| Step | What to do | Why it matters |
|---|---|---|
| 1 | Loosely assemble front pipes to manifolds or headers | Sets the reference point for the entire system |
| 2 | Install hangers before fully lifting mufflers | Prevents twisting and reduces stress on joints |
| 3 | Center pipes in tunnels and over axle sections | Avoids rattles, heat damage, and suspension contact |
| 4 | Tighten from front to rear in stages | Locks alignment progressively without pulling bends off line |
| 5 | Start engine and check leaks with gloved hand nearby | Confirms sealing before final road test and heat cycling |
After staged tightening, start the engine and listen at idle, then raise rpm briefly while watching for movement. A strip of paper held near joints will flutter where leaks exist. Recheck torque after the first full heat cycle because new gaskets compress and clamps settle. On slip fit systems, I often mark the pipe orientation with a paint pen after final alignment; if a section rotates later, the shift is easy to spot. Proper installation is not about making the system merely fit. It is about ensuring it remains sealed, quiet, and correctly supported for years.
Common fitment problems and how they connect to engine mechanical work
The most common installation complaint is a system that will not line up with the manifold outlets. Usually the root cause is not the new exhaust. It is sagging engine mounts, a collapsed transmission mount, bent frame horns from a minor collision, aftermarket headers built around a different starter, or reproduction manifolds with machining variation. I have also seen fresh body bushings change the relationship between the floorpan and the chassis enough to create new contact points. When these issues appear, resist the urge to force alignment with oversized clamps or pry bars.
Exhaust replacement also intersects directly with tuning. If you switch from a restrictive single system to a free flowing dual exhaust, idle mixture, main jetting, and ignition timing may need adjustment. On carbureted engines, improved scavenging can expose a previously hidden lean hesitation. On engines with vacuum advance, a repaired manifold leak may increase stable vacuum at idle, changing curb idle speed and transfer slot exposure. This is why exhaust work belongs inside a larger engine and mechanical maintenance strategy rather than as an isolated bolt on job.
Heat management is another overlooked area. Headers can raise starter temperatures, boil fuel in nearby lines, and stress clutch linkage bushings. Tailpipe routing near the rear axle can overheat shock absorbers or melt air ride plumbing on modified classics. If the original heat riser valve is present on a cold climate car, verify its condition because it affects warmup and manifold temperature distribution. Every exhaust replacement should end with a broader inspection of mounts, tune, fuel delivery, and cooling system margins.
Maintenance, longevity, and when to seek specialist help
A new exhaust system lasts longest when the engine runs correctly and the underbody stays dry. Rich mixtures accelerate internal muffler corrosion because water and acidic combustion byproducts remain trapped. Short trip driving is hard on exhausts for the same reason. Fix oil leaks that soak hangers, keep drain paths clear in the trunk and floor, and wash road salt from the underbody in winter. During routine service, inspect clamp tightness, hanger elasticity, and fresh marks that signal movement. Small corrections early prevent split seams and cracked welds later.
Some jobs justify specialist help. Cast iron manifold stud extraction, custom mandrel bending for rare body styles, emission legal converter replacement, and ceramic coating are better handled by experienced shops with the right equipment. If your car is exceptionally valuable, document part numbers, finish details, and routing before and after installation for restoration records. Exhaust replacement may seem narrow, but it is central to restoration and maintenance because it supports engine efficiency, protects occupants from fumes, and influences every mile the car travels. Inspect carefully, choose parts deliberately, install methodically, and use this project as the starting point for stronger engine and mechanical work across the entire vehicle.
Frequently Asked Questions
What should I inspect before replacing a classic car exhaust system?
Before ordering parts or unbolting anything, inspect the entire system from the exhaust ports to the tailpipe exits. On a classic car, the exhaust is rarely an isolated repair. Check the manifolds or headers for cracks, warped flanges, broken bolts, and soot marks that indicate leaks. Look closely at the manifold-to-pipe connections, collector flanges, crossover pipe if equipped, mufflers, resonators, hangers, clamps, and tailpipe routing over the axle and around the fuel tank. Surface rust is common, but deep scaling, pinholes, crushed pipe sections, and loose internal baffles mean replacement is overdue.
You should also inspect nearby components that can be affected by heat or vibration. Brake lines, fuel lines, parking brake cables, floor insulation, transmission crossmembers, and rear suspension parts can all suffer when an exhaust system sags, leaks, or has been poorly modified in the past. In many restoration jobs, exhaust replacement uncovers hardened rubber hangers, stripped studs, leaking gaskets, and previous repairs done with improvised clamps or mismatched pipe diameters. If the engine has been running rich or lean, take note of exhaust discoloration, strong fuel smell, popping on deceleration, or excessive soot, because replacing the system without correcting tuning issues may shorten the life of the new components.
Finally, verify exactly what configuration the car is supposed to have. Many classic models changed exhaust routing based on engine size, transmission type, wheelbase, emissions equipment, and whether the car used single or dual exhaust. Good measurements, photos, and a clear plan will save you frustration and help you avoid buying a system that fits on paper but interferes with the chassis in the real world.
How do I choose the right exhaust system for a classic car restoration?
The right exhaust system depends on how original you want the car to be and how you actually use it. If the project is a factory-correct restoration, look for a system that matches the original pipe diameter, muffler style, routing, hanger locations, and exit position. That matters not only for appearance, but also for sound, drivability, and clearance. A stock-style system often provides the best balance for a street-driven classic because it preserves low-end torque, keeps cabin drone under control, and fits the chassis the way the manufacturer intended.
If your goal is improved performance, choose upgrades carefully. Bigger is not always better. Oversized pipes can reduce exhaust velocity and hurt throttle response on mild engines. A mostly stock small-block or inline engine usually benefits more from proper fitment, good-quality bends, leak-free connections, and a well-matched muffler than from a dramatically larger pipe size. Chambered, turbo-style, and straight-through mufflers all produce different sound levels and flow characteristics, so match the muffler design to your engine build, gearing, and comfort expectations. On a classic car that spends real time on the road, noise fatigue is a real issue.
Material also matters. Aluminized steel is cost-effective and period-friendly for many drivers, while stainless steel offers better long-term corrosion resistance, especially in humid climates or for cars that are driven regularly. Pre-bent vehicle-specific kits usually save time and fit better than universal sections, but even the best kit may need minor adjustment because classic cars often have frame variances, prior collision damage, or replacement driveline parts. When in doubt, prioritize fit, ground clearance, serviceability, and engine compatibility over marketing claims.
What tools and steps are involved in replacing a classic car exhaust system safely?
At minimum, you will want a solid floor jack, quality jack stands, wheel chocks, penetrating oil, a full socket and wrench set, breaker bar, pry tools, exhaust hanger pliers if available, safety glasses, gloves, and ideally a reciprocating saw or cutoff tool for stubborn old sections. A torque wrench is helpful during final assembly, and anti-seize compound is highly recommended on fasteners where appropriate. If the car has severely rusted hardware, expect some bolts or studs to snap no matter how carefully you work. Having replacement hardware, gaskets, manifold studs, and hangers on hand can keep the job moving.
Safety starts with supporting the car correctly on stable stands placed under proper structural points, not under weak floor areas or unsupported suspension components. Let the exhaust cool fully before touching it. Once the vehicle is secure, spray all fasteners and joints with penetrating oil and give it time to work. Remove the old system in a controlled sequence, usually starting at the rear and working forward, unless the front connections are already loose and accessible. On many classic cars, trying to remove the entire exhaust in one piece wastes time and creates unnecessary strain on manifolds, hangers, and underbody components.
During installation, loosely assemble everything first. That is one of the most important habits in exhaust work. Fit the front pipes, intermediate sections, mufflers, tailpipes, and hangers without fully tightening clamps so you can rotate and shift each section for proper alignment. Check clearance around the floorpan, axle, springs, shocks, transmission mount, fuel tank, and brake and fuel lines. Make sure the system is supported by the hangers rather than forced into place by the manifolds. Once the tips are centered and the pipes have adequate clearance for engine movement and chassis flex, tighten from front to rear. After startup, listen and feel for leaks, watch for vibration, and recheck clamp tightness after a short heat cycle.
What common problems come up during exhaust replacement on older cars?
The most common problem is seized or broken hardware. Exhaust fasteners on classic cars live through decades of heat cycles, moisture, and corrosion, so manifold bolts, flange studs, and clamp threads are often in poor shape. Broken studs at the manifold or cylinder head can turn a simple replacement into a much larger repair. Rusted hangers are another frequent issue, and when they fail, the entire exhaust can shift out of position and create contact points that were not obvious before disassembly.
Fitment problems are also very common, even with reproduction systems. Classic cars may have replacement engines, aftermarket transmissions, non-original crossmembers, altered ride height, or prior repairs that slightly change underbody geometry. A pipe that should clear on a factory blueprint may tap the floorpan or sit too close to a brake line in the real car. In addition, previous owners may have installed incorrect manifolds, mismatched collector flanges, or reducers that complicate the connection between old and new components.
Another issue is discovering that the exhaust was masking other engine problems. A leaking manifold gasket, cracked manifold, overly rich carburetor tune, ignition miss, or poor engine mount can affect how the new system sounds and behaves. If the engine rocks excessively under load, the pipes may strike the frame or steering linkage no matter how carefully you install them. This is why good exhaust work often overlaps with general mechanical diagnosis. The best results come when you treat the exhaust as part of the complete engine and chassis system, not as a standalone bolt-on part.
How can I make sure the new exhaust system performs well and lasts a long time?
Long service life starts with correct installation and good engine condition. A properly aligned system with enough clearance, strong hangers, fresh gaskets, and quality hardware will last much longer than one that is twisted into place or left hanging under tension. Make sure the pipes do not contact the body, rear axle, leaf springs, control arms, or crossmember through the full range of engine and suspension movement. Even light contact will turn into noise, fatigue cracking, or broken mounts over time.
Engine tune has a direct effect on exhaust longevity. If the carburetor is too rich, unburned fuel and carbon can shorten muffler life and create strong odors. If the engine runs too lean or has ignition timing issues, excess heat can damage manifolds, gaskets, and nearby components. Fix oil leaks as well, because oil contamination on hot exhaust parts creates smoke, smell, and fire risk. On classics with close underbody packaging, install heat shielding where needed to protect brake lines, fuel lines, wiring, and floor insulation.
For long-term care, recheck the system after the first few drives because heat cycling often loosens clamps and settles hangers. Periodically inspect for soot marks at joints, changes in exhaust note, new vibrations, and shiny wear spots that indicate rubbing. If you live in a wet climate, keeping the car dry and taking it on drives long enough to evaporate condensation will help prevent internal corrosion, especially in mufflers. Whether your goal is originality or improved drivability, a well-chosen and properly installed exhaust system supports better power delivery, lower cabin noise, safer operation, and better overall engine health.




