
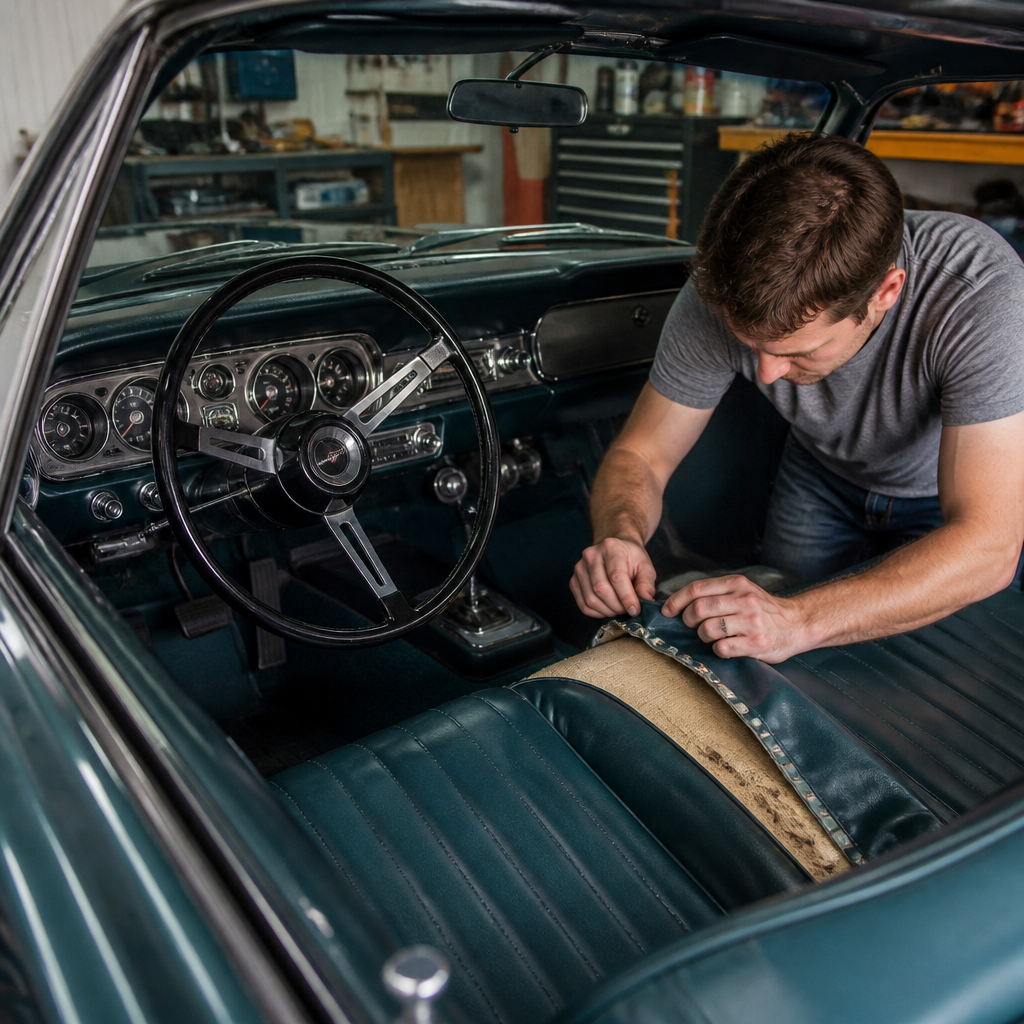
Reupholstering a classic car yourself is one of the most practical ways to transform a tired interior, preserve originality where it matters, and raise the overall quality of a restoration without handing the entire job to an upholstery shop. In classic car terms, interior restoration covers every cabin surface you see and touch: seat covers, foam, springs, door panels, carpets, headliners, package trays, kick panels, dash pads, weatherstripping, insulation, and trim hardware. Reupholstery is the fabric, vinyl, leather, padding, and attachment work that renews those parts. I have learned across full and partial restorations that interior work is where amateur projects either start looking professional or start revealing shortcuts. Unlike engine rebuilding, upholstery is visible every time the door opens, and small mistakes in alignment, tension, fastener placement, or material choice stand out immediately.
That is why a do-it-yourself approach matters. It can save substantial labor costs, but more importantly, it gives you control over factory-correct grain patterns, stitch lines, pleat spacing, seat feel, and sound deadening choices. It also forces a methodical inspection of floor pans, seat frames, rust, moisture paths, and electrical routing before new materials hide problems. This hub for interior restoration explains the full process, the tools, the order of work, and the decisions that separate durable results from cosmetic fixes. If you are restoring a Mustang, Chevelle, Beetle, 911, C10, or any other classic, the principles are the same: document everything, rebuild the structure before the soft trim, choose correct materials, and install each layer in sequence so the finished interior looks right, fits right, and lasts.
Plan the Interior Restoration Before You Remove a Single Clip
The best first step is not buying seat covers. It is creating a restoration plan based on condition, originality goals, budget, and the level of disassembly your car needs. Start by photographing every surface from multiple angles: front seats, rear seat, headliner bows, sail panels, door panel fasteners, carpet edges, sill plates, seat belt anchors, and console brackets. Measure pleat widths, seam spacing, and listing locations if you intend to duplicate original upholstery. On many American cars from the 1960s and 1970s, trim codes on the cowl tag or build sheet tell you the correct interior color and material family. European classics often rely on chassis records, option stickers, or marque-specific registries.
Then decide whether your project is preservation, refurbishment, or full interior restoration. Preservation keeps as much original trim as possible. Refurbishment typically replaces visible soft trim while reusing stable panels and hardware. Full restoration strips the cabin, repairs the substrate, renews insulation, rebuilds seats, and replaces or recovers trim throughout. In my experience, most do-it-yourself owners underestimate the value of sequencing. If you install new carpet before fixing a leaking windshield gasket or cowl vent, you can ruin it quickly. If you recover seats before checking track alignment and spring support, they may still feel poor. Order matters as much as workmanship.
Inspect the Structure: Floors, Frames, Springs, and Moisture Sources
Before upholstery begins, inspect every hidden support beneath the trim. Remove seats, carpet, sill plates, lower panels, and any underlayment so the metal shell is visible. Surface rust on floors can usually be cleaned, treated, primed, and sealed. Perforation around seat mounts, toe boards, and rocker edges requires welding and should be repaired before any insulation or carpet goes back in. Seat frames need similar scrutiny. Broken zigzag springs, cracked welds, worn pivot bushings, and collapsed burlap or webbing will make brand-new covers look wrong because the shape underneath is wrong.
Moisture sources are equally important. Classic cars commonly leak at windshield seals, rear glass channels, heater boxes, cowl drains, vent window seals, firewall penetrations, antenna bases, and door vapor barriers. If you skip leak testing, new jute padding and carpet can trap water, accelerate corrosion, and create mildew. Use a hose carefully with one person outside and one inside watching likely intrusion points. Also inspect wiring routed under carpet and behind kick panels. Brittle insulation, poor splices, and unfused accessories should be corrected now, when access is easy. A clean, dry, solid shell is the real foundation of successful interior restoration.
Choose Materials That Match the Car and the Way You Use It
Material selection affects appearance, longevity, comfort, and authenticity. Vinyl was standard on many domestic classics because it was durable and economical. Leather appeared on higher trims and many European cars, while cloth, basketweave, velour, and houndstooth defined specific eras and models. The right choice depends on your build objective. If you are restoring a numbers-matching concours car, use reproduction materials matched to the original trim code from suppliers such as Legendary Auto Interiors, PUI Interiors, TMI Products, or SMS Auto Fabrics, depending on make and model support. If you are building a driver, modern foam density, upgraded backing scrim, and improved sound deadening may be smarter than exact reproduction.
Foam deserves special attention. Old seat foam hardens, shrinks, and loses support. Reusing it under new covers often causes wrinkles and soft spots. Molded replacement foam is ideal when available because it reproduces original contours. Sheet foam can work for custom applications, but density and thickness must be chosen carefully. Too soft and the seat bottoms out; too firm and the cover will not settle naturally. For carpet, molded kits fit better than universal rolls, especially around transmission tunnels and footwells. For insulation, butyl-based sound deadening is preferable to asphalt products because it handles heat better and emits less odor. Closed-cell foam and mass-loaded vinyl can further reduce noise, but they add weight and thickness, so check trim clearances before committing.
Use the Right Tools and Follow a Realistic Work Sequence
Classic car upholstery is less about exotic equipment than disciplined use of the correct basic tools. You need hog ring pliers, side cutters, trim clip tools, steam or a heat gun with restraint, spray adhesive rated for automotive interiors, upholstery needles, heavy shears, chalk, measuring tools, and a stable workbench. A quality pneumatic stapler helps on panels where staples are appropriate, though many classic interior pieces rely on clips and adhesives instead. An industrial sewing machine is necessary only if you are fabricating covers from scratch. Most do-it-yourself restorers get better results using pre-sewn covers and focusing their skill on removal, substrate repair, seat rebuilding, and accurate installation.
| Interior task | Main tools | What good results depend on |
|---|---|---|
| Seat disassembly and recovery | Hog ring pliers, cutters, steam, marker | Correct listing attachment, even tension, sound foam and springs |
| Door panel restoration | Clip tool, stapler, adhesive, drill | Straight backing board, aligned trim, intact moisture barrier |
| Carpet installation | Knife, chalk, roller, adhesive | Dry floor, accurate trimming, test fitting before cutting openings |
| Headliner installation | Binder clips, adhesive, heat source, awl | Centered bows, gradual tensioning, patience around corners and sail panels |
The sequence I trust is simple: repair metal and leaks first, refinish and lubricate seat frames second, add insulation third, install headliner before front and rear glass trim where applicable, fit carpets after wiring and underlayment are finalized, restore door panels with fresh vapor barriers, then install seats and finishing trim last. That order minimizes rework and gives you clean access to fasteners and edges.
Rebuild Seats Correctly: Frames, Padding, Listings, and Covers
Seats are the centerpiece of a classic car interior, and they reward careful rebuilding more than any other component. Strip each seat one at a time so you always have a reference. Keep left and right side hardware separate, and label spacer locations. Once the old cover is off, inspect listing wires, spring assemblies, edge rods, and frame paint. Media blasting and repainting seat frames with a durable chassis coating makes sense when corrosion is present. Replace broken springs and support layers before new foam goes on. Many original seats used burlap over springs, then cotton or foam padding, then muslin or scrim before the final cover. Recreating those layers prevents the cover from chafing and helps the seat assume its intended shape.
When installing new covers, centerlines matter. Mark the middle of the foam and the middle of the cover before pulling anything tight. Steam helps vinyl relax, especially in cool weather, but too much heat can distort grain or damage stitched seams. Start by securing the internal listings with hog rings, then work outward evenly from center to edges. Do not chase one wrinkle by over-pulling a corner; that usually creates two more. On tuck-and-roll or pleated designs, compare both sides repeatedly so the pleats stay straight. For leather, allow extra time for the material to settle naturally. For seat backs with map pockets, chrome trim, or release escutcheons, cut openings only after the cover is fully located. A clean seat rebuild should look taut, symmetrical, and consistent with factory contours rather than drum tight.
Restore Door Panels, Carpet, Headliner, and Trim as a Complete System
Door panels often seem simple, but they reveal whether an interior was restored thoughtfully. Remove old panels carefully to preserve clips, stainless trim, armrest brackets, and escutcheons. If the backing board is warped or water damaged, replace it with automotive door panel board rather than household hardboard, which absorbs moisture poorly. Install a proper plastic vapor barrier behind the panel. This single sheet prevents water inside the door from soaking the panel and carpet, and many neglected classics are missing it. Check window felts, regulator movement, and door lock rods while the panel is off. Once the panel is installed, access becomes limited.
Carpet installation requires repeated test fitting. Lay molded carpet in the sun or warm it gently so contours relax. Position it before trimming any holes. Seat mounts, shifter openings, dimmer switch locations, and console brackets should be marked from underneath or pierced with a small awl first; large early cuts are the fastest way to ruin a carpet set. Use adhesive only where needed, because future serviceability matters. Heel pads must align naturally with pedal position, not just with the molded shape.
Headliners are usually the most intimidating part of interior restoration, and for good reason. Multi-bow headliners must be centered front to rear and side to side before tensioning. Each bow often has a specific location and length. Transfer them in order during removal. Clip the material lightly, evaluate seam alignment with roof structure, then glue gradually at windshield and rear window openings while keeping equal tension. Wrinkles near sail panels usually mean the material was pulled in the wrong direction, not that it needs more force. Patience is the real tool here. Finish the job by restoring package trays, pillar trim, kick panels, seat belts, and weatherstripping so the cabin feels complete rather than partly renewed.
Know When to DIY and When to Outsource Specialist Work
Doing your own classic car upholstery does not mean doing every stitch yourself. Good restoration judgment includes knowing when an expert can protect your budget and the car’s value. Complex stitched patterns, convertible top installation, heat-seamed inserts, rare material replication, and cracked molded dash restoration are often better outsourced to specialists with dedicated machines and pattern libraries. The same applies when a car has highly valuable original trim worth conserving. A skilled trimmer can sometimes preserve factory seat faces while rebuilding hidden support layers, which maintains authenticity that replacement kits cannot match.
Still, most enthusiasts can successfully handle interior disassembly, rust inspection, insulation, carpet fitting, seat installation, panel work, and final assembly if they move slowly and document thoroughly. The biggest mistakes I see are cutting before test fitting, covering unresolved leaks, mixing hardware, and assuming reproduction parts fit perfectly out of the box. They often do not. Dry fitting, comparing side to side, and making small adjustments are part of the work, not a sign of failure. When you approach interior restoration as a system instead of a cosmetic shopping list, the results improve dramatically.
Reupholstering a classic car yourself is ultimately about control, craftsmanship, and respect for the vehicle’s original design. A strong result starts with inspection and planning, continues through structural repair and careful material selection, and ends with patient installation of seats, panels, carpet, and headliner in the right order. Every stage affects the next. Sound floors support good carpet fit. Correct foam shapes support wrinkle-free seat covers. Vapor barriers protect door panels. Leak repairs protect everything.
As the hub for interior restoration, this guide should help you map the full job and identify the subprojects that deserve deeper attention on your car. If you are ready to begin, start with a complete photo record, decode your trim information, and inspect for rust and leaks before ordering parts. That one disciplined first step will save money, prevent rework, and set up an interior you will be proud to see every time you open the door.
Frequently Asked Questions
What parts of a classic car interior can I realistically reupholster myself?
A do-it-yourself interior restoration can cover far more than just slipping new covers over the seats. In most classic cars, you can tackle seat upholstery, seat foam replacement, burlap and listing repairs, door panels, rear quarter panels, kick panels, package trays, carpets, sound deadening, insulation, armrests, weatherstripping, and a wide range of trim hardware if you work carefully and stay organized. Many owners also install pre-sewn headliners, though that is usually one of the more difficult jobs because proper tensioning and wrinkle control take patience. Dash pads and complex molded pieces can sometimes be repaired at home, but they often require specialty materials and techniques that may not be ideal for a first-time project.
The best way to decide what is realistic is to separate the work into categories: soft trim, hard panels, and specialty components. Soft trim such as seat covers and carpet kits is often very manageable because reproduction parts are widely available for many popular classics. Hard panels like door cards and package trays are also good DIY candidates if the backing boards are solid or can be reproduced. Specialty components such as convertible top pads, intricate pleated seat designs, and heat-formed vinyl pieces are more advanced and may be better left to an upholstery shop unless you already have experience.
In practical terms, many beginners get excellent results by doing everything except the most technically demanding items. You can save a significant amount of money and still transform the cabin by removing the old interior, documenting how it was assembled, repairing springs and foam, installing seat covers, fitting carpets, refreshing panels, and replacing weatherstripping and insulation yourself. That approach preserves originality where it matters, improves fit and finish, and lets you reserve professional labor only for the tasks that truly require it.
What tools and materials do I need before I start reupholstering a classic car?
A successful reupholstery job starts with the right tools long before the first seat cover comes off. At minimum, you should have hog ring pliers, plenty of hog rings, diagonal cutters, screwdrivers, trim removal tools, socket sets, pliers, awls, utility knives, heavy shears, contact adhesive, spray adhesive rated for automotive interiors, chalk or grease pencils, measuring tape, straightedges, heat gun or steamer, and a good stapler if you are working on panel-backed components. You will also want zip-top bags, labels, masking tape, and a phone or camera for documenting hardware locations and assembly order. Good lighting and a clean workbench make a bigger difference than many people expect.
For materials, the exact list depends on how complete the restoration will be, but common items include reproduction seat covers, upholstery vinyl or cloth, foam, cotton batting, burlap, jute padding, carpet kits, insulation, panel board, scrim-backed foam, contact cement, weatherstripping, and replacement clips and fasteners. If originality matters, take time to source materials with the correct grain, stitching pattern, color, and texture for your year and trim level. If comfort and drivability matter more, upgraded foam, modern thermal barriers, and improved sound deadening can dramatically improve the cabin without changing the car’s visual character.
It is also smart to gather reference information before you begin. Factory assembly manuals, trim books, restoration guides, and photos of well-restored cars can help you confirm seam placement, pleat count, carpet edge binding, and panel shape. One of the biggest reasons DIY interiors go wrong is not lack of effort, but lack of preparation. When the tools, materials, and reference photos are ready ahead of time, the actual installation becomes more methodical, accurate, and less stressful.
How difficult is it to reupholster classic car seats, and what are the most common mistakes beginners make?
Classic car seat upholstery is very doable for a careful beginner, but it is not a rushed weekend job if you want the finished result to look factory-correct. The real work is usually not the outer cover itself. It is the condition of what sits underneath: broken springs, rusted frames, weak webbing, collapsed foam, deteriorated burlap, missing listings, and previous repair shortcuts. A new cover will only look as good as the foundation beneath it. If the frame is straight, the springs are repaired, and the padding profile is restored properly, even a first-time installer can achieve a tight, attractive finish.
The most common beginner mistake is tearing into the seat without documenting how it was originally assembled. Before removing anything, take detailed photos from all angles, including how the cover attaches to listing wires, where hog rings are positioned, how the foam wraps around the frame, and where any relief cuts or attachment tabs are located. Another frequent mistake is reusing worn-out padding to save time or money. Old foam may look acceptable at a glance, but if it has hardened, shrunk, or deformed, the new upholstery will wrinkle, pull unevenly, or wear prematurely.
Other common problems include pulling the cover too hard in one area while leaving another section loose, installing covers cold instead of warming them for flexibility, failing to center seams before final attachment, and using the wrong size or placement of hog rings. Beginners also sometimes ignore minor spring damage, which leads to lumpy seats and accelerated wear. The best approach is to work slowly, compare both seats side by side, and tighten the upholstery in stages rather than all at once. Heat, patience, and repeated test-fitting matter more than brute force. If you treat seat upholstery as a process of rebuilding shape first and attaching material second, your results will be dramatically better.
Should I try to preserve the original interior materials, or is it better to replace everything?
That depends on the condition of the interior, the rarity of the car, and your overall restoration goals. In many classic cars, preserving original materials where possible adds authenticity and can even increase appeal to buyers who value originality. If the seat frames, trim panels, hardware, and some upholstery components are structurally sound, they may be worth restoring rather than replacing. Original stitching layouts, embossing patterns, grain textures, and panel shapes can be difficult to duplicate perfectly, so saving good originals often gives the finished interior a more correct and convincing look.
At the same time, there is a point where replacement is the smarter choice. Severely cracked vinyl, rotten panel boards, crumbling foam, mildew-damaged carpet, sagging headliners, hardened weatherstripping, and rust-stained insulation should generally be replaced. Trying to preserve parts that are already beyond their service life usually leads to a disappointing result and often forces you to redo the job later. The interior may look acceptable for a short time, but poor materials underneath will continue to fail and undermine all the labor you invested.
A balanced strategy works best for many DIY restorers. Preserve and refurbish what defines the car’s originality, such as trim hardware, stainless moldings, emblems, seat frames, and reusable panel cores. Replace soft materials that have predictable age-related failure, such as foam, carpet, insulation, adhesive-backed barriers, and weatherstripping. This gives you the best of both worlds: authentic appearance where it counts and durability where the original materials have already done their job. If the car is especially rare or historically significant, it may be worth consulting marque experts before discarding anything, even damaged pieces, because they can serve as patterns for correct reproduction.
How long does a DIY classic car reupholstery project take, and how can I get professional-looking results?
The timeline can vary enormously depending on the car, your skill level, and how deep the restoration goes. Replacing a carpet kit and refreshing door panels might take a few weekends. Rebuilding seats, fitting a headliner, replacing insulation, restoring package trays, and reassembling every trim piece can stretch into several weeks or months, especially if you are also cleaning and refinishing hardware along the way. A common mistake is underestimating the amount of prep work involved. Removal, labeling, rust treatment, adhesive cleanup, and repairing hidden structure often take as much time as installation.
If you want professional-looking results, focus first on fit, sequencing, and cleanliness. Remove each component carefully, bag and label every fastener, and photograph everything before disassembly. Test-fit reproduction parts before applying glue or making permanent cuts, because aftermarket pieces sometimes need minor trimming or alignment adjustments. Clean and refinish seat frames, panel supports, and exposed brackets before reassembly so the finished cabin looks complete rather than partially restored. Use quality adhesives correctly, allow proper tack time, and avoid the temptation to force materials into place before they are ready.
The details are what separate an average interior from an impressive one. Make sure seams are centered, pleats run straight, carpet edges sit flat, sill plates align evenly, and weatherstripping does not bunch or twist. Warm vinyl before installation, use fresh blades for clean cuts, and replace worn clips instead of reusing tired hardware. Work one section at a time and do not move on until the current piece fits correctly. Most importantly, compare your progress constantly against reference photos and the opposite side of the car. Professional-looking results rarely come from secret tricks; they come from patience, consistency, and refusing to accept “good enough” in the small details that everyone notices once the interior is back together.</




