
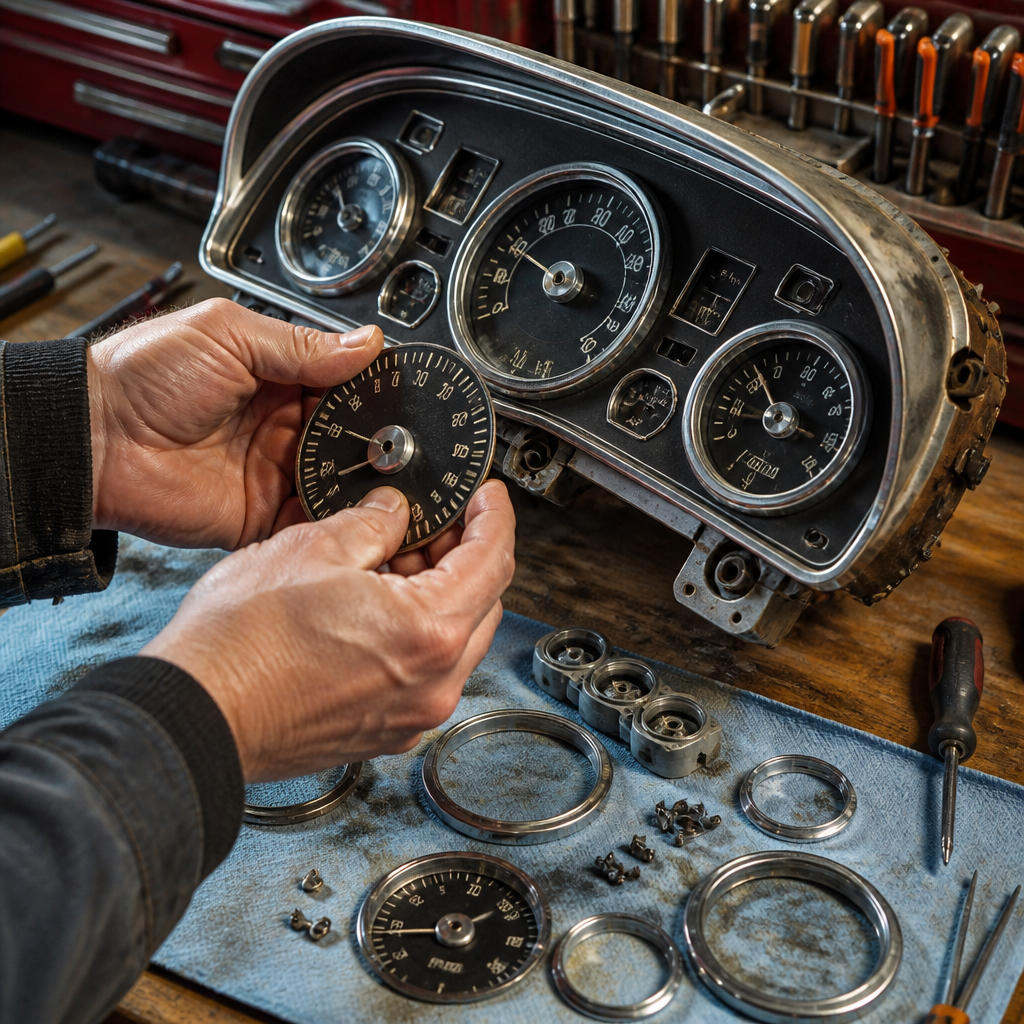
Restoring classic car gauges and instrument clusters is one of the most satisfying parts of interior restoration because it combines craftsmanship, electrical diagnosis, cosmetics, and preservation in a single project. In practical terms, gauges are the instruments that report vehicle conditions such as speed, fuel level, oil pressure, coolant temperature, charging status, and engine rpm, while the instrument cluster is the housing, bezel, lenses, wiring, and printed circuits that bring those readings together in the dashboard. When these components fade, stick, flicker, or fail, the driver loses both vital information and a large part of the cabin’s original character. I have worked on clusters from 1950s mechanical speedometer setups to 1980s printed-circuit panels, and the same lesson always holds: careful restoration improves safety, authenticity, and resale value at the same time.
Classic car gauge restoration matters because these parts age in predictable ways. Ultraviolet exposure yellows clear lenses and fades numerals. Heat warps plastic housings. Oxidation forms on terminals, ground points, and bulb sockets. Lubricants inside speedometer heads dry out and harden. Bourdon-tube oil gauges can become inaccurate, and thermal fuel or temperature gauges may drift when senders or voltage limiters fail. Owners often replace a dead cluster with aftermarket units, but that shortcut can hurt originality and create fitment or wiring problems. A proper interior restoration approach preserves the factory look, restores function to known standards, and documents what was changed so future service is easier.
This guide serves as a hub for interior restoration by showing how gauge and cluster work fits into the broader process. Instrument panels connect directly to dash pad restoration, steering column trim, switch refurbishment, wiring harness repair, heater control rebuilding, interior lighting upgrades, and weather sealing that protects restored parts from moisture. If the cluster comes out, it is smart to inspect dash insulation, duct seals, ignition switch access, radio brackets, and brittle connectors at the same time. A well-planned project saves labor, reduces the risk of cracked trim, and ensures that once the dashboard is reassembled, every visible and hidden component supports reliable operation.
Before turning a screw, define your restoration goal. A concours restoration prioritizes factory-correct lens texture, silk-screened markings, font styles, needle color, fastener finishes, and date-coded components. A driver-quality restoration may accept LED illumination, upgraded voltage regulation, or recalibrated internals for modern roads and fuels. Either way, the best results come from methodical inspection, accurate testing, and restraint. Many clusters are damaged not by age but by rushed disassembly, aggressive polishing, over-tightened screws, or solvent use on delicate markings. If you understand the cluster type, document the original layout, and restore each element in sequence, you can return classic car gauges to dependable service without erasing the history that makes them valuable.
Identify the cluster type and common failure points
The first step in classic car gauge restoration is identifying what you are working on, because instrument design changed significantly by decade and manufacturer. Prewar and many midcentury cars used mostly mechanical systems. A speedometer cable spun a magnet inside the speedometer head, and the drag on a cup moved the needle against a hairspring. Oil pressure might be read by a direct mechanical line, and ammeters were wired in series with the charging circuit. By the late 1960s and 1970s, many domestic vehicles used electric thermal gauges fed by senders and a pulsing instrument voltage regulator, often around five volts average. European cars frequently used different resistance ranges, and 1980s clusters commonly added flexible printed circuits, quartz clocks, and tachometer modules.
Each type has predictable faults. Mechanical speedometers chatter when the cable core is dry, kinked, or routed with sharp bends. Needles bounce when the head is dirty or the cable oscillates. Fuel gauges read empty because of poor grounds at the sender, worn rheostats in the tank unit, or a failed stabilizer behind the cluster. Temperature gauges can peg hot from a short to ground, while ammeters may show charging problems that are actually corroded bulkhead connectors. Printed circuits crack around screw holes, and copper traces lift from age and heat. Clock contacts burn, light sockets lose tension, and chrome-plated plastic bezels pit where the original vacuum metallizing has failed. Knowing these patterns lets you diagnose rather than guess.
Plan the job like an interior restoration project, not a parts swap
A gauge project is easier when it is treated as part of full interior restoration. I start by photographing the dash from multiple angles, then close-ups of every connector, bulb socket, ground strap, cable route, and fastener location. Labeling matters because many clusters use similar plugs that can still be mispositioned, especially after previous repairs. Factory service manuals, wiring diagrams, assembly manuals, and owner’s literature are essential references. For American cars, reproduction manuals and marque-specific forums are valuable. For European cars, wiring color charts and parts books often reveal subtle year-to-year differences in warning lamps and regulator placement.
Bench organization prevents damage. Use divided trays for screws, clips, and spacers; acid-free bags for lenses and printed overlays; and painter’s tape for temporary labels that will not leave adhesive on old plastic. Disconnect the battery before any dash work, and if the vehicle has a direct-reading ammeter, treat those wires with extra caution because they can carry substantial current. Removing seats is not always necessary, but for full-size classics or tight sports cars, the extra space can prevent accidental pressure on a wheel rim, dash pad, or steering column trim. The goal is a controlled work environment where every removed piece can be cleaned, tested, refinished, and reinstalled without introducing new faults.
Remove, inspect, and document every component
Cluster removal is where many valuable parts are lost, especially brittle lenses, tabs, and trim strips. Work slowly around bezel edges and hidden fasteners, because manufacturers often concealed screws above ashtrays, under switch knobs, or behind radio escutcheons. Pulling the cluster straight out without freeing the speedometer cable, vacuum lines, capillary tubes, or harness clips can crack housings instantly. On capillary-tube temperature gauges, never kink or cut the tube; the sealed ether system is not a simple hose and usually requires specialist rebuilders if damaged.
Once the assembly is on the bench, inspect the housing for warpage, broken posts, rust transfer from screws, and signs of overheating near bulb sockets or printed circuits. Check each terminal for verdigris, darkening, or looseness. Examine gauge faces for flaking paint and compare needle rest positions before disassembly. I mark screw locations because lengths vary, and using a long screw in the wrong place can distort a face plate or contact a moving mechanism. During this phase, list every related interior restoration task exposed by the removed cluster: heater control cables, duct foam, radio light bulbs, dash speaker grilles, steering column seals, and under-dash insulation. This is where a hub approach saves time across the entire interior restoration project.
Clean lenses, faces, bezels, and housings without destroying originality
Cleaning is not cosmetic trivia; it determines whether a restored cluster looks authentic or overworked. Clear lenses should be washed first with mild soap, water, and a clean microfiber cloth to remove grit before any polishing. Dry wiping old plastic causes scratches immediately. If the lens is acrylic, plastic polish systems such as Meguiar’s PlastX or Novus can remove light haze, but deep crazing may require careful sanding and machine polishing or replacement. Solvents such as lacquer thinner, acetone, and many glass cleaners can permanently fog old plastic and should be avoided.
Gauge faces require even more restraint. Many are printed with fragile inks that lift under aggressive rubbing. I use soft detailing swabs, minimal moisture, and compressed air at low pressure. If the white numerals are chalking or the black background is stained, reproduction faces may be the only reliable path for a show-level result, but preserving original faces is usually preferable when the print remains intact. Metal bezels can often be refinished with bright-dip anodizing, vacuum metallizing, or specialized chrome-effect coating depending on the original process. Plastic housings respond well to gentle degreasing and plastic-safe cleaners. The aim is to remove contamination while preserving texture, sheen, and factory edge definition.
Test, repair, and calibrate the gauges correctly
Good restoration depends on bench testing. Start with continuity checks, terminal inspection, and ground verification using a quality digital multimeter. For electric gauges, compare sender resistance and gauge response to factory specifications. Many Ford, GM, and Chrysler systems used brand-specific resistance ranges, so a sender that physically fits may still produce inaccurate readings. Thermal gauges need time to respond; instant needle movement usually indicates a mismatch or fault. Mechanical oil and vacuum gauges can be checked with regulated pressure sources. Speedometers and tachometers require calibration using controlled input speeds. Specialist shops use calibration benches that spin heads at known revolutions per mile or hertz values, then adjust springs, magnets, or electronics to bring readings into tolerance.
| Gauge type | Common failure | Typical test method | Restoration fix |
|---|---|---|---|
| Mechanical speedometer | Bounce, noise, inaccuracy | Spin cable input at known speed | Clean head, lubricate correctly, recalibrate |
| Fuel gauge | Reads empty or full constantly | Substitute resistors matching sender range | Repair regulator, sender circuit, or gauge movement |
| Temperature gauge | Pegs hot or reads low | Resistance simulation and ground check | Replace sender, repair short, recalibrate movement |
| Tachometer | No signal or erratic reading | Signal generator or ignition pulse test | Rebuild circuit board, replace capacitors, calibrate |
| Clock | Stops or drains battery | Bench power draw and function test | Convert to quartz or rebuild contacts |
Lubrication deserves precision. Speedometer heads require very small amounts of the correct lubricant in the correct places; over-lubrication migrates onto cups and hairsprings, causing drag and inaccurate readings. Cables need proper graphite or cable-specific lubricants depending on design, and some later cables with lined housings should not be greased at all. On printed-circuit clusters, repair lifted traces with conductive methods or replacement films rather than crude jumper wires that interfere with fit. Voltage limiters can often be upgraded from mechanical pulsing units to solid-state regulators hidden in the original location, improving stability while preserving appearance. That kind of invisible reliability upgrade is often the best choice for cars driven regularly.
Restore illumination, warning lamps, and supporting wiring
Night visibility is a major part of instrument cluster restoration, and it is often poor because of cumulative small losses rather than one big defect. Corroded bulb sockets, weak grounds, cloudy light pipes, faded reflector paint, and rheostat wear all reduce brightness. Start by measuring voltage at the cluster under load with the headlamps on. If voltage drop is excessive, inspect the headlight switch rheostat, bulkhead connectors, fuse contacts, and grounding points before blaming the bulbs. Refinish internal reflector surfaces in the correct satin white or reflective coating where factory design used it. A dirty housing can absorb a surprising amount of light.
Choosing between incandescent and LED lighting depends on the restoration target. Original incandescent bulbs preserve factory color temperature and dim smoothly through stock rheostats. LEDs reduce current draw and heat, useful in fragile plastic housings, but they can create hot spots, alter the color of green or blue lens filters, and sometimes do not dim well without circuit changes. If using LEDs, select non-polarity-sensitive automotive units with diffused output and test them in the assembled housing before final installation. Warning lamps for turn signals, high beams, brake systems, and charging faults should always be function-tested during reassembly because a hidden bulb problem can mask a serious vehicle issue once the car returns to the road.
Refinish details, reassemble carefully, and protect long-term value
The final stage is where restored gauges become a finished instrument cluster. Repaint needles only when necessary and match the original fluorescent orange, red, or white using thin coats that do not change balance. Replace foam seals that block light leaks and cushion lenses. Install fresh anti-rattle pads where the factory used them. When tightening screws into aged plastic, stop at snug; stripped posts and stress cracks are common after otherwise excellent restorations. Before the cluster goes back into the car, bench test every function again, then test once more after installation but before the bezel and lower trim are fully secured. That extra step catches pinched wires, bad grounds, and misrouted speedometer cables while access is still easy.
For originality and value, document the entire process with photos, parts numbers, resistance readings, and any calibration certificates from specialist shops. Buyers and judges appreciate proof that a restoration was done correctly rather than cosmetically. This is especially important for rare muscle cars, luxury models, and limited-production European classics where original clusters can affect provenance. It also helps future maintenance because the next owner will know whether the clock was converted to quartz, the voltage limiter was changed to solid state, or the odometer was serviced. Properly restored classic car gauges do more than look right. They give trustworthy information, preserve the design language of the dashboard, and connect the driver to the car in the way its engineers intended.
Restoring classic car gauges and instrument clusters is a cornerstone of interior restoration because it blends function, appearance, and historical accuracy in one visible assembly. The key steps are clear: identify the gauge system, document the dash thoroughly, remove components without stress, clean delicate surfaces conservatively, test each instrument by specification, repair wiring and illumination faults, and reassemble with patience. Done properly, the result is not just a prettier dashboard. It is a safer car, a more valuable car, and a more authentic driving experience.
This hub page should guide every related interior restoration decision. When the cluster is out, inspect the dash harness, switches, heater controls, trim, insulation, and seals so the whole cockpit improves together. Use factory manuals, known resistance values, proper lubricants, and specialist calibration services where needed. Avoid shortcuts like universal senders, harsh solvents, and over-restoration that erases original textures or markings. The best interiors are not merely shiny; they are coherent, correct, and dependable in daily use or show judging.
If you are planning a restoration and want the dashboard to match the quality of the rest of the cabin, start with a full cluster inspection and build your interior restoration checklist around it. Treat every gauge reading as a system, every lens as original material worth preserving, and every wiring repair as an investment in long-term reliability. With the right process, classic car gauges can look factory fresh and perform with confidence for decades to come.
Frequently Asked Questions
What is the difference between restoring a classic car gauge and restoring the entire instrument cluster?
Restoring a single gauge usually focuses on the function and appearance of one instrument, such as the speedometer, fuel gauge, temperature gauge, tachometer, or oil pressure gauge. That work may involve cleaning the face, refinishing needles, recalibrating readings, repairing internal movements, replacing bulbs, or correcting electrical faults tied to that one unit. Restoring the entire instrument cluster is broader. It includes not only the gauges themselves, but also the bezel, lenses, mounting hardware, indicator lights, sockets, printed circuit boards, voltage regulators, connectors, and the surrounding trim that ties the assembly together.
In practice, most successful restorations treat the cluster as a complete system. A freshly calibrated fuel gauge will still read incorrectly if the printed circuit has a damaged trace, the cluster ground is poor, or the voltage reducer is unstable. Likewise, a polished lens and refinished bezel can dramatically improve the interior, but they do not solve sticking needles or inaccurate readings. Thinking in terms of the entire cluster helps you catch issues that would otherwise be missed, including brittle wiring, corrosion at terminals, faded markings, mismatched illumination, and mounting points that create vibration or grounding problems. For a reliable and factory-correct result, it is usually best to inspect, test, restore, and reassemble everything as one coordinated project.
How do I know whether my classic car gauges can be restored or if they need to be replaced?
Most original classic car gauges can be restored, and in many cases restoration is preferable to replacement because factory units often fit better, look more authentic, and preserve the vehicle’s originality. The first step is evaluating the condition of the gauge body, face, needle, lens, terminals, and internal mechanism. Cosmetic wear such as faded markings, yellowed lenses, surface rust on housings, dirty internals, and chipped paint on needles is usually repairable. Electrical issues like intermittent readings, dead backlighting, poor grounding, damaged bulb sockets, and failed sending-unit connections are also commonly correctable. Even many mechanical speedometers and tachometers with sticky movement or needle bounce can be serviced, lubricated, and recalibrated.
Replacement becomes more likely when the gauge has severe internal damage, missing components, cracked housings that prevent secure mounting, burned or warped internals, or previous repair attempts that altered the unit beyond practical recovery. Reproduction gauges can be a solution, but quality varies widely, and some replacements do not match the original font, needle shape, illumination color, or electrical behavior. If the car is a rare model, numbers-matching restoration or concours correctness may also make original gauge restoration the better choice even if the work is more involved. The best approach is to test each unit methodically, compare the cost and authenticity of restoration versus replacement, and save as many original components as possible whenever structural integrity allows.
What are the most common problems found in classic car instrument clusters?
Classic car instrument clusters typically suffer from a combination of age, heat, vibration, moisture, and past electrical modifications. One of the most common issues is inaccurate gauge readings caused by bad grounds, failing voltage regulators, corroded connectors, weak printed circuit traces, or mismatched sending units. A fuel gauge that reads full all the time, a temperature gauge that never moves, or an oil pressure gauge that behaves erratically often points to a system problem rather than a failed gauge alone. Burned-out bulbs, dim illumination, and intermittent warning lights are also frequent complaints, especially when bulb sockets are oxidized or the cluster housing is no longer grounding properly to the dash.
Cosmetic deterioration is just as common. Clear plastic lenses often become scratched, cloudy, or yellowed. Chrome or painted bezels may fade, pit, or peel. Gauge needles can discolor from bright orange or red to pale pink, and face markings may become worn or difficult to read. Mechanical gauges such as speedometers sometimes develop needle flutter, squealing noises, odometer failure, or sticking from dried lubricants and worn internal parts. On later classic vehicles, flexible printed circuit boards can crack or delaminate, causing hard-to-trace electrical faults. In many cars, previous owners have added aftermarket stereos, alarms, tachometers, or gauges, leaving behind spliced wires and non-original connectors that introduce new problems. A careful restoration addresses all of these issues together, rather than solving only the most obvious symptom.
What tools and steps are recommended for restoring classic car gauges and instrument clusters at home?
A home restoration can be very rewarding if approached patiently and methodically. Useful tools include small screwdrivers, nut drivers, trim tools, needle-nose pliers, multimeters, test lights, soldering equipment, contact cleaner, plastic polish, fine detailing brushes, masking supplies, and a reliable service manual or wiring diagram specific to the vehicle. It also helps to have labeled containers for hardware, a clean bench, a camera or phone for reference photos, and a gentle work style because old plastics, silk-screened faces, and delicate needles are easy to damage. If calibration work is expected, bench-testing tools and known-good senders or resistors can be extremely helpful.
The best process starts with disconnecting the battery and documenting everything before removal. Take photos of connector locations, wire colors, bulb positions, and fastener placement. Remove the cluster carefully to avoid cracking the dash pad or stressing old wiring. Once on the bench, inspect for corrosion, damaged traces, loose studs, broken sockets, warped housings, and evidence of overheating. Clean metal contacts and terminals, polish or replace lenses as needed, refinish needles only with appropriate paint, and avoid scrubbing printed gauge faces aggressively because markings can come off. Check continuity through printed circuits, inspect voltage reducers or regulators, and test individual gauges according to factory specifications. During reassembly, verify grounds, replace weak bulbs, confirm connector fit, and bench-test function whenever possible before reinstalling. The key is to move slowly, preserve original finishes where you can, and know when specialized work such as speedometer calibration or clock repair is better sent to a professional.
Should I restore my original gauges to factory specifications or upgrade them with modern internals?
That decision depends on how you plan to use the car and what matters most to you: originality, drivability, reliability, or a balance of all three. Restoring to factory specifications is usually the right choice for owners who value authenticity, collector appeal, and period-correct appearance. Original gauges preserve the look and feel of the dashboard, maintain historical character, and often support resale value in cars where stock presentation matters. A proper factory-style restoration can still deliver dependable performance if the gauges are rebuilt correctly, the wiring is sorted out, and the sending units and voltage supply are matched to original requirements.
Modern upgrades make sense when the car will be driven frequently, used on long trips, or operated in demanding conditions where more precise readings and improved reliability are priorities. Some restorers choose to retain the original faces and bezels while converting the internals to modern electronic movements. This approach can improve accuracy and reduce the weaknesses associated with aging mechanical or thermal-type gauges, while preserving much of the factory look. The tradeoff is that some upgrades may alter illumination, needle sweep, response time, or originality in ways that experienced enthusiasts will notice. The smartest path is to define the goal of the restoration before you start. If the project is a concours-style preservation, stay as close to stock as possible. If the goal is a dependable driver with subtle improvements, selective modernization behind original-looking components can be an excellent compromise.




