
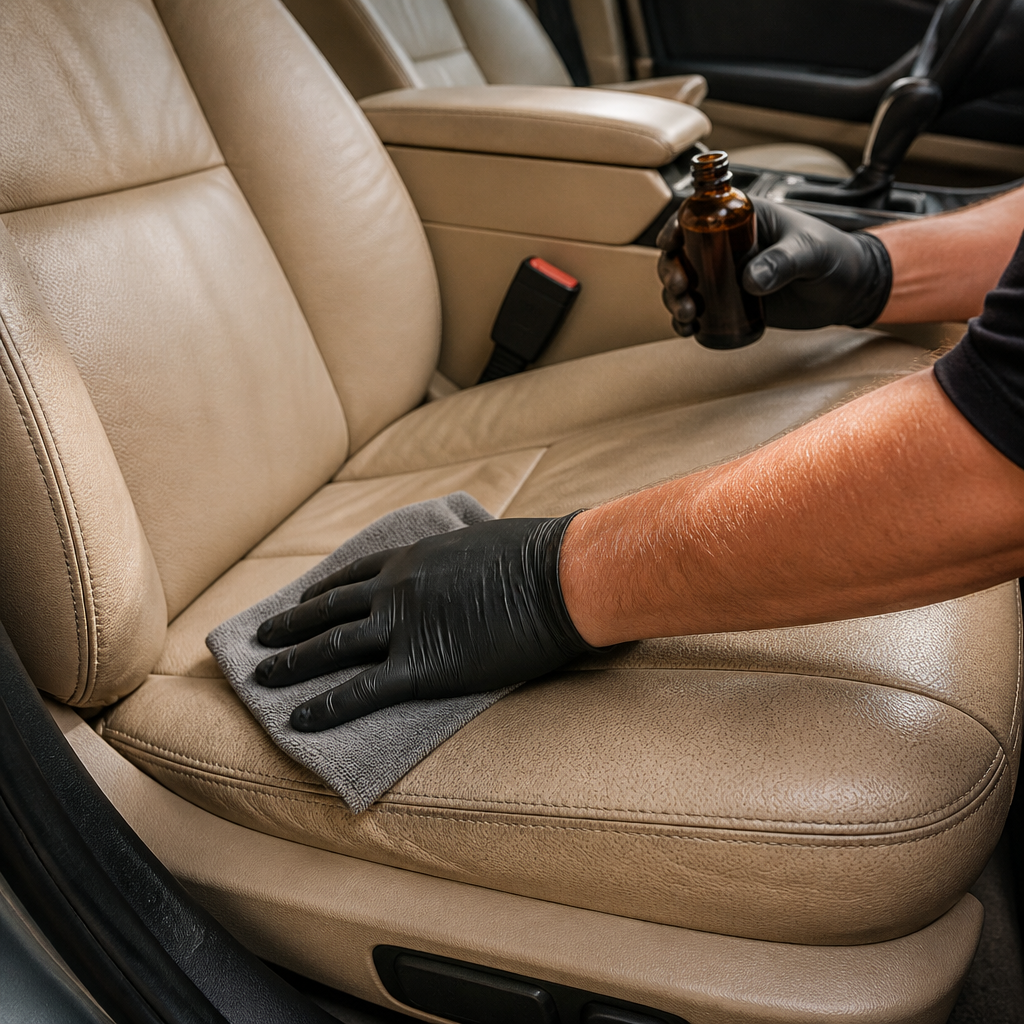
Leather interiors reward careful restoration because the material is durable, repairable, and visually central to a vehicle’s cabin. When people ask how to clean and restore leather interiors, they usually mean more than wiping seats with a cleaner. They want to remove body oils, lift dye transfer, reduce cracking, restore softness, correct fading, and protect the finish so the problem does not return quickly. In automotive restoration, leather refers to both aniline or semi-aniline hides and the far more common pigmented leather finished with a protective topcoat. That distinction matters because the correct process depends on the surface finish, not just the word leather on a window sticker. I have restored daily drivers, neglected family SUVs, and collector cars, and the biggest mistake I see is treating every seat the same. Strong degreasers, household conditioners, and glossy dressings often make interiors look better for a day while weakening the finish over time. Proper leather interior restoration uses controlled cleaning, measured moisture, abrasion only when necessary, color repair where the finish has failed, and protection matched to real use. This matters because replacement upholstery is expensive, original interiors help preserve value, and small defects spread quickly when ignored. A lightly worn bolster can often be stabilized in one session; a cracked, flaking seat usually needs cleaning, filling, recoloring, and curing steps that take planning. If you understand the leather type, common failure patterns, and the right sequence, you can restore appearance without causing preventable damage and keep the cabin looking correct for years.
Identify the leather type and assess the damage first
The first step in interior restoration is diagnosis. Most modern automotive leather is pigmented leather: the hide is dyed, then coated with a colored finish and a clear protective topcoat. That means you are usually cleaning and repairing the coating system, not bare hide. Older luxury cars and some premium trims may use semi-aniline leather, which has a lighter coating and absorbs liquids more readily. Full aniline leather is uncommon in mainstream vehicles because it stains easily. Synthetic leather, often sold as vinyl, leatherette, or polyurethane upholstery, needs a different chemistry entirely. A quick water-drop test on an inconspicuous area can help, but manufacturer documentation and seat feel are better indicators.
Assessment should separate dirt from damage. Dark shine on a driver seat bolster is often embedded body oil, not healthy conditioning. Blue staining is usually denim dye transfer. Stiffness can come from contamination in the topcoat rather than a dry hide. Cracks also vary: surface creasing in the finish is common and often cosmetic, while deep cracks that expose fibers indicate structural wear. Check high-contact areas first: outer bolsters, seat bottoms, steering wheels, shift knobs, armrests, and door pulls. Also inspect stitching, perforations, heated-seat zones, and any previous repair. I photograph every panel before starting because comparison under the same light reveals progress and prevents overworking one area.
A practical way to classify condition is light, moderate, or heavy deterioration. Light deterioration includes grime, mild shine, and slight color loss. Moderate deterioration adds abrasion, visible topcoat wear, minor cracking, and transfer stains. Heavy deterioration includes peeling color, hardened surfaces, torn seams, collapsed foam, or exposed substrate. This classification determines whether you can complete the work with cleaner and protector alone or need fillers, colorant, and trim removal for access. It also sets realistic expectations. Cleaning can dramatically improve appearance, but it will not reverse torn leather, broken stitching, or damaged seat foam.
Use the right cleaning process for automotive leather
Effective leather cleaning is controlled soil removal, not saturation. Start by vacuuming creases, piping, stitching lines, and perforations with a soft brush attachment. Grit lodged in seams acts like sandpaper during scrubbing. Next, choose a dedicated leather cleaner with a balanced pH and low residue. Reliable products come from Leather Master, Colourlock, Gyeon, and similar specialist lines. Avoid all-purpose cleaners unless the manufacturer specifically states they are safe for coated automotive leather at the required dilution. Avoid steam on weakened finishes and never flood perforated seats, since moisture can reach foam, seat sensors, or heater elements.
Apply cleaner to a soft brush or microfiber applicator rather than directly soaking the seat. Work one small section at a time using light circular agitation, then wipe away suspended soil with a clean microfiber towel. Repeated light passes are safer than one aggressive pass. On shiny bolsters, use a dedicated degreasing cleaner designed for leather topcoats. On dye transfer, a specialty transfer remover is more effective than scrubbing harder. If the towel shows color matching the seat, stop and reassess; you may be removing failed finish rather than dirt. That is a restoration issue, not a cleaning step.
Drying technique matters. After cleaning, wipe the area dry and allow airflow before judging the result. Damp leather often looks temporarily darker and more uniform, which can hide remaining wear. If the surface feels tacky, residue remains and should be removed with a damp microfiber followed by a dry towel. Conditioners are not mandatory for most modern coated automotive leather because the protective coating limits absorption. In practice, protection products designed for coated leather provide more benefit than oily conditioners. They reduce friction, slow dye transfer, and help future cleaning. The best clean leather finish is matte or low satin, not glossy and slippery.
Remove stains, oil buildup, and odor without harming the finish
Stain removal requires identifying the source before choosing a product. Organic soils such as sweat, food residue, and skin oils respond to foaming leather cleaner and degreasing agents. Dye transfer from dark jeans usually sits in or on the topcoat and often needs a transfer remover. Ink is more difficult because solvents that dissolve ink can also soften or strip the finish. Start with the least aggressive method and test every chemical in a hidden area. Rushing this step is why many otherwise salvageable seats end up needing color repair.
Odor control is also part of interior restoration. Leather itself rarely causes bad smells; trapped moisture, smoke residue, spilled drinks, and contaminated foam usually do. Clean the leather surface first, then inspect carpet underlays, seat tracks, and cabin filters if odor persists. Enzyme treatments can help with organic contamination on adjacent trim, while an ozone treatment may reduce smoke odor when used carefully and according to safety guidance. However, ozone is not a cleaning substitute and can degrade some materials if overused. In restoration work, source removal always beats masking.
| Problem | Likely Cause | Best First Response | What to Avoid |
|---|---|---|---|
| Shiny, dark bolster | Body oil buildup on topcoat | Leather degreaser with soft brush agitation | Heavy scrubbing with stiff brushes |
| Blue staining | Denim dye transfer | Dedicated transfer remover | Magic erasers and strong solvents |
| Sticky surface | Product residue or softened finish | Wipe with damp microfiber, reassess coating | Layering conditioners over residue |
| Musty smell | Moisture in foam or adjacent trim | Dry source, clean surrounding materials | Fragrance sprays as a fix |
One common myth is that household saddle soap is ideal for car leather. It is not the standard choice for modern automotive interiors because it can leave residue and alter finish feel. Another myth is that more conditioner solves stiffness. In many cases, stiffness improves only after contaminants are removed and the coating is stabilized. Treat the actual defect, not the symptom you notice first.
Repair cracks, scuffs, and color loss the professional way
Once the leather is truly clean, you can evaluate whether cosmetic repair is needed. Scuffs that have not broken through the color coat may improve with cleaning and a protector. If pigment has worn away, you need refinishing. Professional-grade systems from Colourlock, Furniture Clinic, and Leather World Technologies typically include prep solution, sanding pads, filler, colorant, and a clear finish. The objective is to recreate a thin, flexible coating, not to bury damage under thick product.
For minor cracks, lightly level raised edges with fine abrasive, usually in the 800 to 1500 grit range depending on the system. Apply leather filler sparingly into the crack, dry it completely, and sand smooth. Overfilling creates ridges that are obvious under side lighting. On worn bolsters, feather the transition between intact finish and repaired area. Color matching is crucial. Many suppliers can mix by manufacturer code, but codes are not always exact after years of UV exposure, so test cards save time. Apply colorant in thin layers with a sponge, airbrush, or spray gun, drying between coats. Thick coats crack sooner and can feel plastic.
The topcoat determines sheen and wear resistance. Most factory interiors are matte to satin. If the repaired area is glossier than the surrounding seat, it will look patched even if the color is right. I generally finish high-contact areas with a durable clear topcoat, then allow full cure before use. Some systems air cure in hours but reach working hardness more slowly, especially in humid conditions. Avoid loading fresh repairs with body weight, heat, or aggressive cleaners until the manufacturer’s cure time has passed. This is where many do-it-yourself repairs fail: the owner sees dry color and assumes the repair is finished.
Not every defect should be repaired in place. Torn panels, split seams, and stretched leather often require upholstery disassembly. Foam support may need rebuilding with high-density material before the leather goes back on; otherwise, the panel flexes excessively and the finish fails again. Steering wheels deserve special mention because hand oils and friction punish them relentlessly. A steering wheel recolor can look excellent, but only if cleaning is meticulous and the coating is thin, well-cured, and protected afterward.
Restore long-term durability with protection and maintenance
Restoration is incomplete without a maintenance plan. UV exposure, abrasion, skin oils, sunscreen, and friction from entry and exit are the main reasons leather interiors degrade. A quality leather protector for coated leather adds slip, reduces dye transfer, and creates a sacrificial layer that takes abuse before the factory topcoat does. This is more important on light interiors, driver bolsters, and family vehicles. It is also the reason freshly restored seats can stay better longer than neglected original seats.
Maintenance intervals depend on use. A daily-driven commuter with children or pets may need light cleaning every month and deeper cleaning every three to six months. A weekend classic stored indoors may only need seasonal attention. The method remains simple: vacuum, clean gently, dry fully, and reapply protector as directed. Keep hard objects out of back pockets, address spills immediately, and enter the vehicle without sliding across the outer bolster. These habits sound small, but they directly reduce friction damage.
Climate control helps more than most owners realize. Extreme heat accelerates topcoat wear and can harden neglected surfaces; repeated moisture cycles encourage odor and mildew in adjacent materials. Use windshield shades, crack windows safely when possible, and maintain door and sunroof seals to prevent water intrusion. If you are maintaining a restored collector car, store it clean and avoid covering damp interiors. Regular inspection is the final step. Catching early abrasion or transfer staining lets you solve a minor problem with cleaner and protector instead of a full refinishing session.
When to handle it yourself and when to call a specialist
Many leather interior cleaning tasks are ideal for an owner: routine cleaning, light stain removal, protector application, and careful maintenance of low-wear areas. Enthusiasts who work patiently can also repair minor scuffs and limited color loss with a good kit. However, there is a clear threshold where a specialist saves money and preserves originality. If the seat has torn seams, detached panels, hardened leather, failed previous repairs, airbag stitching concerns, or widespread color mismatch, professional intervention is the better route.
Specialists bring more than products. They have airbrush control, color-matching experience, understanding of substrate movement, and the judgment to know when a panel should be refinished versus replaced. They also know how to blend adjacent panels so repairs disappear in natural light. In my experience, the worst outcomes come from aggressive cleaning before a proper diagnosis and from thick recoloring attempts on contaminated surfaces. If you are uncertain, stop after gentle cleaning and document the condition. That alone protects the interior while preserving options.
To keep your restoration and maintenance program effective, treat leather as a finished automotive surface, not an old saddle or sofa. Identify the material, clean contamination safely, repair only what is necessary, and protect high-contact areas consistently. Done correctly, leather interior restoration improves appearance, comfort, and resale value while extending the life of original trim. Start with a careful inspection, choose products made for automotive leather, and build a simple maintenance schedule you can actually follow.
Frequently Asked Questions
What is the safest way to clean leather car seats without causing damage?
The safest approach is to treat automotive leather as a finished surface rather than as raw hide. Most vehicle seats have a protective topcoat, so harsh scrubbing, strong solvents, household degreasers, and excessive water are more likely to damage the finish than improve it. Start by vacuuming the seats thoroughly with a soft brush attachment so loose grit does not act like sandpaper during cleaning. Then use a pH-appropriate leather cleaner applied to a microfiber towel or a soft leather brush, not directly flooding the seat. Work in small sections, especially on high-contact areas such as bolsters, seat bottoms, armrests, and steering wheels, where body oils and embedded soil tend to build up.
Agitate gently to loosen contamination, then wipe away residue with a clean damp microfiber towel. Repeat as needed rather than trying to force all the grime off in one aggressive pass. That is the key difference between safe cleaning and accidental damage. If the towel continues to lift dirt, the leather is still dirty. Once clean, dry the surface fully and inspect it under good lighting. Proper leather cleaning should leave the surface matte and natural-looking, not shiny or slick. Excess gloss often means remaining oils, product residue, or worn finish. After cleaning, apply a quality leather protectant to reduce future staining, friction wear, and UV-related fading. Safe cleaning is not about saturation or heavy conditioners; it is about controlled soil removal, preserving the factory coating, and resetting the surface so it can be protected properly.
How do you remove body oils, dye transfer, and dark stains from leather interiors?
Body oils, denim dye transfer, and general darkening are some of the most common reasons owners search for leather restoration advice. In most cases, these marks are not deep structural damage at first. They begin as contamination sitting on or slowly working into the protective finish. The earlier they are addressed, the better the result. Start with a dedicated leather cleaner strong enough for automotive use but still safe for coated leather. Apply it to a soft brush or microfiber applicator and focus on one small test area first. Dye transfer often shows up on light-colored bolsters and seat edges, while body oils collect on headrests, seat backs, armrests, and steering wheels.
Multiple gentle cleaning cycles usually work better than one aggressive attempt. If the stain lightens with each pass, keep going carefully. If it does not respond, it may have penetrated the finish or permanently altered the coating. At that point, stronger stain-removal methods should be approached cautiously because overcleaning can strip color, increase dryness, or create shiny wear spots. This is especially true on older leather where the topcoat is already thin. For stubborn transfer, a professional may use more specialized products and techniques to lift contamination without dissolving the finish. Once the stain is reduced or removed, protecting the area is essential. Leather that is left unprotected will quickly attract the same oils and dyes again. Regular maintenance cleaning, especially on light interiors, is the best long-term strategy for preventing dark buildup from becoming a restoration issue.
Can cracked, dry, or stiff leather be restored, or does it need to be replaced?
It depends on the severity of the damage, but many leather interiors can be improved significantly without full replacement. Dryness, stiffness, light surface cracking, and loss of softness often respond well to a proper restoration process. That process usually begins with deep cleaning because leather that feels dry is often also loaded with oils, old dressings, and soil that interfere with any restorative product. After cleaning, the surface can be evaluated more accurately. If the leather is structurally intact and the cracks are mostly in the finish layer, restoration may involve softening the material, refining the surface, recoloring worn areas, and sealing everything with a fresh protective coating.
However, not all cracks are equal. Fine creasing from normal use is very different from deep splits, torn seams, or leather that has become brittle enough to break when flexed. Once the hide itself is badly compromised, cosmetic treatment alone will not truly repair it. In those cases, filler, dye, and topcoat may improve appearance temporarily, but replacement panels or professional upholstery repair may be the better solution. For moderately aged leather, though, restoration can make a dramatic difference in both feel and appearance. The goal is not to make old leather brand new in every case, but to stabilize it, improve texture, reduce visible cracking, restore a more even color, and prevent rapid further deterioration. When done properly, restoration extends the life of the interior and preserves original materials that are often worth saving.
How do you restore faded or worn leather color in a vehicle interior?
Restoring faded or worn leather color is a refinishing job, not just a cleaning step. If seats look pale, blotchy, scuffed, or rubbed through on entry bolsters, the original color coat or top finish has usually worn down. The correct process starts with cleaning and degreasing so no oils remain to interfere with adhesion. Next, the damaged areas are assessed for scratches, cracking, and coating loss. Light imperfections may be smoothed and prepped before any color is applied. If necessary, minor repairs are made to create a more even surface. Only then should color restoration begin.
For a durable result, the new color must be compatible with automotive leather finishes and applied in controlled, even layers. Spot repairs can work on small worn areas, but larger faded sections often need blending to avoid obvious transitions. After recoloring, a protective topcoat is typically applied to set the sheen level and improve resistance to abrasion, oils, and UV exposure. This is what separates a proper restoration from a temporary cosmetic cover-up. Simply rubbing in conditioner or using a generic dye product rarely produces a lasting or natural-looking result. When color restoration is performed correctly, the leather retains a factory-like appearance, the repaired area blends with surrounding panels, and the finish is much less likely to rub off prematurely. Maintenance afterward matters just as much as the repair itself, because fresh color can fail early if the seats are immediately exposed to heavy abrasion and neglected cleaning.
What products and maintenance routine help keep restored leather soft, clean, and protected?
The best maintenance routine is simple, consistent, and focused on protection rather than overloading the leather with heavy dressings. Start with routine vacuuming to remove abrasive dust from seams, perforations, and stitching lines. Clean the leather on a schedule that matches use, not just when it looks dirty. Daily drivers, family vehicles, and light-colored interiors need attention more often because body oils, sunscreen, sweat, and clothing dyes build up gradually. Use a dedicated automotive leather cleaner for periodic wipe-downs and a quality protectant that adds resistance to UV rays, friction, and staining. This is especially important on driver bolsters, steering wheels, center armrests, and seat bottoms.
Avoid common mistakes such as using all-purpose cleaners, silicone-heavy shine products, saddle soaps not intended for modern automotive finishes, or soaking the leather with conditioners in the hope of “feeding” it. Most modern vehicle leather does not benefit from greasy residue on the surface. In fact, that residue can attract dirt and make the seats feel slick or look unnaturally glossy. Instead, aim for a clean, dry-to-the-touch, low-sheen finish. As a practical routine, inspect high-wear areas monthly, clean lightly as needed, and apply protectant every few months or according to climate and use. In hot, sunny environments, sunshades and covered parking help preserve both color and suppleness. In restoration terms, maintenance is what protects the investment. Cleaning removes the contaminants that wear the finish down, and protection slows the return of fading, staining, stiffness, and surface cracking.




