
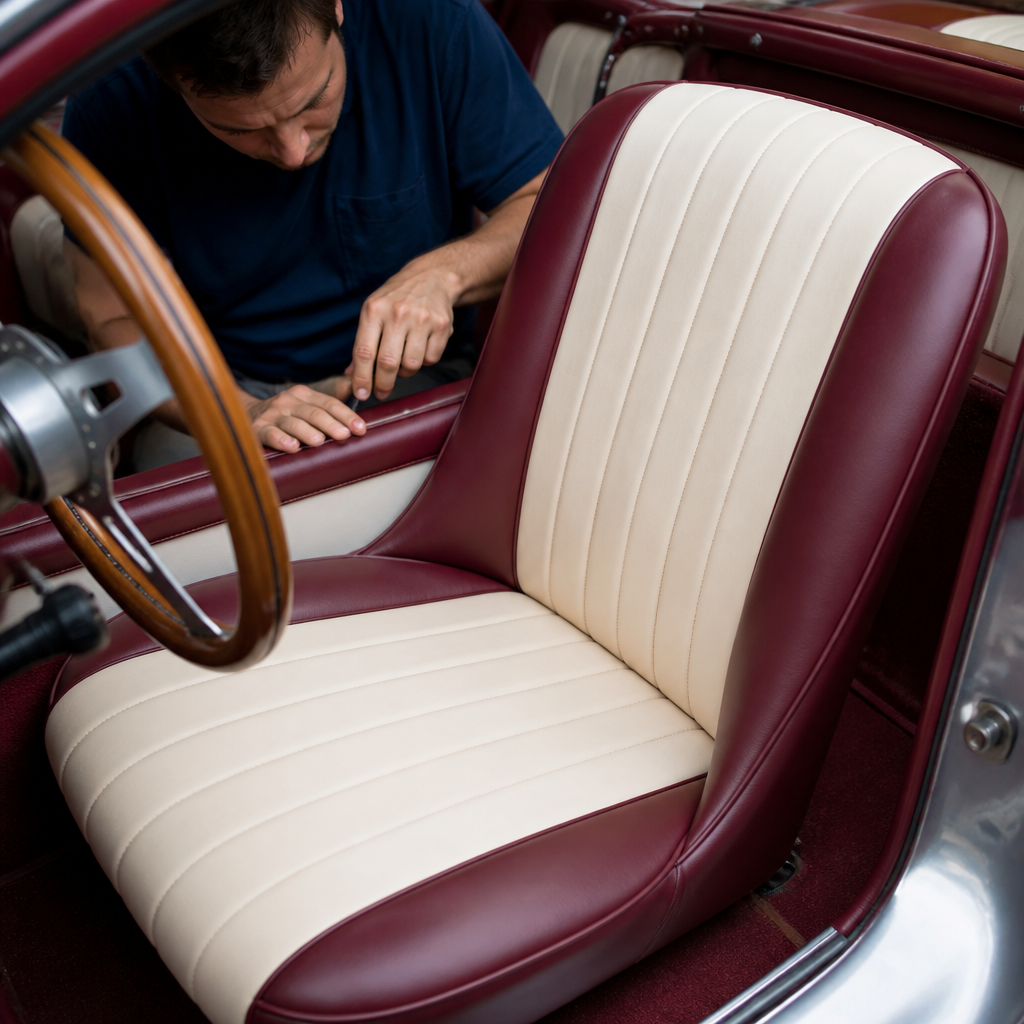
Classic car seats and upholstery restoration is the process of repairing, rebuilding, and refinishing the interior soft trim so a vintage vehicle looks correct, feels comfortable, and holds value. Interior restoration includes seat frames, springs, padding, foam, burlap, listing wires, vinyl, leather, cloth inserts, door panels, headliners, carpets, package trays, insulation, and the small trim details that make a cabin feel complete. I have worked on interiors ranging from 1950s bench-seat sedans to 1970s muscle cars, and the lesson is always the same: a beautiful paint job cannot compensate for torn seams, collapsed cushions, and musty carpet. Buyers, judges, and drivers notice the cabin immediately because it is the part of the car they touch, smell, and see up close.
For owners researching how to restore classic car seats and upholstery, the first question is usually whether the job is cosmetic or structural. Cosmetic work addresses stains, faded covers, split seams, and worn piping. Structural work goes deeper into broken zigzag springs, rusted frames, deteriorated horsehair pads, sagging webbing, and brittle seat tracks. The distinction matters because a seat can look acceptable in photos while being unsafe or uncomfortable in use. A proper classic car interior restoration starts with inspection, documentation, and a plan that respects originality, budget, and how the vehicle will be driven.
Interior restoration matters for three practical reasons. First, it protects long-term value. Cars with correct grain vinyl, factory-style pleat spacing, and accurate stitch patterns consistently command more than cars with generic trim-shop replacements. Second, it improves safety and usability. Rebuilt seat frames, secure anchor points, and fresh padding reduce fatigue and keep occupants properly positioned behind the wheel. Third, it preserves authenticity. Materials and construction methods changed by era and manufacturer, so restoring a 1966 Mustang pony interior requires different decisions than restoring a 1948 Buick broadcloth bench or a 1978 Mercedes MB-Tex cabin. When done well, upholstery restoration is not decoration; it is conservation combined with craftsmanship.
As a hub for interior restoration, this guide explains how to assess seat condition, choose materials, decide between repair and replacement, and sequence related work such as carpeting, sound deadening, and trim panel refurbishment. It also highlights where specialist articles usually go deeper, including leather care, headliner installation, seat spring rebuilding, and concours-correct material sourcing. If you understand the core process here, you can plan the entire interior with fewer surprises and better results.
Inspect the Interior Before Removing Anything
The best upholstery restorations begin with disciplined inspection. Before pulling a single hog ring, photograph every seat face, side, back, hinge cover, trim escutcheon, and seam. Measure pleat width, insert placement, and button spacing. Note whether the seat sits level, whether the tracks move smoothly, and whether the foam rebounds or stays compressed. Smell the cabin too. Mildew, rodent contamination, and old water leaks usually point to hidden damage in padding, jute underlayment, or floor insulation. In my experience, moisture is the issue owners underestimate most. A split rear window seal can ruin rear seat padding and package tray boards long before the seat cover visibly fails.
Then inspect the structure. Remove the seats and check frame welds, coil or sinuous springs, webbing, burlap layers, listing rods, and attachment points. Surface rust is common and manageable; deep pitting at hinge mounts or seat legs requires repair before upholstery work starts. On many American cars from the 1960s, broken seat springs create the classic “driver lean” that owners misdiagnose as bad foam. European cars often hide crumbling coconut fiber pads or horsehair that shed dust and collapse under modern use. Documenting these conditions lets you order parts accurately and avoid redoing finished covers because a spring failed afterward.
Choose a Restoration Goal: Driver, Show, or Preservation
The right restoration standard depends on the car and the owner’s purpose. A driver-level restoration prioritizes durability, comfort, and a tidy original look. You may use high-quality reproduction vinyl, molded foam, and discreet modern insulation while keeping factory patterns. A show-level restoration demands stronger material research. Judges often notice incorrect embossing, wrong heat-seam patterns, non-original grain, shiny thread, or foam contours that make seats appear overstuffed. Preservation work is different again. If original upholstery is rare but salvageable, careful cleaning, localized stitching, color blending, and panel repairs may be better than full replacement.
This choice affects cost and sourcing. A full set of ready-made reproduction covers from suppliers such as Legendary Auto Interiors, TMI, PUI, or SMS Auto Fabrics may fit common muscle cars well, but low-production models often require custom trimming from original samples. Leather selection also changes. Correct automotive hides are typically chrome tanned and pigment finished for UV resistance, unlike furniture leather that may look rich initially but wear poorly in a car. Matching a factory interior means evaluating grain direction, sheen, perforation pattern, backing material, and stitch construction, not just color.
Restore Seat Frames, Springs, and Padding First
Seat upholstery only fits correctly when the foundation is rebuilt first. Start by stripping covers carefully and saving every listing wire, clip, and panel as a pattern. Media blast or mechanically clean metal frames, repair cracked welds, and coat the frame with epoxy primer or a durable chassis paint. Replace damaged springs using equivalent gauge and style. Coil spring seats may need retied spring units; zigzag spring seats need proper clips and edge wire tension. Skipping this step creates wrinkles, uneven bolsters, and premature seam failure because the cover is carrying load that the frame and springs should support.
Padding choice determines both appearance and comfort. Earlier cars often used layered cotton, jute, horsehair, or molded latex, while many restorers now substitute molded polyurethane foam. Foam is practical, but density matters. Foam that is too soft gives a puffy, modern shape; foam that is too hard feels wrong and strains cover seams. Where originality matters, combine modern foam with cotton batting and burlap in ways that mimic factory contour. I routinely test-fit the seat with muslin or the old cover before final installation because even good reproduction foam often needs carving, steaming, or added scrim to match the original profile.
| Component | Common Failure | Best Repair Approach | Why It Matters |
|---|---|---|---|
| Seat frame | Cracked welds, rust at mounts | Weld repair, rust treatment, epoxy prime | Maintains seat strength and alignment |
| Springs | Sagging, broken coils, detached clips | Replace matching springs and retension | Prevents lean, improves support |
| Burlap and webbing | Torn or brittle support layers | Install new burlap or webbing before padding | Stops foam from sinking into springs |
| Foam or padding | Collapsed bolsters, powdering, distortion | Use density-correct foam and batting | Restores shape and comfort |
| Listing wires | Rust, bends, missing sections | Clean or replace to original length | Ensures proper pleat definition |
Select Upholstery Materials That Match the Era
Material choice is where many interiors drift away from period correctness. Vinyl was common in American and European cars because it was durable, affordable, and available in distinct grains. Leather appeared on higher trims, but even then, seating surfaces might be leather while backs and sides were vinyl. Cloth interiors used specific weaves, loop patterns, and heat-seamed details that are difficult to duplicate without exact source material. If you are restoring a classic car seat upholstery set, ask for samples in natural light, compare them to unfaded hidden areas, and verify whether the material is sewn, embossed, or heat-pressed.
Thread, trim, and hardware deserve equal attention. UV-resistant polyester thread usually outperforms cotton, but visible topstitching should still match the original look in thickness and spacing. Piping diameter affects the whole seat profile. Chrome seat buttons, stainless trim strips, hinge covers, and welting colors often vary by trim level. Good restorers keep original panels even when unusable because they reveal seam allowances, panel orientation, and attachment methods. This is especially important for interiors with asymmetrical patterns, map pockets, or integrated armrests where a generic pattern will never look factory-correct.
Install Seat Covers Methodically for a Factory Fit
Installing seat covers is part technique, part patience. Warm vinyl becomes more pliable, so many trimmers use a steamer, heat gun on low, or direct sunlight to relax wrinkles before stretching. The cover should be anchored from the center outward, attaching listing rods and hog rings in the same sequence used by the factory so pleats stay straight. Pulling too hard on one edge to remove wrinkles usually distorts another area. On bucket seats, symmetry is critical; on bench seats, consistent crown and skirt alignment matter more than extreme tension.
Leather requires even more care. It stretches differently across grain, can mark under aggressive pliers, and needs controlled humidity during installation. Perforated inserts tear if hog-ringed carelessly. After fitting, let the covers settle before making final judgments about minor ripples. Some relax after use; others indicate missing batting or an attachment point installed in the wrong order. Professional-looking interiors come from repeated dry fitting, not brute force.
Coordinate Door Panels, Headliner, Carpet, and Insulation
Interior restoration is a system, not a seat-only task. Restored seats can still look wrong if the door panels are warped, the headliner bows are mispositioned, or the carpet pile and heel pad are incorrect. Door panels often fail from moisture entering past window felts and vapor barriers, so replace backing boards with water-resistant material and reinstall proper moisture barriers before attaching new panel skins. Headliners require their own sequencing because glass removal, bow placement, and windlace installation affect final tension. Wrinkles at the sail panels are usually a setup problem, not simply a material problem.
Carpet and sound deadening have a major influence on perceived quality. Molded carpets should fit after floor repairs, seam sealing, and insulation installation are complete. Butyl sound deadening reduces resonance, while closed-cell foam and mass-loaded vinyl improve heat and noise control. These upgrades make touring more pleasant, but they add weight and can trap moisture if installed over untreated rust. On high-end restorations, I use insulation strategically rather than covering every surface, because correct drain paths and service access matter as much as quietness.
Know When to Repair, Re-dye, or Replace
Not every classic car interior needs full replacement. Small seam separations, minor bolster wear, and dried but intact leather can often be repaired. Quality leather restorers can clean, fill cracks selectively, and recolor seating surfaces with automotive-grade coatings. Vinyl can sometimes be plastic-welded from the backside or repaired with grain-matched compounds, though these fixes rarely hold up on high-stress bolsters as well as panel replacement. Cloth inserts are harder. Sun fading and rot usually mean replacement, but isolated burns or tears may be rewoven by specialists for rare fabrics.
The decision comes down to use and rarity. If the car is a survivor with uncommon trim, preserving original material may outweigh minor flaws. If it is a driver with widespread deterioration, replacement is more durable and often more economical than piecemeal repairs. The mistake is mixing standards randomly: fresh seat covers beside yellowed door panels and brittle armrests make the whole cabin feel unfinished. Plan the interior as one project, even if you phase the work over time.
Budget, Timeline, and Common Mistakes
Classic car seat restoration costs vary widely. A straightforward DIY installation on a common car with reproduction covers and foam may cost a few thousand dollars including carpet and panels. A custom or concours interior with rare material sourcing, spring rebuilding, headliner work, and trim restoration can climb far higher. Time also matters. Waiting for correct fabric, chrome trim refurbishment, or seat medallion plating can delay completion by months. Build contingencies into both budget and schedule because hidden rust, mouse damage, and prior poor repairs are common.
The most common mistakes are easy to avoid: ordering covers before confirming seat type and production date, skipping frame repair, throwing away original patterns too soon, using household adhesives instead of high-temperature trim adhesive, and installing carpet before resolving leaks. Another frequent error is over-restoring. Seats that are too firm, too shiny, or overstuffed may look new but no longer look correct. The best interior restoration balances authenticity, durability, and the way the car will actually be used.
Restoring classic car seats and upholstery is one of the highest-impact improvements you can make under the broader restoration and maintenance umbrella. It brings back comfort, visual accuracy, and pride of ownership while supporting resale value and everyday enjoyment. The key is to treat interior restoration as a structured process: inspect thoroughly, set a clear goal, rebuild frames and springs before touching finish materials, choose era-correct upholstery, and coordinate seats with door panels, carpet, insulation, and headliner work.
If you remember only one principle, make it this: the visible seat cover is only as good as the structure beneath it. Strong frames, correct spring tension, properly layered padding, and accurate installation create the fit and feel people associate with a well-restored car. Shortcuts almost always show up later as wrinkles, sagging cushions, split seams, or mismatched trim. Careful documentation and measured decision-making save money because they prevent rework.
Use this page as your hub for interior restoration planning, then go deeper into the specific jobs your car needs most, whether that is seat foam rebuilding, leather repair, carpet replacement, headliner installation, or sourcing hard-to-find fabrics. With the right parts, the right sequence, and patience, you can restore a cabin that looks authentic, smells clean, and feels right every time you open the door. Start with a full inspection and photo set, and build your interior restoration plan from there.
Frequently Asked Questions
What is included in classic car seat and upholstery restoration?
Classic car seat and upholstery restoration covers far more than replacing torn fabric or installing fresh vinyl. A proper restoration starts with a full inspection of the interior soft trim and support structure, including seat frames, springs, tracks, hinges, padding, foam, burlap, listing wires, hog rings, and original attachment points. From there, the work typically extends to the visible materials such as leather, vinyl, cloth inserts, pleated panels, welting, stitching patterns, and seat backs, along with matching components like door panels, armrests, kick panels, headliners, carpets, package trays, sail panels, insulation, and trunk liners where appropriate.
The goal is to restore both appearance and function. That means rebuilding seats so they sit at the correct height, provide the right support, and retain the original shape intended by the manufacturer. In many classic cars, especially from the 1950s through the 1970s, worn springs, collapsed foam, brittle burlap, or rusted frames can make an otherwise attractive interior feel uncomfortable and incorrect. A quality restoration addresses those hidden issues before new covers go on. Done correctly, the finished interior looks factory-correct or period-appropriate, feels solid and comfortable, and helps preserve the vehicle’s authenticity and long-term value.
How do I know whether my classic car seats need repair, rebuilding, or complete replacement upholstery?
The answer depends on the condition of both the visible upholstery and the structure underneath it. If the seat covers have minor splits, loose seams, fading, or small worn spots, repair may be enough, especially on original interiors where preservation matters. However, if the seats feel uneven, sag in the center, lean to one side, rock on the tracks, or make noise when occupied, the problem usually goes deeper than the outer material. Broken springs, cracked seat frames, failed padding, disintegrated burlap, and missing listing wires are all common in older vehicles and often require partial or full rebuilding.
Complete replacement upholstery is usually the best route when the original covers are badly shrunk, hardened, torn across multiple panels, water-damaged, sun-baked, or previously repaired incorrectly. The same is true when foam has collapsed beyond reuse or when the original materials are too deteriorated to serve as accurate patterns. A careful restorer will evaluate what can be saved, what should be repaired, and what needs to be recreated. In many cases, the best result is a combination approach: preserving usable hardware and structural pieces while replacing the trim materials and padding. That approach keeps the interior true to the car while restoring comfort, durability, and visual quality.
Is it better to restore original upholstery or install reproduction materials?
There is no single answer for every car, because the right choice depends on the vehicle’s rarity, intended use, budget, and the condition of the existing interior. If the car still has a largely intact original interior, restoration and preservation are often worth serious consideration. Original materials, stitching styles, grain patterns, and fit details can be difficult to duplicate exactly, and for highly collectible vehicles, preserving as much factory material as possible can support authenticity and value. Small tears, seam failures, dry leather, and localized damage can sometimes be repaired while retaining the original character of the cabin.
Reproduction materials become the better option when the originals are too far gone, unavailable in reusable condition, or no longer safe and comfortable. High-quality reproduction kits or custom-made covers can closely match factory patterns, colors, pleat spacing, and textures, but quality varies widely. The best results come from using accurate reference materials, checking grain and sheen, and making sure the patterns actually fit the seat frames and contours correctly rather than just looking close from a distance. For drivers and restomods, some owners also choose upgraded foams or slightly modernized materials for comfort and durability. The key is deciding whether your priority is concours-level originality, honest driver-quality restoration, or a tasteful custom interpretation, then choosing materials that support that goal consistently throughout the interior.
What are the biggest challenges in restoring vintage car seats and interior upholstery correctly?
One of the biggest challenges is that the visible upholstery is only the final layer of a much more complex system. By the time a classic car reaches restoration age, the seat frames may have rust, fatigue cracks, bent mounting points, or old repairs that distort the shape. Springs may be broken or stretched, and the original padding materials may have compressed so badly that even perfect new covers will not sit correctly. If those structural issues are ignored, the finished seats can look puffy, loose, twisted, or overly tight. Good upholstery work depends on solid foundations, and rebuilding those foundations takes patience, parts knowledge, and an understanding of how the seat was originally assembled.
Another major challenge is historical accuracy. Many classic interiors used very specific materials, embossing patterns, stitch counts, heat seams, button placements, and trim details that are easy to overlook. Door panels, headliners, windlace, carpets, and package trays must also coordinate correctly in color, texture, and fit, or the interior will feel mismatched even if each part looks good on its own. On top of that, old cars often vary from one production run to another, and previous owners may have swapped components over the decades. The most successful restorations rely on careful disassembly, labeling, photography, pattern preservation, and comparison to known-correct examples. That attention to detail is what separates an average reupholstery job from a truly convincing classic car interior restoration.
How can I make sure a restored classic car interior lasts and continues to look good?
Longevity starts with the restoration process itself. Quality materials, proper seat rebuilding, correct installation tension, and rust-free support structures all matter just as much as the outer appearance. Covers that are stretched improperly, foam that is the wrong density, or hidden moisture left under carpet and insulation can shorten the life of the entire interior. It is also important to use materials suited to the car’s environment and use. For example, a regularly driven classic may benefit from more durable padding and better moisture control, while a show car may prioritize exact original-style finishes. In either case, sealing leaks, replacing worn weatherstripping, and ensuring the floor and roof areas are dry before installation are essential steps.
Once the restoration is complete, maintenance is what protects your investment. Keep the car clean, avoid prolonged sun exposure when possible, use a windshield shade, and store the vehicle in a dry, ventilated space. Leather should be cleaned and conditioned with products appropriate for automotive hides, while vinyl and cloth should be cleaned gently to avoid breaking down stitching or surface finishes. Vacuum carpets and seat creases regularly so grit does not act like sandpaper. If you notice loose seams, sagging sections, or water intrusion, address them early before minor issues become expensive repairs. A well-restored classic car interior can hold up beautifully for years, but it stays that way only when craftsmanship is paired with consistent care.




