
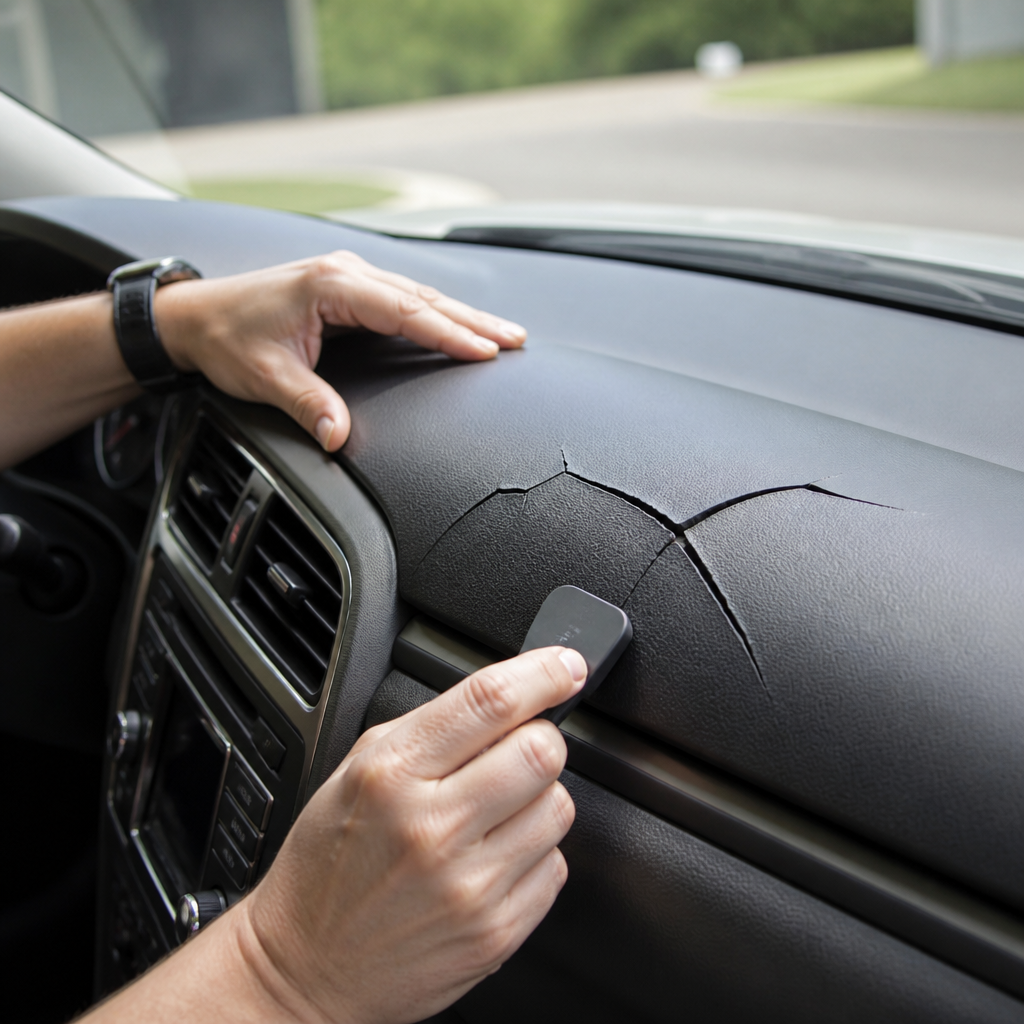
A cracked dashboard makes an interior look neglected, but the problem is more than cosmetic. In every restoration shop I have worked in, dashboard damage has been one of the clearest signals of long-term heat exposure, ultraviolet degradation, and shrinking vinyl or plastic substrates. Learning how to repair cracked dashboards matters because the dash sits in constant view, supports vents and switches, and often affects resale value more than owners expect. Interior restoration, in practical terms, means returning cabin materials, trim, controls, and surfaces to safe, attractive, functional condition. A dashboard repair is therefore both a finish repair and a structural stabilization job.
Most dashboards are built from a rigid base, usually molded plastic, topped with foam and a skin of vinyl, PVC, urethane, or textured plastic. As cabin temperatures rise, plasticizers evaporate, materials dry out, and the surface becomes brittle. The first signs are shine loss and slight warping near defroster vents. Next come hairline splits, then wider cracks that expose foam or the hard substrate below. Once a crack forms, vibration, seasonal expansion, and cleaning chemicals usually make it spread. That is why quick cosmetic concealment rarely lasts unless the substrate is stabilized first.
For owners building a complete interior restoration plan, the dashboard is the hub component that connects visually to seats, carpets, headliners, steering wheels, and door panels. A successful repair should match the surrounding grain, color, and sheen while preserving vent openings, panel fit, and airbag seams where applicable. This article serves as a central guide to interior restoration by explaining dashboard crack repair methods, when to restore versus replace, the tools professionals trust, and how dashboard work ties into broader cabin refurbishment decisions. If you understand these fundamentals, you can plan smaller detail repairs and full-cabin projects with fewer mistakes.
What causes dashboard cracks and how do you assess the damage?
Dashboard cracks are usually caused by heat cycling, ultraviolet radiation, low humidity, chemical cleaners, and material age. In older vehicles, especially 1980s through early 2000s models, the dashboard top often gets cooked under the windshield for decades. Dark interiors absorb more heat, and vehicles parked outdoors fail faster than garage-kept examples. I also see damage accelerated by silicone-heavy dressings that create temporary gloss but contribute to long-term drying and dust attraction. On some trucks and SUVs, windshield leaks add another layer of damage by degrading foam and creating hidden rust or mold beneath the dash pad.
Assessment starts with identifying whether the crack is superficial, through the skin only, or structural through the foam and base. Press around the damaged area. If the surface flexes without crumbling, a repair filler system may hold. If the foam has turned powdery, the hard shell is fractured, or multiple cracks radiate from vent corners, the panel may require extensive rebuilding or replacement. Inspect nearby trim gaps, vent bezels, mounting tabs, and airbag covers. A dashboard that has warped upward near the windshield can be repaired cosmetically, but fitment issues often return unless the underlying distortion is corrected.
Before choosing a method, decide what finish standard you need. A daily driver can often accept a visible but tidy repair. A show car, high-value collector model, or leased luxury vehicle needs much closer grain and color accuracy. This is where interior restoration becomes strategic. If the dashboard is faded, brittle, and surrounded by worn door panels, replacing only the crack may make the rest of the cabin look worse. In hub planning terms, dashboard repair should be considered alongside seat leather repair, carpet dyeing, plastic trim refinishing, and weatherstrip renewal so the entire interior presents consistently.
Should you repair, cap, wrap, or replace the dashboard?
There are four realistic options: localized repair, full surface restoration, overlay cap installation, or dashboard replacement. Localized repair works best for one or two stable cracks where the substrate remains sound. Full surface restoration involves opening cracks, reinforcing them, filling, texturing, priming, and recoloring the entire dash top. An overlay cap is a molded shell bonded over the original dashboard; it is often the most cost-effective choice for common classics and trucks with widespread cracking. Replacement means sourcing a new old stock, reproduction, or salvage dashboard and transferring all trim and components.
The right choice depends on budget, originality goals, and part availability. I recommend localized repair when the dashboard is rare, the crack count is low, and the owner wants to preserve the factory skin. A cap makes sense when the original is too far gone but the vehicle is not valuable enough to justify custom upholstery work. Replacement is the cleanest fix if a quality factory or reproduction dash is available and the labor to remove the old one overlaps with other jobs like heater core replacement, evaporator service, or wiring restoration. Those combinations often make replacement more economical than it appears at first glance.
| Option | Best Use Case | Main Advantage | Main Limitation |
|---|---|---|---|
| Localized repair | Small, stable cracks | Preserves original material | Grain matching is difficult |
| Full restoration | Moderate cracking across top surface | Uniform color and finish | Labor intensive |
| Overlay cap | Widespread cracks on common models | Fast and affordable | Edges can look less factory |
| Replacement | Severe damage or warped structure | Best structural result | Parts and removal cost |
For a hub article on interior restoration, it is important to understand how these options affect adjacent projects. A replacement dash may require removing the steering column trim, center console sections, radio surround, glove box, and instrument cluster. That creates an ideal moment to replace brittle clips, clean ducting, renew foam seals, polish gauge lenses, and fix squeaks. In other words, dashboard work is rarely isolated. Done thoughtfully, it becomes the anchor job that upgrades the entire front cabin rather than a patch hidden under a windshield sunshade.
How to repair cracked dashboards step by step
A durable dashboard repair follows a sequence, and skipping steps is why many DIY fixes sink, split, or telegraph through the topcoat within months. First remove trim pieces, vents, and accessories around the crack if practical. Clean the area with a wax and grease remover approved for interior plastics, then wipe with isopropyl alcohol. Avoid lacquer thinner or strong solvent blends that melt surrounding material. Next use a rotary tool, carbide burr, or V-groove cutter to open the crack slightly. This sounds counterintuitive, but widening the crack into a controlled channel removes weak edges and creates room for filler and reinforcement.
After grooving, feather the edges with 80- to 180-grit abrasives depending on material thickness. If the crack extends through the panel, reinforce from beneath whenever access allows. In the shop, I commonly use a two-part flexible epoxy with a fiberglass mesh or fabric backing on rigid plastic dashes, and a dedicated urethane repair compound on soft dashboards. Products from SEM, 3M, Polyvance, and Urethane Supply Company are established choices because they publish compatibility guidance and cure profiles. The key is matching filler flexibility to the original substrate. A rigid body filler on a flexible dash top almost always fails.
Once reinforced, fill the groove in thin layers rather than one heavy pass. Let each layer cure fully, then shape it with sanding blocks or contour pads. Rebuild the profile slightly proud of the surface so it can be leveled flush. If the dashboard has a textured grain, restore it before color coating. Professionals use grain papers, texture pads, or sprayable texture coatings to mimic factory patterns. Heat-assisted grain transfer can work on some vinyl skins, but it requires practice to avoid gloss differences. Prime only with an adhesion-promoting, flexible primer designed for interior plastics, then apply a matched interior coating in light coats to blend sheen and color.
The final step is curing and inspection. Leave the vehicle out of direct sun until coatings harden fully, because heat can imprint fresh finishes and expose low spots. Reinstall vents and trim carefully to avoid stressing the repair. If the repair line remains faintly visible at certain angles, that is normal on many older dashboards with deep grain and large thermal movement. What matters is that the crack is stabilized, sealed, and visually integrated. For owners managing broader interior restoration, this is also the right time to clean upholstery seams, treat door seals, and refinish faded plastic trim so the restored dash does not outshine the rest of the cockpit.
Tools, materials, and professional standards that improve results
The difference between a short-lived repair and a durable one often comes down to tools and process control. At minimum, use nitrile gloves, plastic-safe cleaner, lint-free towels, masking materials, a rotary tool, flexible spreaders, contour sanding pads, and a stable work light positioned low across the surface. Low-angle lighting reveals sinkage, texture mismatch, and pinholes better than overhead shop lights. For finishing, an HVLP detail gun or quality aerosol system gives more even coverage than brushing dye by hand. A digital infrared thermometer also helps confirm that the panel is within the product’s recommended application temperature range.
Standards matter because dashboards combine cosmetics with safety. If the vehicle has a passenger airbag, do not bridge or bury the deployment seam with rigid filler, fiberglass, metal staples, or thick coatings. Follow OEM service information for trim clearances and seam treatment. Likewise, if electronics are integrated into the panel, disconnect the battery and protect sensors and harnesses from dust and solvents. Material selection should be based on substrate identification when possible. PP, ABS, PVC, urethane, and vinyl all respond differently to adhesion promoters and repair compounds. Plastic identification marks on the rear of removed panels are useful when available.
Color matching deserves the same rigor as structural repair. Interior colors are not simple black, gray, or tan. They may have blue, red, or green undertones and different gloss units. I usually test on hidden trim or spray cards before touching the dash. SEM Color Coat, OEM-matched interior dyes, and custom-mixed automotive trim coatings can all work, but prep determines adhesion more than brand reputation alone. This is also where interior restoration intersects with upholstery and trim work: if seats are being re-dyed or door panels refinished, match the dashboard to the whole cabin, not to a single sun-faded section.
Common mistakes, maintenance, and how dashboard repair fits full interior restoration
The most common mistake is treating dashboard cracks like exterior dents. Polyester body filler, generic primer, and hardware-store paint may look acceptable for a week, then shrink, crack, or peel once summer heat hits. Another mistake is leaving contamination in the crack. Dressings, skin oils, and dust trapped in porous foam prevent adhesion. I also see owners chase a perfect invisible repair on severely warped dashboards when an overlay cap or replacement would produce a stronger, cleaner result. Good restoration decisions are not about stubbornly preserving every original surface; they are about balancing authenticity, durability, labor, and vehicle value.
After repair, prevention is straightforward and effective. Use a windshield sunshade, keep the cabin ventilated when possible, and choose water-based UV protectants rather than greasy silicone products. Regular cleaning with a pH-balanced interior cleaner prevents grime buildup that can abrade textured surfaces. If the windshield is being replaced, inspect the pinchweld and cowl drains because hidden leaks can ruin a newly restored interior. In hot climates, ceramic window film within legal limits noticeably reduces dashboard temperatures. Those simple maintenance steps extend the life of not only the dash, but also leather tops, stitching, infotainment screens, and plastic switchgear.
As the hub page for interior restoration, this topic should guide your next steps. If your dashboard is cracked, inspect the rest of the cabin systematically: seats for split seams and collapsed bolsters, carpet for fading and odor, headliner for sagging foam, door panels for delamination, and trim for chalking or broken clips. Addressing those issues in a planned sequence saves labor and creates a consistent finish. Start with assessment, choose repair versus replacement honestly, use materials made for flexible interiors, and protect the result from heat and UV. A restored dashboard transforms the cabin immediately, so make it the starting point for a complete interior restoration plan.
Frequently Asked Questions
Can a cracked dashboard really be repaired, or does it usually need to be replaced?
Yes, many cracked dashboards can be repaired, and in a lot of cases a careful repair is the most practical option. Whether repair makes sense depends on the depth of the crack, the material of the dashboard, and how much warping, brittleness, or sun damage is present across the rest of the panel. Small surface cracks, split seams, and localized damage around corners or defroster vents are often good candidates for repair using plastic fillers, flexible repair compounds, grain-texture products, and color-matched coatings. If the underlying structure is still sound, a well-executed repair can dramatically improve appearance and restore a more uniform surface.
Replacement becomes more likely when the dashboard has multiple long cracks, severe distortion, missing chunks, broken mounting points, or widespread ultraviolet damage that has made the entire shell fragile. In those situations, repairing one area may still leave the rest of the dash weak and likely to fail later. For older vehicles, though, replacement dashboards can be expensive, hard to source, or in no better condition than the original. That is why restoration shops often weigh originality, parts availability, cost, and the owner’s expectations before deciding. If the goal is a clean, respectable driver-quality interior, repair is often the smartest path. If the goal is a show-level restoration or the dash structure is compromised, replacement or a professionally restored dash cap solution may be the better investment.
What causes dashboards to crack in the first place?
The main causes are heat, ultraviolet exposure, and age-related material shrinkage. A dashboard spends years sitting under the windshield, which acts like a magnifier for solar heat. That repeated thermal cycling dries out vinyl, hardens plastics, weakens foam underneath, and causes expansion and contraction over and over again. Eventually, the outer skin loses flexibility and begins to split, especially along stress points, seams, speaker openings, and vent edges. Once a crack starts, normal vibration from driving and further sun exposure usually make it spread.
Material construction also plays a major role. Some dashboards are made with a rigid plastic base covered by foam and vinyl, while others are molded from harder composite materials. As these layers age, they do not always expand and contract at the same rate. That mismatch creates tension beneath the surface. Add low humidity, years of direct sunlight, and poor maintenance, and the dashboard begins to shrink, curl, or fracture. In practical terms, a cracked dashboard is often a visible symptom of long-term interior neglect or harsh environmental exposure. Preventing future damage usually means using a windshield sunshade, keeping the car out of direct sun when possible, and applying interior-safe UV protectants designed for automotive trim.
What is the best method for repairing a cracked dashboard at home?
The best home repair method is usually a controlled fill-and-refinish process, not simply smearing filler over the top of the crack. First, the damaged area needs to be cleaned thoroughly with a residue-free interior cleaner so oils, dressings, and dust do not interfere with adhesion. Then the crack is typically opened slightly with a precision blade or rotary tool to create a clean repair channel. That may sound counterintuitive, but removing loose edges and exposing stable material allows the repair compound to bond properly instead of sitting on a weak surface. Any brittle or lifting material should be removed before filler is applied.
After preparation, a flexible dashboard or vinyl repair compound is worked into the crack in thin layers. Flexibility matters because the dashboard continues to expand and contract with temperature changes. Once cured, the area is shaped smooth, often with fine sanding or leveling pads, and then re-textured if needed to match the surrounding grain. Many repair kits include grain papers or texture pads to help replicate the original factory surface. The final step is refinishing with a color-matched interior coating or dye made for automotive plastic and vinyl surfaces. Done properly, this approach produces a cleaner, more durable result than quick cosmetic patches. The key is patience: thin applications, correct cure times, and careful texturing matter much more than speed.
Are dashboard repair kits worth using, and how long do the results last?
Dashboard repair kits can be worth using if the damage is minor to moderate and the person doing the repair understands their limitations. A decent kit can handle hairline cracks, small splits, and localized surface defects, especially on daily drivers where the goal is noticeable improvement rather than perfect invisibility. The better kits usually include cleaners, filler compounds, texture materials, and color products intended for flexible interior surfaces. When used correctly on stable material, they can provide surprisingly respectable results at a fraction of the cost of full replacement or professional restoration.
How long the repair lasts depends on surface preparation, the quality of the products, and the environment the vehicle lives in. A careful repair on a garaged vehicle with UV protection may hold up for years. A rushed repair on a dashboard that is still baking in direct sunlight every day may begin to telegraph through again much sooner. It is also important to understand that many kits improve the appearance more than they completely eliminate evidence of damage. On heavily textured or badly faded dashboards, the repaired area may still be visible under certain lighting. For best longevity, combine the repair with preventive care: use a sunshade, keep interior temperatures down when possible, and apply only products that will not leave greasy residue or soften the repair coating over time.
When should a cracked dashboard repair be left to a professional?
A professional is the right choice when the dashboard has complex damage, valuable originality, or a finish standard that is hard to achieve with DIY materials. Deep cracks that run through multiple contours, damage around vents and instrument openings, large sunken sections, and areas with missing material are all more challenging than they first appear. Professionals have access to higher-grade fillers, heat-setting tools, advanced texture replication methods, and better color-matching systems. They also know how to stabilize the area beneath the visible crack so the problem does not simply reappear through the new finish.
Professional repair is also worth considering if the vehicle is collectible, if the dashboard must be removed for structural work, or if you want a near-factory appearance. In many classic and high-value cars, a poorly done dashboard repair can hurt the interior more than an honest crack would. Experienced restoration shops can evaluate whether the dash should be repaired in place, removed and rebuilt, capped, or replaced entirely. They can also identify related problems such as vent distortion, failed foam support, or mounting issues that a surface repair alone will not solve. If you have already attempted a repair and the crack has returned, that is another strong sign to step back and let a specialist handle it properly.




