
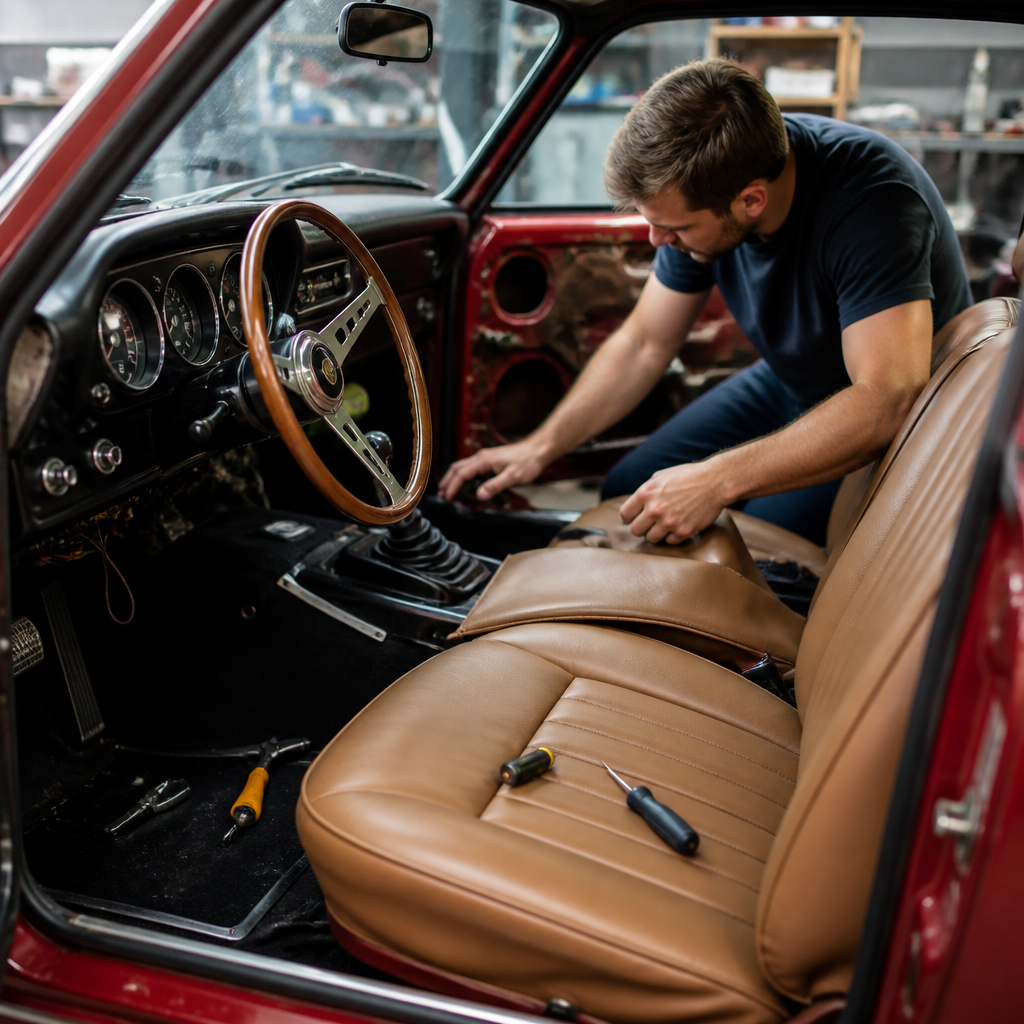
Classic car interior restoration turns a worn cabin into a usable, period-correct space while protecting the value, comfort, and historical character of the vehicle. In restoration work, the interior includes upholstery, seat frames, springs, foam, carpets, headliners, dashboards, gauges, steering wheels, door panels, trim, weatherstripping, sound deadening, and often hidden components such as heater boxes, wiring, and seat tracks. Restoring these parts is not simply cosmetic. A cracked dash can signal years of ultraviolet damage, a sagging seat can point to broken webbing or rusted springs, and musty carpet often means old water intrusion that will eventually corrode the floorpan. When I assess a vintage cabin, I treat appearance, function, safety, and originality as one system, because interior defects usually share a root cause.
That systems view matters because interiors age differently than paint or drivetrains. Sun dries vinyl, leather loses oils, foam collapses, adhesives fail, and steel structures hidden under trim quietly rust. Previous owners may install non-original radios, universal seat covers, or house-grade carpet that looks acceptable in photos but creates expensive problems later. A complete guide to classic car interior restoration must therefore answer practical questions: What should be saved, what should be replaced, how do you plan a correct restoration, and where do costs escalate? It should also help owners decide between a preservation-focused refresh and a concours-level rebuild. The right path depends on the car’s rarity, intended use, available parts, and budget. For most owners, the best restoration is not the most expensive one. It is the one that returns the cabin to reliable, coherent condition without erasing the car’s identity.
This interior restoration hub explains how to inspect a classic car interior, build a parts and labor plan, choose materials, sequence the work, and avoid common mistakes. It also frames interior restoration within the broader restoration and maintenance process. Cabin work often overlaps with rust repair, weather sealing, electrical troubleshooting, and glass removal, so timing matters. If you install fresh carpet before solving a windshield leak, you will pay twice. If you upholster seats before testing track alignment or replacing floor insulation, you risk damaging new covers. Whether you are restoring a 1967 Mustang, a Tri-Five Chevrolet, a W113 SL, or a square-body truck, the same core principles apply: document everything, diagnose before disassembly, preserve what is rare, and rebuild in a sequence that prevents rework.
How to assess a classic car interior before restoration
The first step in classic car interior restoration is a structured inspection. Start with photos from every angle, then remove nothing until you have documented stitching patterns, trim grain, fastener types, and hardware locations. I always inspect in layers. The visible layer covers tears, cracks, fading, missing knobs, and incorrect materials. The functional layer covers seat adjusters, latch operation, gauge response, heater controls, window regulators, courtesy lights, and horn contacts. The hidden layer covers floor rust, moisture paths, seat frame corrosion, brittle wiring, degraded insulation, and previous repairs. Use a moisture meter around footwells and trunk-divider areas if the car shows mildew. Pull sill plates and lift carpet edges. Surface rust can often be stabilized; perforation means metal work before trim installation.
Originality assessment is equally important. Factory assembly manuals, dealer brochures, trim tag data, and marque-specific judging guides help confirm what belongs in the car. On many American classics, seat upholstery pattern and carpet loop type changed by trim level, while European cars may have market-specific materials and switchgear. Matching numbers may dominate auction language, but interior correctness strongly affects value because it is constantly visible and expensive to redo. During inspection, separate components into four categories: reusable as-is, restorable originals, quality reproductions available, and scarce parts requiring specialist repair or custom fabrication. That sorting process controls the budget more than any upholstery quote does.
Planning scope, budget, and restoration goals
Owners usually choose one of three restoration goals: driver-quality refresh, factory-style restoration, or concours-level authenticity. A driver refresh prioritizes comfort, cleanliness, and safety. It may use reproduction seat covers, pre-molded carpet, repaired dash pads, and upgraded sound deadening. A factory-style restoration aims to visually match original specifications while improving longevity where hidden updates are sensible. A concours build demands date-correct materials, exact grain and stitch counts, proper hardware finishes, and accurate supplier markings where documented. Costs vary dramatically. A straightforward muscle car interior with strong reproduction support may run far less than a low-production import requiring custom door cards, wood veneer restoration, and rebuilt Jaeger or VDO instruments.
Good planning also means sequencing interior work with body and mechanical tasks. Windshield and back glass should be resealed before final carpet and panels go in. Heater cores and air-conditioning evaporators should be pressure-tested while the dash is apart. Power accessories and lighting circuits should be repaired before insulation hides the harness. I recommend a written scope listing every component, the chosen action, expected lead time, and whether original hardware will be replated, painted, or replaced. This prevents a common problem: spending heavily on visible trim while leaving unresolved leaks, wiring faults, or heater box foam failure that will force disassembly later.
| Component | Restore Original | Replace with Reproduction | Best Choice When |
|---|---|---|---|
| Seat frames and springs | Usually yes | Rarely available complete | Original structure is repairable and fit matters |
| Seat upholstery covers | Sometimes | Common on popular models | Material is torn, shrunken, or mismatched |
| Carpet sets | Rarely | Often available pre-cut or molded | Old carpet has odor, wear, or water damage |
| Dash pad | Specialist restoration possible | Available for some models | Cracks are severe and appearance affects value |
| Gauges and switches | Yes | Selective replacement only | Original calibration and fit are important |
| Door panels | Sometimes | Often available | Backing boards are warped or clips have failed |
Seats, upholstery, and trim materials
Seat restoration combines metal repair, padding work, and finish trim. Many owners focus on the cover, but comfort and appearance depend more on what sits underneath. Seat frames should be stripped and checked for cracks at hinge points, track mounts, and recliner pivots. Zigzag springs, coil springs, burlap, listing wires, hog rings, and webbing all affect shape. Replacing only the cover over collapsed foam produces a loose, overstuffed look that judges and experienced buyers spot immediately. For cars from the 1950s and 1960s, foam density and contour matter; for earlier cars, cotton batting and horsehair-style pads may be part of the correct build approach. Upholstery shops that understand vintage patterns can replicate pleat spacing, heat seams, and welt details that generic trimmers often miss.
Material choice should match both originality goals and use. Leather looks rich but is not always factory-correct; many cars used vinyl, MB-Tex, broadcloth, or patterned inserts. Modern leather can outperform period hides, but grain and sheen must suit the era. Vinyl quality varies widely. Premium automotive vinyl resists UV damage and cleans easily, while cheap material shrinks and hardens around stitched edges. Carpets also differ. Loop pile, cut pile, square-weave, and molded synthetic sets each suit different vehicles. Underlayment influences cabin temperature and noise. Butyl-based sound deadening is effective and dimensionally stable, whereas asphalt products can soften in heat and create odor. When owners ask what makes an interior feel expensive, my answer is consistent fit, correct texture, and restraint. The best interiors do not look newly invented; they look convincingly right.
Dashboards, instruments, steering wheels, and electrical details
The dashboard is the visual center of the cabin and one of the most technically demanding areas to restore. Pad cracks, peeling veneer, cloudy lenses, faded silk-screen markings, and nonfunctional gauges often appear together because heat and time affect every material differently. Instrument clusters should be disassembled carefully, with needle positions documented and housings labeled. Mechanical gauges may need cleaning, recalibration, or capillary tube replacement; electric gauges often need printed circuit repair, resistor checks, and proper grounding. Specialists who restore Smiths, Stewart-Warner, Delco, VDO, and Veglia instruments are worth using because accuracy matters as much as appearance. A beautiful tachometer that reads 800 rpm high is still wrong.
Electrical restoration behind the dash is also where safety improves most. Brittle insulation, Scotchlok connectors, household wire, and bypassed fuse circuits are common finds in classic cars. If the harness is largely original and the copper is sound, localized repairs with correct terminals and loom may be enough. If insulation cracks when flexed, replacement is smarter. Companies such as American Autowire, Painless Performance, and Rhode Island Wiring Service support different eras and restoration philosophies, from stock reproduction to discreet modernization. Steering wheels deserve similar scrutiny. Hairline cracks can be filled and refinished; severe deterioration may require epoxy recasting. Horn rings, cancel cams, and column bushings should be serviced before the wheel returns, because a restored wheel attached to a sloppy column still feels neglected.
Carpet, headliner, weather seals, and hidden causes of damage
Carpet and headliner installation seems straightforward until hidden issues surface. Before any soft trim goes in, solve water entry. Common leak points include windshield gaskets, cowl vents, rear glass channels, quarter window seals, heater box drains, antenna mounts, and door vapor barriers. I have seen freshly restored interiors ruined within one season because old gaskets were reused. The floor should be cleaned, repaired, epoxy-primed if appropriate, seam-sealed, and insulated only after leak testing. Seat mounting points and seat belt anchors deserve special attention, since rust here affects safety directly. If the car originally used jute padding, modern mass-backed alternatives can improve noise control, but they may change fit under sill plates and consoles.
Headliners demand patience because wrinkles, listing rod position, and adhesive choice determine the final result. Perforated vinyl, cloth, and wool materials each react differently to temperature and tension. On pillarless hardtops and many coupes, windlace and sail panel geometry matter as much as the headliner itself. Weatherstripping should never be judged only by softness out of the box. Fit, profile accuracy, and compression set are what determine whether doors shut properly and windows seal. Brands differ by model, and the best part is not always the cheapest or the most heavily advertised. After installation, leave time for settling and adjustment. Door glass alignment, vent window frames, and latch striker positions often need fine tuning to work with fresh seals.
When to do it yourself and when to hire a specialist
Some interior restoration tasks are realistic for careful enthusiasts, while others justify specialist labor. Removal, cataloging, basic cleaning, seat frame painting, sound deadening installation, minor wiring repairs, and carpet fitting are often manageable with patience and a factory manual. Dash wood refinishing, gauge calibration, convertible top boot fabrication, complex French seams, and heat-pressed upholstery patterns usually are not beginner jobs. The deciding factor is not pride; it is the cost of mistakes. A miscut carpet can be replaced. A torn original door panel or damaged rare instrument bezel may be difficult to recover from.
Choose shops by inspecting completed work, not just social media photos. Ask how they handle pattern duplication, substrate repair, foam shaping, and hardware refinishing. Request references from owners with the same marque. Good trimmers talk in specifics: stitch length, scrim backing, grain match, listing attachment, and lead times for materials. They also warn you about tradeoffs. For example, some reproduction covers fit better with additional foam shaping; some preassembled door panels need clip hole correction; some restored plastic parts remain more fragile than new reproductions. A successful classic car interior restoration depends on those honest conversations. Start with a detailed inspection and restoration plan, then move section by section so every repair supports durability, comfort, and authenticity for years.
Frequently Asked Questions
What does classic car interior restoration usually include?
Classic car interior restoration covers far more than replacing torn seat covers or installing fresh carpet. A complete restoration typically includes upholstery, seat frames, springs, foam padding, carpets, headliners, dashboards, gauges, steering wheels, door panels, trim pieces, weatherstripping, sound deadening materials, and package trays. In many cases, it also involves hidden but important components such as seat tracks, heater boxes, vent controls, wiring under the dash, insulation, and hardware that supports both comfort and safety. These concealed parts are easy to overlook, but they often determine how usable and correct the finished interior feels.
The scope depends on the condition of the vehicle and the goal of the project. A preservation-minded restoration may focus on cleaning, repairing, and stabilizing original materials wherever possible. A full restoration, by contrast, may require stripping the cabin to bare metal, treating rust, rebuilding seat structures, replacing deteriorated foam, recovering panels, refinishing trim, and reinstalling every component in a way that matches factory appearance. The best interior restorations balance authenticity, function, and longevity, so the cabin not only looks period-correct but also feels solid, operates properly, and supports the overall value of the car.
Why is interior restoration important beyond appearance?
Interior restoration matters because the cabin affects safety, drivability, comfort, and vehicle value just as much as exterior paint or engine condition. A cracked dashboard, brittle wiring, loose seat frames, failing springs, rotten weatherstripping, or damaged heater controls can cause real problems that go well beyond cosmetics. Gauges need to read accurately, seats need to support occupants properly, and switches, vents, and controls should function as intended. When these systems are neglected, the car may be unpleasant to drive, less safe to use, and more expensive to repair later.
There is also the issue of preservation. Moisture intrusion from failed seals, trapped debris under carpets, and deteriorated insulation can lead to hidden corrosion in floors, rockers, and lower body panels. An interior restoration often reveals these issues early enough to address them before they become major structural problems. From a collector standpoint, a correct and well-executed interior helps protect the historical character of the vehicle. Buyers and judges pay close attention to stitching patterns, grain textures, materials, colors, trim fitment, and instrument presentation. In other words, the interior is not just where you sit; it is one of the clearest indicators of how carefully the entire car has been restored.
Should I keep the interior original or upgrade it with modern materials?
The answer depends on your goals for the car. If originality, show judging, and collector value are top priorities, keeping the interior as factory-correct as possible is usually the best path. That means using the right upholstery pattern, vinyl or leather type, carpet weave, headliner material, trim finish, and hardware style for the year, make, and model. Even small details such as pleat spacing, piping, emblem placement, and fastener design can matter in a concours-level restoration. Maintaining originality generally preserves the car’s historical integrity and can strengthen market appeal among serious collectors.
If the car is being built as a driver, a touring car, or a restomod, carefully chosen upgrades can make a lot of sense. Modern seat foam can improve comfort, upgraded sound deadening can reduce road noise, and improved weatherstripping can make the cabin quieter and more usable. Some owners also choose discreet wiring improvements, better insulation, or rebuilt gauges for reliability. The key is to be intentional. A random mix of modern materials and incorrect trim can hurt the visual harmony of the interior and may reduce resale appeal. The best upgraded interiors respect the original design while improving durability and comfort in ways that do not feel out of character for the vehicle.
How do you know whether interior parts should be repaired, restored, or replaced?
This decision usually comes down to condition, rarity, cost, and the importance of originality. Original parts should be saved whenever practical, especially if they are difficult to source or unique to the vehicle. Seat frames, metal trim, gauge housings, steering wheel cores, dash structures, and certain hardware can often be restored even when they look rough at first glance. Surface rust, faded finishes, split seams, collapsed foam, and sagging headliners may appear severe, but many of these issues can be corrected by a skilled restoration specialist without losing the underlying original character.
Replacement becomes necessary when components are structurally unsound, heavily warped, unsafe, or too deteriorated to restore economically. Examples include rotten floor-backed carpet padding, severely broken plastic panels, crumbling insulation, extensively corroded seat springs, or wiring that has become brittle and hazardous. Reproduction parts can be excellent, but quality varies widely, so fit, texture, color accuracy, and construction method should always be evaluated before purchase. In many restorations, the best result comes from combining approaches: restore original metal and trim where possible, repair reusable pieces with correct techniques, and replace only what cannot reasonably be saved. That approach typically preserves authenticity while keeping the project practical.
What are the most common mistakes to avoid during classic car interior restoration?
One of the most common mistakes is treating the interior as a purely cosmetic project. Installing new upholstery over bad springs, ignoring rusty seat frames, skipping wiring inspection, or laying carpet over damp or corroded floors can create expensive problems later. Another major mistake is failing to document disassembly. Classic interiors often use unique clips, spacers, screws, and attachment methods, and if those details are not photographed and labeled, reassembly can become frustrating and inaccurate. Rushing material selection is another issue. Incorrect vinyl grain, wrong carpet style, mismatched colors, or poorly made reproduction panels can make an otherwise good restoration look obviously off.
Owners also run into trouble when they overlook hidden systems. Heater boxes, defroster ducts, window regulators, seat tracks, pedal seals, insulation, and weatherstripping should be addressed while the interior is apart, because access is easiest at that stage. Skipping these items may save money initially but usually leads to repeat labor and compromised results. Finally, many restorations suffer from unrealistic budgeting. Interior work often uncovers hidden rust, prior repairs, broken trim, and unavailable parts, so costs can rise quickly. The smartest approach is to plan the restoration in phases, research parts sources carefully, preserve reusable original components, and prioritize both correctness and function. A classic car interior should not only look right on day one; it should remain comfortable, durable, and true to the vehicle for years to come.




