
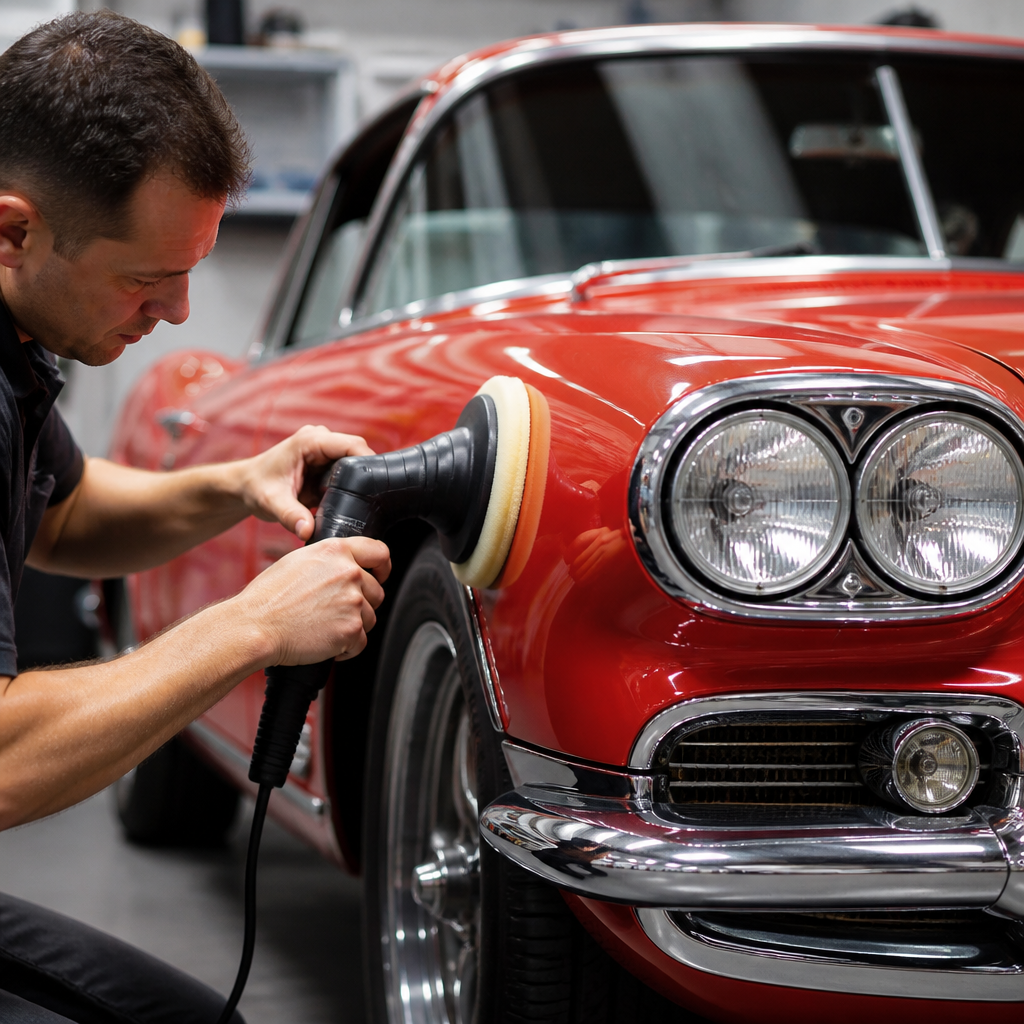
Classic car paint can look deep, rich, and period-correct for decades, but only if polishing and buffing are done with the right methods, tools, and restraint. In restoration shops, “polishing” usually means refining the paint surface with abrasives to remove oxidation, haze, swirls, and sanding marks, while “buffing” refers to using a powered machine and pad to level and gloss that surface. On classic cars, that distinction matters because many finishes are older single-stage enamels or lacquers, not modern, forgiving basecoat-clearcoat systems. A 1967 Mustang in single-stage Rangoon Red reacts very differently to heat, pressure, and compound choice than a repainted 1990s clear-coated Corvette. Understanding those differences protects originality, preserves film thickness, and improves gloss without burning edges or thinning irreplaceable paint. This bodywork and paint hub explains how to assess paint condition, choose compounds and pads, machine polish safely, handle common defects, and know when to stop. It also connects the broader bodywork and paint topics every owner eventually faces: prep, rust repair, spot blending, paint correction, panel alignment, and long-term finish care. If you want concours shine or simply a clean, honest driver finish, proper polishing and buffing are the bridge between a dull surface and a paint job that shows the shape and character of the car.
Assess the Paint Before You Touch a Machine
The first rule in classic car paint correction is inspection before action. I never put a buffer on a vintage panel until I know what paint is on the car, how thick it is, and whether it has been repainted, blended, or spot repaired. Factory lacquer, older enamel resprays, and modern urethane each cut differently. Single-stage paint transfers color onto the pad because the pigment sits through the film; clear coat should not. That simple test on a white microfiber often tells you whether you are working original pigment or a later clear-coated refinish. A paint thickness gauge adds another layer of certainty. Readings that jump dramatically from one section to another often indicate filler, heavy primer, or previous repair work, especially around quarter panels, lower fenders, and door bottoms.
Lighting is equally important. Use high-CRI LED inspection lights and move them across the panel from different angles. Swirl marks, solvent pop, oxidation, buffer trails, crow’s feet, and sanding pigtails all reveal themselves differently. On dark classics like Tuxedo Black or Midnight Blue, holograms appear quickly. On lighter colors, oxidation and dieback are more common clues. If you see checking, cracking, lifting edges, or extremely thin paint on body lines, do not correct aggressively. Those defects are structural or age-related, not just cosmetic. Washing and decontamination come next. Remove dust, polishing residue, embedded fallout, sap, and traffic film before correction. A pH-balanced shampoo, iron remover if the finish tolerates it, and a clay bar or synthetic clay mitt can leave the surface clean enough for accurate diagnosis. Skipping this step drags contaminants under the pad and adds fresh scratches before real polishing even begins.
Tools, Pads, and Compounds That Actually Work on Classic Finishes
Successful buffing depends less on brute force than on matching machine, pad, and abrasive to the paint. For most enthusiasts, a dual-action polisher is the safest starting point because it reduces the chance of creating heat spots and rotary holograms. A forced-rotation dual-action can cut faster on hardened urethane, while a free-spinning DA is ideal for finishing softer single-stage paint. Rotary buffers still have a place in experienced hands, especially after wet sanding, but they demand careful control on crowns, panel edges, and raised styling lines common on classics from the 1950s through the 1970s.
Pad selection matters as much as machine choice. Wool pads cut fast and run cooler in some heavy-compounding situations, but they can leave their own marring. Microfiber cutting pads remove oxidation efficiently on dead single-stage paint. Foam pads are the usual finishing choice: cutting foam for moderate defect removal, polishing foam for gloss enhancement, and finishing foam for jeweling. Compound chemistry has improved significantly. Diminishing abrasives break down as you work them, while many modern non-diminishing abrasives keep a consistent cut and wipe off cleaner. Brands commonly trusted in restoration environments include 3D, Meguiar’s Professional, Menzerna, Rupes, Koch-Chemie, and 3M Perfect-It. There is no universal best system. Soft lacquer may respond beautifully to a mild polish on a polishing foam pad, while oxidized enamel may need a heavier initial compound followed by at least one refining step to restore clarity.
| Paint condition | Recommended machine | Pad choice | Typical product approach |
|---|---|---|---|
| Light oxidation, minor swirls | Free-spinning dual-action | Polishing foam | One-step polish with light cut |
| Moderate defects, older repaint | Dual-action or rotary by experienced user | Microfiber cutting or cutting foam | Medium compound, then finishing polish |
| Wet-sanding marks on hardened urethane | Rotary followed by dual-action | Wool or heavy-cut foam, then finishing foam | Heavy compound, polish, final refine |
| Fragile original single-stage paint | Free-spinning dual-action | Soft polishing foam | Least aggressive polish first, limited passes |
The Correct Polishing Process, Step by Step
The safest professional habit is to start with a test spot. Choose an area about 18 by 18 inches on a representative panel, usually the hood or upper door, and try the least aggressive combination first. Prime the pad lightly, apply a small amount of product, spread it at low speed, and then work the section using overlapping passes. Keep the pad flat. Tilting concentrates force on an edge and can strike through the paint in seconds. On a dual-action machine, moderate arm speed and controlled pressure are more effective than pushing hard. On a rotary, heat management becomes the priority. If the panel feels too hot to hold your hand on comfortably, stop and let it cool.
Classic cars often require smaller pads than modern vehicles because the body shapes are more sculpted. Around fender peaks, headlight brows, A-pillars, and trunk corners, a three-inch backing plate gives far more control than a six-inch setup. Tape trim, emblems, and sharp edges with automotive masking tape. Old stainless trim can catch a pad; die-cast pot metal pits can tear one. Clean the pad frequently with compressed air, a pad brush, or a washer. A clogged pad stops cutting evenly and starts instilling haze. After each section, wipe residue with a soft microfiber and inspect under direct light. If the improvement is adequate, repeat that system around the car. If not, step up slightly in cut, never dramatically, and reassess. Once defects are removed, switch to a finer polish and softer pad to restore clarity and eliminate compounding haze. Final wipe-down with a paint-safe panel wipe reveals the true result without filler oils hiding defects.
How to Handle Oxidation, Swirls, Sanding Marks, and Other Common Defects
Different paint defects require different strategies, and classic finishes punish guesswork. Oxidation is common on older single-stage reds, blacks, and dark blues that spent years outside. The surface turns chalky because ultraviolet exposure breaks down the upper paint layer. In many cases, a compound on microfiber or wool followed by a refining polish will revive surprising gloss, but severe oxidation can reveal uneven pigment loss. Once color is gone, polishing cannot replace it. Swirl marks and buffer trails are usually correctable, but they become obvious on broad, flat hoods and decklids. They often result from dirty pads, overly aggressive wool finishing, or rotary work without a follow-up polishing step.
Sanding marks need disciplined escalation. If a fresh restoration has 2000-grit or 3000-grit wet-sanding marks after dust nib removal or orange peel leveling, match your compound and pad to that grit. Chasing deeper defects than the sanding pattern is risky because you remove excess film for little visual gain. Random isolated deep scratches, etching from bird droppings, and stone chips are different again. A scratch that catches a fingernail is often too deep to remove safely on original paint. In those cases, improvement rather than elimination is the correct goal. Paint swelling, solvent pop, dieback, fisheyes, and checking are not polishing issues at all; they trace back to refinishing materials, contamination, or aging. If a panel has lacquer checking or microcracks, aggressive machine work can worsen the appearance by loading compound into the cracks and thinning the surrounding film. Knowing what not to polish is one of the clearest marks of good bodywork judgment.
Original Paint Versus Repainted Cars: Why the Approach Changes
An original-paint survivor and a fully repainted restoration should not be treated the same way. Survivor cars carry historical value in their factory-applied finish, texture, tape lines, and even mild imperfections. On those cars, preservation is usually more important than maximum correction. I aim to clean, brighten, and stabilize the finish, not make it look dipped in glass. That means fewer passes, lower-cut polishes, cooler-running pads, and acceptance of some age marks. The reward is authenticity. Auction houses and marque specialists routinely note original paint as a premium feature, especially on muscle cars, air-cooled European classics, and low-mileage luxury sedans.
Repainted cars offer more latitude, but only if the refinishing work was sound. A quality urethane respray can often tolerate multistage correction, texture leveling, and final jeweling for show presentation. Poor repaints are another matter. Excessively soft paint can gum up pads and mar instantly. Cheap clear can delaminate years later, and old blend lines may appear as you refine adjacent panels. Panel-by-panel measurement helps here because some restorations hide thin edges under excellent gloss. Always inspect overspray lines under weatherstrips, inside jambs, and around trim openings to understand what has been done before. If you maintain a classic that has a mix of original paint, repaired sections, and older spot work, adjust your process area by area. Uniform technique across inconsistent materials is how burned edges and mismatched gloss happen.
Protection, Maintenance, and the Wider Bodywork and Paint System
Polishing is only one part of bodywork and paint care. Once the finish is corrected, it needs protection suited to how the car is used. Carnauba wax still has followers in the classic scene because it gives warm, flattering depth on single-stage colors, especially black, red, and maroon. Synthetic sealants usually last longer and resist detergents better. Ceramic coatings can work well on cured repaint jobs, but they are not mandatory and can be a poor fit if the owner wants frequent touch-ups with traditional glaze products. Whatever you choose, apply it to paint that is fully corrected and free of polishing oils if the product requires a bare surface.
Long-term results depend on washing and storage habits. Use the two-bucket method or multiple microfiber wash mitts, dry with filtered air or plush towels, and avoid tunnel washes entirely. Keep the car indoors if possible, use a breathable cover only on a clean vehicle, and address chips quickly before corrosion starts. This hub also sits within the wider restoration and maintenance workflow. Good paint correction cannot hide rust bubbling under a quarter panel, misaligned panels that chip at the edges, or poor filler shaping under reflective lighting. The best bodywork and paint results come from sequencing: metal repair first, filler shaping and block sanding second, primer surfacer refinement third, paint application fourth, then color sanding, polishing, protection, and maintenance. If you polish with that larger system in mind, you preserve both finish quality and the long-term value of the car. Evaluate the paint carefully, start with the least aggressive method, refine only as needed, and protect the result. Then build out the rest of your restoration and maintenance plan by learning the connected topics in bodywork and paint, from rust repair to panel prep to finish preservation.
Frequently Asked Questions
What is the difference between polishing and buffing classic car paint?
On classic cars, polishing and buffing are closely related, but they are not the same step. Polishing refers to refining the paint surface with an abrasive polish or compound to remove light oxidation, swirl marks, haze, fine scratches, and sometimes sanding marks. The goal is to improve clarity and smoothness while removing as little material as possible. Buffing usually refers to using a powered tool, such as a rotary or dual-action machine, along with a pad, to work that polish or compound across the paint and build gloss. In practical shop terms, polishing is the corrective process, while buffing is often the machine-driven method used to perform it.
That distinction matters even more on classic vehicles because many older cars wear single-stage enamel or lacquer rather than modern basecoat-clearcoat systems. Single-stage paint contains color all the way through the film, so when you polish it, the color may transfer onto the pad. That is normal, but it also means you are directly removing pigmented paint rather than simply refining a clear top layer. Because of that, classic paint requires a measured approach: milder abrasives, lower heat, careful pad choice, and fewer passes. Understanding whether you are correcting defects, restoring gloss, or simply maintaining a delicate original finish helps you choose the safest method and avoid unnecessary paint loss.
Is it safe to machine buff original or older single-stage paint?
Yes, machine buffing can be safe on original or older single-stage paint, but only when it is approached conservatively and with a clear understanding of the paint’s age, condition, and thickness. Older finishes are often much thinner and more fragile than modern coatings, and they may have already been polished several times over the decades. If the paint is heavily oxidized, checked, cracked, lifting, or worn through at edges and body lines, aggressive machine buffing can do more harm than good. Before any correction work begins, the paint should be carefully washed, decontaminated, and inspected under good lighting. Whenever possible, using a paint thickness gauge and testing a small hidden area first is the safest way to see how the finish responds.
For most classic cars, a dual-action polisher is the safer starting point because it creates less concentrated heat and is less likely to leave holograms or burn through paint than a rotary buffer. A soft foam pad and a mild polish are usually the best first combination. If more cut is needed, step up gradually rather than starting with a heavy compound. Rotary machines do have a place, especially for experienced restorers working on cured resprays or sanding mark removal, but they demand more skill and restraint on old lacquer or enamel. Keep the pad clean, avoid lingering in one spot, stay away from sharp edges and raised contours, and remember that preserving original paint is usually more important than chasing a perfect, modern-looking finish.
What tools and products are best for polishing and buffing a classic car?
The best tools and products for classic car paint are the ones that give you the most control while removing the least amount of material. In most cases, that means starting with high-quality microfiber wash media, clay or other paint-safe decontamination tools if needed, a dual-action polisher, soft foam polishing pads, and a mild diminishing-abrasive polish or finishing compound designed for delicate or older finishes. Microfiber towels should be plush, clean, and dedicated to paint work only. Good lighting is also essential, because defects like haze, swirls, and oxidation can hide in one angle and become obvious in another. If you are working by hand in especially delicate areas, foam or microfiber applicators can be safer than a machine.
Product choice should match the paint type and the severity of the defects. For light oxidation and general gloss improvement, use a gentle cleaner polish rather than a heavy-cut compound. For more severe defects, sanding marks, or chalky surfaces, a stronger compound may be necessary, but only after a test spot confirms the paint can tolerate it. Pad selection matters just as much as liquid selection: wool pads cut faster and run hotter, while foam pads are usually more forgiving. On single-stage lacquer and enamel, softer foam pads are often the safest option. It is also wise to have a dedicated glaze or paint-friendly finishing product available for cars where preservation and richness of appearance matter more than defect elimination. The ideal setup is not the most aggressive one; it is the one that restores depth, color, and gloss with the smallest possible intervention.
How do you polish and buff classic car paint without damaging it?
The safest way to polish and buff classic car paint is to work slowly, test first, and always use the least aggressive method that achieves a clear improvement. Start with a thorough wash to remove loose dirt, followed by careful decontamination only if the paint needs it. Old lacquer and enamel can be softer than expected, so even claying should be done gently with plenty of lubrication. Once the surface is clean and dry, inspect it in bright light and identify thin areas, chips, edge wear, previous repairs, and places where primer may already be close to the surface. Tape off trim, emblems, panel edges, and delicate body lines before machine work begins.
Choose a small test section and try a mild polish with a soft pad first. Make only a few controlled passes, then wipe the area clean and inspect the result. If that combination improves the finish enough, there is no reason to become more aggressive. Keep machine speeds moderate, avoid heavy pressure, and let the polish and pad do the work. Clean pads often, because old oxidized paint residue can build up quickly and increase marring. Never concentrate heat on one spot, and use extra caution around crowns, ridges, and edges where paint is thinnest. After correction, refine the finish with a lighter polish if needed, then protect it with a wax or paint-safe sealant appropriate for the car’s finish. The key principle is simple: on a classic car, preserving paint is the priority, and every polishing step should be judged by whether the improvement is worth the material removed.
How often should classic car paint be polished and buffed?
Classic car paint should be polished and buffed only as often as needed, not on a fixed schedule. Unlike washing or waxing, polishing is a corrective process that removes a small amount of paint each time. That makes frequency especially important on vintage finishes, original paint, and older repaints of unknown thickness. If the car is properly stored, washed carefully, and protected with a quality wax or sealant, it may only need a light machine polish occasionally, or even less often. Many well-kept classic cars benefit more from gentle maintenance and hand-applied protection than from repeated correction.
A good rule is to polish only when there is a visible problem that cannot be solved with cleaning or protection alone, such as oxidation, light swirl marks, mild water spotting, or dullness that has built up over time. Full compounding or aggressive buffing should be rare. In many cases, an annual inspection is more useful than an annual polishing. If the paint still looks rich, smooth, and glossy, leave it alone. For show preparation, a non-abrasive glaze or finishing product may be enough to enhance depth without removing additional paint. The more original and irreplaceable the finish, the more conservative the maintenance plan should be. With classic cars, longevity comes from restraint: wash carefully, protect regularly, correct sparingly, and save the heavy buffing for situations where it is truly necessary.




