
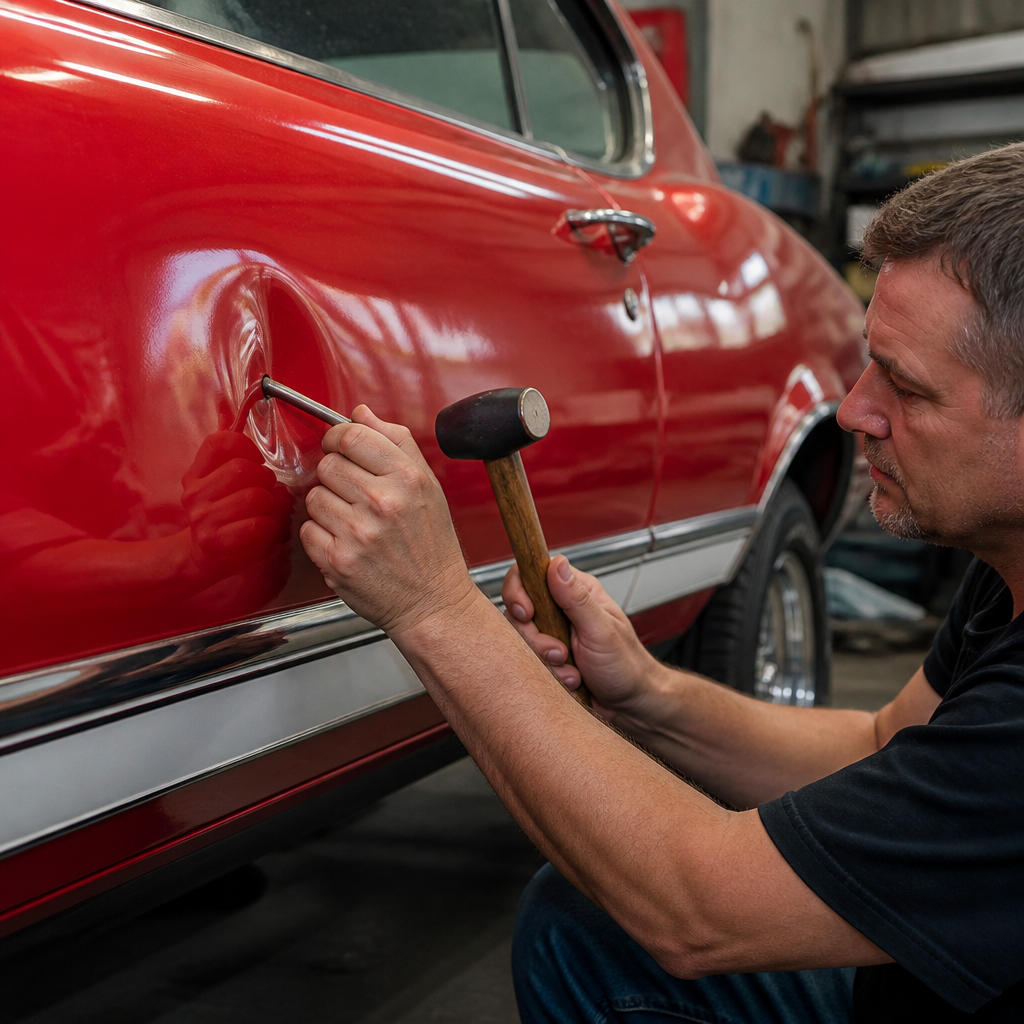
Classic car panels can often be saved, and knowing how to fix dents in classic car panels is one of the most valuable skills in bodywork and paint restoration. In restoration shops, dents are rarely just cosmetic flaws. They distort reflections, crack aging paint, hide stretched metal, and sometimes signal corrosion or past collision repairs under the surface. A dent is any unwanted deformation in sheet metal or aluminum caused by impact, pressure, or improper storage. On classic vehicles, dent repair matters more than on modern daily drivers because original panels are scarce, reproduction parts may fit poorly, and preserving factory metal usually protects both historical authenticity and vehicle value.
Bodywork and paint restoration covers inspection, metal straightening, filler work, rust correction, priming, block sanding, paint application, and final finishing. Dent repair sits at the center of that process because every later stage depends on the panel being correctly shaped first. If the metal is still low, stretched, or crowned in the wrong place, primer and filler only disguise the defect temporarily. I learned early in restoration work that the best paint job in the shop cannot hide bad metal once sunlight hits a long fender or quarter panel. Straight metal saves time, materials, and frustration.
This hub article explains the full decision process behind dent repair on classic cars, including how to assess damage, choose between paintless and conventional methods, use hand tools correctly, manage filler and primer, and know when replacement is smarter than repair. It also connects the wider bodywork and paint discipline into one practical framework. Whether you are fixing a parking lot ding on a 1967 Mustang, a soft crease on a Mercedes W113, or a deep quarter-panel impact on a Tri-Five Chevrolet, the same principles apply: diagnose carefully, move metal gradually, preserve structure, and prepare the surface properly before paint.
Assess the Dent Before Touching the Panel
The first step in fixing dents in classic car panels is not hammering, sanding, or applying filler. It is inspection. I start by cleaning the panel with wax and grease remover, then studying it under a movable LED light or reflection board. Good lighting reveals highs, lows, stretched areas, and crown lines that overhead shop light hides. Run a clean hand across the panel, but trust reflected light more than touch. A shallow dent in the center of a broad hood may feel minor yet show significant distortion once a straight line is reflected across it.
Look for cracked paint, chipped edges, rust bubbling, old filler, and signs of previous repairs. A magnet wrapped in cloth can help identify heavy filler on steel panels, though not on aluminum. Check the backside if access is available through trim openings, trunk cavities, or removed interior panels. Determine the panel material before choosing tools. Many classics use mild steel, but some British sports cars, Corvettes, and specialty models include aluminum or fiberglass. Fiberglass repair follows a different process, while aluminum requires different hammer technique, more care against stretching, and dedicated tools to avoid contamination.
Classify the damage by depth, diameter, crease sharpness, and access. A broad shallow dent with intact paint may be a candidate for paintless dent repair. A sharp crease across a body line usually needs conventional metal finishing and refinishing. If the impact has stretched the metal, caused a reverse crown around the dent, or distorted adjacent gaps at doors, hood, or trunk, the repair is more structural than cosmetic. At this stage, also check whether rust is already present at the dent edge. On a classic car, moisture often enters through cracked paint and starts corrosion quickly, especially on lower doors, wheel arches, and quarter panels.
Choose the Right Repair Method for the Panel and Finish
Not every dent should be fixed the same way. The correct method depends on the metal, paint condition, location, and restoration goal. On a survivor car with valuable original paint, preserving finish may matter more than achieving absolute perfection. On a full repaint restoration, protecting paint is less important than restoring exact panel shape. In practice, dent repair choices usually fall into four categories: paintless dent repair, conventional hammer-and-dolly work, stud welding and pulling, or panel replacement. Heat shrinking may also be necessary if the metal has stretched.
Paintless dent repair works best on shallow dents where the paint is flexible and unbroken. It uses rods, body picks, glue tabs, and controlled tapping to move metal without sanding or repainting. However, older lacquer, enamel, or brittle aged base-clear finishes can crack during manipulation. Conventional hammer-and-dolly work is the core skill for classic steel panels. It involves supporting the panel with a dolly and tapping high or low areas with purpose. Stud welding and slide hammer pulling help when access behind the panel is limited, such as on double-wall quarter panels. Replacement is the last option when rust, tearing, severe stretching, or prior poor repairs make the original panel uneconomical or structurally unsound.
| Method | Best Use | Main Advantage | Main Limitation |
|---|---|---|---|
| Paintless dent repair | Shallow dents with intact paint | Preserves original finish | Risk of cracking old paint |
| Hammer and dolly | Accessible steel panel dents and creases | Restores shape with minimal filler | Requires skill to avoid stretching |
| Stud pulling | Closed panels with poor backside access | Moves lows outward precisely | Needs refinishing afterward |
| Panel replacement | Severe rust, tears, or bad prior repair | Can restore structure efficiently | Fitment and originality concerns |
When deciding, think about final use. A concours restoration usually justifies more labor to save original stampings and maintain correct seams. A driver-quality repair may accept a small amount of filler if the metal is stable and the lines are right. What should never happen is using filler as a substitute for metal work. Polyester filler is designed to refine minor imperfections, not bridge deep lows or cover weak rusted metal.
Use Proper Metalworking Technique to Move the Dent Back
To fix dents in classic car panels correctly, move the metal as close as possible to its original contour before any filler is mixed. This is where patience matters. Most dents should be worked from the outside edges toward the center because the perimeter often traps the low area. On accessible panels, select a dolly that matches the panel crown. A heel dolly, toe dolly, and general-purpose dolly cover most work, but exact shape matters. Use a body hammer with a smooth face; serrated or sharp-faced tools leave marks that require extra finishing.
Understand the difference between on-dolly and off-dolly hammering. On-dolly means the hammer strikes directly over the supported area, raising lows and slightly stretching metal. Off-dolly means the dolly supports nearby while the hammer taps adjacent highs, allowing metal to move with less stretching. For most classic dent repairs, especially on thinner large panels like roofs and quarter panels, off-dolly work is safer. I use light taps and frequent rechecking with a straightedge or reflection board. Heavy blows create more problems than they solve.
Sharp creases need special care because the metal has been displaced along a narrow line. Open the crease gradually with a slapper or flat-faced hammer while controlling the backside with a dolly. If the panel oil-cans, feels loose, or pops in and out after straightening, the metal may be stretched. That is when shrinking becomes necessary. Traditional heat shrinking uses a torch and wet rag, but on classic panels this can easily warp steel if done aggressively. A shrinking disc on an angle grinder is more forgiving. It heats only high spots through friction, and the metal contracts as it cools, tightening the panel without localized overheating. Used correctly, it is one of the best tools in classic bodywork.
Handle Limited Access, Body Lines, and Delicate Original Panels
Many classic car dents are difficult because access is poor, not because the dent itself is severe. Quarter panels, sail panels, lower fenders, and door skins may have braces or double walls blocking direct backside tool access. In those cases, a stud welder is often the cleanest solution on steel. Weld small draw pins or studs to the low area, pull gradually with a mini lifter or slide hammer, then tap down surrounding highs as tension is released. Pulling too hard creates crowns and can tear thin aged metal, so work in short cycles and reassess constantly.
Body lines deserve extra attention because they define the vehicle visually. A 1969 Camaro fender peak, a Porsche 356 hood centerline, or a Volvo Amazon shoulder line will reveal even tiny inaccuracies after paint. Restore the line first, then blend surrounding panel shape into it. Flexible sanding blocks, contour gauges, profile templates, and comparison to the opposite side all help. On symmetrical cars, the undamaged side is your reference standard. Measure line height from fixed points rather than relying on memory or photographs alone.
Original panels also require restraint. Decades-old steel can be thinner from prior sanding, corrosion, or earlier repairs. Factory lead seams, common on many classics, should not be ground carelessly. If lead is present near roof pillars or quarter joints, follow safe handling practices and avoid creating dust. Remove trim, weatherstrips, and interior components before welding or grinding nearby. Fire risk is real, especially around old seam sealer, horsehair insulation, and dry undercoating. A spray bottle and fire watch after welding are standard shop discipline, not optional caution.
Finish the Surface With Minimal Filler, Primer, and Blocking
Once the metal is straight, strip the repair area to stable bare metal or sound surrounding finish. I use 80-grit on a dual-action sander for broad stripping and a clean abrasive disc carefully around edges. Apply polyester body filler only over properly prepared metal or over epoxy primer if the product system allows it; always follow the manufacturer technical data sheet. Reputable systems such as PPG, Glasurit, BASF, Axalta, and SPI publish clear compatibility guidance. Mix filler thoroughly without whipping air into it, spread it thinly, and shape it with long sanding blocks that match the panel size.
Good filler work should refine, not sculpt. On a well-repaired panel, filler thickness is usually very thin, often under one eighth of an inch and ideally much less. Start shaping with 80-grit, then move to 120- and 180-grit as the contour improves. Use guide coat early and often. Guide coat is one of the most effective quality-control tools in bodywork because it instantly shows lows, scratches, and uneven sanding. For large classic panels such as hoods and quarter panels, long blocks are essential. Small hand pads follow waves instead of removing them.
After contour is correct, seal the repair with epoxy primer for corrosion protection, then use a high-build primer surfacer if further leveling is needed. Block sand in stages, commonly 180 to 220, then 320 to 400 depending on the paint system. Keep checking panel gaps, reflections, and transitions into adjacent panels. This is also the stage to decide whether you are blending paint, spot repairing, or preparing the entire panel for refinishing. Single-stage solid colors can sometimes be spot repaired on drivers, but metallics and pearls usually require broader blending for an invisible result.
Know When Rust, Paint, or Panel Condition Changes the Plan
The question is not only how to fix dents in classic car panels, but when dent repair should become rust repair, panel fabrication, or replacement. If grinding reveals perforation, pinholes, or heavy scale, stop cosmetic work and address corrosion properly. Rust expands under paint and filler, so covering it guarantees failure. Localized rusted sections should be cut out and replaced with butt-welded patches shaped to the original contour. Lap patches trap moisture and are usually a poor choice on visible exterior repairs. After welding, metal finish the seam, protect the backside with epoxy or cavity wax, and restore factory drainage paths.
Paint history also matters. Many classics have multiple old finishes, lacquer checking, unknown fillers, and incompatible prior repairs. If the surrounding paint is unstable, feathering only the dent area may lead to edge mapping or later delamination. In those cases, taking the whole panel to a sound substrate is safer. Test solvent sensitivity, inspect for shrinking lacquer, and note previous repair outlines under guide coat. If the car is headed for a complete restoration, it is often more efficient to correct all bodywork systematically panel by panel rather than chase isolated dents in deteriorated coatings.
The key takeaway is simple: repair decisions should serve the car’s long-term integrity, not just immediate appearance. Fix the dent, protect the metal, and finish the panel in a way that will still look right years later. If you are building your restoration plan, use this bodywork and paint hub as your starting point, then move methodically into dent repair, rust repair, priming, and refinishing with the same standard: preserve as much original character as possible while doing the repair thoroughly.
Frequently Asked Questions
Can classic car dents really be repaired, or is panel replacement sometimes the better option?
Yes, many classic car dents can be repaired successfully, and in restoration work, saving the original panel is often the preferred approach whenever the metal is still structurally sound. Original factory panels usually fit better, preserve the car’s authenticity, and avoid the alignment problems that can come with reproduction sheet metal. A skilled technician will first evaluate the depth and shape of the dent, the condition of the paint, whether the metal has stretched, and whether there is rust, filler, or evidence of old collision repairs beneath the surface. If the dent is shallow and the panel is solid, metal finishing techniques such as hammer-and-dolly work, spoon work, shrinking, and careful planishing can often restore the shape with minimal filler.
Replacement becomes the better option when the panel is severely rusted, badly creased across body lines, torn, excessively stretched, or already weakened by previous poor repairs. In some cases, a panel may look repairable from the outside but reveal pinholes, hidden brazing, thick filler, or patchwork once stripped. That is why proper inspection matters before any repair plan is made. The goal is not simply to make the dent disappear visually, but to restore the metal in a stable, lasting way that supports high-quality paint and preserves the integrity of the vehicle. On a true classic, thoughtful repair is usually worth attempting first, but replacement should not be ruled out when the damage or corrosion makes a repair unreliable or uneconomical.
What is the safest way to fix dents in classic car panels without damaging old metal or paint?
The safest way is to begin slowly, diagnose the panel correctly, and use the least aggressive method that will move the metal in a controlled way. Classic car sheet metal can be thinner, more fatigued, or more brittle than modern panels, and original finishes may already be fragile from age, sun exposure, or previous repainting. Before touching the dent, the technician should clean the area, inspect reflections under good lighting, and determine whether the dent is accessible from the back side. If the reverse side can be reached, gentle pressure with appropriate body tools may allow the metal to be coaxed outward rather than struck hard from the front. This reduces the risk of overworking the panel.
If paint preservation matters, especially on survivor cars, paintless dent repair may be possible for certain shallow dents where the finish is still intact and the metal has not been sharply stretched. However, classic panels often have thicker older paint, prior repairs, or limited access, so traditional metalworking is frequently more realistic. The biggest mistakes come from rushing, using too much force, heating the panel unnecessarily, or trying to “pop” the dent out in one move. Proper dent repair happens gradually: raising low spots, supporting high spots, reading the panel’s shape, and repeatedly checking the reflection line. Patience protects both the metal and the finish. Even when repainting is planned, careful handling is essential because old steel and aluminum can be surprisingly easy to warp if mishandled.
How do you know if a dent has stretched the metal, and why does that matter in restoration?
Knowing whether the metal is stretched is one of the most important parts of dent repair on a classic car. A simple dent is a displaced area of metal that can often be returned close to its original shape with controlled pressure and light finishing. A stretched dent is different. The impact has increased the surface area of the metal, meaning the panel may remain loose, oil-can, or unstable even after the visible low spot is pushed back out. Common signs of stretched metal include a panel that flexes in and out too easily, a soft or floppy feel, a broad shallow depression that refuses to stay in shape, or highs and lows that seem to move around during repair. Sharp impacts, large blunt impacts, and previous poor repair work can all cause stretching.
This matters because stretched metal usually needs shrinking as part of the repair process. If a restorer simply fills and sands over stretched sheet metal, the panel may continue to move, crack the filler, distort reflections, or fail later under paint. On classic cars, where long quarter panels, hoods, and door skins reveal every wave, that is a major problem. Shrinking can be done mechanically or with carefully controlled heat, depending on the panel material and repair strategy. The key is precision. Over-shrinking can make the panel too tight and create new distortions. Under-shrinking leaves the metal unstable. In quality restoration, the objective is to return the panel to proper tension and contour so that any skim coat used afterward is minimal and purely for refining the surface, not compensating for unfinished metalwork.
Should you use body filler after fixing a dent in a classic car panel?
Yes, in many cases a thin skim of quality body filler is completely appropriate after the metal has been repaired correctly. There is a common misconception that any use of filler means the job was done poorly, but that is not how professional restoration works. Even excellent metal finishing may leave minor imperfections, tiny low spots, or subtle surface inconsistencies that are best corrected with a light finishing layer before primer and blocking. The important issue is not whether filler is used at all, but how much is used and what condition the metal is in underneath. If the dent has been properly worked back to shape, the filler should be thin, stable, and applied over clean, prepared metal or over the appropriate epoxy foundation depending on the product system being used.
Problems begin when filler is used to hide poor dent repair, stretched metal, rust, or old damage that was never corrected. Thick filler on a classic car panel can absorb moisture if materials and procedures are wrong, crack over unstable metal, and reveal itself later through sinkage or contour changes. For restoration-quality work, the panel should first be stripped and inspected, then straightened as far as reasonably possible through metalwork. After that, a small amount of filler can refine the panel, followed by high-build primer and careful block sanding to restore the proper lines and reflections. On valuable classics, this layered approach produces a cleaner, straighter, longer-lasting result than trying to shape the entire panel with filler alone.
What tools and techniques are most commonly used to repair dents in classic car panels?
The tools depend on the type of dent, panel access, metal thickness, and whether the vehicle has steel or aluminum bodywork, but several core tools appear in most traditional dent repair work. Hammers and dollies are foundational. Different hammer faces and dolly shapes allow the technician to support the panel and move the metal with control. Body spoons, slappers, picks, and pry tools are also useful for moving larger areas more gently than a hammer alone. For inaccessible dents, stud welders and pull systems may be used on steel panels to draw low spots outward without drilling holes. Sanding blocks, guide coat, and reflection boards are just as important as impact tools because they reveal the true shape of the panel during the finishing stage.
Technique matters more than the tool itself. Good dent repair is based on understanding where the impact forced the metal, where tension collected, and how to reverse that distortion step by step. A technician may begin by relieving crowns, lifting the deepest low, planishing the repaired area, and checking panel tension before deciding whether shrinking is needed. On crown-heavy panels and strong body lines, extra care is necessary because those shapes hold memory and can become distorted quickly if worked carelessly. Heat shrinking discs, shrinking hammers, precision welding repairs, and file finishing may all come into play on more advanced jobs. The best restorers do not attack the dent blindly. They read the panel, choose measured corrections, and preserve as much original metal as possible while restoring the factory contour. That combination of patience, observation, and skilled tool use is what separates a lasting repair from a quick cosmetic patch.




