
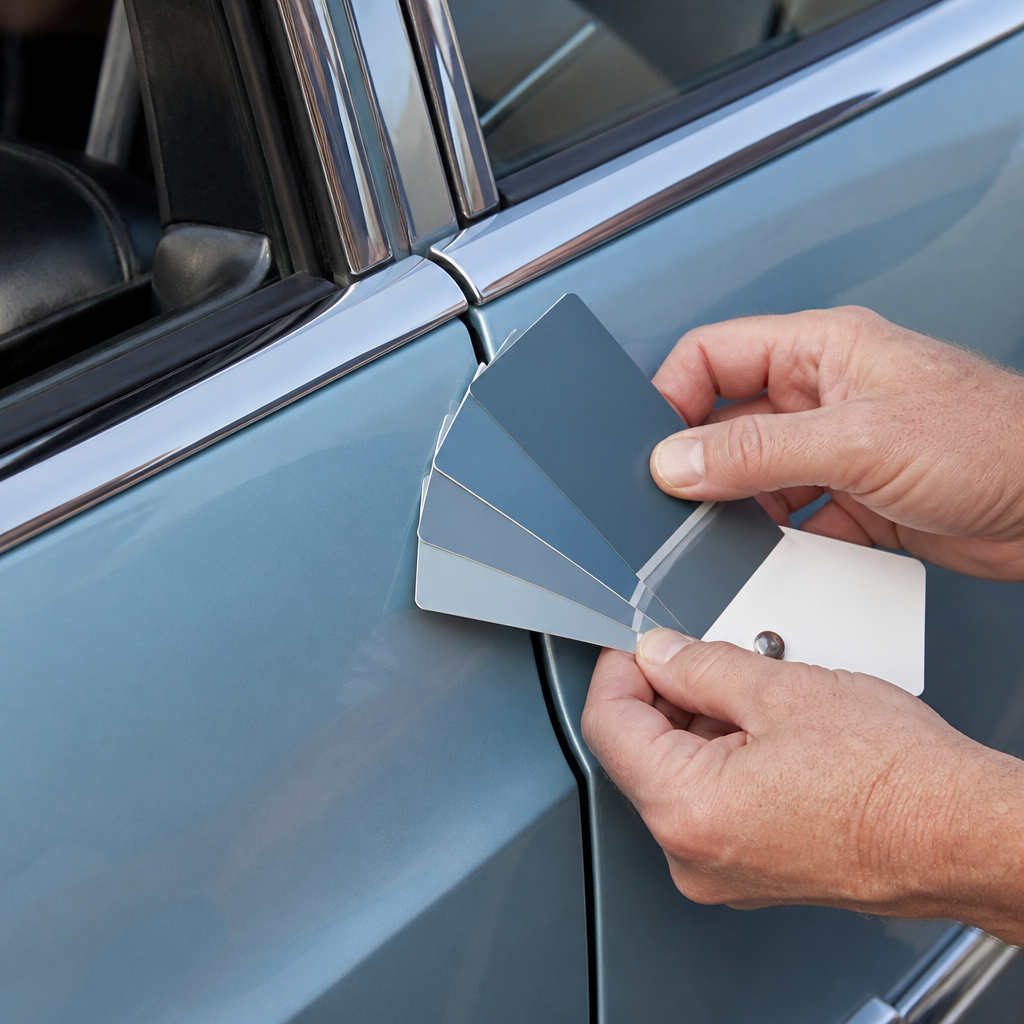
Matching original paint colors is one of the most important and misunderstood parts of vehicle restoration, collision repair, and long-term maintenance. In bodywork and paint, “original paint color” can mean several different things: the factory color code assigned when the vehicle was built, the exact formula mixed by the manufacturer’s paint supplier, the color that actually landed on the panel during production, or the aged finish you see on the vehicle today. Those are not always identical. I have matched paint on daily drivers, collector cars, and partial repaints, and the same lesson appears every time: getting the color right requires more than reading a sticker and ordering a can.
This matters because paint mismatch is immediately visible, even to people who cannot explain why a repair looks wrong. Human eyes notice differences in hue, value, chroma, metallic flop, and gloss across adjacent panels. A silver fender can look blue beside a warmer door. A red quarter panel can appear darker at dusk than in direct sun. Pearl whites are especially unforgiving because the ground coat, mid-coat, film build, and spray technique all affect the final appearance. When the match is poor, the repair advertises itself, vehicle value can suffer, and the owner often pays twice: once for the incorrect job and again to fix it.
As the hub for bodywork and paint within restoration and maintenance, this guide explains how to match original paint colors correctly from start to finish. It covers paint codes, VIN and label locations, digital color tools, spray-out cards, blending, refinishing systems, and quality checks. It also addresses practical realities such as faded finishes, prior repairs, discontinued formulas, and why factory consistency was never as perfect as many owners assume. If you want a repair that disappears instead of one that merely looks close, these are the methods that work.
Start with the factory paint code, but do not stop there
The first step in matching original paint colors is finding the vehicle’s factory paint code. On most cars and trucks, the code appears on a compliance label, service parts identification label, door jamb sticker, firewall plate, trunk label, or under-hood decal. Manufacturers use different naming conventions. General Motors may use WA codes, Ford often lists an exterior paint code on the certification label, Toyota may use a three-digit code such as 040 or 202, and Mercedes-Benz commonly uses a three-digit number sometimes paired with a descriptive name. Classic vehicles may rely on cowl tags, build sheets, or marque-specific decoding references.
The paint code tells you the intended factory color family, not necessarily the exact appearance of your vehicle today. In real shops, I treat the code as the starting point for formula lookup inside systems from PPG, BASF Glasurit, Axalta Cromax, Spies Hecker, AkzoNobel Sikkens, or Sherwin-Williams Automotive Finishes. Those databases often list multiple “variants” for the same code because production plants, model years, and paint batches differed. A black may be straightforward, but metallic grays, blues, silvers, and tri-coats often have several alternate formulas. If you ignore those variants and mix only the default, you increase the odds of a visible mismatch.
VIN decoding can help verify year, assembly plant, and trim, but VINs usually do not contain the actual exterior paint code in a directly usable form for mixing. Owners often assume a dealer can identify the exact color from the VIN alone. Sometimes dealer parts systems can point you toward the factory code, but refinish work still depends on paint manufacturer formula libraries, chip books, and color tools. For vintage restorations, factory sales brochures are useful for naming colors, yet they are unreliable for accurate tone because printing shifts, aging paper, and digital scans distort color.
Understand why the same paint code can look different
Many people are surprised that two vehicles with the same original paint code can still look different. Factory production tolerances are the first reason. Automakers bought paint from major suppliers and applied it in high-volume conditions where line speed, electrocoat, primer shade, robot settings, and bake cycles influenced the final color. Refinish professionals call these differences “variants.” Paint companies document them because they see them repeatedly in the field. In practice, one formula may be slightly redder, one coarser in metallic grain, and another lighter in value while all remain acceptable under the same OEM code.
Aging is the second reason. Ultraviolet light degrades pigments and clear coat. Oxidation changes gloss and shifts how light reflects from the surface. Heat, acid rain, road salt, improper polishing, and environmental fallout alter the top layer over time. Horizontal panels usually fade faster than vertical panels. On a twenty-year-old truck, the hood may no longer match the protected area behind the fuel door even if both started life in the same color. That is why fuel doors, mirror caps, and other removable pieces are useful for scanning: they can be positioned near the mixing room and often represent the current vehicle color better than a formula book.
Prior repairs are the third reason, and they are extremely common. A car may wear its original code on the label but have a repainted bumper, repaired quarter panel, or aftermarket fender sprayed in an off-brand line with a different toner set. Plastic bumper covers also read differently from steel body panels because substrate color, flexibility additives, and texture affect appearance. When someone says they want the “original paint color,” the first job is to determine whether the adjacent panels still represent the original finish at all.
Use modern color-matching tools the way professionals do
Today’s best matches come from combining database research with instrument reading and visual judgment. Spectrophotometers are the standard digital tool in quality refinish shops. Devices such as the PPG RapidMatch, BASF Glasurit Ratio Scan, Axalta Acquire, and similar systems measure the color on the vehicle and compare it against formula libraries. They do not magically create perfection, but they narrow the field fast and identify likely variants. On difficult silvers and pearls, that saves material, booth time, and comebacks.
Good scanning technique matters. The panel must be cleaned thoroughly to remove wax, compound residue, traffic film, and silicone contamination. I also inspect the surface for chalking or clear-coat failure because degraded paint gives unreliable readings. Most devices require multiple readings from a flat area away from body lines, edges, chips, or repaired spots. Taking readings from more than one panel helps confirm consistency. If the front door and rear door scan differently, assume there is prior paintwork, fading variation, or both.
Even with digital tools, a human still validates the result. The software may suggest three or five candidate formulas. I compare their descriptions, look at the recommended variant chips if available, and then mix test quantities. This is where experienced painters outperform guesswork. They know that a formula can be numerically close yet spray too dark, too green, or too coarse when reduced and applied over a specific sealer shade. Digital matching improves efficiency, but it does not eliminate the need for process control and trained eyes.
| Method | What it does well | Main limitation | Best use |
|---|---|---|---|
| Factory paint code lookup | Identifies the original color family and available formulas | Does not account for fading or production variants by itself | Starting point for every match |
| Variant chip comparison | Shows known alternate formulas for the same OEM code | Still depends on visual selection under proper lighting | Choosing between supplier formulas |
| Spectrophotometer scan | Measures the current vehicle color and suggests close formulas | Can misread dirty, damaged, or heavily polished surfaces | Late-model repairs and difficult metallics |
| Spray-out card testing | Reveals true sprayed appearance, flop, and coverage | Takes time and material | Final confirmation before painting the vehicle |
| Panel blending | Hides slight differences by tapering color into adjacent panels | Requires more labor and refinishing area | Most modern collision and restoration work |
Confirm the match with spray-out cards and correct paint-system setup
No serious painter skips spray-out cards. A spray-out is a sample panel prepared with the same sealer shade, basecoat process, gun setup, and clear coat planned for the job. This is where many color problems are either caught early or created carelessly. Paint appearance changes with undercoat color, film thickness, reducer speed, atomization, spray distance, overlap, air pressure, and flash time. A formula that looked acceptable on paper can fail visibly once sprayed beside the car.
Sealer shade is especially important. Major paint manufacturers specify value-shade systems for a reason. A translucent yellow sprayed over a dark gray sealer will not look like the same yellow sprayed over a light beige sealer. Tri-coats are even more sensitive because the base and mid-coat build interact. On pearl white finishes such as common OEM three-stage whites, one extra pass of pearl can make the repaired area noticeably milkier or grayer. The correct procedure is to spray multiple test cards with controlled coat counts, then hold them against the vehicle in daylight, shade, and booth lighting.
Gun technique also affects metallic orientation. Coarse aluminum flakes can stand up or lay down differently depending on atomization and drop-coat technique, changing how the color “flops” from straight-on to an angle. I have seen the right formula look wrong simply because the painter used the wrong air pressure and a wet final coat that mottled the metallic. Matching original paint colors is therefore not just a mixing problem. It is a whole-system problem that includes substrate preparation, product choice, application method, and evaluation.
Blend repaired areas instead of trying to butt-match panel to panel
The most reliable way to match original paint colors on a vehicle is to blend color into adjacent panels. A butt match means stopping the new color at a panel edge and expecting the repaired panel to match the next panel perfectly. That is possible on some solid colors and small parts, but it is risky on most metallics, pearls, and aged finishes. Blending works by gradually extending reduced color into the neighboring panel so the eye cannot detect a hard transition. After clear coat, the repair reads as continuous rather than isolated.
In collision repair, a common example is replacing a front fender. Even if the new fender formula is extremely close, spraying only that fender beside an older door often reveals a shift. The professional fix is to color the new fender and blend into the front door, sometimes also into the hood depending on color sensitivity and panel relationship. On rear quarter repairs, shops frequently blend the door and decklid or tailgate as needed. This adds labor, masking, and materials, but it dramatically improves the final result.
There are limits, and customers should understand them. If multiple surrounding panels are badly faded, checked, or previously repainted with poor material, blending may expose existing differences rather than hide them. Restoration work on classics also raises authenticity questions. A concours restoration may aim for full-vehicle refinishing in the correct factory color rather than isolated blending. A preservation-minded owner, by contrast, may prefer a localized repair that keeps as much original finish as possible even if a faint transition remains under critical inspection. The right decision depends on the vehicle, budget, purpose, and finish condition.
Choose the right approach for classics, modern finishes, and touch-up repairs
Different vehicles require different matching strategies. On classic cars, original color names and codes may be available from OEM literature, club registries, trim-tag databases, and restoration guides, but the modern equivalent formula may still need adjustment because today’s toners and regulations differ from historical chemistry. Older single-stage enamels and acrylic lacquers often have a different visual character than a modern basecoat-clearcoat system. If authenticity matters, discuss whether you want exact historical appearance, exact code fidelity, or practical visual harmony with the surviving panels.
Modern vehicles add complexity through waterborne basecoats, special effect pigments, matte finishes, and manufacturer-specific three-stage systems. Waterborne color can match extremely well, but humidity control, airflow, and flash discipline matter. Matte and satin finishes are a category of their own because sheen is part of the color perception. You cannot polish defects out of matte clear the way you can with gloss clear, and even minor texture differences are visible. Special effect colors used by brands like Mazda, Lexus, and many European manufacturers often require strict application procedures published in technical data sheets.
Touch-up repairs are the smallest jobs and often the most disappointing when expectations are unrealistic. Paint pens and brush bottles can hide stone chips and small scratches, but they rarely become invisible on close inspection. Aerosol touch-up matched by code can work for mirrors, trim pieces, or older work vehicles, yet it is not a substitute for proper panel refinishing. For anything near eye level on a valued vehicle, a professional localized repair with color blending is usually the point where results become acceptable.
Inspect the final color in the right light and document the formula
Final inspection should never happen under booth lights alone. Color must be checked in direct sun, open shade, and, when possible, under color-corrected shop lighting around 5000K. Different light sources change how metallics and pearls present. This phenomenon, called metamerism, explains why a panel can match outdoors but shift under sodium or LED lighting. A repair is acceptable only when it remains harmonious in the conditions where the owner actually uses the vehicle. That standard sounds strict, but it is the standard that prevents callbacks.
After approval, document everything. Record the OEM code, paint line, formula number, variant selected, toner adjustments, sealer shade, gun setup, reducer and hardener choice, booth temperature, and number of coats. Keep the final spray-out card. Shops that do this create their own repeatability. When the same vehicle returns months later for a bumper repair or another panel, that record saves hours and reduces uncertainty. For restorers managing long projects, documentation is just as valuable as mechanical notes because bodywork and paint often happen in stages.
Matching original paint colors is successful when research, tools, technique, and judgment work together. Start with the factory code, verify the current vehicle color, test with spray-outs, and blend where needed. Respect how age, production variation, and prior repairs change what “original” really means. If you are planning bodywork and paint under a broader restoration and maintenance program, use this hub as your roadmap, then apply the same discipline to preparation, corrosion repair, and finish protection. The payoff is simple: repairs that disappear, value that holds, and a vehicle that looks right every time you walk up to it.
Frequently Asked Questions
What does “original paint color” actually mean on a vehicle?
“Original paint color” can refer to several different things, and that is exactly why so many restorers and vehicle owners get confused. In the simplest sense, it may mean the factory paint code listed on the vehicle’s identification label. That code tells you the intended production color assigned when the vehicle was built. However, in professional refinishing, that is only one piece of the puzzle. The manufacturer’s paint supplier may have had a specific mixing formula tied to that code, but production conditions, plant location, application method, film build, and bake cycles could all slightly influence how that color actually appeared on the car when it left the assembly line.
There is also a difference between the paint formula on paper and the color that physically landed on a particular panel. Even brand-new vehicles can show minor variation from panel to panel because of manufacturing tolerances. Over time, sunlight, oxidation, environmental exposure, polishing, and prior repairs further change the appearance of the finish. That means the “original paint color” visible today may no longer match the untouched color that existed decades ago. In restoration, some owners want the car returned to the exact factory paint code, while others want a match to the paint currently on the vehicle, including its age and fade. Knowing which definition you are working toward is essential before any color matching begins.
Why doesn’t the factory paint code always produce a perfect match?
A factory paint code is a critical starting point, but it is not a guarantee of an exact visual match. Most paint codes have multiple known variants. These variants exist because the same coded color may have been produced at different assembly plants, by different suppliers, or during different model-year runs with subtle but real shifts in tone, flop, metallic size, or brightness. Two vehicles carrying the same code can still look slightly different when parked side by side, especially in silvers, grays, whites, reds, and complex pearl finishes.
Another major reason is age. Paint changes over time. Ultraviolet exposure, weather, contamination, oxidation, and even regular washing can alter the appearance of a finish. Clear coat aging can change gloss and warmth, and single-stage paints can fade or chalk significantly. On older vehicles, the current finish often looks different from the fresh factory formula. That means if you mix the exact original code and spray it next to aged paint, the new section may appear too clean, too dark, too bright, or too saturated.
Application also matters. Spray gun setup, air pressure, distance, overlap, orientation coat technique, and drying conditions all affect final color, especially with metallic and pearl systems. A formula that is technically correct can still look wrong if applied differently than the adjacent finish. That is why experienced refinishers rely on more than the code alone. They use variant decks, spray-out cards, spectrophotometer readings, visual checks in multiple lighting conditions, and blending techniques to make the repair disappear.
What is the best way to match original paint on a classic car or older vehicle?
The best approach is to combine documentation, inspection, and modern color-matching tools rather than depending on any single method. Start by identifying the vehicle’s factory paint code from the data plate, door jamb sticker, trim tag, or manufacturer records. That gives you the historical color family and original code reference. From there, inspect the vehicle carefully for protected areas where paint may be less faded, such as behind trim, inside the fuel door, under weatherstripping, under the trunk seal, inside the glove box door area, or behind interior panels. These hidden locations often preserve a closer representation of the vehicle’s earlier finish.
Next, compare that information against modern paint system databases. Most major paint manufacturers provide multiple formula variants under the same code, and those variants can be extremely helpful. A technician may also use a spectrophotometer to scan the existing surface and generate a starting formula based on the actual color present on the vehicle today. That scan is useful, but it should still be verified by eye because instrument readings can be affected by gloss, texture, curvature, and metallic orientation. The most reliable shops create spray-out cards, then hold them against the vehicle in sunlight, shade, and artificial light before choosing the final formula.
For high-level restoration work, the real question is whether you want factory-correct or visually correct. A concours restoration may prioritize historical accuracy to the original code and finish type. A driver-quality restoration or partial repaint may prioritize matching the vehicle’s current appearance so repaired panels do not stand out. In many cases, the best professional result comes from tinting the selected formula and blending into adjacent panels rather than trying to butt-match one panel edge to another. That process gives the painter room to hide inevitable differences and produce a natural, seamless result.
Can faded or weathered paint still be matched accurately?
Yes, faded or weathered paint can usually be matched very well, but the process is different from simply reproducing the original factory formula. When paint has aged, you are no longer matching a new color standard; you are matching a changed surface that may be lighter, duller, warmer, flatter, or less saturated than it was originally. On older vehicles, especially those with single-stage finishes or long-term sun exposure, this difference can be substantial. A skilled shop will first determine whether the goal is to restore the original factory appearance or to match the finish exactly as it looks today.
If the goal is a repair that disappears into the existing paint, the technician will often start with the code, evaluate formula variants, and then adjust the mix to account for fade. Spectrophotometer scans can help establish a baseline, but visual confirmation remains essential. Many painters polish and clean the surrounding area first because oxidation, surface contamination, or chalking can make the color appear more distorted than it really is. Once the surface is corrected, they create spray-out samples and compare them in multiple light sources. This is especially important because weathered paint can shift differently indoors versus outdoors.
In practical terms, accurate matching of aged paint often depends on blending. Instead of painting only the damaged section and hoping for an invisible edge, the refinisher may extend color into the adjacent panel and taper it out before clearing the area. That reduces the eye’s ability to detect minor color differences. So while faded paint is absolutely matchable, the best results come from a thoughtful process that accounts for aging, surface condition, and real-world application technique rather than relying solely on the original code.
Should I use paint code lookup tools, a spectrophotometer, or a professional body shop for the most accurate match?
Each option has value, but they are not equal in precision when used alone. Paint code lookup tools are excellent for identifying the vehicle’s original color designation and narrowing down the formula family. They are a necessary first step, especially if you are verifying whether a vehicle still wears its original color or researching a restoration. However, a code lookup by itself is rarely enough for a flawless match because it does not account for variants, aging, prior repainting, or application differences.
A spectrophotometer adds another level of accuracy by reading the actual color on the vehicle and comparing it to formulas in a paint manufacturer’s database. This can be very useful on late-model and older vehicles alike, particularly when the original finish has shifted over time. Still, the device is a tool, not a final answer. It may provide several close formulas, and a technician must still decide which one works best. Metallic orientation, panel shape, gloss level, and surface cleanliness can all influence the reading, which is why experienced painters never skip test panels and visual evaluation.
For the most accurate and predictable result, a professional body shop or restoration shop is typically the best choice because they combine all of these methods. A good shop will confirm the code, research known variants, scan the vehicle if appropriate, prepare spray-out cards, compare them under different lighting conditions, and adjust the formula if needed. Most importantly, they understand application technique and blending strategy, which are just as important as the formula itself. If your goal is truly matching original paint color rather than just buying a similar-looking product, professional evaluation and testing will almost always produce the best outcome.




