
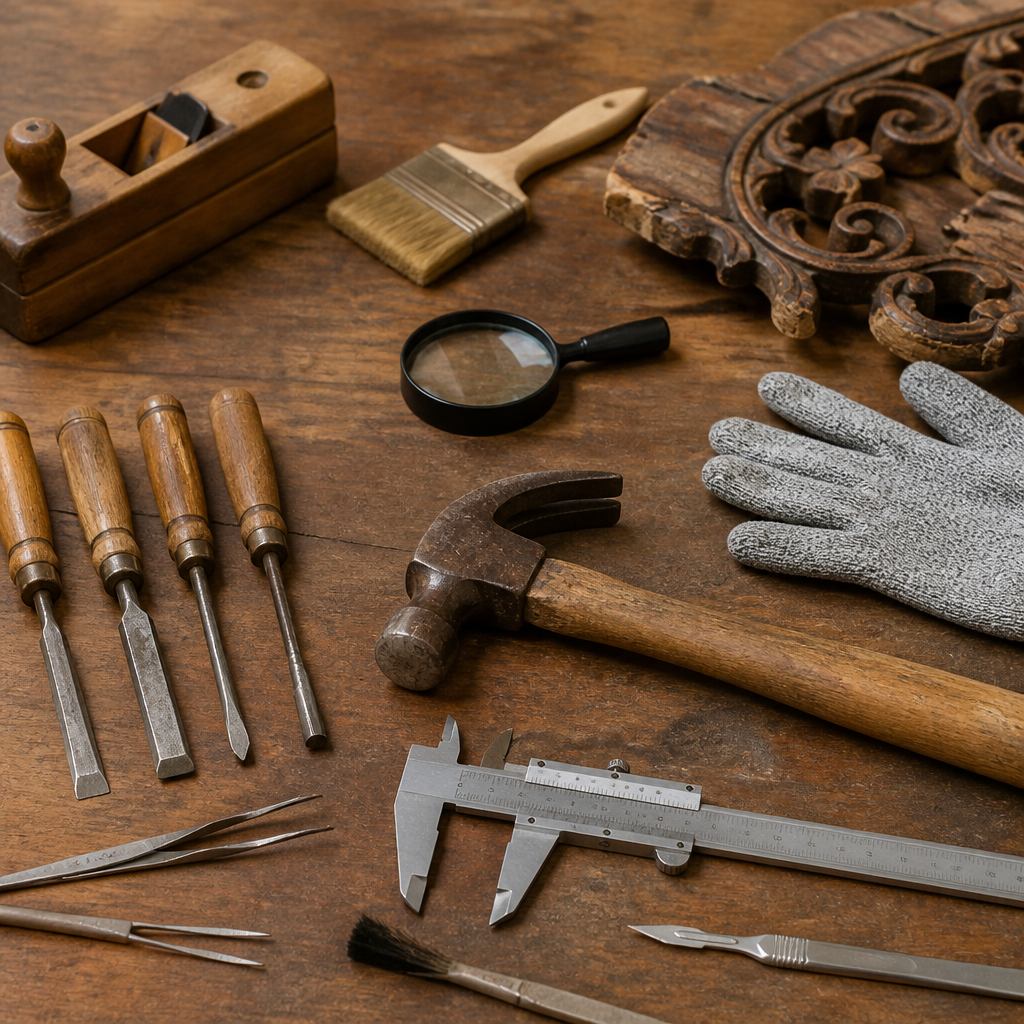
Choosing the right tools for restoration projects determines whether a job preserves original material, introduces preventable damage, or stalls halfway through because the equipment cannot match the task. In restoration and maintenance work, “tools and equipment” includes everything from hand scrapers, moisture meters, and HEPA vacuums to infrared cameras, rotary polishers, and dehumidifiers. Restoration itself can mean repairing water-damaged interiors, reviving historic woodwork, stabilizing masonry, cleaning metals, or maintaining aging building systems so they remain functional and safe. The common thread is controlled intervention: you are not simply building new; you are assessing existing conditions, protecting what can be saved, and using methods that fit the material, age, and scope of the project.
I have learned on active job sites that tool selection is rarely about buying the most expensive option. It is about matching tool capability to substrate, contamination risk, access constraints, finish requirements, and operator skill. A carbide scraper that speeds paint removal on one elevation can gouge a soft historic trim profile on another. An aggressive rotary grinder may clean concrete quickly, yet it can overheat coatings, aerosolize hazardous dust, and erase evidence needed for later repairs. The right restoration tools reduce rework, improve safety, support documentation, and protect the original fabric of the building or object.
This matters because restoration projects are uniquely unforgiving. Existing materials are often brittle, layered, dirty, wet, painted, patched, or previously repaired with incompatible products. Lead-based paint, asbestos-containing materials, mold growth, corrosion, and hidden moisture can turn an ordinary equipment choice into a compliance issue. Standards from organizations such as OSHA, the EPA, IICRC, and the National Park Service influence what tools should be used, how debris should be controlled, and how surfaces should be treated. If you choose well, tools become precision instruments. If you choose poorly, they become sources of damage, dust, delay, and unnecessary cost.
This hub article explains how to choose restoration tools and equipment across the full workflow: assessment, cleaning, removal, drying, repair, finishing, and maintenance. It also acts as a foundation for deeper articles within the broader Restoration & Maintenance topic, so the goal is comprehensive coverage rather than a narrow product roundup. By the end, you should understand which categories matter most, how to evaluate tools by project type, and where investing in better equipment genuinely improves outcomes.
Start with project conditions, not product catalogs
The first step in choosing tools for restoration projects is to define the actual condition of the material and the end goal. Ask five practical questions before you buy, rent, or unpack anything: What material are you working on? What damage is present? What must be preserved? What contamination or safety risks exist? What finish standard is required at handoff? Those answers determine whether you need delicate hand tools, powered removal equipment, specialized testing devices, or environmental controls.
For example, restoring original oak flooring after a minor plumbing leak is very different from removing delaminated engineered flooring after Category 3 water intrusion. The first project may call for a pinless moisture meter, floor drying mats, a random orbital sander, cabinet scrapers, and moisture-stable fillers. The second may require demolition bars, personal protective equipment, containment sheeting, an air scrubber with HEPA filtration, and a commercial dehumidifier. In masonry restoration, repointing historic brick usually requires hand chisels, mortar hawks, jointers, and low-vibration mixers because hard grinding wheels can widen joints and chip arrises.
Another key consideration is reversibility. In conservation-minded restoration, the ideal tool allows intervention with the least permanent change. That is why steam boxes, infrared paint softeners, and detail scrapers are often preferred over open-flame torches or high-speed grinders on old millwork. Start with the least aggressive method that can reasonably achieve the result, then scale up only when testing proves it is necessary.
Essential inspection and diagnostic tools
Good restoration work begins with diagnosis, and diagnostic tools often deliver the highest return on investment because they prevent unnecessary demolition. A quality flashlight, telescoping inspection mirror, borescope, moisture meter, infrared thermometer, and thermal imaging camera help locate hidden defects before finishes are disturbed. On water-damage jobs, I rely on noninvasive moisture meters for rapid scanning, then confirm suspicious readings with a pin meter at trim, sill plates, or subfloors. That combination reduces false positives caused by dense materials or surface salts.
Air quality and contamination assessment can require even more specialized equipment. A hygrometer tracks relative humidity and temperature so drying plans can be adjusted to actual psychrometric conditions. Particle counters and manometers support containment verification on remediation projects. Surface pH test strips help evaluate masonry cleaning residue and concrete readiness for coatings. On exterior restoration, a crack monitor or caliper can distinguish active movement from an old stabilized fracture, which affects whether you need stitching systems, sealants, or simple cosmetic repair.
Documentation tools matter too. A smartphone is useful, but consistent documentation is better with a laser measure, labeled photo workflow, and moisture map templates. Restoration decisions are easier to justify when the evidence is organized. This is particularly important in insurance work, historic preservation, and multi-trade coordination, where tool-based findings guide scope, sequencing, and budget.
Hand tools versus power tools in restoration work
Many people assume power tools are always more efficient, but in restoration and maintenance, hand tools often provide better control. Putty knives, awls, chisels, pry bars, nail pullers, burnishing tools, utility knives, and cabinet scrapers can separate components, lift failed caulk, remove loose material, and probe decay without widening the damage. I keep multiple stiffnesses of scraper blades because the right flex can preserve a sound substrate while still releasing failed paint or adhesive.
Power tools become the right choice when production speed, consistency, or material hardness exceeds what hand labor can handle. Oscillating multi-tools are among the most versatile restoration tools because they can plunge-cut trim, remove grout, scrape mastics, and sand in confined spaces with minimal overcutting. Random orbital sanders are safer for finish refinement than belt sanders on delicate surfaces. Variable-speed drills and impact drivers improve fastening control, while low-RPM rotary tools help with polishing and localized corrosion removal.
The rule I use is simple: if a hand tool can achieve the result cleanly within a reasonable labor window, start there. If not, move to the least aggressive powered option with dust control and speed adjustment. Restoration rewards finesse more than brute force.
Core tool categories and best-use cases
Restoration projects typically draw from the same core equipment families, but each category has a distinct purpose. Choosing by category prevents overspending on specialty tools before you have covered the basics.
| Tool category | Primary use | Best examples | Key caution |
|---|---|---|---|
| Inspection and testing | Find hidden damage and verify conditions | Moisture meters, thermal cameras, hygrometers | Interpret readings in context of material type |
| Cleaning and containment | Remove debris and control spread | HEPA vacuums, air scrubbers, pump sprayers | Standard shop vacs are not substitutes for HEPA units |
| Removal and demolition | Take out failed material with control | Oscillating tools, pry bars, scrapers, rotary hammers | Aggressive tools can expand the repair area fast |
| Drying and environmental control | Stabilize moisture and temperature | Dehumidifiers, air movers, desiccant systems | Wrong sizing wastes power and slows drying |
| Repair and installation | Rebuild or stabilize components | Mixers, trowels, caulk guns, drills, clamps | Tool mismatch can compromise bond or alignment |
| Finishing and protection | Refine appearance and durability | Sanders, polishers, spray systems, brushes | Over-finishing can erase historic character |
This framework is useful because most restoration jobs require at least one tool from each category. A plaster repair, for instance, may need moisture assessment, dust extraction, careful lath exposure, controlled drying, patching tools, and finish sanding. Thinking in systems instead of single purchases leads to fewer gaps on site.
Choosing tools by material type
Material sensitivity should guide your selection more than brand loyalty. Wood restoration favors sharp edged hand tools, moisture meters calibrated for species range, detail sanders, glue injectors, clamps, and finish-compatible abrasives. If the wood is historic, avoid excessive heat and high-speed abrasion that can scorch fibers or blur profiles. For metals, the tool set depends on whether you are removing corrosion, polishing, or cutting. Stainless steel wire brushes can contaminate some metals, so matching brush material matters. Needle scalers and abrasive discs work on heavy rust, while nonwoven pads are better for light oxidation and finish preparation.
Masonry and concrete restoration require different priorities: dust management, appropriate hardness, and joint preservation. Mortar removal on older brick often calls for hand tools or small grinders with shrouds and vacuum extraction. Diamond cup wheels can flatten texture if used carelessly. Tile and stone restoration benefits from variable-speed polishers, honing pads, and pH-appropriate cleaners rather than generic acidic products that etch calcareous stone.
On drywall and painted surfaces, the critical question is not just how to cut or sand, but whether coatings may contain lead. EPA Renovation, Repair and Painting rules can apply in pre-1978 housing and child-occupied facilities, changing the acceptable tools and containment methods. In those settings, a sander paired with certified HEPA extraction is not a convenience; it is part of compliant practice.
Safety, compliance, and dust control equipment
Restoration tool selection is inseparable from safety equipment. Respirators, eye protection, hearing protection, gloves, coveralls, knee pads, and fall protection are not accessories to the work; they are work equipment. The same is true for containment poles, zipper doors, polyethylene sheeting, negative air machines, and grounded extension systems. If you create dust, fumes, or aerosols, source capture should be planned at the same time as cutting or grinding capacity.
HEPA vacuums deserve special attention because they are central to restoration and maintenance. True HEPA filtration captures 99.97 percent of particles at 0.3 microns, which is why these units are used for lead-safe renovation, mold cleanup support, and fine dust control. Pairing a shrouded grinder or sander with a HEPA extractor reduces cleanup time, improves visibility, and lowers occupant disruption. On water-damage projects, GFCI protection, cord management, and equipment inspection are nonnegotiable around wet environments.
Compliance also affects chemical application tools. Low-pressure sprayers, foaming applicators, and labeled transfer containers help ensure cleaners, biocides, or consolidants are applied correctly. The tool is part of the dosage and dwell-time equation, so inaccurate delivery can undermine both performance and documentation.
When to buy, rent, or outsource specialized equipment
Not every restoration contractor or property owner should own every machine. Buy tools you use weekly, rent tools you use occasionally, and outsource processes requiring high-cost equipment or rare expertise. Moisture meters, quality hand tools, HEPA vacuums, laser measures, and oscillating tools are usually worth owning because they support routine work and pay back quickly. Commercial desiccant drying systems, dry ice blasting rigs, soda blasting units, or large floor grinders may be smarter to rent unless they are central to your business model.
Outsourcing is often best for highly specialized tasks such as structural lifting, advanced coatings analysis, laser cleaning, or hazardous material abatement. I have seen teams waste days trying to adapt general-purpose tools to tasks better handled by a specialist with the proper equipment package. The cost difference often disappears once labor inefficiency, material damage, and schedule impact are added up.
Before investing, compare total cost of ownership: purchase price, consumables, calibration, maintenance, batteries, filters, training time, and downtime risk. A cheaper extractor with poor hose durability and weak auto-cleaning can cost more over a year than a premium model from Festool, Hilti, or Bosch Professional if your crew depends on dust-free sanding daily.
Building a practical restoration tool kit
A strong restoration tool kit is modular. Start with a dependable base: inspection light, moisture meter, HEPA vacuum, oscillating multi-tool, drill-driver set, pry tools, scrapers, chisels, hand saws, random orbital sander, extension cords, PPE, and containment supplies. Add trade-specific layers based on your work mix, such as masonry jointers, upholstery extraction tools, flooring pull bars, polishers, grout removal blades, or spray systems. Organize everything in labeled cases so testing tools stay clean, blades stay sharp, and consumables are visible before they run out.
Standardization helps crews perform consistently. If every technician knows which meter is used for baseline readings, which abrasive sequence is used for hardwood finish prep, and which vacuum connects to each dust-producing tool, training becomes faster and mistakes become less common. Keep a maintenance log for batteries, filter changes, calibration dates, and worn accessories. Restoration success often comes from reliability, not novelty.
The right tools for restoration projects are the ones that diagnose accurately, intervene gently, control hazards, and deliver a durable result without sacrificing original material. Start by understanding the substrate, the damage, the finish target, and the compliance requirements. Then choose tools by function: inspection, cleaning, removal, drying, repair, and finishing. Favor control over aggression, and remember that the least invasive effective method is usually the best starting point.
For most teams, the smartest investments are not flashy machines but dependable diagnostic tools, dust control equipment, versatile hand tools, and a few carefully chosen power tools with variable speed and extraction capability. Material type matters, safety requirements matter, and total cost of ownership matters. Buying every specialty tool rarely makes sense; renting and outsourcing remain important parts of a disciplined restoration equipment strategy.
Use this page as your hub for Tools & Equipment within Restoration & Maintenance, then build outward into specific guides for moisture detection, HEPA extraction, paint removal, masonry repair, floor restoration, and drying systems. If you are planning a project now, audit your current kit against the workflow described here and identify the gaps before work begins. Better tool choices lead to cleaner jobs, safer crews, and restoration results that hold up over time.
Frequently Asked Questions
How do I determine which restoration tools are actually necessary for a specific project?
The right tool selection starts with a clear diagnosis of the material, the type of damage, and the outcome you need to achieve. In restoration work, that means evaluating whether you are dealing with water intrusion, surface contamination, structural instability, finish failure, corrosion, biological growth, or simple age-related wear. A moisture-damaged plaster wall, for example, requires a very different tool set than smoke-stained trim, oxidized metal hardware, or historic wood flooring with a failing finish. Before buying or using anything, define the substrate, the extent of the damage, how delicate the original material is, and whether the goal is cleaning, drying, repair, removal, or preservation.
A practical way to approach this is to divide tools into categories: inspection and testing tools, cleaning tools, material removal tools, repair tools, and environmental control equipment. Inspection tools such as moisture meters, hygrometers, infrared cameras, borescopes, and basic hand lights help you understand what is happening before you touch the surface. Cleaning tools may include HEPA vacuums, soft brushes, microfiber cloths, pH-appropriate cleaners, and low-abrasion pads. Material removal tools can range from hand scrapers and oscillating multi-tools to rotary grinders and demolition equipment, but the least aggressive effective option is usually the best place to start. Repair tools might include clamps, fillers, spreaders, injectors, nail sets, or polishers, depending on the material. Environmental tools such as air movers, dehumidifiers, air scrubbers, and containment barriers become essential when moisture, dust, or contamination is part of the project.
It also helps to ask a few decision-making questions before building your tool list: What am I trying to preserve? What could be damaged if I use too much force, heat, speed, suction, or moisture? Do I need a diagnostic reading or just visual confirmation? Is the tool designed for restoration-level precision or for rough construction work? In many cases, the best setup combines specialized restoration equipment with simple hand tools. A high-end moisture meter may be critical for confirming dryness, but a careful hand scraper may still be safer than a powered tool for removing failed paint from historic millwork. Choosing tools this way keeps the project focused, reduces unnecessary spending, and helps avoid irreversible damage.
Why is it so important to match the tool to the material being restored?
Matching the tool to the material is one of the most important principles in restoration because original surfaces are often more fragile, irregular, or irreplaceable than they first appear. Historic wood can have softened fibers, plaster can be brittle beneath a stable-looking finish, stone can react badly to aggressive abrasion, and old metal can lose detail if over-polished. A tool that works perfectly in new construction or general renovation may be far too harsh in a restoration setting. The goal is not just to make the surface look better quickly; it is to preserve as much original material and character as possible while solving the problem that caused deterioration.
For example, wood restoration often calls for tools that provide control rather than speed. Sharp hand scrapers, sanding blocks, detail sanders with variable speed, and moisture meters are often more appropriate than large belt sanders or heavy grinders. In masonry or plaster restoration, low-vibration tools and fine hand tools are usually safer than impact-heavy equipment that can spread cracks or dislodge intact material. For water-damaged interiors, the wrong drying equipment placement can create uneven drying, warping, or hidden moisture migration, so dehumidifiers, air movers, and monitoring tools must be chosen based on room size, material permeability, and moisture load rather than guesswork.
The same logic applies to cleaning and finishing. A HEPA vacuum is often the right choice where dust control matters, especially around soot, mold residues, lead dust, or historic interiors. Rotary polishers can be extremely effective on the right stone, metal, or finish, but if used with the wrong pad, speed, or compound, they can burn, swirl, or strip the surface. Tool compatibility is really about force, friction, heat, pressure, and chemistry. When those factors align with the material, restoration is safer and more predictable. When they do not, the tool itself becomes the source of damage. That is why professionals test small areas first, use adjustable equipment whenever possible, and choose the gentlest effective method before scaling up.
What are the most essential inspection and safety tools for restoration projects?
Inspection and safety tools are not optional extras in restoration work; they are what allow you to make informed decisions and carry out the work without creating new hazards. At the inspection stage, some of the most useful tools include moisture meters, hygrometers, infrared cameras, flashlights, inspection mirrors, borescopes, and simple straightedges or probes. Moisture meters help confirm whether wood, drywall, plaster, or subflooring still holds elevated moisture. Hygrometers measure ambient humidity and help track drying conditions. Infrared cameras can identify temperature differences that suggest hidden moisture, insulation gaps, or air leakage, although they should be used as a screening tool and verified with direct measurement. These tools help you identify conditions you cannot reliably see from the surface.
On the safety side, personal protective equipment should be selected based on the risks present, not treated as a generic checklist. Respiratory protection is especially important when a project may involve mold, soot, dust, lead-based paint, silica, or chemical vapors. Gloves, eye protection, hearing protection, and disposable or washable protective clothing may also be necessary depending on the task. Containment materials, negative air machines, and HEPA vacuums are often just as important as the hand tools themselves because restoration frequently disturbs fine particles that can spread through a building if not controlled. If the project involves older structures, test kits or professional assessment for lead, asbestos, or other hazardous materials may be required before any disturbance begins.
Basic safety and inspection equipment also improves the quality of the final result. A restoration project can appear complete visually while still holding moisture behind a wall, contamination in settled dust, or active deterioration in inaccessible cavities. Accurate readings and proper controls prevent premature closure of the job. In practical terms, that means you are less likely to repaint over a damp substrate, trap moisture behind finishes, spread debris through the HVAC system, or miss hidden deterioration that will require rework later. The best restoration tool kit is never just about the tools that remove, sand, cut, or polish. It also includes the instruments and protective systems that help you understand conditions, verify progress, and work responsibly.
Is it better to rent, buy, or hire a professional when specialized restoration equipment is involved?
That decision depends on how specialized the tool is, how often you expect to use it, how much training it requires, and what happens if it is used incorrectly. Buying makes sense for core tools that you will use repeatedly and can operate with confidence, such as quality hand scrapers, shop lighting, HEPA vacuums, moisture meters, basic sanders, clamps, and common hand tools. These are foundational items that support many types of restoration and are worth owning if restoration work is a regular activity. Renting can be the smarter option for expensive, project-specific equipment such as commercial dehumidifiers, air scrubbers, floor machines, infrared cameras, specialty extractors, or larger polishers, especially if you only need them for a limited time.
The biggest factor, however, is the skill required to use the equipment correctly. Some restoration tools are straightforward, while others demand judgment and experience. A dehumidifier is not just something you plug in and forget; proper drying requires understanding psychrometrics, air circulation, material moisture content, and daily monitoring. An infrared camera is useful, but misreading thermal patterns can lead to false conclusions. Rotary machines can save time, but they can also gouge, overheat, or remove finish too aggressively. In those cases, the cost of a mistake can exceed the cost of hiring a qualified professional from the start, especially when the material is historic, structurally important, or difficult to replace.
A good rule is to buy tools for repeatable, low-risk tasks, rent tools for infrequent but manageable jobs, and hire a professional for high-risk, technically complex, or regulated situations. Water damage affecting concealed cavities, mold concerns, structural stabilization, smoke contamination, hazardous material disturbance, and restoration of high-value historic finishes are all examples where professional involvement is often justified. The right decision is not the one that gives you the biggest tool collection; it is the one that protects the material, keeps the project efficient, and lowers the chance of avoidable damage or failed results.
How can I avoid damaging original materials when using restoration tools?
The best way to avoid damage is to begin with a preservation mindset: remove as little material as necessary, use the least aggressive effective method, and verify results constantly as you work. Restoration is different from replacement-driven renovation because the original surface often has value beyond function alone. It may carry craftsmanship, patina, historical significance, or dimensions that are difficult to reproduce. Once those details are sanded away, over-cut, chemically etched, or overheated, they usually cannot be brought back. That is why successful restoration relies on controlled methods, slow progress, and frequent reassessment rather than maximum power and speed.
In practical terms, this means




