
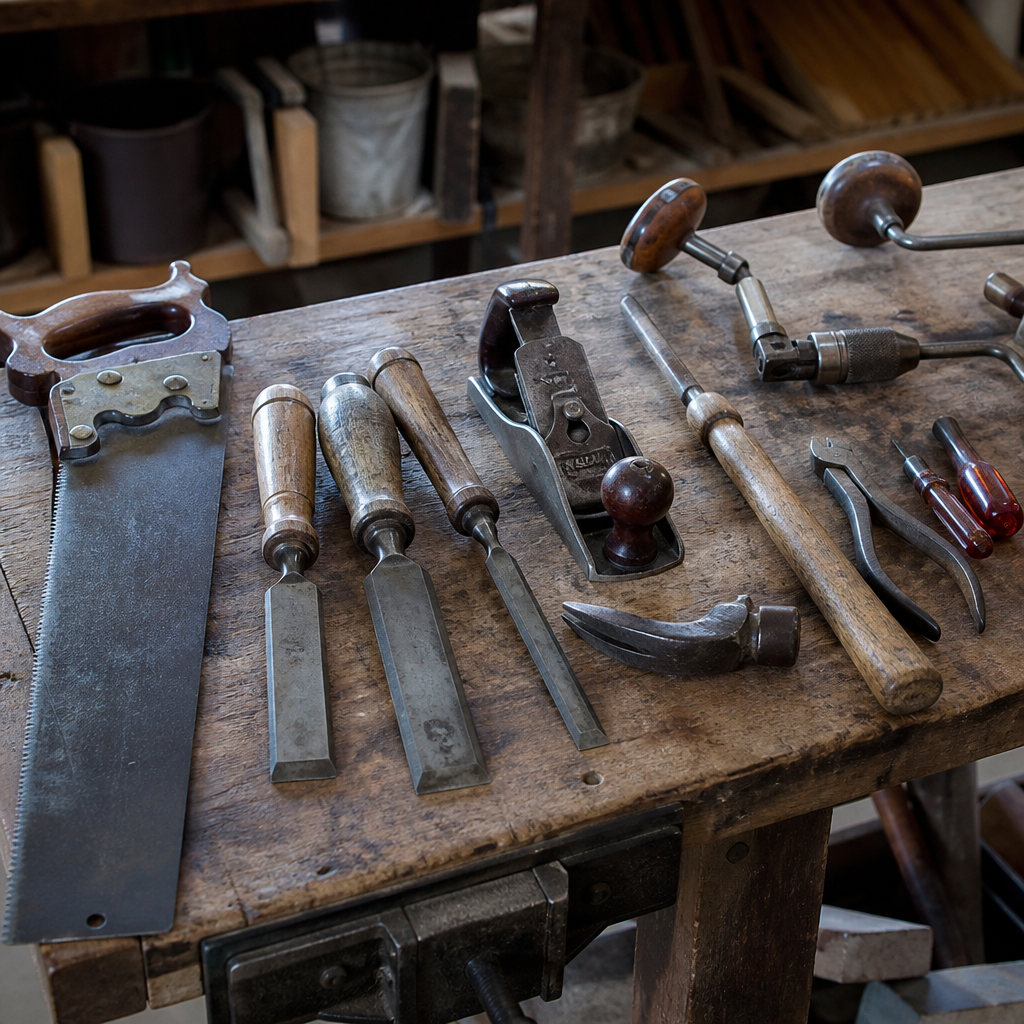
Restoration work succeeds or fails on control, and control starts with the right hand tools. In restoration and maintenance, “hand tools” means manually operated tools used to disassemble, clean, measure, repair, shape, fasten, and finish components without relying on powered motors. For restorers working on furniture, metal fixtures, machinery, architectural elements, or vintage household objects, these tools are not backup equipment; they are the foundation of precise, low-risk work. I have learned across bench restorations, site repairs, and conservation-minded maintenance jobs that powered tools remove material quickly, but hand tools preserve evidence, fit, and original character.
This matters because restoration is different from ordinary repair. A repair only has to make something functional. Restoration has a higher standard: retain as much original material as possible, reverse damage where practical, and avoid introducing new harm. That standard demands sensitivity. You need to feel thread resistance before a screw shears, read flatness before a panel twists, and remove corrosion without erasing tool marks or patina. Essential hand tools let you work incrementally, inspect constantly, and stop at the right moment. They also improve safety. A properly chosen scraper, screwdriver, or clamp often does a cleaner job than an aggressive power tool and leaves you with fewer irreversible mistakes.
As the hub page for tools and equipment within restoration and maintenance, this guide covers the core categories every restorer should own first, how each tool is used in real work, and what separates a durable professional tool from a frustrating one. The focus is practical: which tools earn space on the bench, what standards and features matter, and where beginners often buy the wrong thing. If you are building a restoration toolkit that can handle wood, metal, hardware, painted surfaces, adhesives, and fine adjustments, start here and use this article as the central reference point for the rest of your equipment decisions.
Measuring and marking tools that prevent expensive mistakes
The most important restoration tools are often the ones that remove nothing at all. Accurate measuring and marking determine alignment, fit, symmetry, and repeatability before any intervention starts. Every restorer needs a 16-foot or 25-foot tape measure, a 6-inch steel rule, combination square, engineer’s square, calipers, feeler gauges, and a marking knife or sharp pencil. On fine work, I use a rule and knife far more than a tape because hooks flex, printed markings wear, and a knife line is more exact than graphite. For hardware restoration, calipers are indispensable for checking shaft diameters, thread-related dimensions, washer thickness, and wear patterns.
Good measuring tools save original material. When fitting a replacement escutcheon, truing a cabinet door, or resetting hinges, the aim is usually not to make parts perfectly new but to make them fit the existing object with minimal modification. A combination square checks 90-degree references, depth, and layout lines. Feeler gauges reveal gaps under straightedges, between mating machine parts, and around lids or doors. A center punch belongs in this category as well because accurate drilling begins with positive location. If a bit wanders on painted metal or polished brass, damage spreads immediately.
Choose hardened stainless or tool-steel rules with etched graduations, not printed ones. Buy squares that can be verified against a known reference edge. Digital calipers are fast, but a quality dial or vernier model remains reliable when dust, finish residue, or weak batteries interfere. If a restorer asks which hand tools reduce rework the most, the answer is measuring and marking tools, because once you cut, scrape, or file material away, no amount of skill brings original stock back.
Screwdrivers, drivers, and extraction tools for fragile fasteners
Fasteners are where many restorations go wrong. Old screws are frequently soft, corroded, paint-filled, over-tightened, or mismatched from previous repairs. Every restorer needs a complete set of hollow-ground slotted screwdrivers, quality Phillips drivers, Pozidriv drivers where relevant, stubby drivers, precision drivers, bit drivers, and impact-resistant handles. Hollow-ground tips matter because they fill the slot walls instead of tapering out like common hardware-store drivers. That increases contact, reduces cam-out, and protects original screw heads that may be impossible to replace convincingly.
For seized hardware, add picks, awls, a manual impact driver, left-hand drill bits, screw extractors, and a small set of taps and dies for thread chasing, not thread cutting from scratch. In restoration, extraction is a process, not a stunt. First clean the slot with a pick, apply penetrating oil, support the work, and choose the exact bit size. If the screw still resists, controlled shock from a hand impact driver can break corrosion without heating surrounding finish. On antique furniture hardware and old machinery covers, this often saves the fastener and the substrate.
The table below shows the driver and fastener tools I consider essential on a restoration bench and the job each one handles best.
| Tool | Best Use | Why It Matters in Restoration |
|---|---|---|
| Hollow-ground slotted screwdriver set | Traditional slotted screws on furniture, locks, plates | Protects original screw slots and reduces slipping |
| Phillips and Pozidriv drivers | Mid-century hardware and imported fittings | Prevents stripping caused by wrong driver geometry |
| Precision screwdriver set | Small mechanisms, knobs, instruments | Gives control on delicate screws and trim pieces |
| Manual impact driver | Seized screws in metal housings and hinges | Breaks corrosion while limiting prolonged twisting force |
| Picks and awls | Cleaning paint and debris from fastener heads | Improves bit engagement before removal starts |
| Left-hand bits and extractors | Damaged or broken fasteners | Provides a recovery path when preservation fails |
Buy fewer, better drivers rather than big bargain sets with soft tips. Brands vary, but the benchmark is precise tip fit, tough steel, and handles that allow torque without hand fatigue. Keep tips dressed and clean. One damaged screwdriver can ruin a century-old screw in seconds.
Pliers, cutters, and gripping tools for controlled force
Pliers are not universal substitutes for wrenches, but in restoration they are essential for holding, bending, pulling, clipping, and supporting components during disassembly and reassembly. A well-rounded kit includes slip-joint pliers, needle-nose pliers, locking pliers, diagonal cutters, end cutters, smooth-jaw pliers, and parallel-jaw pliers. Smooth jaws matter more than many beginners realize. Serrated jaws leave witness marks on soft brass, plated steel, aluminum trim, and small shafts. When I am straightening bent lamp hardware or holding a polished nut for repositioning, smooth-jaw or padded parallel-jaw pliers are the safe choice.
Diagonal cutters handle wire, cotter pins, and cable ties from previous repairs. End cutters are excellent for pulling small brads or clipped fasteners flush to a surface with minimal leverage marks when used over a thin shim. Locking pliers have a place, but only with discipline. They are useful on sacrificial or hidden surfaces, especially when a rounded fastener needs controlled grip after every less invasive option fails. On visible hardware, they can cause permanent scarring in one squeeze.
For gripping and turning, add an adjustable wrench set and a small set of combination wrenches in common imperial and metric sizes. Vintage restoration often crosses standards. I routinely see inch-based fasteners mixed with later metric replacements. Sloppy wrench fit rounds corners quickly, so size accuracy matters. If budget is limited, prioritize cleanly machined pliers, tight pivots, and cutters that actually meet at the edge. Poor gripping tools encourage excess force, and excess force is the enemy of restoration.
Hammers, mallets, chisels, scrapers, and striking tools for material removal
Material removal in restoration must be selective. That is why striking and edge tools deserve careful curation. Every restorer needs a small ball-peen hammer, a cross-peen or riveting hammer for metal work, a tack or light assembly hammer, a wooden or rawhide mallet, bench chisels, a cabinet scraper, putty knives, and a stiff painter’s scraper. A claw hammer is useful, but it is not the star of restoration. More often, you need tools that persuade parts apart gently, lift finishes in thin layers, or pare damaged material without bruising surrounding surfaces.
On painted wood windows, for example, a sharpened putty knife and cabinet scraper can remove failing paint from localized areas while preserving crisp profiles that power sanding would blur. On rusted steel covers, a small ball-peen helps tap around a seized joint after penetrating oil has wicked in, encouraging movement without prying on one point. Chisels should be sharp enough to cut fibers cleanly and strong enough to handle adhesive residue, plugs, and localized rot removal. Bevel-edge bench chisels in several widths cover most needs, but they must be maintained; a dull chisel crushes and tears rather than cuts.
Cabinet scrapers deserve special emphasis. Properly burnished, they remove finishes and level repaired areas with exceptional control and little dust. They are especially valuable when heat or solvents might disturb veneer glue lines or historic coatings. Restorers who master scrapers work cleaner and preserve more detail than those who default to abrasive removal.
Clamps, vises, and support tools that stabilize the work
A restoration bench is only as precise as its workholding. If a piece shifts, flexes, or racks under hand pressure, every cut and adjustment becomes less accurate. Essential support tools include spring clamps, F-style clamps, C-clamps, bar clamps, small hand-screw clamps, bench dogs, soft jaws for a vise, and non-marring pads or shims. For curved, fragile, or finished surfaces, cork, leather, and dense felt are as important as the clamp itself. I keep scrap hardwood cauls in multiple lengths because they spread pressure and prevent dents when reglueing rails, flattening laminations, or securing protective blocks for extraction work.
On metal and mixed-material projects, a bench vise with replaceable jaw liners is indispensable. Soft copper, aluminum, nylon, or leather jaw covers let you hold hardware firmly without chewing it up. When straightening a bracket or reforming a bent plate, the difference between supported and unsupported work is dramatic. You gain cleaner bends, better alignment, and less risk of cracking old material. Even small restorations benefit from a dedicated bench hook, sanding block, and bench mat. These are simple support tools, but they reduce slips, edge damage, and finish contamination.
Beginners often underestimate clamp quantity and overestimate clamp pressure. More pressure does not equal a better bond or a straighter assembly. In furniture and joinery restoration especially, even pressure, correct caul placement, and dry-run fitting matter more than brute force. Stable workholding makes every other hand tool safer and more accurate.
Abrasives, files, brushes, and finishing tools for cleaning and refinement
Cleaning and refinement are where restorers shape final appearance. The essential hand tools here include sanding blocks, abrasive papers in a sensible grit progression, abrasive pads, needle files, mill files, riffler files, wire brushes, brass brushes, burnishing pads, and polishing cloths. The key is matching the abrasive and tool hardness to the material. Steel wire on soft brass can scratch deeply. A coarse file on plated hardware can cut through the finish in a few strokes. Sandpaper wrapped around fingers rounds edges unpredictably, while a block maintains flatness and reveals high spots honestly.
Files are especially useful because they remove small amounts of material with control. Needle files tune slots, keyways, and tiny burrs. A mill file trues edges, flushes repairs, and deburrs cut metal. Chalk on a file reduces pinning, and a file card keeps teeth clear. For rust removal, hand brushes and abrasive pads let you stop when sound metal or acceptable patina appears. In conservation-sensitive work, that stopping point is critical. Not every object should be polished bright. Sometimes the right outcome is stable, clean, and intact, not shiny.
For surface preparation before waxing, shellac touch-up, or paint blending, hand sanding still outperforms random abrasion in tight areas and around moldings. Keep dedicated abrasives for wood, ferrous metal, and nonferrous metal to avoid cross-contamination. Finishing tools should improve clarity and texture, not erase history. That judgment separates restoration from refinishing.
How to choose quality hand tools and build a complete restoration kit
If you are building a hand tool kit for restoration and maintenance, buy in layers. Start with measuring tools, screwdrivers, pliers, a hammer, chisels, scrapers, clamps, files, and a good bench light. Then expand into specialty tools based on the objects you restore most often, such as upholstery tools, burnishers, veneer hammers, pin vises, or gunsmith-style bits. The best hand tools are defined less by marketing than by fit, hardness, serviceability, and ergonomics. Blades should hold an edge. Pivots should move smoothly without side play. Cutting edges should meet cleanly. Handles should transmit feedback, not just cushion the hand.
Established standards and trusted makers matter because consistency matters. Squares should be square. Calipers should repeat measurements. Driver tips should match fastener geometry accurately. Reputable brands often publish steel types, tolerances, and intended use, which is more meaningful than decorative packaging. Storage matters too. Tool rolls, drawer organizers, silica gel, and light oil prevent edge damage and corrosion. I recommend labeling specialty drivers and keeping a simple maintenance routine: clean after use, sharpen regularly, and retire tools that begin damaging work.
The main benefit of owning essential hand tools is not convenience; it is preservation. The right tool lets you move slowly, verify fit, and solve problems with minimal intrusion. That protects original material, reduces rework, and raises the quality of every restoration you complete. Use this hub as your starting map for the broader tools and equipment category, then deepen each area with focused buying guides, maintenance articles, and technique tutorials. Build your kit deliberately, learn what each tool is telling your hands, and your restorations will become cleaner, safer, and far more faithful to the objects you are trying to save.
Frequently Asked Questions
What hand tools are considered essential for most restoration projects?
The most useful hand tools in restoration are the ones that help you work slowly, accurately, and with as little damage as possible. A strong starter set usually includes several screwdrivers in different sizes and tip styles, a set of combination wrenches, adjustable pliers, needle-nose pliers, locking pliers, a small hammer, a rubber or rawhide mallet, a utility knife, scrapers, chisels, files, a hand saw, clamps, a measuring tape, a combination square, calipers, punches, and a wire brush. For finer work, restorers also benefit from picks, awls, dental-style detail tools, and small inspection mirrors.
These tools matter because restoration is rarely just about taking something apart and putting it back together. You may need to loosen a rusted fastener without snapping it, lift old finish without gouging the substrate, true up a bent bracket, clean corrosion from a tight corner, or measure replacement parts to match original dimensions. Powered tools can be helpful in some stages, but hand tools give you tactile feedback and better control, which is critical when you are working on aged wood, brittle finishes, soft metals, old hardware, or irreplaceable parts.
If you are building a kit, prioritize quality over quantity. A few well-made screwdrivers that fit correctly are more valuable than a large bargain set that cams out and damages screw heads. The same is true for chisels that hold an edge, files that cut cleanly, and measuring tools that stay accurate. A thoughtful hand-tool kit becomes the foundation for safer disassembly, cleaner repairs, and better final results across furniture, machinery, fixtures, and decorative objects.
Why are hand tools so important when power tools can do the job faster?
Speed is not the main goal in restoration; preservation is. That is why hand tools remain indispensable even when power tools are available. Restoration work often involves fragile materials, hidden fasteners, irregular surfaces, hand-cut joinery, old adhesives, patina, and wear patterns that should be preserved rather than erased. Hand tools let you feel resistance, detect movement, and stop immediately when something is not reacting as expected. That kind of feedback is something power tools simply do not provide at the same level.
For example, a hand screwdriver allows you to feel whether a screw is beginning to turn, binding in place, or stripping under pressure. A scraper used by hand can remove failing finish while leaving sound material intact. A file can shape a repair with gradual, controlled removal instead of taking off too much too quickly. A chisel can be guided with precision through a glue line or damaged joint without tearing out surrounding fibers. In each case, the hand tool reduces the risk of overcutting, overheating, scarring, or permanently altering original material.
There is also a practical reason to lean on hand tools: many restoration problems are highly specific and do not benefit from brute force. A seized hinge pin, a rounded slotted screw, a warped wooden drawer runner, or a corroded lamp fitting usually needs patience and finesse, not more RPM. Experienced restorers know that using the right hand tool at the right moment often prevents expensive mistakes, protects historical value, and produces repairs that look more authentic when the project is complete.
How do I choose the right hand tools for different restoration materials like wood, metal, and hardware?
The right tool choice depends on both the material and the task. In wood restoration, control over cutting and surface preparation is especially important, so chisels, card scrapers, block planes, coping saws, marking gauges, clamps, and layout tools tend to be central. You want sharp edges, flat reference surfaces, and tools that can remove glue, shape patches, trim plugs, or refine joints without crushing wood fibers. A soft-faced mallet is often preferable to a steel hammer when persuading parts into place because it reduces surface bruising.
For metal restoration, the priority often shifts to gripping, loosening, cleaning, aligning, and measuring. Pliers, small wrenches, punches, files, wire brushes, picks, taps for chasing threads, and accurate calipers become more important. You may need to free frozen fasteners, remove corrosion, dress burred edges, or check shaft and bore dimensions before fitting replacement components. In this setting, using tools with precise jaws and properly machined faces matters because slipping or marring can quickly ruin a part that may be difficult to replace.
When dealing with mixed-material objects or old hardware, versatility matters. Hollow-ground screwdrivers are excellent for antique screws because they engage the slot more fully and reduce the chance of damage. Needle-nose pliers help in tight spaces, but smooth-jaw pliers or padded jaws are better when surface marks matter. A restorer should also think in terms of protection: backing blocks, thin shims, leather jaw covers, and masking materials often work together with hand tools to reduce risk. In short, choose tools not only for the job they perform, but for how gently and precisely they perform it on the specific material in front of you.
What are the most common mistakes people make with restoration hand tools?
One of the biggest mistakes is using the wrong tool size or type for the task. A screwdriver that does not fit the slot, pliers used where a wrench should be used, or a dull chisel forced through a joint can cause permanent damage very quickly. Restoration often involves original parts that are worn, soft, oxidized, or irregularly sized, so tool fit is even more important than it is in ordinary repair work. Taking an extra minute to match the tool to the fastener or material can save hours of corrective work later.
Another common problem is applying too much force too early. Many beginners assume a stubborn part needs more leverage, when in reality it may need penetrating oil, heat control, support from behind, or a different sequence of disassembly. Excess force rounds screw heads, snaps bolts, splits wood, and bends delicate hardware. Good restoration technique is usually incremental: stabilize the object, inspect how it was assembled, test movement, and then use the least aggressive tool and method that can accomplish the step safely.
Poor maintenance is also a frequent issue. Dull blades tear instead of cut, rusty files stop cutting cleanly, mushroomed punches become unsafe, and inaccurate measuring tools lead to poor-fitting repairs. Storage matters too. Tossing precision tools into a box where edges bang together shortens their useful life. Finally, many people underestimate the value of practice. Hand tools reward skill. Learning how a sharp scraper feels, how much pressure a fragile fastener can tolerate, or how a file should be stroked on brass versus steel comes with experience. The more intentionally you use your tools, the better your restoration results will be.
How should I maintain and organize hand tools so they stay reliable for restoration work?
Reliable tools start with routine care. Keep cutting tools sharp, keep metal surfaces clean and lightly protected from rust, and inspect working edges and gripping faces regularly. Chisels, knives, and scrapers should be honed before they become obviously dull, because restoration work depends on clean, predictable cuts. Files should be cleaned with a file card and stored so their teeth do not rub against each other. Screwdrivers should have clean, undamaged tips. Pliers and adjustable tools benefit from occasional lubrication at pivot points so they move smoothly and do not bind during delicate work.
Organization is just as important as maintenance because restoration often requires you to switch between tools quickly while staying focused on fragile parts. A practical setup might include a main toolbox for general tools, a separate precision kit for measuring and fine-detail tools, and a bench area with frequently used items within reach. Many restorers organize by function: fastening, cutting, shaping, measuring, and cleaning. That makes it easier to work methodically and prevents the frustration of improvising with the wrong tool simply because the right one is buried somewhere.
You should also think about workflow protection. Store sharp-edge tools with guards or in racks, keep measuring tools in cases, and label drawers or trays clearly. During active projects, use small parts containers so removed screws, washers, pins, and fittings stay matched to the component they came from. Good tool organization does more than save time; it helps preserve accuracy, reduces accidental damage, and supports a calmer, more disciplined approach to restoration. In a field where precision matters at every stage, well-maintained and well-organized hand tools are part of the craft itself.




