
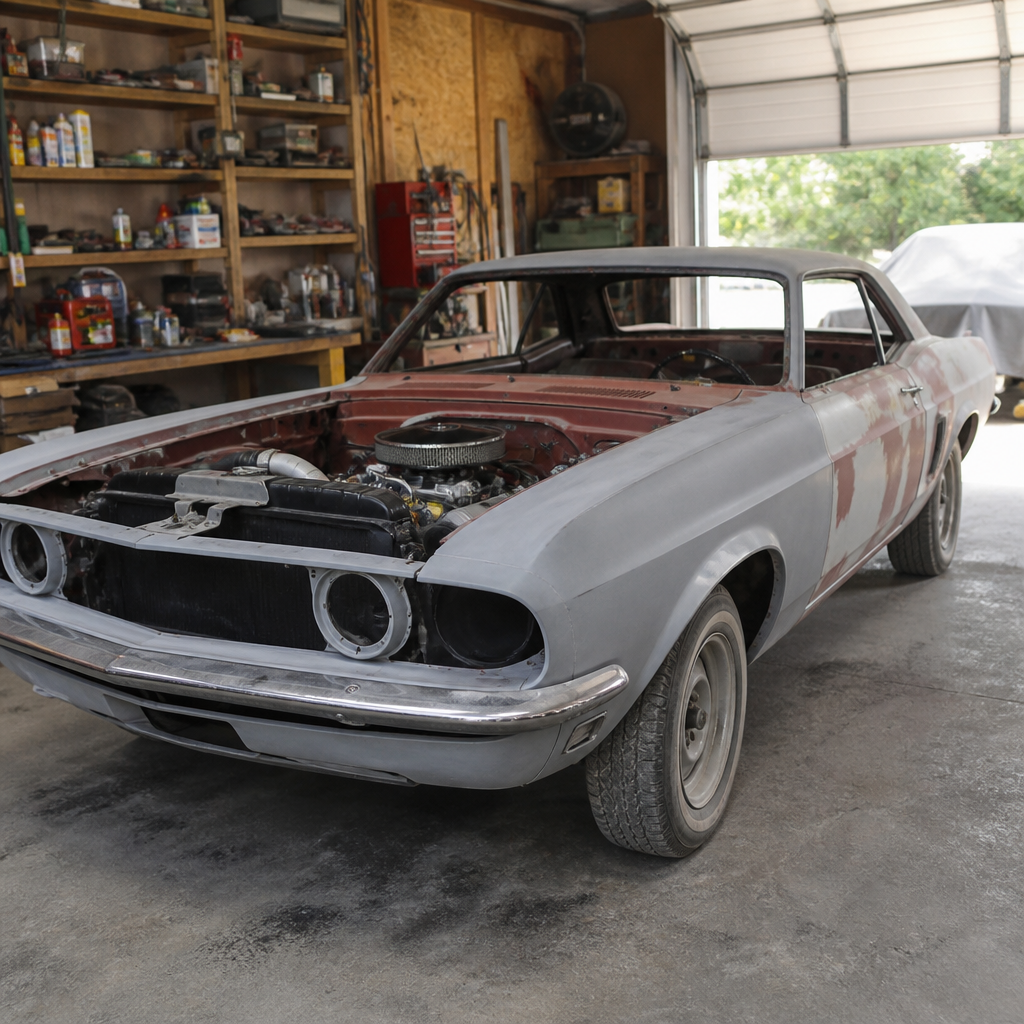
DIY classic car restoration turns an aging vehicle into a working piece of automotive history through careful inspection, mechanical repair, bodywork, paint preparation, trim renewal, and patient reassembly. A classic car is usually defined by age, cultural significance, and design era, though insurance providers, registration agencies, and enthusiast clubs often use different thresholds, commonly twenty to thirty years. Restoration itself can mean several levels of work. Preservation keeps as much original material as possible. Refurbishment improves usability without chasing strict authenticity. Full restoration returns the car to factory-correct or period-correct condition, sometimes exceeding original build quality in safety and corrosion protection.
I have worked on driver-grade muscle cars, British roadsters, and seventies trucks, and the same truth appears every time: successful projects are won in planning, not only in wrenching. People usually search for a DIY classic car restoration guide because they want a practical roadmap. They need to know where to start, how much it costs, which tools matter, what can be done at home, and when specialist help is the smarter choice. Those questions matter because the wrong sequence wastes money fast. Installing fresh interior over a leaking windshield, for example, almost guarantees ruined carpet, hidden rust, and repeat labor.
This hub article covers DIY restoration guides from first assessment to final road testing so readers can understand the full process before diving into detailed subtopics. It matters because classic cars are emotional purchases, but restoration is a discipline. You are balancing originality, drivability, budget, workspace, time, parts availability, and safety. Some projects deserve a frame-off restoration. Others should remain honest survivors with mechanical sorting and cosmetic stabilization. The best outcome is not always the most expensive one. It is the result that fits the car, the owner, and the intended use, whether that means weekend shows, long-distance touring, or a reliable local cruiser.
Before touching a wrench, define the project goal in one sentence: concours correct, weekend driver, restomod, or preservation. That decision controls every later choice, from paint code research to whether you rebuild the original carburetor or install electronic fuel injection. Gather factory service manuals, assembly manuals, parts catalogs, and marque-club resources early. These documents save hundreds of hours because they provide torque specs, wiring diagrams, trim placement, fastener finishes, and production changes by model year. Good restoration is systematic documentation plus disciplined execution, and that approach prevents classic beginner mistakes such as disassembling too much at once or buying parts before confirming compatibility.
Assess the Car Before You Buy Parts
The first hands-on step in any DIY classic car restoration is a complete condition assessment. Start with structural rust, because rust repair can consume more money than engines, paint, and upholstery combined. Check frame rails, rocker panels, floor pans, trunk floors, cowl vents, wheel arches, suspension pickup points, windshield channels, and lower fenders. Use a magnet carefully on suspect filler-heavy panels, inspect from underneath with strong lighting, and probe flaky areas with a pick. Surface rust is manageable. Perforation near structural points changes the economics of the project. On unibody cars, severe rust can make panel alignment and safe suspension geometry difficult even after patchwork.
Next evaluate completeness. Missing trim, unique glass, original seats, and model-specific brackets are often harder to source than common mechanical parts. A cheap project car can become expensive if rare grille pieces or year-specific taillights are absent. Then inspect drivetrain condition: engine compression, oil pressure if it runs, transmission engagement, differential noise, brake hydraulics, steering play, and wheel bearing condition. Electrical systems deserve equal attention. Brittle insulation, hacked alarm wiring, poor grounds, and fused circuits hidden under tape can add weeks of troubleshooting. Document everything with photos, notes, and labeled bagging from the start. The camera on your phone is one of the best restoration tools you own.
Build a Realistic Plan, Budget, and Workspace
A restoration plan should list phases in sequence: inspection, disassembly, metal repair, chassis and suspension, drivetrain, wiring, bodywork, paint, weather seals, glass, interior, and final tuning. Writing the sequence seems basic, but it prevents common rework. I have seen owners install rebuilt front suspension before welding nearby rust, then remove it again to gain access. Budgeting should include parts, machine work, consumables, specialty tools, outside labor, transport, and storage. Add a contingency of at least twenty percent. Hidden corrosion, cracked exhaust manifolds, damaged threads, and incorrect reproduction parts appear on almost every project.
Your workspace affects quality more than most beginners realize. You need dry storage, adequate electrical service, ventilation, good lighting, shelving, and enough room to open doors, use jack stands, and store removed panels safely. A compact garage can work if organization is excellent. Label shelves by system, keep fasteners in marked bags, and use rolling carts for active subassemblies. Essential tools include quality jack stands, a hydraulic jack, torque wrench, engine hoist if doing major drivetrain work, compression tester, multimeter, brake line tools, body hammers, dollies, angle grinder, and a decent air compressor for some paint and pneumatic tasks. Buy measuring tools before shiny accessories.
| Restoration Stage | Main Tasks | Common DIY Risk | Best Practice |
|---|---|---|---|
| Assessment | Rust checks, compression, inventory, documentation | Underestimating structural damage | Inspect underside, cowl, and frame points before ordering parts |
| Disassembly | Remove trim, glass, drivetrain, interior, wiring | Losing hardware and orientation | Photograph every step and label bags by subsystem |
| Metal and chassis | Patch panels, suspension, brakes, steering | Repairing cosmetics before structure | Finish welding and fitment before primer and assembly |
| Mechanical rebuild | Engine, transmission, fuel, cooling, electrical | Mixing incompatible parts | Verify year-specific specs against manuals and casting numbers |
| Finish and reassembly | Paint, seals, trim, interior, testing | Damaging new finishes during install | Dry-fit components and solve leaks before final trim |
Disassembly, Labeling, and Cataloging Parts
Disassembly is where many restorations become stalled collections of unlabeled parts. Work system by system rather than stripping the entire car in one weekend. Remove trim carefully with correct tools to avoid bending stainless or snapping clips that may be unavailable. Bag hardware immediately and write descriptions that will still make sense a year later, not just “door bolts.” Include left or right side, orientation, washer stack order, and shim locations. For wiring, apply numbered tags at both ends before removal. For glass and brightwork, use padded storage and vertical racks where practical. Distortion and scratches often happen in storage, not during removal.
Create a digital inventory spreadsheet with part condition, source status, and whether each item should be restored, replaced, replated, or upgraded. This single habit saves surprising money because it reduces duplicate purchases and lets you batch outside services such as zinc plating or upholstery repair. If the project is a known model with reproduction support, compare original parts against replacement catalogs before discarding anything. Original fasteners, brackets, and trim often fit better than reproductions. Even worn originals can serve as templates. During teardown, inspect evidence of previous repairs. Overlapping patches, brazed seams, and fiberglass over rust are common discoveries that should reshape the repair plan immediately.
Bodywork, Rust Repair, and Paint Preparation
Body restoration is usually the most intimidating part of a DIY classic car restoration, and with good reason. Visible paint is only the surface expression of hidden metal accuracy. Start by confirming panel gaps and body alignment before cutting rusted sections away. Brace door openings if structural areas are being replaced. Remove rust fully; do not trap it under filler. For localized corrosion, fabricate repair patches or use stamped patch panels, trimming them for tight butt welds where appropriate. On structural sections, duplicate factory seams, reinforcement points, and drain paths. Weld-through primer has uses between overlapping panels, but it is not a substitute for clean metal and proper coating afterward.
After metal finishing, use minimal body filler over stable repairs rather than sculpting shape from filler alone. Epoxy primer is the correct foundation over bare metal for many systems because it seals well and provides corrosion resistance. High-build primer helps refine blocking, but blocking itself is what produces straight reflections. Long sanding blocks reveal highs and lows better than hand sanding with fingertips. Guide coat is not optional if you want flat panels. Test-fit trim, bumpers, lights, and weatherstrips before final paint whenever possible. Many restorers learn too late that reproduction seals can shift panel position or create interference at doors and deck lids.
Engine, Drivetrain, Brakes, and Suspension
Mechanical restoration should focus first on safety and reliability. Brakes, steering, tires, and fuel integrity come before horsepower. Rebuild or replace wheel cylinders, calipers, master cylinders, rubber hoses, and steel lines as needed, and inspect backing plates, drums, rotors, and parking brake hardware. Old brake fluid absorbs moisture, promoting internal corrosion. Suspension work usually includes bushings, ball joints, tie-rod ends, shocks, leaf spring eye bushings, and sometimes control arm shafts or kingpins depending on era. Measure ride height and inspect alignment shims before teardown. On body-on-frame vehicles, body mount condition also affects door fit and steering feel.
For engines, decide whether a refresh or full rebuild is justified. Compression and leak-down testing, bearing material in drained oil, crankshaft endplay, cooling system contamination, and smoking behavior provide good clues. A dormant engine may only need careful revival, including pre-lubrication, fuel system cleaning, ignition service, and cooling system work. A worn engine with taper, low oil pressure, and metal debris belongs at a machine shop for proper measurement. Use machinists familiar with older blocks, valve seat recession concerns, and period-specific tolerances. Transmissions and differentials follow the same principle: verify condition, preserve originals when practical, but do not ignore noise, slipping, or contaminated lubricant.
Electrical Systems, Interior, and Final Assembly
Classic car wiring failures are usually caused by heat, corrosion, vibration, and previous owner modifications. Begin with grounds, because poor grounding creates misleading symptoms across gauges, lighting, and charging circuits. If the original harness insulation is brittle or spliced repeatedly, replacement harnesses from reputable suppliers are often safer and faster than piecemeal repair. Follow factory routing, grommet locations, and amperage protection. Avoid household connectors and twisted joints under tape. Proper crimping, soldering where appropriate, and heat-shrink insulation produce durable repairs. Charging systems, starter cables, ignition components, and fuse panels should be load-tested rather than judged by appearance alone.
Interior restoration should wait until leaks, glass fitment, and most dirty work are finished. Sound deadening, insulation, carpet, seat foam, door cards, headliners, and dash pads all depend on a dry shell. Before installing soft trim, water-test the car at windshield corners, cowl drains, quarter windows, and trunk seals. Reassembly is where patience pays off. Use protective tape on painted edges, lubricate seals with the correct products, and align panels gradually. Once assembled, perform staged commissioning: static electrical checks, fuel pressure verification, cooling fan operation, initial engine break-in if applicable, brake bedding, alignment, and short road tests. Keep notes and correct small faults early before they become expensive failures.
When to DIY and When to Hire a Specialist
The smartest restorers are not the ones who do everything themselves; they are the ones who know which tasks reward home effort and which require specialized equipment or deep trade experience. Mechanical disassembly, parts cleaning, brake service, suspension rebuilding, basic wiring, and trim fitting are realistic for many committed hobbyists. Precision machine work, complex upholstery, windshield installation on rare cars, and high-end final paint often justify professional help. The same goes for structural frame straightening and advanced rust repair in safety-critical areas. Paying for expert work at the right time can lower total cost by preventing ruined parts, poor fit, and repeat labor.
This DIY classic car restoration hub gives you the sequence that matters most: inspect honestly, plan carefully, repair structure first, make the car safe and reliable, then focus on finish and comfort. The main benefit of following a disciplined process is not just saving money. It is ending up with a classic car that starts, stops, tracks straight, resists corrosion, and delivers the character that made you choose it in the first place. Use this guide as your roadmap, then move into detailed articles on rust repair, engine rebuilding, wiring, paint prep, and interior restoration so each stage gets the attention it deserves. Start by assessing your car this week and writing a restoration plan before buying a single part.
Frequently Asked Questions
1. What qualifies as a classic car, and how do I know if my vehicle is worth restoring?
A classic car is generally a vehicle that is old enough to represent a distinct design period, engineering approach, or cultural moment in automotive history. In many cases, cars that are twenty to thirty years old begin to fall into the classic category, but the exact threshold depends on the source. Insurance companies, state registration agencies, auction houses, and enthusiast clubs may all use slightly different standards. Age matters, but so do originality, rarity, styling, historical interest, brand reputation, and collector demand.
When deciding whether a vehicle is worth restoring, look at more than nostalgia alone. Start with the car’s structural condition. A solid frame or unibody, manageable rust, and a mostly complete set of original parts usually make a project far more realistic. Next, consider parts availability. Some models have strong aftermarket support, active owner communities, and easy-to-find reproduction trim, weatherstripping, and mechanical components. Others may require expensive hunting for rare or discontinued pieces.
You should also compare the likely restoration cost to the finished value of the car, but remember that value is not always purely financial. Many DIY restorers choose a vehicle because it belonged to family, represents a dream car from their youth, or simply has a body style they love. If the car has sentimental significance, solid fundamentals, and a realistic path to completion, it can absolutely be worth restoring even if it is not the most profitable project on paper.
2. What are the main stages of a DIY classic car restoration?
A DIY classic car restoration usually follows a clear sequence, although the exact order can vary depending on the car’s condition and the restorer’s goals. The first stage is assessment and planning. This includes inspecting the body, undercarriage, engine, transmission, brakes, suspension, wiring, glass, interior, and trim. At this point, it is smart to photograph everything, label parts, create a budget, and define the type of restoration you want to complete.
The next stage is disassembly. Parts are removed carefully and organized so reassembly is not guesswork months later. Many experienced hobbyists use labeled bags, shelves, bins, and detailed notes to keep hardware and trim sorted by system or location. Once the car is stripped to the degree needed, structural and mechanical repairs begin. Rust repair, floor or panel replacement, frame work, brake rebuilding, steering service, fuel system cleaning, engine work, and suspension refurbishment are often tackled before cosmetic finishing.
After the core systems are sound, attention shifts to bodywork and paint preparation. This can include dent repair, filler work, sanding, primer application, seam sealing, and panel alignment. Trim and interior restoration often happen alongside this phase, especially if upholstery, weather seals, gauges, or brightwork need replacement or refurbishment. Once paint and detail work are finished, the final stage is patient reassembly and testing. Wiring is checked, fluids are filled, systems are adjusted, and the car is started, driven, and fine-tuned. The most successful restorations are methodical rather than rushed, because each stage affects the quality of the next one.
3. Should I preserve, restore, or do a full frame-off rebuild on my classic car?
That decision depends on the vehicle’s condition, originality, intended use, and your budget. Preservation is the lightest-touch approach. It focuses on stabilizing the car and keeping as much original material as possible. That may mean cleaning and protecting factory paint, rebuilding essential mechanical systems, repairing small issues, and leaving age-related wear in place. Preservation is often ideal for rare cars, survivor vehicles, and cars with historically significant originality.
A standard restoration goes further. The goal is to return the vehicle to reliable, attractive condition while respecting its original style and components. This often includes body repair, repainting, interior work, rebuilt mechanical systems, renewed trim, and correction of years of neglect or wear. This is the most common path for DIY hobbyists because it balances authenticity, drivability, and project scope.
A full frame-off or complete nut-and-bolt rebuild is the most extensive option. The body is separated from the frame when applicable, or the vehicle is stripped to a bare shell in unibody cases. Every system is rebuilt or replaced, and the car is refinished to a very high standard. This approach makes sense when the vehicle is severely deteriorated, highly valuable, or destined for show-level results. However, it is also the most expensive, time-consuming, and technically demanding. For many first-time restorers, a thoughtful driver-quality restoration is a smarter and more achievable goal than aiming immediately for concours perfection.
4. What tools, workspace, and skills do I need to restore a classic car at home?
You do not need a professional shop to begin, but you do need a safe, organized workspace and a realistic understanding of your abilities. At minimum, most home restorers benefit from an enclosed garage or covered work area with good lighting, ventilation, electrical access, and enough room to move around the vehicle with parts laid out in an orderly way. A dry environment matters because moisture can quickly undo progress on metal, wiring, upholstery, and stored components.
Basic tools usually include a quality socket and wrench set, screwdrivers, pliers, pry bars, torque wrench, jacks, sturdy jack stands, oil drain equipment, multimeter, compression tester, and specialty tools suited to your specific make or model. For body and paint prep, you may also need sanders, grinders, body hammers, dollies, welding equipment, clamps, and personal protective gear. Safety equipment is non-negotiable. Gloves, eye protection, hearing protection, respirators, and fire extinguishers should be part of the setup from the start.
As for skills, patience and documentation are just as important as mechanical talent. You can learn a great deal as you go, especially if you use factory service manuals, restoration guides, marque-specific forums, and club resources. Tasks such as basic disassembly, cleaning, bolt-on component replacement, wiring diagnosis, brake service, and interior removal are often manageable for careful beginners. More advanced jobs like structural welding, engine machining, transmission rebuilding, and final paint spraying may require practice, professional help, or both. A successful DIY restoration does not mean doing every single operation alone. It means managing the project intelligently and knowing when to bring in expert assistance.
5. How can I keep a DIY classic car restoration on budget and avoid common mistakes?
The best way to control costs is to create a restoration plan before spending heavily on parts. Start with a complete inspection and a written list of what the car actually needs versus what you would ideally like to improve later. Separate essential systems such as brakes, steering, suspension, fuel delivery, cooling, wiring safety, and structural integrity from cosmetic upgrades. This keeps the project grounded in reliability and safety first.
One of the most common mistakes is tearing the entire car apart too early without a labeling system, budget, timeline, or storage strategy. That often leads to lost hardware, duplicate purchases, stalled momentum, and confusion during reassembly. Another major mistake is underestimating rust. Surface corrosion is one thing, but hidden rust in floor pans, rocker panels, trunk floors, frame rails, and lower fenders can dramatically expand the scope and cost of the project. It is also easy to overspend on shiny accessories before the mechanical foundation is sorted out.
To stay on budget, price parts sources carefully, compare reproduction versus original components, and rebuild usable parts when practical. Buy the best manuals you can find, join owner communities, and keep detailed records of expenses, part numbers, and work completed. Break the project into stages so progress feels manageable. Most important, do not rush. Haste causes broken fasteners, poor paint preparation, wiring errors, and expensive rework. A disciplined, step-by-step approach almost always saves more money than it costs, and it gives you a much better chance of finishing with a classic car that is both enjoyable and dependable.




