
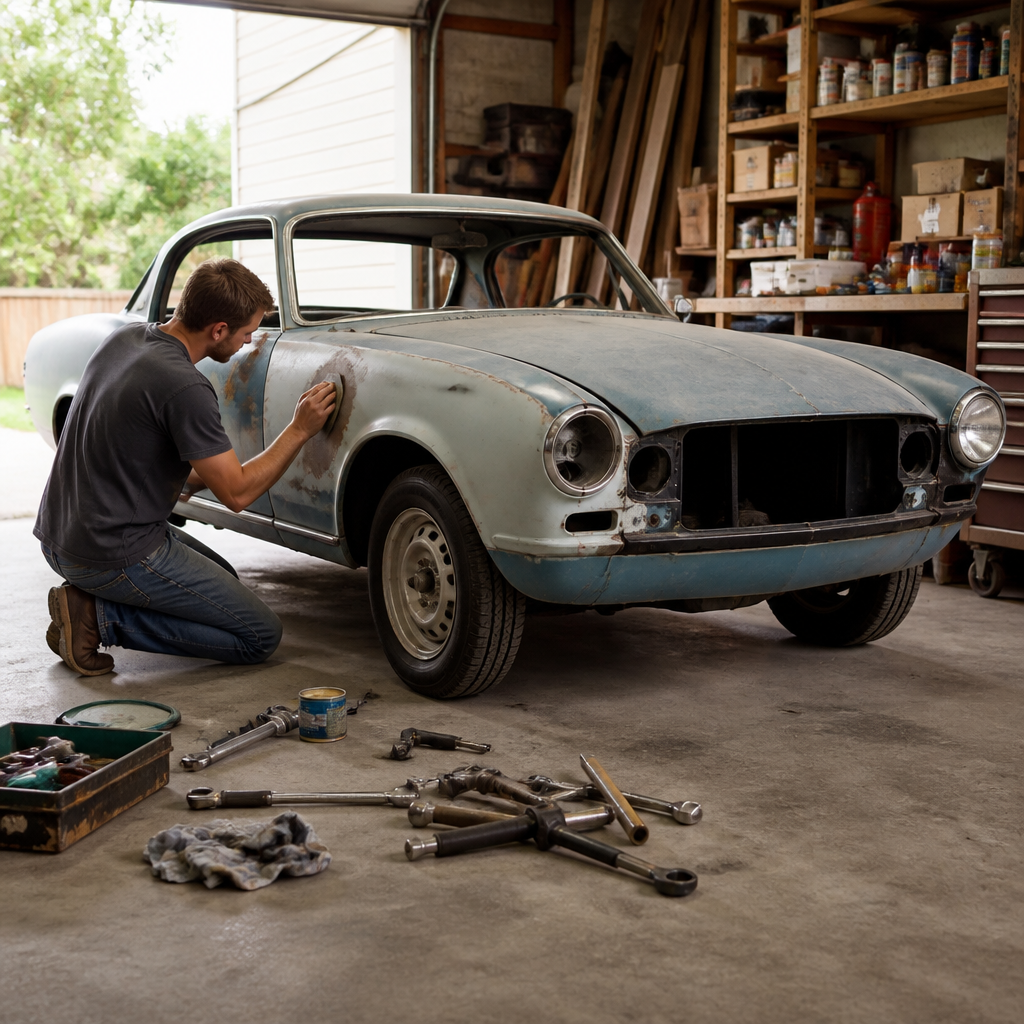
Restoring a classic car on a budget starts with a clear definition of both “classic” and “budget,” because the cheapest project is not always the least expensive to finish. In practical terms, a classic car is usually a vehicle at least twenty to twenty-five years old with historical, cultural, or enthusiast value, while a budget restoration means making deliberate tradeoffs to return that vehicle to safe, reliable, attractive condition without chasing a concours-level result. I have worked on driver-grade Mustangs, C10 pickups, air-cooled Volkswagens, and seventies Japanese coupes, and the same lesson applies every time: money is saved long before the first wrench turns, during planning, inspection, parts strategy, and scope control. For readers exploring DIY restoration guides, this article serves as the hub page within restoration and maintenance, connecting the core decisions behind project selection, bodywork, mechanical repairs, electrical troubleshooting, interior refreshes, paint choices, tool planning, and long-term preservation. Budget restoration matters because labor rates, parts inflation, and outsourced paint work can quickly exceed a car’s final value, yet a disciplined owner can still revive a worthy vehicle, build practical skills, and preserve automotive history without draining savings.
Choose the right project car before you buy
The best budget restoration begins with ruthless vehicle selection. If you overpay for a rusty, incomplete, or heavily modified car, every later decision gets harder. I always tell first-time restorers to buy the most complete, rust-free example they can afford, even if the paint is poor or the engine does not run perfectly. Cosmetics and mechanical systems are usually more manageable than severe structural corrosion. Frame rails, floor pans, rocker panels, trunk floors, shock towers, and windshield channels deserve close inspection with a flashlight, magnet, and pick. Fresh undercoating can hide welded patches or perforation, so look for inconsistent texture and trapped moisture. Missing trim, glass, seat hardware, and model-specific brackets also matter, because small unavailable parts can stall a project longer than an engine rebuild.
Research is not optional. Before purchase, check parts support from suppliers such as Summit Racing, RockAuto, LMC Truck, Moss Motors, Wolfsburg West, YearOne, National Parts Depot, and marque-specific forums. Some platforms, like first-generation Camaros and Ford Broncos, have deep reproduction catalogs but high purchase prices. Others, like eighties GM G-bodies or sixties full-size sedans, may be cheaper to buy yet require more used-part hunting. The smartest budget projects typically combine strong parts availability, broad owner knowledge, and simple construction. A carbureted small-block Chevrolet, Ford inline-six, or air-cooled VW flat-four will nearly always be easier and cheaper to revive than a low-production luxury coupe loaded with one-year-only electronics.
Paperwork matters just as much as sheet metal. Verify the VIN, title status, and state registration requirements before money changes hands. A bargain car without clear ownership documents can become an expensive lawn ornament.
Set a restoration goal and control scope
Most budget overruns come from unclear goals. Decide early whether your car will be a driver restoration, weekend cruiser, period-correct survivor, restomod, or near-stock show car. A budget build works best when the target is a safe, dependable, visually honest driver. That means prioritizing brakes, fuel delivery, cooling, steering, suspension, wiring integrity, weather sealing, and rust stabilization before premium chrome, rare option codes, or perfect panel gaps. I have seen owners spend eight thousand dollars on paint while driving with dry-rotted fuel hoses and original single-circuit brakes. That is backward restoration planning.
Create a written scope document. List every system: body, frame, engine, transmission, rear axle, brakes, suspension, steering, cooling, fuel, electrical, interior, glass, weatherstripping, and trim. Under each system, separate essential repairs from desirable upgrades. Essential means required for safety, legal road use, or preventing damage. Desirable means appearance improvement or comfort. This document becomes your decision filter when surprise costs appear, which they always do.
Photograph everything before disassembly and keep a digital folder by system. Use labeled bags, bins, and tags for fasteners. A budget restoration is often won by organization, because lost hardware leads to duplicate purchases, rushed substitutions, and assembly errors.
Build a realistic budget and timeline
A realistic classic car restoration budget includes more than parts. You need consumables, machine work, specialized tools, inspection fees, transport, manuals, and contingency. I advise first-time restorers to split expected spending into three buckets: acquisition cost, safety/mechanical revival, and cosmetic improvement. Then add a contingency of at least fifteen to twenty percent. On most DIY projects, the hidden costs are not glamorous. They are seam sealer, abrasives, welding gas, drill bits, rust converter, gaskets, fluids, electrical terminals, fastener kits, and shipping charges.
The timeline should match your available hours, workspace, and skill level. If you only have weekends and a one-car garage, do not strip the entire vehicle to a shell unless you are certain you can finish. Rolling disassembly is usually smarter: complete the brakes, fuel system, cooling system, and ignition first; then tackle suspension; then body and interior one area at a time. Keeping the car mobile and partially assembled protects motivation and reduces the risk of abandoned-project syndrome.
| Expense Category | Typical Budget Priority | Budget-Saving Approach |
|---|---|---|
| Brakes and tires | Highest | Buy quality new components; avoid used safety parts |
| Fuel and cooling systems | High | Rebuild stock components before upgrading |
| Suspension and steering | High | Replace wear items only after inspection and measurement |
| Engine work | Medium to high | Test compression and oil pressure before planning a full rebuild |
| Paint and bodywork | Variable | Do prep yourself and outsource only final spraying if needed |
| Interior and trim | Lower initially | Clean, dye, repair, and reuse original pieces where possible |
Prioritize safety and reliability first
If a classic car cannot stop, steer, cool itself, or avoid fuel leaks, it is not ready for cosmetic spending. Start with a full safety inspection. Replace flexible brake hoses, inspect hard lines for corrosion, rebuild or replace wheel cylinders and calipers, verify master cylinder function, and measure drum or rotor wear against service specifications. Old brake fluid absorbs moisture, so plan a complete flush. Tire age also matters. Even tires with good tread can be unsafe after six to ten years, depending on storage and condition.
Next, address fuel delivery. Stale gasoline turns to varnish, clogs jets, sticks floats, and damages rubber hoses. Drop and inspect the tank if contamination is likely. Replace filler neck hoses, vent lines, filters, and any cracked rubber sections with modern fuel-compatible material. On carbureted cars, a rebuild kit often restores drivability for far less than a replacement carburetor, provided the throttle shafts and main body are still usable. Cooling systems deserve the same attention: radiator flow, water pump condition, thermostat operation, fan clutch or electric fan function, and pressure cap rating all affect reliability.
Electrical integrity is another first-pass priority. Clean grounds, inspect bulkhead connectors, repair brittle insulation, and use proper crimping tools with heat-shrink where needed. Random no-starts on old cars often trace back to voltage drop, corroded terminals, or weak engine grounds, not expensive major parts.
Use DIY restoration guides strategically
DIY restoration guides are most valuable when they are system-specific, not generic. Factory service manuals remain the gold standard because they include torque specs, wiring diagrams, adjustment procedures, and diagnostic flow. Pair those manuals with parts books, assembly manuals, marque forums, and trusted video walkarounds from specialists who show measurements, common failure points, and tool choices. For American cars, assembly manuals can reveal clip locations, fastener finishes, routing paths, and bracket orientation that ordinary repair manuals omit.
Use guides in the right sequence. Read the whole procedure before touching the car, then gather every gasket, seal, clip, and consumable before beginning. This simple habit saves repeated shipping costs and prevents half-finished work from sitting exposed. When I rebuild door mechanisms or drum brakes, I print exploded diagrams, take phone photos at every step, and compare old parts to new ones before installation. That approach prevents one of the most expensive DIY mistakes: forcing an incorrect part to fit and damaging adjacent components.
Not every guide should be followed blindly. Cross-check advice when tolerances, metallurgy, or safety-critical systems are involved. A forum post can be useful, but it does not override a factory torque value or bearing preload procedure.
Save money on bodywork and paint without cutting corners
Bodywork is where many budgets collapse, largely because labor hours multiply quickly. The cost-effective approach is to separate metal repair, surface preparation, and final finish quality. Structural rust must be cut out and repaired with properly shaped metal, not buried under filler. Cosmetic dents, small waves, and imperfect gaps are more negotiable on a driver-grade restoration. If you can weld patch panels, grind carefully, apply filler sparingly, and block sand patiently, you can save thousands before any paint gun is loaded.
Rust treatment should be honest. Surface rust can often be removed mechanically and sealed with epoxy primer. Perforated steel needs replacement. Polyester filler is for contour correction, not hole filling. High-build primer can straighten minor imperfections, but it cannot replace metal finishing. Budget painters often deliver acceptable results when the owner handles disassembly, stripping, panel prep, and masking details correctly. The expensive part is usually prep time, not spraying color.
Single-stage urethane can be a practical budget choice for solid colors and period-correct looks. Basecoat-clearcoat offers more depth and repair flexibility but adds material cost and process complexity. Whatever system you choose, buy compatible products from one paint line and follow technical data sheets for flash times, mix ratios, and temperature ranges.
Rebuild mechanical systems only as far as evidence requires
You do not always need a full engine rebuild. Begin with compression testing, leak-down testing if possible, oil pressure verification, spark inspection, vacuum readings, and cooling system checks. An engine with even compression, acceptable oil pressure, and no bearing noise may only need seals, ignition components, carburetor service, and valve adjustment. I have revived long-stored V8s with fresh fluids, a primed oiling system, cleaned fuel supply, points conversion, and careful timing setup for a fraction of rebuild cost.
Transmission and differential decisions should also be evidence-based. Replace leaking seals and service fluids first. Manual gearboxes often survive years of neglect if they were not run dry. Automatic transmissions are more sensitive, but harsh shifts do not always mean total failure; vacuum modulator issues, throttle linkage misadjustment, or old fluid can be part of the problem. On axles, check backlash noise, leaks, and bearing play before assuming a complete overhaul is necessary.
Suspension restoration benefits from methodical inspection. Ball joints, bushings, tie-rod ends, idler arms, drag links, leaf spring shackles, and shocks age predictably. Replace what is worn, then align the car to modern radial-tire settings where appropriate. Many classics drive dramatically better from basic bushing, shock, and alignment work alone.
Find affordable parts and know when to buy new, used, or rebuilt
Budget restoration depends on parts sourcing discipline. Buy new for safety-critical rubber, hydraulics, bearings, brake friction material, and most electrical wear items. Consider rebuilt for starters, alternators, steering gears, carburetors, and some brake boosters when the supplier is reputable. Used original parts are often best for trim, brackets, glass frames, seats, and date-correct hard parts, especially when reproduction quality is inconsistent. Original GM, Ford, Mercedes-Benz, Toyota, and Volkswagen hardware often fits better than cheap reproductions.
Use swap meets, owner forums, salvage yards, estate sales, and social marketplace groups, but verify part numbers and casting dates. For rare models, joining a marque club often saves more money than any single purchase because members know cross-compatible components and known vendor issues. I keep a spreadsheet with part numbers, suppliers, price history, and fit notes. That record prevents duplicate buying and highlights when a seemingly expensive OEM-style part is cheaper than modifying a poor aftermarket version.
Shipping can erase savings fast, so combine orders and compare warehouse locations. Also remember the value of rebuildable cores. Throwing away an original carburetor, distributor, or window regulator can be a costly mistake.
Finish strong with interior, weatherproofing, and preservation
Interior work makes a restored classic feel complete, but budget strategy still applies. Deep cleaning, steam treatment, vinyl dye, carpet patching, seat foam repair, and headliner tightening can transform a cabin without a full replacement kit. Dash pads, door cards, and gauges should be repaired only after you stop water leaks. New weatherstripping around doors, glass, trunk openings, cowl drains, and heater boxes protects every dollar already invested by keeping rust and mold from returning.
Once the car runs and looks presentable, preservation becomes the final stage of restoration and maintenance. Apply cavity wax in hidden rust-prone sections, keep drain holes open, wash the underside after wet driving, and maintain a battery tender during storage. Start a service log with fluid dates, torque checks, alignment specs, and part numbers used. This habit increases reliability now and resale confidence later.
The core lesson in how to restore a classic car on a budget is simple: buy smart, define a driver-focused goal, spend first on safety and rust control, use DIY restoration guides with factory documentation, and let evidence guide every repair. You do not need perfection to build a rewarding classic. You need planning, patience, and enough discipline to say no to unnecessary scope creep. If you are building out your restoration and maintenance knowledge, use this hub as your starting point and map your next project system by system.
Frequently Asked Questions
What is the best kind of classic car to buy if I want to keep restoration costs low?
The best budget restoration candidate is usually not the rarest, flashiest, or cheapest car you can find. It is the car with the strongest combination of parts availability, mechanical simplicity, and a solid body. In most cases, a complete, running, largely original vehicle with surface rust and cosmetic wear will be far less expensive to restore than a non-running “barn find” with severe structural corrosion or missing components. Beginners often focus on purchase price alone, but the total cost to finish the project matters much more than the amount paid up front.
Look for models with large enthusiast communities, strong aftermarket support, and easy-to-find used parts. Popular domestic classics, common European models, and widely produced Japanese classics often make better budget projects than obscure or low-production vehicles. If replacement fenders, trim, weatherstripping, brake components, and engine parts are easy to source, you will save both money and downtime. Cars with simple carbureted engines, straightforward electrical systems, and conventional suspensions are also easier for a home restorer to manage without expensive specialty tools.
Body condition should be your top priority. Rust repair is one of the fastest ways to destroy a budget because it requires time, fabrication skill, and often professional welding and paintwork. A car with faded paint, torn upholstery, and tired mechanicals can usually be revived in stages. A car with rotten floors, rusted frame rails, missing trim, and a bad title can become a financial trap. If your goal is a safe, reliable, attractive driver rather than a show winner, buy the most complete and structurally sound car you can afford, even if the purchase price is a little higher.
How do I set a realistic budget for a classic car restoration?
A realistic restoration budget starts by defining your end goal before you buy a single part. If you want a dependable weekend driver with good paint, a clean interior, and sorted mechanical systems, your budget will look very different from someone chasing factory-correct details or concours judging. Budget restorations succeed when the owner makes intentional decisions about where to spend, where to reuse, and where “good enough” is truly good enough. That means focusing first on safety, reliability, and weather protection before cosmetic perfection.
Start by dividing your plan into categories: purchase price, transportation, tools, mechanical repairs, brakes, suspension, tires, electrical work, body and rust repair, paint, interior, weatherstripping, glass, trim, registration, insurance, and an emergency reserve. Many first-time restorers underestimate small recurring expenses such as hardware, hoses, fluids, gaskets, sandpaper, sealants, clips, and shipping charges. Those seemingly minor costs add up quickly over months of work. It is smart to build in a contingency fund of at least 15 to 25 percent because old cars almost always reveal hidden issues once disassembly begins.
A practical approach is to estimate the minimum needed to make the car safe and drivable first, then create a second-stage cosmetic budget. This helps prevent the common mistake of spending heavily on wheels, paint, or upholstery while ignoring brakes, cooling, wiring, and fuel delivery. If your available funds are limited, plan the restoration in phases. Get the car running and stopping properly, then improve the suspension, then address leaks and weatherstripping, and finally move to cosmetic upgrades. A phased plan keeps the project moving and lowers the risk of ending up with an expensive car that sits unfinished in the garage.
Which parts of a restoration should I do myself, and which jobs are usually worth paying a professional for?
The most cost-effective restorations happen when owners handle labor-intensive tasks that can be learned safely and leave highly specialized work to professionals. Cleaning, disassembly, labeling parts, basic tune-up work, brake service, suspension refreshes, interior removal and installation, weatherstripping, polishing trim, and many bolt-on repairs are often ideal do-it-yourself jobs. If you are patient, organized, and willing to learn, these tasks can save a substantial amount of money while also giving you a better understanding of the car.
On the other hand, some jobs can become more expensive if attempted without the right skill level. Major rust repair, structural welding, high-level bodywork, show-quality paint, complex transmission rebuilding, precision engine machining, and advanced electrical diagnosis are often worth outsourcing. Paint and bodywork especially can consume enormous amounts of time and material, and mistakes are costly to correct. That does not mean you cannot contribute. Many professionals will save you money if you handle stripping, parts removal, or prep work yourself, as long as you coordinate clearly and do the work to an acceptable standard.
The key is to be honest about your tools, time, workspace, and experience. There is no shame in paying for critical work that affects safety or long-term durability. In fact, that can be the smarter budget decision. A poorly welded patch panel, a misdiagnosed wiring problem, or an improperly assembled engine can cost far more to fix later than getting it done properly the first time. A good rule is simple: do the jobs that reward patience and organization, and pay professionals for jobs that demand high-end skill, expensive equipment, or safety-critical precision.
How can I save money on parts without ending up with poor quality components?
Saving money on parts is less about buying the cheapest option and more about buying strategically. The smartest budget restorers compare reproduction parts, new old stock, refurbished originals, salvage-yard pieces, and good used parts before making a purchase. Original factory components were often built to a very high standard and may still outperform low-grade reproductions, especially in areas like trim fit, switch quality, brackets, and interior hardware. Rebuilding an original carburetor, alternator, or seat frame can sometimes be a better value than replacing it with a poor aftermarket substitute.
Use owner forums, marque-specific clubs, swap meets, online classifieds, and specialist vendors to understand which parts are worth buying new and which are safer to source used. For safety items such as brake hoses, wheel cylinders, master cylinders, fuel lines, tires, and suspension bushings, new quality parts are usually the right choice. For trim, glass, interior pieces, and non-wearing components, carefully selected used parts can save a lot of money while preserving originality. Buying a complete donor car or a large parts lot can also be more economical than purchasing dozens of individual pieces one at a time.
It is also important to avoid “false economy.” Cheap parts that fit poorly, fail early, or require rework can cost more in labor and frustration than reputable components from established suppliers. Read reviews from actual owners, compare return policies, and verify compatibility before ordering. Whenever possible, buy once and buy correctly. Keeping a master parts list, part numbers, supplier notes, and a simple spreadsheet of pricing will help you track spending and avoid duplicate purchases. Organization is one of the most overlooked ways to save money during a restoration.
What should I focus on first if I want a budget-friendly restoration that results in a dependable driver?
If your goal is an enjoyable classic you can actually drive, the first priorities should be safety, reliability, and protection from further deterioration. Start with the braking system, steering, suspension, tires, fuel system, cooling system, charging system, and basic wiring integrity. A classic car does not need perfect chrome or flawless paint to be rewarding, but it does need to start consistently, stop confidently, run at the right temperature, and operate safely on modern roads. These systems form the foundation of a successful budget restoration.
After the car is mechanically sound, address leaks, weatherstripping, glass seals, and any rust that is actively getting worse. Preventing water intrusion can save the interior, the floor pans, and the electrical system from future damage. From there, move to comfort and usability items such as seat repairs, gauges, lights, wipers, heater function, and door seals. Once the car is safe and pleasant to use, cosmetic improvements become much more satisfying because you are improving a functioning vehicle instead of decorating an unfinished project.
This driver-first approach also protects your budget psychologically. It gives you milestones you can reach, lets you enjoy the car sooner, and reduces the chance of burnout. Many restorations stall because owners tear the entire car apart too early and then face a mountain of expensive work all at once. By working in logical phases and preserving momentum, you can keep spending under control while steadily improving the car. In practical terms, a reliable, presentable classic that gets driven regularly is often a far better outcome than an over-ambitious restoration that never gets completed.




