
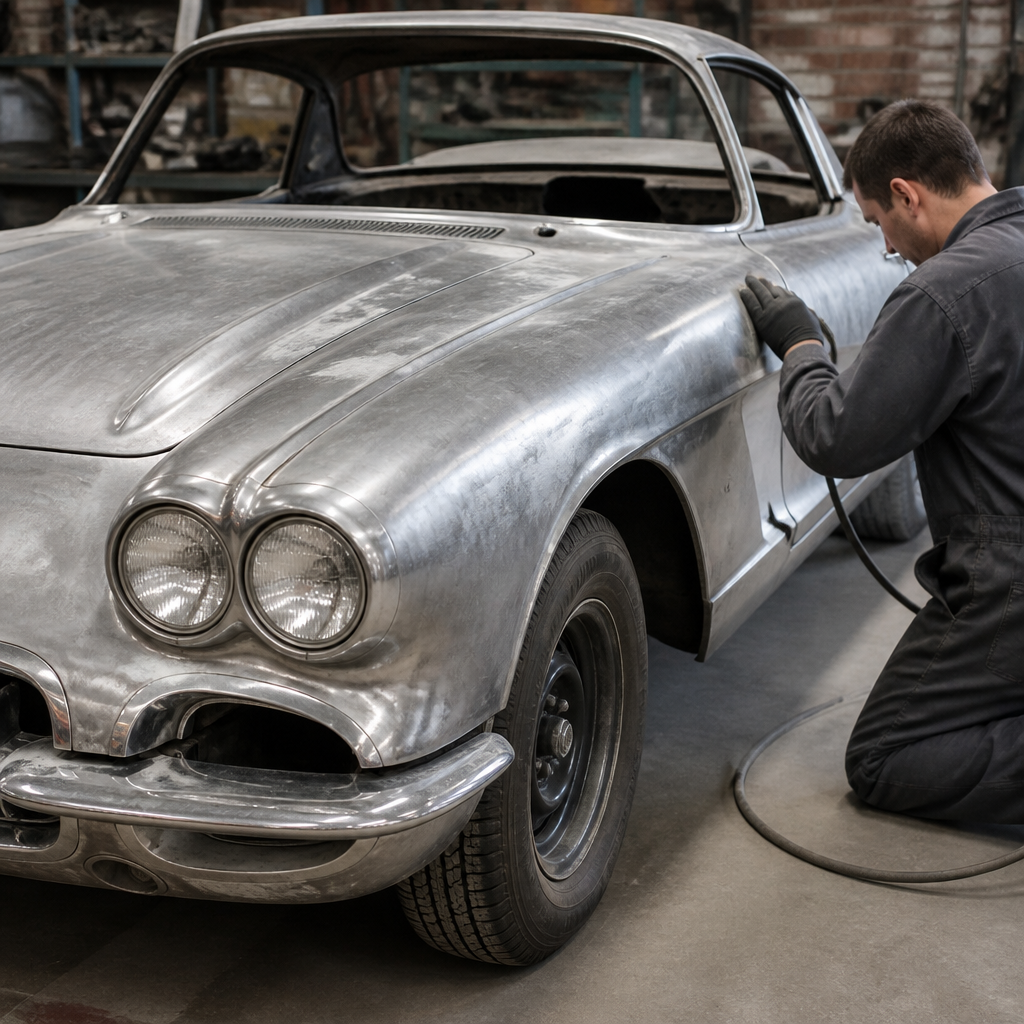
Classic car bodywork is the foundation of any restoration because the shell, panels, and paint determine not only how a vehicle looks, but also how well it resists corrosion, aligns mechanically, and holds long-term value. In restoration shops, I have seen owners spend heavily on engines and trim only to discover that weak metal beneath fresh paint quickly turns an exciting project into a costly redo. Understanding classic car bodywork basics helps you judge project cars accurately, plan repairs in the right sequence, and make informed decisions about welding, rust treatment, panel replacement, filler use, priming, and paint systems. For a restoration and maintenance hub, bodywork and paint deserve special attention because every other step, from glass fitting to weather seals and final detailing, depends on the body being straight, sound, and properly finished.
Bodywork refers to the repair, reshaping, protection, and finishing of a vehicle’s exterior metal or composite surfaces. On most classics, that means steel bodies with bolt-on fenders, doors, hoods, decklids, rocker panels, quarter panels, floor pans, and structural members such as inner wings or frame sections. Paintwork includes surface preparation, corrosion control, primers, seam sealing, underbody coatings, color application, and clear coats where appropriate. Older vehicles may use single-stage enamel or lacquer, while many modern restorations use basecoat-clearcoat systems for durability and easier color matching. The key terms matter. Metal finishing means correcting dents with hammers and dollies before filler. Panel gap means the spacing between adjoining panels, such as door-to-fender clearance. Orange peel describes a textured paint surface. Flash rust is the light oxidation that can appear quickly on bare steel after sanding or blasting.
This topic matters because bad bodywork is expensive to reverse and surprisingly easy to hide. A polished finish can conceal filler over rust, poorly welded patches, misaligned panels, and trapped moisture in seams. Buyers often focus on shine, but experienced restorers look first at lower fenders, rocker panels, wheel arches, door bottoms, cowl areas, boot floors, battery trays, rain gutters, and windshield channels. These areas collect water and debris, making them common rust zones. Good bodywork protects originality when possible, preserves safety, and supports resale value. It also prevents a cycle of repeated repairs. If you understand where corrosion starts, how to evaluate structural integrity, and why prep work determines final paint quality, you will save time, money, and frustration throughout any classic car restoration.
How to Assess a Classic Car Body Before Repairs
The first rule of bodywork is diagnosis before disassembly. I begin every project with a dry inspection, a lift inspection, a magnet check on suspect panels, and a detailed set of photos. Panel gaps tell an important story. Even gaps do not guarantee a perfect shell, but inconsistent gaps, doors that rise when opened, and hoods that sit proud at one corner often indicate accident damage, worn hinges, twisted structure, or poor prior repairs. Check the car on level ground with seals installed if possible. A shell can move once weatherstrips, glass, or front clip parts are removed, so record baseline fitment early.
Rust inspection must separate cosmetic corrosion from structural loss. Surface rust on a hood underside may be manageable with blasting and epoxy primer. Perforation in torque boxes, chassis rails, spring mounts, or inner sills is a different category because it affects strength. Use a pick, borescope, and strong light to inspect enclosed cavities. Look for swelling at lap joints, bubbling under paint, seam cracks, and underseal that appears thicker in one area than another. Fresh undercoating is not proof of protection. In many purchase inspections, it hides old patches or active corrosion.
Previous collision damage should be checked with measuring tools, not guesswork. Tram gauges, plumb bobs, and factory body dimension charts are still useful, and computerized measuring systems are available in high-end shops. Signs include wrinkled inner aprons, uneven spot weld patterns, replaced front clips, or ripples visible when a panel is viewed at a shallow angle. Lead loading on some older cars can also hide seam repairs. Assessment is the hub step that guides every detailed article linked from this subtopic, because rust repair, dent repair, panel alignment, paint prep, and final finishing all depend on a correct starting diagnosis.
Rust Repair Fundamentals and Corrosion Prevention
Rust repair on a classic car should remove the cause, not only the visible stain. Iron oxide forms when steel is exposed to oxygen and moisture, and the process accelerates when dirt, salt, and trapped water stay in seams or cavities. That is why lower body sections fail first. Proper rust repair means cutting back to clean metal, fabricating or fitting the correct patch, welding it with minimal distortion, protecting both sides of the repair, and restoring drainage and seam sealing. Simply grinding a blister flat and skimming filler over it is temporary at best.
Replacement metal should match the original gauge and shape as closely as possible. Butt-welded repairs are usually preferred for visible exterior panels because they avoid moisture-trapping overlaps and reduce the chance of a visible repair line later. Flanged lap joints may be acceptable in hidden areas when designed correctly and sealed thoroughly, but they are not best practice for outer skins. After welding, the backside must receive epoxy primer or weld-through coatings where appropriate, followed by seam sealer and cavity wax. Products from 3M, PPG, Eastwood, and Bilt-Hamber are widely used because they fit proven corrosion-control workflows.
Blasting method matters. Aggressive media on thin body panels can warp steel, while soda blasting may leave residues that complicate paint adhesion if not neutralized. For many shells, crushed glass, garnet, or fine aluminum oxide used carefully by an experienced operator offers better control. Chemical dipping can clean hidden cavities effectively, but unless the shell is neutralized and coated properly afterward, residue trapped in seams may create later problems. Prevention is always cheaper than rework. Keep drains open, repair weather seals, clean wheel housings, and apply cavity wax inside doors, sills, pillars, and box sections.
Panel Repair, Metal Finishing, and Filler Use
Dents, stretched metal, and poor panel shape can rarely be solved with filler alone. The correct process is to return the steel as close as possible to its original form before any skim coating. That means understanding crown, tension, and impact direction. A shallow dent in a door skin responds differently from a crease across a swaged body line. Hammers, dollies, spoons, slappers, shrinking discs, stud weld pullers, and body files all have specific roles. In practice, careful metal finishing reduces filler thickness, improves durability, and lowers the risk of sinkage after paint cures.
Body filler has a legitimate place in restoration when used thinly over stable, properly prepared metal. Quality polyester fillers and glazing putties from reputable brands can produce excellent results, but they are finishing materials, not structural substitutes. I treat anything beyond a few millimeters as a warning sign to revisit the metalwork. Excess filler cracks with vibration, traps heat differently from steel, and often reveals edges months after paint. On highly visible panels such as hoods and quarter panels, block sanding must follow the panel’s natural lines, not simply chase a glossy surface under workshop lights.
Lead loading appears on some classics from the factory, especially at roof-to-quarter seams. It can still be used by specialists, but modern restorations often replace failed lead repairs with welded metal finishing and filler because of health concerns and process complexity. Whatever method is chosen, feather edges must be smooth, repair boundaries must be stable, and the substrate must be clean. Good panel repair is measurable: reflections remain straight, body lines stay crisp, doors shut without lifting, and the shape holds true before high-build primer is ever sprayed.
Primer, Sealer, and Paint Systems That Last
Paint durability starts long before color. Bare steel should usually receive epoxy primer because it offers excellent adhesion and moisture resistance. Polyester primer can help level imperfect panels, and urethane high-build primers are useful for final blocking, but they should sit on a sound foundation. Etch primer still has niche uses, yet many paint manufacturers recommend epoxy directly over properly prepared metal, especially when following a complete system from one brand. Mixing incompatible products increases the risk of solvent reactions, lifting, or adhesion failure, so technical data sheets are not optional reading.
Surface preparation controls final appearance more than paint brand alone. Sanding grits, cure times, panel temperature, humidity, and cleanliness all affect results. Silicone contamination from dressings causes fisheyes. Moisture in compressed air clouds finishes and can lead to adhesion problems. A proper setup includes water separators, desiccant filtration, tack cloths used correctly, and a controlled spray environment. On driver-quality restorations, single-stage urethane can suit period-correct looks, especially for solid colors. For show-level depth and easier future blending, basecoat-clearcoat is common, though not always historically authentic.
| Stage | Main Purpose | Common Materials | Key Risk if Done Poorly |
|---|---|---|---|
| Metal prep | Clean and stabilize substrate | Degreaser, abrasives, rust remover | Rust returns under paint |
| Primer | Seal metal and build surface | Epoxy, urethane, polyester | Adhesion failure or shrinkage |
| Block sanding | Straighten panels | Guide coat, sanding blocks | Waves and uneven reflections |
| Sealer and color | Create uniform color foundation | Sealer, basecoat or single-stage | Patchiness and poor coverage |
| Clear and finishing | Protect gloss and refine surface | Clear coat, compounds, polish | Peeling, dieback, sanding marks |
After paint, curing and finishing deserve patience. Cutting and polishing too early can mark soft clear. Reassembly can chip edges that were never fully hardened. Fresh paint also continues to outgas, so some shops delay waxing for several weeks. A lasting finish depends on following one tested paint system, honoring flash times, and protecting hidden areas as carefully as visible ones.
Panel Alignment, Trim Fit, and Reassembly Order
Panel alignment is where bodywork quality becomes obvious to everyone, even non-experts. The accepted order is to fit the body structure first, then doors, then adjacent panels such as wings or fenders, followed by hood and decklid. That sequence reflects how shut lines reference each other. Many restorers paint parts off the car for access, but final fit should always be checked in primer with latches, seals, and representative trim installed. A perfect gap on a bare shell can change once weatherstrips compress and glass frames add tension.
Classic cars often left the factory with wider tolerances than modern vehicles, so accuracy means consistency, not artificial perfection. A 1960s British sports car or an early American muscle coupe may never achieve modern luxury-car gaps without extensive modification, and forcing that standard can distort originality. What matters is even spacing, flush surfaces, free movement, and no metal-to-metal contact. Shim packs, hinge rebuilding, striker adjustment, latch centering, and body mount condition all influence fitment. Sagging mounts can make a well-repaired car look crooked.
Trim reinstallation should be planned before paint. Stainless moldings, clips, emblems, mirrors, wheel arch trim, and bumper brackets often require holes, studs, or hidden fasteners that are difficult to address after final finishing. I label and test-fit every piece during mock-up because aftermarket clips frequently differ from original hardware. The bodywork hub role of this topic is practical: each subtopic article, from door alignment to chrome trim handling, sits downstream of solid planning during reassembly.
Tools, Budget, and Deciding Between DIY and Professional Work
Classic car bodywork can be done at home, but only certain tasks suit every skill level. Safe DIY work often includes stripping trim, cataloging hardware, cleaning seams, basic sanding, rust assessment, cavity waxing, and small bolt-on panel repairs. Welding structural sections, correcting collision damage, spraying catalyzed coatings, and achieving high-level straightness require more training, better equipment, and controlled conditions. In the workshop, the largest cost driver is labor, because shaping metal and blocking panels consume many hours that no miracle product can eliminate.
A realistic tool list includes welders suited to automotive sheet steel, body hammers and dollies, clamps, sanding blocks, guide coat, measuring tools, respirators rated for paint materials, hearing and eye protection, moisture-controlled air supply, and safe extraction. For paint, isocyanate-containing products demand serious respiratory protection; many professionals use supplied-air systems. Budgeting should separate visible tasks from hidden preservation work. Owners often price color coats and underestimate metal fabrication, seam sealing, underbody preparation, and refitting. Those hidden steps determine whether a restoration lasts five years or twenty.
Choose a professional shop by inspecting finished cars in person, not just glossy photos. Ask how rust repairs are documented, whether epoxy is applied to both sides of patches, which paint system is used, how panel gaps are established, and how change orders are approved. Good shops are transparent about tradeoffs. They will tell you when preserving original metal is wiser than replacing an entire panel, and when reproduction panels create more fitting work than they save. If you are building a restoration and maintenance plan, start with a thorough body assessment and map the related repair articles you need next.
Classic car bodywork basics come down to a few non-negotiable principles: inspect carefully, repair metal properly, control rust at its source, use filler sparingly, follow a compatible primer and paint system, and fit panels before chasing cosmetic perfection. Every strong restoration in the bodywork and paint category begins with structure and preparation, not shine. When the shell is solid, panel gaps are honest, and hidden cavities are protected, paint becomes the final layer of a durable process instead of a disguise for unfinished work. That is the main benefit of understanding this subject at hub level: you can judge quality, plan your budget intelligently, and connect each specialist task into one coherent restoration path.
Whether you are evaluating a project car, managing a professional build, or doing selected work yourself, bodywork knowledge prevents expensive mistakes. It helps you ask better questions, spot shortcuts early, and preserve both safety and value. Use this hub as your starting point for deeper guidance on rust repair, dent correction, panel alignment, prep, primers, paint application, and finish care. Review your car methodically, document what you find, and tackle repairs in the correct order.
Frequently Asked Questions
What does classic car bodywork actually include?
Classic car bodywork covers far more than paint and panel appearance. It includes the vehicle’s shell, structural sections, outer panels, inner wings, floors, sills, wheel arches, door bottoms, bonnet and boot alignment, seam sealing, rust prevention, filler work, primer preparation, and the final paint finish. In practical restoration terms, bodywork is the foundation that everything else depends on. If the shell is weak, twisted, rusted through, or poorly repaired, even a freshly rebuilt engine and new interior will sit on a compromised platform.
Good bodywork also affects mechanical fit and function. Panel gaps influence how doors, wings, and lids open and close. Structural rust in mounting areas can affect suspension geometry, steering feel, and how the car tracks on the road. Water ingress through poor seams or hidden corrosion can damage electrics and interior trim. That is why experienced restorers inspect beyond the visible paint surface. They look at weld quality, previous repairs, underseal condition, signs of filler, corrosion in known weak spots, and whether the body has been repaired in a way that preserves strength and original shape. In short, bodywork is not just cosmetic; it is structural, protective, and central to the car’s long-term value.
Why is bodywork considered the most important part of a classic car restoration?
Bodywork is often considered the most important part because it is usually the most expensive, time-consuming, and difficult area to correct properly once problems are uncovered. Mechanical parts can often be rebuilt or replaced in a relatively straightforward way, but severe rust, poor accident repairs, bad panel alignment, and distorted shells can consume enormous amounts of labor. Once corrosion has spread into floors, sills, chassis legs, pillars, and other structural areas, repairs become much more complex than a simple patch or cosmetic respray.
It also sets the standard for the entire restoration. A car with strong, straight metal provides a reliable base for suspension setup, glass fitment, weather sealing, trim installation, and final paint quality. By contrast, a car with hidden rust under fresh paint may look attractive at first glance but can quickly become a financial trap. Moisture trapped behind filler, under vinyl roofs, beneath seam sealer, or inside cavities can continue eating away at the metal even after cosmetic work has been done. That is why buyers and restorers are taught to prioritize shell condition before getting excited about chrome, upholstery, or engine upgrades. If the body is right, everything else becomes easier to fit, protect, and preserve over time.
How can you tell whether a classic car has rust or poor previous body repairs?
Spotting rust or old repair work starts with a careful visual inspection, but it should never stop there. Common warning signs include bubbling paint, uneven reflections, cracking filler, mismatched panel gaps, overspray on trim or rubber seals, fresh underseal applied over dirt or corrosion, and magnetically weak areas that may suggest heavy filler. Check the bottoms of doors, wheel arches, sills, floor pans, boot floors, spare wheel wells, windscreen surrounds, and lower wing sections, as these are common moisture traps on many classics. Look for signs that seams are swollen, spot welds are missing or irregular, or panels appear wavy rather than crisp.
A closer inspection underneath and inside hidden areas is just as important. Lift carpets, inspect the boot, look behind trim panels where possible, and pay attention to jacking points, suspension mounts, and body braces. Poor repairs often reveal themselves through overlapping metal patches, inconsistent welds, thick seam sealer hiding joins, or panels that do not match factory contours. A paint depth gauge can help identify areas with excessive filler or multiple paint layers, and a borescope can be useful for checking inside cavities. On a valuable or complex project, a professional inspection is money well spent. Experienced body specialists know where specific models rust and can often distinguish between honest age-related wear and repairs that may fail later. The key is to judge the quality of the metal underneath, not just the shine on top.
Is it better to repair original panels or replace them with new ones?
In many cases, repairing original panels is preferable if the damage is localized and the remaining metal is solid. Original factory panels generally fit better, preserve the car’s authenticity, and can help maintain value, especially on rare or collectible models. A skilled metalworker can cut out rusted sections, fabricate repair pieces, and weld in fresh steel while retaining the majority of the original structure. This approach is often the best balance between originality and durability, provided the corrosion has not spread too far and the repair is done to a high standard.
Replacement becomes the better option when rust is extensive, structural integrity is compromised, or previous repairs have left the panel too distorted or weakened to save economically. That said, not all replacement panels are equal. Reproduction parts can vary widely in thickness, shape, pressing accuracy, and overall fit. Some require substantial adjustment before they align properly. Used original panels can be a better alternative than low-quality reproductions, but they must be checked carefully for hidden corrosion. The decision should be based on structural soundness, cost, parts quality, and the goals of the restoration. For a driver-quality car, practical durability may matter most. For a high-end restoration, preserving correct panel lines, original metal, and factory appearance may carry more weight. The best answer is usually the one that delivers sound metal, proper fit, and long-term protection rather than the quickest cosmetic result.
What should owners know before budgeting for classic car bodywork?
Owners should understand that bodywork estimates often change once the car is stripped and hidden issues are exposed. A surface-rust project can turn into a major metal reconstruction once paint, filler, seam sealer, and undercoating are removed. Rust commonly spreads from the inside out, so visible damage may represent only a fraction of the real problem. This is why reputable restoration shops are cautious about quoting fixed numbers too early. The true condition of sills, floors, arches, pillars, and mounting points often becomes clear only after disassembly and blasting or full strip-down.
It is also important to budget for the full process, not just welding or paint. Proper bodywork may involve media blasting, metal fabrication, rust repair, lead loading or minimal filler work, trial fitting of panels and trim, primer stages, block sanding, seam sealing, cavity waxing, and high-quality paint materials. Labor is the biggest cost because precision bodywork takes time. If originality matters, sourcing the correct panels or repairing factory metal can add further expense. Owners should ask shops how they document hidden damage, whether they stage approvals as work progresses, what rustproofing they use after repairs, and how much trial assembly is included before final paint. A realistic budget with a contingency reserve is essential. On classic cars, good bodywork is not where you save money lightly, because doing it twice is almost always far more expensive than doing it correctly the first time.




