
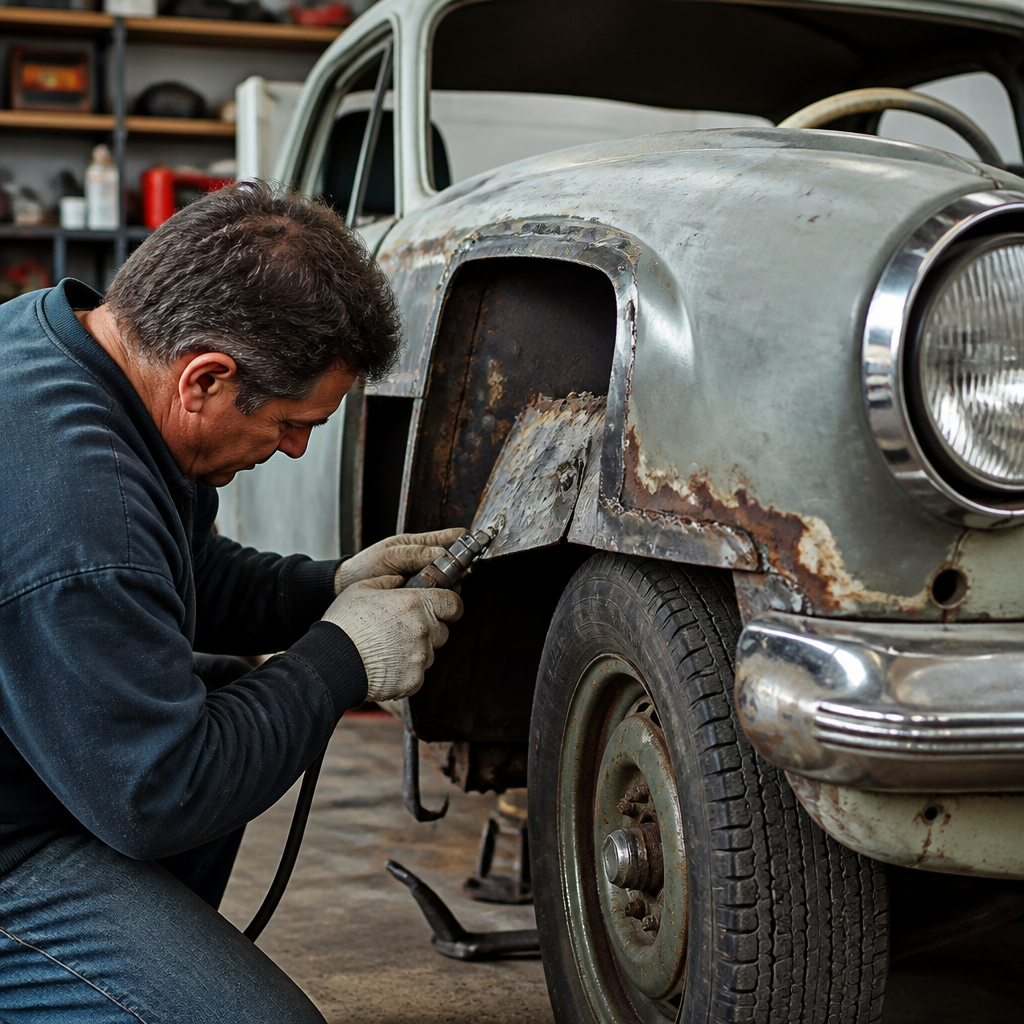
Rust repair on a classic car is never just cosmetic; it is structural preservation, value protection, and the difference between a weekend driver and a project that keeps getting worse every season. In restoration shops, “rust” usually means iron oxide formed when bare steel reacts with moisture and oxygen, while “bodywork” covers the metal, filler, panel alignment, and surface preparation that happen before paint. “Paint” is more than color, because primer, seam sealer, undercoating, surfacer, and topcoat all work together as a corrosion-control system. If you own a vintage Mustang, Beetle, Camaro, MGB, or pickup, understanding how to repair rust correctly helps you judge estimates, plan work in stages, and avoid shortcuts that trap moisture and guarantee future blistering.
Classic cars rust in predictable places: lower fenders, rocker panels, floor pans, wheel arches, trunk drops, cowl seams, windshield channels, battery trays, and around vinyl top trim. Those areas collect mud, road salt, wet insulation, and condensation. Surface rust may look minor, but rust often spreads from the back side of a panel long before it shows through the paint. I have opened seemingly solid quarter panels and found pinholes, swollen seam sealer, and flaky scale behind them. That is why proper rust repair starts with diagnosis, not sanding whatever is visible and covering it with filler.
This guide serves as a hub for classic car bodywork and paint decisions. It explains how to inspect rust, choose between treatment and panel replacement, prepare metal, weld patches, use filler correctly, prime and paint repaired areas, and protect finished work so corrosion does not return. It also clarifies where home restorers can succeed and where a specialist is worth the cost. If you want a reliable road car, a strong concours foundation, or simply cleaner panel gaps and durable paint, rust repair is the first discipline to master.
Inspect the car methodically before buying parts or cutting metal
The first job is mapping every rust area and deciding whether the shell is fundamentally sound. Start with bright lighting, a pick, magnet, body hammer, borescope, and a simple moisture meter if the interior is damp. Remove sill plates, trunk mats, kick panels, lower rear seat cushions, and wheelhouse liners where possible. Look for bubbling paint, cracked seam sealer, swollen undercoating, loose drain plugs, and staining around weld seams. Tap suspect panels lightly; solid steel gives a sharper ring, while delaminated or heavily scaled metal sounds dull. A magnet helps reveal thick filler over old repairs, though aluminum trim and leaded seams can complicate the reading.
On monocoque classics, rust in the floors, rockers, torque boxes, frame rails, and suspension pickup points matters far more than rust in a bolt-on fender. Measure door gaps before disassembly. If the doors sag and the rocker structure is weak, brace the shell before cutting anything. Convertibles need extra caution because they rely heavily on floor and sill strength. British sports cars often rot in castle rails and closing panels; air-cooled Volkswagens hide corrosion in heater channels and spare-wheel wells; older domestic coupes frequently rust in rear window channels and trunk extensions. Make notes, take photos, and label every area by severity: surface rust, pitting, perforation, or structural loss.
Inspection should also include previous repairs. I routinely find fiberglass mat under filler, riveted patches, roofing tar used as seam sealer, and lap joints left bare on the back side. These shortcuts affect how much sound metal remains and whether a repair panel will fit correctly. Good diagnosis saves money because it prevents buying partial patches when the surrounding flange, brace, or inner wheelhouse is already compromised.
Choose the correct repair method for the type and depth of corrosion
There is no single rust repair method. Surface rust on a removable panel may need stripping, metal conditioning, epoxy primer, and refinish work. Deep pitting may require blasting or mechanical cleaning to bright metal followed by epoxy. Perforated steel needs cut-out and replacement, not filler. Structural rust in rails, sills, and mounts requires welded steel of the correct gauge and shape. Any repair that leaves active rust under paint will fail, because corrosion products expand and push coatings off the panel.
A practical rule is simple: if a pick goes through the metal, replace it. If the metal has thinned enough to oil-can, replace it. If pitting remains after cleaning and the area is non-structural, treatment may be acceptable, but only if the steel still has integrity. Rust converters can be useful on inaccessible textured areas, yet they are not substitutes for removing scale and unstable metal. Most professional restorers trust epoxy primer over properly cleaned bare steel more than miracle coatings marketed as all-in-one solutions.
Panel availability shapes the plan. Popular classics such as first-generation Camaros, 1964–1973 Mustangs, Tri-Five Chevrolets, and early Broncos have extensive reproduction sheet metal. Lesser-supported models may require hand-fabricated patches. Full panel replacement often gives a cleaner result on skins and floors, but partial patches preserve factory seams and stampings when the damage is localized. The decision balances originality, labor time, fit quality, and budget.
| Rust condition | Best repair approach | Typical example |
|---|---|---|
| Light surface oxidation | Strip to bare metal, clean, epoxy prime | Hood underside with paint failure |
| Moderate pitting without holes | Mechanical cleaning or blasting, assess thickness, epoxy, skim filler if needed | Door bottom caught early |
| Pinholes or perforation | Cut out affected area and weld patch or replacement section | Lower fender behind wheel |
| Structural section loss | Brace shell, replace with formed steel of correct gauge, fully weld and protect both sides | Rocker panel or frame rail |
| Hidden seam corrosion | Open seam, remove rust, repair flanges, reseal | Windshield channel or trunk gutter |
Prepare the work area, tools, and panels before metal repair begins
Successful bodywork depends on setup. Use a dry, ventilated workspace with fire safety equipment, especially when grinding old undercoating or welding near seam sealer. Disconnect the battery, protect glass, remove fuel sources when possible, and keep a fire watch after welding. Essential tools include a MIG welder with shielding gas for most hobby restorers, a spot-weld cutter, angle grinder, wire wheels, flap discs, body hammers, dollies, cleco fasteners or panel clamps, shears, and measuring tools. For higher-end work, a shrinker-stretcher, bead roller, joggler, and TIG welder add precision.
Before cutting, expose the full extent of rust. Strip paint around the area, remove seam sealer, and inspect the back side. Mark cut lines into healthy steel, ideally where a patch can follow a body line or natural contour. Avoid tiny postage-stamp patches; they create more weld distortion and are harder to finish cleanly. When using reproduction panels, test-fit them with adjacent panels installed. A quarter patch that looks right on the bench may throw off the trunk gap or wheel opening profile on the car. Good restorers fit the panel to the car, not the other way around.
Panel cleanliness matters. Weld-through primer has a narrow use case on hidden overlapping flanges, but it should not replace bare, clean metal at the actual weld. For butt welds, remove coatings from the edge. Keep patch gaps consistent, usually around 0.8 to 1.0 millimeter for controlled MIG welding on thin automotive steel. Uneven gaps increase burn-through and warping.
Cut out rust fully and weld in sound steel with distortion control
The quality of a rust repair is determined at the cut line. Remove all weakened steel, including rust creeping under spot-welded flanges. Leaving a thin brown edge because it is easier to fit around is a false economy. Shape the patch from matching gauge steel, usually 18 to 20 gauge for many outer body panels, though floors and structural pieces vary by model. Butt-welded patches are preferred on visible exterior skins because they minimize moisture traps and produce a flatter finished surface than overlapping seams.
Weld slowly. Tack the patch in alternating positions to spread heat, cool with compressed air if needed, and never run a long bead across a quarter panel. Heat is what warps sheet metal. I typically install a patch with dozens of small tacks, connecting them gradually only after the panel remains stable. Hammer-weld and planish lightly where access allows to relieve shrinkage. Grind the weld carefully with a flap disc, not an aggressive hard wheel that gouges the surrounding steel. If pinholes appear during grinding, reweld them immediately rather than burying them later.
Spot-welded factory construction should be replicated where practical. Plug welds are appropriate when attaching floors, braces, and wheelhouses to flanges. Structural areas must match original load paths, hole spacing, and reinforcement. This is one reason factory assembly manuals and model-specific forums are valuable references. On many classics, a floor pan patch is not just a flat sheet; it must align with seat mounts, crossmembers, drain stamping, and exhaust clearance. Accuracy here prevents problems during interior reassembly and chassis alignment.
Finish the metal correctly with filler, primer, and seam sealing
Body filler is not the enemy; misuse is. On a properly welded and shaped panel, filler should refine minor low spots, not bridge holes or replace metal contouring. Apply filler over clean bare steel or over epoxy primer if the product system allows it; always follow the technical data sheet from manufacturers such as PPG, BASF Glasurit, Axalta, or Evercoat. Spread thin coats, block-sand with a long board where possible, and use a guide coat to reveal highs and lows. Polyester glazing putty helps refine final imperfections after the main filler is blocked.
Once the panel is straight, epoxy primer is the corrosion barrier of choice because it seals metal better than old lacquer primers and adheres strongly. Urethane high-build primer surfacer goes over cured epoxy when additional blocking is needed. Seam sealer belongs on factory-style joints, trunk seams, floor overlaps, and repaired channels, not smeared randomly over bare steel. Brushable or cartridge seam sealers from 3M or SEM work well when applied over primed surfaces according to the product instructions. On hidden cavities, use cavity wax after paint. This step is overlooked constantly, yet it is one of the best ways to protect the back side of rockers, doors, and quarter panels.
Underside coatings deserve restraint. Thick rubberized undercoat can hide poor welding and trap moisture if applied over contaminated steel. A better system is epoxy primer, seam sealer, topcoat or tinted chassis coating, and then a wax-based protectant in enclosed spaces. If originality matters, match the factory texture and overspray patterns for your model year.
Paint blending, full repaint decisions, and long-term rust prevention
After repair, the next question is whether to blend paint locally or repaint the entire panel or car. Solid colors and period single-stage finishes can sometimes be spot-repaired successfully, but metallics, faded lacquer, and sun-aged enamel are harder to blend invisibly. Many classics have paint variation from previous repairs, making adjacent panel matching difficult. If rust repair touches multiple lower-body sections, a complete exterior refinish often produces better visual consistency and longer service life because all vulnerable edges and seams can be sealed together.
Paint system choice depends on the goal. Single-stage urethane suits many restorations seeking a period-correct look with modern durability. Basecoat/clearcoat offers excellent depth and repairability, especially for metallic colors. Whichever system you choose, surface prep determines the result far more than brand loyalty. Final sanding scratches, cleanliness, panel temperature, and flash times matter. Follow the manufacturer’s mixing ratios and recoat windows precisely.
Preventing rust return is an ongoing maintenance practice. Keep drain holes open in doors, rockers, and trunk lids. Replace hardened weatherstrips, windshield seals, and body plugs. Fix leaking cowls and heater boxes before they soak carpet padding and floor pans. Wash the underside after wet or salty driving, and avoid trapping a damp car under a non-breathable cover. Garages help, but a humid garage can still feed corrosion, so airflow matters. Annual inspections with trim removal in vulnerable areas will catch problems while they are still repairable.
Repair rust on a classic car by diagnosing every affected area, removing all weakened metal, welding in sound steel, sealing both sides of the repair, and finishing the surface with compatible filler, primer, seam sealer, and paint. That sequence is what separates durable restoration work from cosmetic patching. It also explains why rust repair estimates vary so widely: the visible bubble is rarely the whole job.
For owners using this page as their bodywork and paint hub, the central lesson is clear. Start with inspection, not products. Match the repair method to the severity of corrosion. Prioritize structure before cosmetics. Use welded steel where steel is missing, then rely on modern epoxy primers and cavity protection to lock the work down. When done correctly, rust repair restores strength, sharpens panel fit, supports a better paint finish, and preserves the car’s long-term value.
If your project has rust in more than one area, break it into systems: floors and structure first, exterior panels second, paint last. Document everything, buy the best-fitting metal you can, and do not bury active corrosion under filler or undercoat. Whether you handle the work yourself or hire a restoration shop, use this framework to ask better questions and demand repairs that last. Your classic car will drive better, look straighter, and stay on the road longer because of it.
Frequently Asked Questions
How do I know whether rust on a classic car is just surface rust or a serious structural problem?
The first step is understanding that not all rust is equal. Surface rust is usually limited to the top layer of steel and often appears as light orange or brown discoloration on exposed metal where paint has failed, moisture has sat, or a panel has been scratched. If the metal still feels solid, has not bubbled badly, and does not flex or crumble when cleaned with a wire wheel or abrasive pad, you may be dealing with a repairable early-stage problem. Serious structural rust goes much further. It typically shows up as bubbling paint, swelling seams, flaky scale, pinholes, soft spots, cracking filler, or metal that sounds dull when tapped. On a classic car, those signs often appear around rocker panels, floor pans, trunk floors, wheel arches, lower fenders, cowl areas, windshield channels, frame rails, body mounts, and suspension attachment points.
A proper inspection should go beyond what is visible on the exterior. Rust often starts from the back side of a panel where condensation, trapped dirt, or failed seam sealer holds moisture against bare steel. That means you should inspect underneath the vehicle, inside the trunk, behind interior trim, under carpets, inside wheel housings, and anywhere factory drains may have clogged. Use a pick, flashlight, mirror, and even a borescope if necessary. If a screwdriver easily penetrates the metal, if seams are separating, or if a structural area near steering, braking, suspension, or seat mounting is compromised, the repair is no longer cosmetic. At that point, cutting out and replacing damaged steel is the safe and correct path. On a classic car, identifying the difference early can save enormous time and money because surface rust can often be cleaned and treated, while structural rust spreads until the only proper fix is metal replacement.
Can I repair rust on a classic car myself, or should I leave it to a professional restoration shop?
That depends on the extent of the rust, the location of the damage, and your skill level with metalwork. If you are dealing with minor surface rust on non-structural areas, many owners can successfully handle the work themselves. Cleaning the metal, removing oxidation completely, applying a quality rust treatment where appropriate, priming with epoxy, and resealing the area are all realistic DIY tasks if you are patient and follow proper preparation steps. Small isolated blemishes, accessible patches in lower-risk areas, and preventative treatment on solid metal can often be tackled in a home garage with good tools, careful inspection, and enough time. The key is that the repair must remove or isolate all active corrosion rather than simply hide it under filler, primer, or paint.
Professional help becomes the better choice when the rust affects structural components, complex curves, hidden cavities, body alignment, or large sections of original steel. Classic cars often require fabrication, butt-welded patch panels, lead or filler correction, seam recreation, and precise panel fitment before paint. Shops also have access to welders, brakes, shrinkers, sandblasting equipment, spray booths, and corrosion-control products that make a longer-lasting repair possible. If the area involves rocker panels, frame sections, spring mounts, windshield channels, or anything that affects safety or dimensional integrity, a professional is strongly recommended. A poor rust repair can trap moisture, distort panels, weaken the chassis, and lower vehicle value far more than leaving the damage untouched until it can be fixed properly. In other words, do-it-yourself work is suitable for manageable cosmetic or preventative jobs, but once rust repair becomes true restoration metalwork, experience matters.
What is the correct process for repairing rust so it does not come back quickly?
Lasting rust repair starts with complete removal of the corrosion, not just sanding the visible stain and painting over it. The damaged area must be cleaned to bare metal so you can accurately assess how far the rust has spread. For light corrosion, that may mean mechanical removal with abrasive discs, wire wheels, stripping discs, or blasting media. For more advanced damage, the only reliable method is cutting out all weakened steel back to solid material. Any pinholes, laminating scale, or thinning metal mean the panel has lost integrity and should be replaced or patched with new steel. Once the bad metal is removed, the repair area needs to be shaped, fitted, and welded carefully so there are no moisture traps or unsupported voids. Good metal finishing minimizes excess filler and preserves panel strength.
After metal repair, the protection stages are just as important as the welding. Bare steel should be cleaned thoroughly and coated with a high-quality epoxy primer because epoxy seals metal far better than basic lacquer-style primers. Weld seams should be dressed and then sealed with automotive seam sealer anywhere factory seams existed or where water could enter. If the back side of the panel is accessible, it should also be coated and protected, because many failed repairs rust again from the inside out. Depending on the area, that may include epoxy primer, cavity wax, internal frame coating, underbody coating, or chip-resistant products. Body filler, if needed, belongs over properly prepared metal or epoxy according to the product system being used, and all surfacer and paint layers should be applied in a compatible sequence. The reason so many rust repairs fail is not because the color coat was poor, but because moisture reached untreated steel through the backside, an unsealed weld, a pinhole, or a badly prepared edge. The best repairs treat both sides of the metal and restore the entire protective system, not just the visible finish.
Is body filler enough to fix rust holes, bubbling paint, or badly pitted metal?
No. Body filler is designed to refine panel shape, smooth minor imperfections, and create a paint-ready surface after the metal has been repaired. It is not a structural material and it is not a rust cure. If you spread filler over rust holes, blistered paint, or soft metal, the corrosion will keep growing underneath. In the short term it may look presentable, but temperature changes, vibration, and moisture intrusion will eventually reveal the problem again as bubbles, cracking, swelling, or stains bleeding through the paint. On a classic car, that kind of shortcut often creates bigger repairs later because the rust continues hidden while the surrounding steel deteriorates.
The correct use of filler comes after the damaged metal has been cleaned or replaced and the area has been restored to solid condition. If a panel is pitted but still genuinely sound, you may be able to remove the corrosion fully, stabilize the area, epoxy-prime it, and use a thin skim coat of filler for final straightening. But if the metal is perforated, severely thinned, or separating at seams, filler should never be used as a bridge or patch. New metal, properly welded in, is the right repair. This matters not only for appearance but also for durability and value. Buyers and restorers know the difference between honest metalwork and a cosmetic cover-up, and classic cars repaired with excessive filler over rust often develop paint failure far sooner than cars repaired with sound welding, sealing, and proper substrate preparation.
What areas of a classic car should I protect after rust repair to keep the problem from returning?
Once the visible rust is repaired, corrosion prevention becomes an ongoing maintenance job. Classic cars are especially vulnerable because many were built before modern corrosion-resistant coatings, galvanized steel, and improved seam-sealing practices became common. The most important areas to protect are the hidden spaces where moisture collects and air circulation is poor. That includes rocker panels, door bottoms, quarter panel cavities, wheel housings, trunk drop-offs, floor pan seams, cowl vents, windshield and back glass channels, frame rails, body mounts, and the underside of patch panels. Any place with overlapping steel, factory spot welds, drain holes, or road spray exposure deserves extra attention. These are the places where rust usually starts unseen and then spreads until it becomes visible on the outer skin.
After repair, use a complete protection strategy rather than relying on paint alone. Epoxy primer should protect bare steel, seam sealer should close vulnerable joints, and cavity wax or internal frame coating should be applied inside enclosed sections whenever possible. Undercoating or chip-resistant coatings can help on the underside and in wheel wells, but they should be applied over properly prepared and sealed surfaces, not over active rust. It is also essential to keep drains open, wash the underside regularly, remove wet carpets quickly, and store the car in a dry environment with stable humidity. If the car is driven, inspect it seasonally, especially after rain or storage. Rust prevention on a classic car is not a one-time step at the end of the project. It is a system of coatings, sealing, cleaning, and periodic inspection that preserves the structure, the bodywork, and the paint investment for the long term.




