
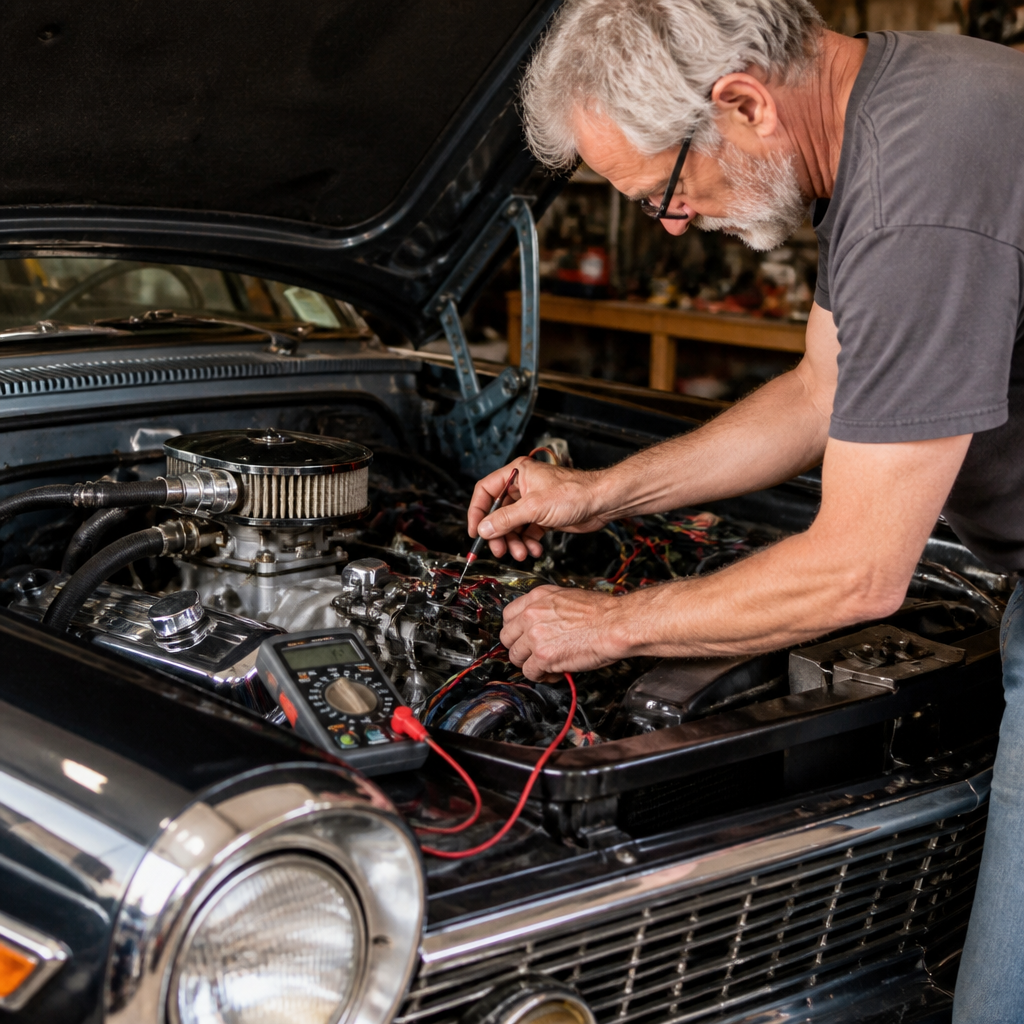
Electrical faults in classic cars rarely stay isolated, because ignition, charging, starting, gauges, and even cooling controls all depend on aging wiring and mechanically simple but failure-prone components. In restoration shops, I have seen a no-start blamed on a carburetor, a rough idle blamed on timing, and an overheating complaint blamed on the radiator, only to find the real cause in a corroded ground strap, a weak alternator, or a cracked ignition feed. For anyone working within restoration and maintenance, learning how to troubleshoot electrical issues in classic cars is essential because electrical diagnosis directly supports reliable engine and mechanical work.
Classic cars use straightforward electrical systems compared with modern vehicles, but age adds complexity. Insulation hardens, terminals oxidize, previous owners splice wires badly, and original charging systems may be marginal even when new. Key terms matter here. Voltage is electrical pressure, current is flow, resistance is opposition, and continuity confirms whether a circuit path is intact. A short sends current where it should not go. A voltage drop test measures how much power is lost across a connection under load. That last method is one of the most useful diagnostic techniques on vintage vehicles because many faults hide in connections that look acceptable but fail when current demand rises.
This hub article connects electrical troubleshooting to the broader engine and mechanical work involved in classic car restoration. Starting problems involve the battery, cables, starter, ignition switch, and engine ground, but they also intersect with compression, fuel delivery, and timing. Charging faults can mimic ignition breakdown at highway speed. Poor grounds can create false gauge readings that lead owners to chase nonexistent oil pressure or temperature issues. Understanding the system as a whole saves time, protects rare parts, and prevents the expensive habit of replacing components without proof. The goal is not just to fix one fault, but to build a repeatable process that supports dependable drivability.
The most effective way to diagnose these cars is to begin with fundamentals, test methodically, and confirm every assumption with a meter or test light. Factory service manuals, wiring diagrams, and component specifications should guide every step. On many American classics, a healthy fully charged 12-volt battery rests around 12.6 volts, while charging output commonly lands between 13.8 and 14.5 volts depending on temperature and regulator design. Six-volt systems require the same disciplined approach, with heavier cables and less tolerance for resistance. Once you understand those baselines, electrical troubleshooting becomes less mysterious and far more mechanical in the best sense: observable, measurable, and fixable.
Start with the power supply, grounds, and wiring condition
The first stage in classic car electrical diagnosis is always the power supply. Before testing coils, regulators, senders, or switches, confirm battery state, cable integrity, and grounds. I start with a visual inspection, but never stop there. Many batteries show 12 volts at rest and still fail under load. Use a digital multimeter, carbon pile load tester, or modern conductance tester from companies such as Midtronics to verify battery health. Clean both terminals to bright metal, inspect for swollen insulation or hidden corrosion under molded cable ends, and confirm cable gauge matches system needs. Six-volt classics require especially large cables, often 0 or 00 gauge; undersized replacements create slow cranking and false starter diagnoses.
Ground paths deserve equal attention. The battery ground to the engine block must be secure, and there should also be bonding straps between the engine, frame, and body. Without them, current seeks alternate paths through throttle linkage, transmission cables, or small gauge wires, causing heat, erratic gauges, and hard starting. A voltage drop test under load is better than a simple continuity test. During cranking, measure from the negative battery post to the starter housing or engine block. More than a few tenths of a volt usually indicates a poor ground path. Perform the same test on the positive side from the battery post to the starter terminal. High drop means resistance in cables, terminals, or switches.
After the main power paths, inspect the harness itself. Classic car wiring often suffers from brittle insulation near exhaust manifolds, oil-soaked tape wraps, unfused accessory additions, and poor crimp repairs. Look for color mismatches against the factory diagram, because nonoriginal wire colors often signal past modifications. Bulkhead connectors, firewall pass-throughs, and under-dash junctions are common trouble spots. If the car retains an ammeter, inspect those high-current connections carefully; loose ammeter terminals can create heat and intermittent total power loss. Good harness restoration means preserving routing, grommets, and support clips so wires do not chafe against sheet metal or sharp engine brackets over time.
Diagnose no-start and hard-start faults with a structured sequence
When a classic car will not start, separate the problem into cranking, ignition, and fuel before touching any adjustment screws. If the engine does not crank, test battery voltage during the start attempt. A major drop can point to a weak battery, internal cable corrosion, or a dragging starter. If the starter solenoid clicks but the motor barely turns, perform voltage drop tests on both sides of the circuit and check engine ground integrity. Heat-soaked starters on big-block cars are a common example; close exhaust routing raises resistance and exposes marginal cables or solenoids that seem fine when cold.
If the engine cranks normally but does not fire, verify spark first. Use an inline spark tester rather than holding a loose plug wire near metal. On breaker-point systems, check that the points open and close, the condenser lead is secure, and the coil receives proper feed voltage. Many older ignition systems use a ballast resistor or resistance wire that lowers running voltage to the coil. During cranking, a bypass circuit often supplies full battery voltage for easier starting. If that bypass fails, the engine may start only when the key is released or may not start at all. I have seen this repeatedly on vintage Mopar and Ford systems where the wiring looked original but had hidden breaks inside the insulation.
Once spark quality is confirmed, check timing and fuel delivery. Electrical faults can still be the root cause of what appears to be a carburetor issue. A weak ignition switch, failing coil, or poor distributor ground may produce spark that looks present but collapses under cylinder pressure. An oscilloscope is ideal, but a simple timing light can reveal irregular firing or loss of trigger signal. For cars converted to electronic ignition, verify module grounds and air gap settings according to manufacturer specifications from PerTronix, MSD, or the original HEI design. Always compare findings against mechanical basics such as compression and vacuum, because the best diagnosis connects engine and electrical behavior instead of treating them as separate worlds.
Trace charging system problems before they damage batteries and ignition performance
Charging faults in classic cars often announce themselves as dim lights, dead batteries, ignition miss at speed, or gauges that drift with engine rpm. The system type matters. Older vehicles may use DC generators with external regulators, while later classics commonly use alternators with either external or internal regulation. Each design can work reliably, but all depend on good connections, proper belt tension, and accurate testing. Begin by measuring charging voltage at the battery with the engine off, then idling, then at about 1,500 to 2,000 rpm with electrical loads on. Numbers outside the normal range point to undercharge or overcharge, both of which shorten battery life.
External regulators are especially sensitive to poor grounding and connector corrosion. A mechanical regulator can stick, chatter, or fail to control output consistently. Generator systems also require correct polarization after certain service operations. Alternator systems may suffer from open field circuits, worn brushes, bad diodes, or failed sense wiring. A bad diode often creates AC ripple that causes unstable gauge behavior, radio noise, and weak charging. Many modern multimeters can read AC voltage at the battery; excessive ripple with the engine running is a strong clue. Belt slip is another overlooked issue, especially on restored engines with glossy pulleys or misaligned brackets.
| Symptom | Likely electrical cause | Best first test |
|---|---|---|
| Battery goes dead overnight | Parasitic draw, glovebox light, stuck relay, shorted diode | Measure key-off current draw and isolate fused circuits |
| Headlights brighten with rpm | Weak charging at idle, poor regulator control, low battery reserve | Check battery voltage at idle and 2,000 rpm |
| Engine misses at highway speed | Low charging voltage reducing coil performance | Test alternator output under load |
| Ammeter swings wildly | Loose bulkhead or charging connections, regulator instability | Inspect high-current terminals and measure voltage drop |
When charging problems persist, inspect the entire current path from alternator or generator output to the battery, including bulkhead connectors, fusible links, ammeter loops, and engine grounds. On some popular muscle cars, these connections are known weak points and are routinely upgraded during restoration. Any upgrade should preserve circuit protection and wire sizing, not simply bypass it with a larger unfused lead. Once repairs are complete, verify that hot restart, idle quality, and lighting performance improve, because charging health directly affects ignition stability and overall drivability.
Fix lighting, gauges, and accessory circuits without creating new faults
Lighting and accessory problems are common on classics because these circuits combine age, weather exposure, and frequent owner modifications. Dim headlights usually come from voltage loss, not bad bulbs alone. Measure voltage at the bulb connector with the lights on and compare it to battery voltage. A difference of more than about half a volt often means resistance in the headlight switch, dimmer switch, connectors, or grounds. Relays can improve performance on vehicles that originally routed full lamp current through the dash switch, but install them with proper fusing and factory-quality terminations. Tail lamps and turn signals often fail because housings lose their ground through rusty mounting points or fresh paint after restoration.
Gauge issues can mislead engine diagnosis, so verify the electrical side before assuming mechanical trouble. Temperature and fuel gauges on many classics use voltage stabilizers or instrument regulators that pulse supply voltage. If several gauges read wrong together, suspect the instrument feed or ground before replacing senders. Oil pressure lights and charge indicators can also behave erratically when the cluster ground is poor. Use the wiring diagram to identify sender resistance ranges and compare actual readings with specifications. On restoration projects, I always test dash functions on the bench when practical, because finding a bad printed circuit or loose cluster ground is easier before final assembly.
Accessories such as heater blowers, wipers, horns, and electric fans deserve the same methodical process. Motors draw more current as bearings wear or linkages bind, which can overheat switches and melt connectors. That means some electrical failures are actually mechanical in origin. If a blower fuse keeps blowing, do not just install a larger fuse; measure current draw and inspect fan resistance, ground quality, and switch condition. If an aftermarket electric cooling fan was added, confirm relay capacity, wire gauge, and thermostat switch rating. Good troubleshooting protects the original harness and keeps engine support systems dependable in traffic and hot weather.
Know when repair, rewiring, or strategic upgrades make the most sense
Not every classic car should keep every original electrical component exactly as built. The right decision depends on use, originality goals, and safety. A numbers-matching concours restoration may justify repairing the factory harness, rebuilding the generator, and preserving period connectors. A regularly driven restomod may benefit from a new harness from American Autowire or Painless Performance, upgraded relays, modern fuse protection, and higher-output charging. The key is to make changes intentionally. Random splices, universal switches, and mismatched wire colors make future diagnosis harder and reduce vehicle value.
Rewiring becomes the smarter option when insulation is cracked throughout the car, multiple circuits have been modified badly, or heat damage has compromised major sections. Strategic upgrades are most worthwhile when they solve a known weakness: adding headlight relays, replacing an externally regulated alternator with a properly engineered internal-regulator unit, or supplementing grounds between engine, body, and frame. Document every change with updated diagrams, labels, and photographs. That documentation matters as much as the parts themselves because it preserves serviceability for the next repair, the next owner, or your own future work after details have been forgotten.
Good electrical troubleshooting in classic cars supports every part of engine and mechanical work. It improves starting, stabilizes ignition, protects charging performance, and prevents false conclusions about fuel, temperature, and lubrication systems. Begin with the battery, cables, and grounds. Use voltage drop testing instead of guessing. Follow the wiring diagram, isolate one circuit at a time, and confirm repairs under real operating load. When the harness is beyond patching, replace it properly rather than extending failure. If you are building out your restoration and maintenance plan, use this hub as the foundation, then map each related ignition, charging, starting, cooling, and instrument task into a documented service checklist you can follow with confidence.
Frequently Asked Questions
What are the most common causes of electrical problems in classic cars?
The most common causes are usually not dramatic component failures but age-related issues that build up over time. In classic cars, wiring insulation can become brittle, connectors can oxidize, grounds can corrode, and switches can wear internally. Because these vehicles rely on relatively simple electrical systems, even a small increase in resistance at a terminal or a weak ground strap can affect multiple systems at once. That is why a bad connection can show up as hard starting, dim lights, erratic gauges, weak ignition performance, or charging problems.
In practice, the usual suspects include corroded battery cables, loose chassis grounds, dirty fuse box contacts, aging ignition switches, weak voltage regulators, worn alternators or generators, and damaged sections of harness hidden under tape or behind the dashboard. Previous repairs also create trouble. It is common to find splices done with the wrong connectors, mismatched wire sizes, bypassed fuses, or added accessories pulling power from circuits never designed to carry the extra load. On a classic car, electrical faults often overlap, so it is important to think in terms of the entire circuit rather than replacing parts based only on symptoms.
How do I systematically diagnose a no-start issue in a classic car if I suspect an electrical fault?
Start with the basics and move in a logical order. First, confirm battery condition, not just battery voltage at rest. A battery may show acceptable voltage and still fail under load. Check the battery terminals for corrosion, make sure the cables are tight, and inspect both the positive cable and the ground path from battery to engine block and body. A poor engine ground is a very common cause of no-start conditions in older vehicles, especially when the starter draws heavy current.
Next, divide the problem into one of three categories: no crank, cranks but no ignition, or cranks but no fuel-related operation due to electrical interruption. If the engine does not crank, test for power at the starter solenoid, inspect the ignition switch output, neutral safety or clutch switch if equipped, and verify that the starter itself is receiving both adequate voltage and a solid ground path through the engine block. If the engine cranks but will not fire, check for voltage at the ignition coil, inspect the ballast resistor if the vehicle uses one, and verify the condition of points, condenser, distributor connections, and primary ignition wiring. A cracked or heat-damaged ignition feed wire can create an intermittent no-start that mimics a carburetor issue.
Use a wiring diagram, a multimeter, and ideally a test light. Voltage-drop testing is especially useful because it reveals resistance that a simple continuity test may miss. For example, if you have battery voltage at the starter but the starter still turns slowly, a voltage-drop test across the positive cable and ground side can expose corrosion hidden inside the cable or at a crimp. The key is to verify each stage of the circuit under actual operating load rather than assuming a part is good because it looks intact.
Why do bad grounds cause so many strange symptoms in classic cars?
Bad grounds are one of the biggest troublemakers in vintage electrical systems because every circuit must complete a path back to the battery. In many classic cars, the body, frame, and engine all serve as return paths, and those connections depend on metal-to-metal contact that degrades with rust, paint, grease, and age. When a ground becomes weak, electricity tries to find an alternate path. That is when you start seeing odd behavior such as gauges fluctuating when lights are turned on, turn signals affecting dash illumination, slow cranking, weak spark, or electric cooling fans running inconsistently.
The reason ground faults are so misleading is that they often imitate failures in unrelated components. A poor ground at the engine can reduce starter performance and weaken ignition output at the same time. A bad dash ground can make you think the fuel or temperature gauge is failing when the real issue is unstable reference voltage. On cars with aftermarket additions, missing or poorly attached grounds are even more common because accessories are often installed without proper return paths.
The best approach is to inspect and clean every main ground point: battery-to-engine, engine-to-firewall or frame, body-to-frame, instrument panel grounds, lighting grounds, and any dedicated ground straps. Remove each connection, clean to bare metal, tighten securely, and protect the area with an appropriate coating after assembly. If symptoms improve when using a temporary jumper wire between the battery negative and a suspect component or section of bodywork, you have likely identified a grounding problem quickly and accurately.
How can I tell whether the charging system is causing broader electrical issues?
A weak charging system often creates symptoms that seem unrelated at first. If the alternator or generator is not maintaining correct system voltage, ignition performance can suffer, starting becomes less reliable, lights may dim at idle, gauges may read inconsistently, and electric accessories such as cooling fans or heater blowers may operate poorly. In a classic car, that can easily lead someone to blame the carburetor, timing, or even the radiator, when the real issue is low system voltage affecting the entire vehicle.
Begin by checking battery voltage with the engine off, then with the engine running. Compare the readings against the expected output for the vehicle’s charging system design. If voltage does not rise appropriately after startup, inspect the alternator or generator, regulator, belt tension, charging wire connections, and grounds. Also inspect bulkhead connectors, ammeter connections if equipped, and any fusible links or main feed junctions. A charging system may technically work but still underperform because of resistance in the wiring between the charging source and the battery.
Pay close attention to heat and load. Some alternators test fine cold and then fade as they warm up. Others perform acceptably at idle with no accessories on but cannot support headlights, blower motor, electric fuel pump, or fan operation together. That is why load testing matters. If voltage drops excessively when accessories are switched on, the issue may be inadequate charging output, poor cable condition, weak grounds, or excessive draw from an accessory circuit. In restoration work, this is a frequent turning point in diagnosis because once system voltage is stabilized, several supposed problems often disappear at the same time.
What tools and troubleshooting methods are most effective when working on classic car electrical systems?
The most useful tools are a factory wiring diagram, a quality digital multimeter, a test light, jumper wires, a battery load tester if available, and simple hand tools for opening connectors and cleaning terminals. A wiring diagram matters more than many people realize because it helps you trace power and ground paths, identify shared circuits, and avoid guessing. In classic cars, multiple systems may branch from one ignition feed or share a common grounding point, so the diagram often reveals why one fault is affecting several components.
As for methods, the most effective approach is disciplined circuit testing. Verify power source first, then move through the circuit one point at a time: fuse, switch, connector, load, and ground. Use voltage-drop testing whenever a component receives power but performs weakly, since that is the best way to uncover high resistance caused by corrosion, damaged wire strands, or poor crimps. Continuity tests have value, but they can be misleading if done on a circuit that passes a tiny meter current yet fails under real load.
It also helps to resist replacing parts too early. On classic vehicles, electrical symptoms are often rooted in wiring condition rather than in the component itself. Clean connections before condemning parts, inspect for heat damage and previous repair work, and test under the same conditions where the fault appears. Intermittent issues may require wiggling harness sections, checking voltage while cranking, or testing after the car reaches operating temperature. A patient, evidence-based process saves time, avoids unnecessary parts replacement, and leads to much more reliable repairs.




