
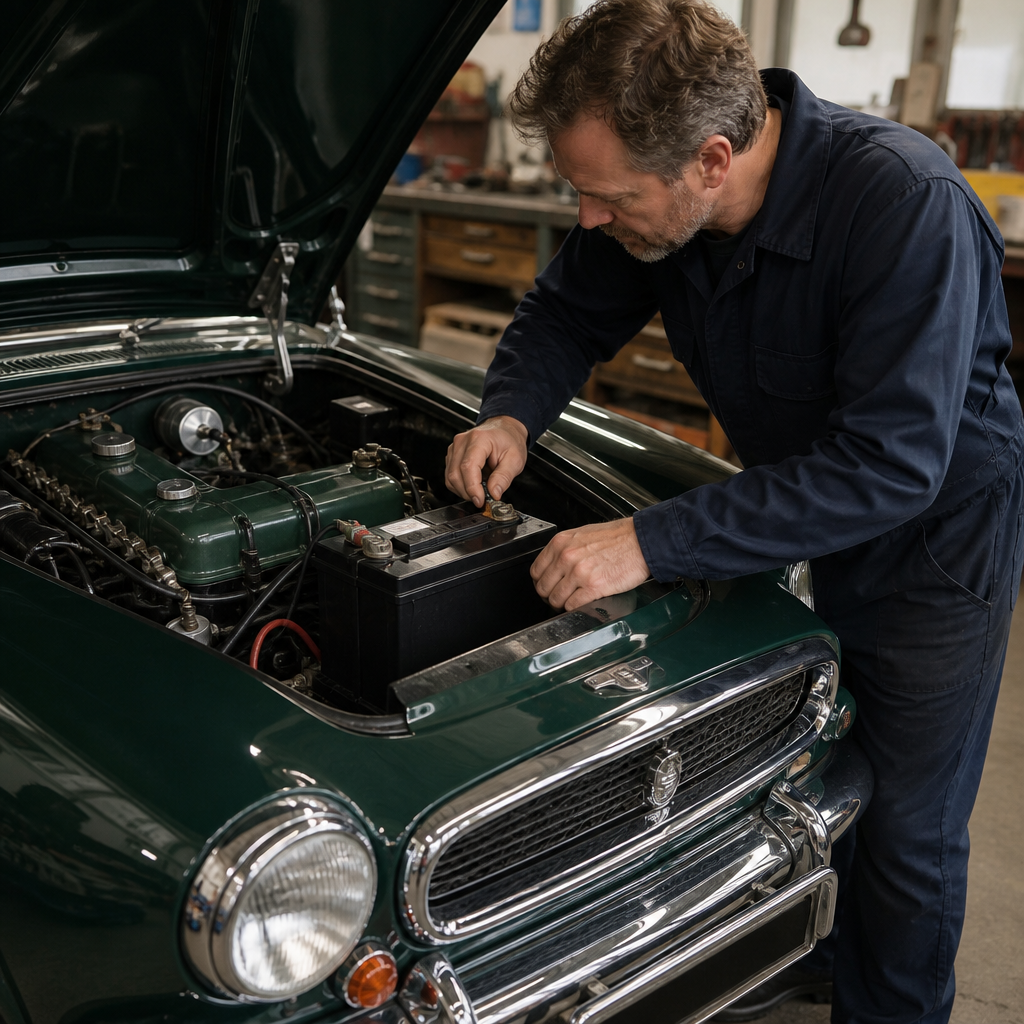
Battery maintenance for classic cars is one of the least glamorous jobs in restoration and ownership, yet it has an outsized effect on reliability, originality, and long-term electrical health. A classic car battery does more than crank the starter. It stabilizes voltage, supports ignition performance, protects charging-system components from stress, and serves as the reserve power source for lights, gauges, clocks, and accessories. On older vehicles, where wiring may be decades old and charging systems were designed around lower electrical loads, battery condition matters even more than it does in a modern car. When I inspect classics that have recurring starting or charging complaints, the problem is often not the starter or generator at all. It starts with an undercharged, poorly maintained, incorrectly sized, or physically neglected battery.
For classic-car owners, battery maintenance means preserving capacity, controlling corrosion, checking charging behavior, and matching the battery to the vehicle’s original design and actual use. It also means understanding basic terms. Voltage is electrical pressure. Cold cranking amps, or CCA, describe how much current a battery can deliver in cold conditions. Reserve capacity measures how long it can supply power if the charging system stops working. State of charge indicates how full the battery is, while state of health reflects its remaining useful life. Flooded lead-acid, AGM, and gel are battery construction types, but classic cars most commonly use flooded batteries or AGM replacements. If your car still uses a generator, external regulator, or positive-ground electrical system, correct battery selection and maintenance become especially important.
This matters because classic cars are often driven less, stored longer, and exposed to more variable temperatures than daily drivers. Those conditions accelerate sulfation, discharge, and terminal corrosion. A battery that sits partially discharged forms lead sulfate crystals on its plates, reducing capacity and shortening service life. Add vibration, weak grounds, and old cables, and small issues become no-start situations at the worst time: after winter storage, during a show weekend, or on the side of the road. Good battery maintenance prevents those failures, reduces stress on expensive original components, and preserves confidence every time you turn the key.
As a maintenance hub, this guide covers the practices that matter most: choosing the right battery, inspecting and cleaning it properly, testing it accurately, charging it during storage, and diagnosing common failures before they strand you. If you maintain one system well on a lightly driven classic, make it the battery and its related connections.
Choose the right battery for the car, not just the tray
The best battery for a classic car matches the vehicle’s electrical architecture, available space, hold-down design, and normal driving pattern. Start by confirming system voltage and ground polarity. Most postwar classics are 12-volt, but many earlier cars remain 6-volt, and some retain positive-ground setups. Installing the wrong battery specification can damage components, cause charging errors, and create avoidable wiring mistakes. Always verify the shop manual, factory service literature, or model-specific club guidance before buying.
Battery group size matters because cable reach, terminal orientation, and hold-down fit affect safety and reliability. If a battery is too tall, the hood may contact the posts. If posts are reversed, cables can stretch or route incorrectly, increasing resistance and chafing risk. For a judged restoration, appearance may also matter. Reproduction tar-top batteries and period-correct cases exist, but many owners hide a modern AGM inside an original-style shell to balance authenticity and reliability.
Battery chemistry affects maintenance needs. Flooded lead-acid batteries are traditional, widely available, and compatible with many older charging systems, but they require electrolyte checks where caps are serviceable and they vent acid vapor that promotes corrosion. AGM batteries are sealed, resist vibration better, self-discharge more slowly, and work well in cars that sit for weeks, but they cost more and may prefer slightly different charging profiles. Gel batteries are less common in automotive classics and are generally not my first recommendation unless the charging system has been specifically matched.
Do not oversize a battery simply because more CCA sounds better. A battery with excessive capacity is not automatically harmful, but if it never reaches full charge because the car only makes short trips or the generator output is modest, it can spend its life undercharged. Match capacity to realistic use. A high-compression V8 with a heat-soaked starter needs more reserve than a small-displacement four-cylinder used for fair-weather drives.
Inspect cables, clamps, hold-downs, and grounds routinely
Battery maintenance is not only about the battery case. The entire starting and charging path matters. I routinely find classics with perfectly good batteries that cannot deliver full power because the cables are undersized, internally corroded, or attached to painted grounding points. Six-volt systems are especially intolerant of resistance. They need heavy-gauge cables, clean grounds, and tight connections because they carry higher current at lower voltage. Using thin modern replacement cables on a 6-volt car is a common mistake.
Inspect the battery case for bulging, cracks, dampness, and signs of acid leakage. Check that the hold-down secures the battery firmly without distorting the case. A loose battery suffers vibration damage and plate wear. Examine both terminals for white, blue, or green corrosion, which increases resistance and can mimic a weak battery. Follow the negative cable to the engine block or chassis grounding point and make sure the contact surface is bare, clean metal. Then inspect the positive cable to the starter solenoid or starter switch for frayed strands, heat damage, or hardened insulation.
Look beyond the obvious. On many classics, the engine-to-body ground strap is just as important as the battery ground cable. If that strap is missing or corroded, current may try to return through throttle linkage, speedometer cables, or smaller wires, causing strange symptoms and potential damage. I have seen dim headlights, erratic gauges, and slow cranking cured simply by replacing a corroded braided ground strap and cleaning the mounting points.
| Component | What to check | Why it matters |
|---|---|---|
| Battery terminals | Corrosion, looseness, cracked clamps | High resistance reduces cranking power and charging efficiency |
| Cables | Correct gauge, soft insulation, intact strands | Undersized or damaged cables cause voltage drop |
| Hold-down | Secure fit without case distortion | Prevents vibration damage and short circuits |
| Ground strap | Clean metal contact, no fraying | Ensures full current return path |
| Battery tray | Rust, acid residue, missing paint | Stops structural corrosion under the battery |
Clean corrosion correctly and protect the surrounding metal
Terminal corrosion is common on stored classics because charging cycles, vented gases, humidity, and temperature swings all contribute to chemical buildup. Cleaning it correctly restores conductivity and helps preserve nearby sheet metal. Start by disconnecting the ground cable first, then the positive cable. That order reduces the chance of accidental shorting with a wrench. Remove the battery if you need full access to the tray.
Use a mixture of baking soda and water to neutralize acid residue on the top of the battery, terminal area, and tray, but keep it out of the cells on serviceable flooded batteries. A dedicated terminal brush cleans post and clamp mating surfaces effectively. If clamps are heavily thinned by corrosion, replace them rather than forcing a poor fit. After cleaning, rinse lightly, dry thoroughly, and coat the connections with dielectric grease or a battery-terminal protectant. Felt anti-corrosion washers can help, but they are not a substitute for clean metal contact.
Do not ignore the tray and surrounding metalwork. Acid mist often strips paint and starts rust beneath the battery long before the owner notices. Wire-brush affected areas, treat corrosion properly, and repaint with an acid-resistant coating if needed. On restored cars, I like to inspect the tray at every oil change because catching this early avoids welding repairs later. If the battery lives under a seat or in the trunk, ventilation and restraint are even more important, and any acid damage can spread unseen into expensive interior or luggage-compartment panels.
Test battery condition and charging performance, not just starting behavior
A battery can crank an engine and still be unhealthy. Proper testing separates state of charge from true battery condition. Begin with an open-circuit voltage reading after the battery has rested. A fully charged 12-volt lead-acid battery typically reads around 12.6 to 12.8 volts; at 12.4 volts it is already significantly discharged. A 6-volt battery at rest should generally read about 6.3 volts when fully charged. These readings vary slightly by chemistry and temperature, but they are useful benchmarks.
Next, load-test the battery or have it tested with a conductance tester. Traditional carbon-pile load testers remain reliable when used correctly, while modern electronic testers from brands like Midtronics and Solar provide fast condition assessments. The key is to test a fully charged battery. Testing a discharged battery only confirms that it is discharged. If one cell is weak, you may see normal resting voltage but poor performance under load.
Charging-system checks matter just as much. With the engine running, verify charging voltage at fast idle and compare it with factory specifications. Many 12-volt alternator systems should charge roughly in the mid-13 to mid-14 volt range, while generator systems may behave differently depending on regulator settings and engine speed. Too little charging leaves the battery sulfated. Too much charging boils electrolyte, warps plates, and accelerates water loss. On classics with external voltage regulators, inaccurate regulation is common and often mistaken for battery failure.
Voltage-drop testing is one of the most useful diagnostics for older cars. Measure voltage loss across the positive cable and ground side while cranking. Excessive drop points to cable or connection resistance, not necessarily a bad battery. This is how you avoid replacing good parts while the real problem remains in the wiring path.
Use smart charging and storage practices during downtime
Storage is where most classic-car batteries lose life. Lead-acid batteries self-discharge over time, and if they remain below full charge, sulfation hardens. That is why the battery in a summer-only convertible often fails sooner than the battery in a regularly driven sedan. The fix is simple: maintain full charge without overcharging.
A quality smart maintainer is the best tool for cars that sit. Use one with automatic float or maintenance mode from a reputable manufacturer such as CTEK, NOCO, Battery Tender, or OptiMate. These chargers monitor voltage and adjust output rather than applying constant current indefinitely. On cars with sensitive electronics or unusual grounding arrangements, connect the maintainer exactly as the manufacturer recommends. If the car is stored in an unheated building, remember that a fully charged battery resists freezing far better than a discharged one.
For long storage, clean the battery, confirm electrolyte level if applicable, charge it fully, and either disconnect the negative cable or use a maintainer. Disconnecting helps on cars with parasitic draw from clocks, radios, or aftermarket alarms, but it will not stop self-discharge entirely. If the battery is removed from the car, store it upright in a cool, dry place away from sparks and open flames. Modern battery cases do not require storage on wood, but they do require stable temperature and periodic charge checks.
Start-and-idle sessions are not a substitute for proper charging. Letting a classic run for ten minutes in the garage rarely replenishes the energy used during starting, especially with headlights, heater blowers, or electric fuel pumps. Either drive the car long enough to recharge the battery fully or connect a maintainer afterward.
Recognize failure patterns and prevent repeat problems
Classic-car battery problems usually follow patterns. Slow cranking after a week often points to self-discharge, parasitic draw, or a battery nearing the end of its life. A battery that goes dead after every drive may indicate undercharging from a weak generator, slipping belt, poor regulator, or corroded connection. Repeated electrolyte loss suggests overcharging. A battery that tests good but struggles only when hot may be exposing starter heat soak, cable resistance, or ignition timing that is too far advanced.
Parasitic draw testing is worthwhile on any classic with unexplained discharge. Some current draw is normal if the car has a clock or memory circuit, but older vehicles often should show extremely low draw when switched off. Use an ammeter in series and isolate circuits one by one. Common culprits include glovebox lamps, trunk lights, stuck relays, aftermarket stereos, and alternator diode leakage on converted charging systems.
Prevention comes down to routine. Inspect the battery monthly during driving season. Check charging voltage twice a year. Clean terminals whenever corrosion appears. Replace old cables before they fail internally. If the battery is over four or five years old, treat it as a consumable and test it proactively before a long trip. Reliability in a classic is rarely accidental; it is built through small, repeatable checks.
Battery maintenance for classic cars is really electrical-system maintenance in its most practical form. The battery, cables, grounds, tray, and charging components work as one system, and neglect in any part weakens the whole car. Choose the correct battery for the vehicle’s voltage, polarity, and usage. Keep terminals and grounds clean and tight. Protect the tray and surrounding metal from acid damage. Test charge level, load capacity, and charging output with proper tools instead of guessing from how the starter sounds. During storage, use a smart maintainer and avoid the false confidence of occasional idle-only run sessions.
The main benefit is simple: dependable starting without sacrificing originality or damaging hard-to-find components. Good battery care also reduces roadside breakdowns, protects regulators and generators, and helps every electrical accessory work as intended. If you are building out a restoration and maintenance routine, make the battery inspection one of your standard checkpoints. Start with a voltage check, terminal cleaning, and ground inspection this week, and your classic will reward you with easier starts and fewer electrical surprises.
Frequently Asked Questions
Why is battery maintenance especially important for classic cars?
Battery maintenance matters more on a classic car than many owners realize because the battery is central to far more than just starting the engine. In an older vehicle, the battery helps stabilize system voltage, supports ignition performance, cushions the charging system from sudden electrical demands, and supplies reserve power to lights, gauges, clocks, radios, and other accessories. When the battery is weak, sulfated, undercharged, or physically deteriorating, those extra stresses can affect every part of the electrical system.
Classic cars are also more vulnerable because their wiring, grounds, connectors, and charging components may already be decades old. A modern car can often tolerate small electrical inconsistencies without obvious symptoms, but an older vehicle may respond with hard starting, dim lights, erratic gauges, poor idle quality, ignition misfires, or charging-system strain. In many cases, owners chase carburetor or starter problems when the root cause is actually low battery voltage or poor battery-cable connections.
There is also an originality and preservation factor. Acid leaks, corrosion, and improper charging can damage battery trays, hold-downs, inner fenders, cables, and surrounding metal. Over time, that kind of neglect creates cosmetic and structural issues that are much harder to correct than routine maintenance. For a regularly driven classic, a properly maintained battery improves dependability. For a collector car in storage, good battery care helps prevent dead batteries, electrical headaches, and avoidable wear on vintage components that may be expensive or difficult to replace.
How often should I check and service the battery in a classic car?
A good rule is to inspect the battery at least once a month during the driving season and before and after any extended storage period. That inspection should include checking the battery case for swelling or cracks, looking for corrosion on the terminals, confirming the hold-down is secure, and making sure the cables are tight and clean. If the car has a traditional serviceable lead-acid battery, you should also check electrolyte levels periodically and top them off with distilled water when needed, following the battery manufacturer’s guidance.
Voltage and charging condition should be monitored routinely as well, especially if the car sits for long stretches between drives. A battery that repeatedly drops below a healthy resting voltage can sulfate and lose capacity even if it appears to recover after charging. Using a digital voltmeter or battery maintainer with condition monitoring makes it easier to catch issues early. If the vehicle has a clock, radio memory, alarm, or any small parasitic draw, the battery may discharge more quickly than expected while parked.
Seasonal changes matter too. Heat accelerates battery-fluid loss and internal degradation, while cold weather reduces cranking performance and exposes weaknesses in marginal batteries. Before winter storage or spring startup, it is wise to test both the battery and the charging system rather than assuming they are fine. On a classic car, preventive checks are always cheaper and easier than diagnosing roadside no-start conditions or replacing damaged wiring and charging components later.
What is the best way to store and maintain a classic car battery when the car is not being driven regularly?
The best approach is to keep the battery fully charged, clean, and protected from long periods of partial discharge. If the car will sit for more than a couple of weeks, a quality battery maintainer is usually the safest choice. Unlike a basic trickle charger, a proper maintainer monitors voltage and applies charge only as needed, helping prevent overcharging while keeping the battery in a healthy state. That is especially important for classic cars because prolonged undercharge promotes sulfation, and overcharge can boil off electrolyte and damage both the battery and nearby metalwork.
Before storage, clean the top of the battery and terminals, make sure the case is dry, inspect the cables, and verify that the battery is securely mounted. If the battery is a conventional flooded type, check electrolyte levels and add distilled water if required. It is also smart to test for any abnormal parasitic draw if the battery tends to go flat during storage. Older wiring, aftermarket accessories, and aging switches can create small drains that slowly discharge the battery and shorten its life.
Storage environment matters as well. A cool, dry, stable-temperature space is better than extreme heat or repeated freeze-thaw conditions. Some owners disconnect the battery during storage, which can be helpful if the car has no memory-dependent electronics and the owner wants to eliminate drain. Others remove the battery entirely and store it on a bench with a maintainer in a controlled area. Either method can work, but the key is consistency: keep the battery charged, inspect it regularly, and never leave it neglected in a discharged state for months at a time.
How do I clean battery terminals and prevent corrosion without damaging original components?
Start by turning the car off and disconnecting the ground cable first, then the positive cable. This reduces the chance of accidental shorting while you work. If there is visible corrosion, use a gentle battery-terminal cleaner or a mixture commonly used to neutralize acid residue, taking care not to flood surrounding painted or plated surfaces. A soft brush, terminal-cleaning tool, and clean cloths are usually enough. The goal is to remove corrosion from the posts, cable ends, and hold-down area without aggressively stripping finishes from original hardware.
Once everything is clean, inspect the cable ends for fraying, stiffness, broken strands, cracked insulation, or looseness where the terminal is attached to the cable. On classic cars, cable condition is just as important as terminal cleanliness because internal corrosion can create resistance even when the outside looks acceptable. Also inspect the battery tray, clamp hardware, and nearby sheet metal for signs of acid damage. If corrosion has migrated beyond the terminal area, address it early before it becomes a restoration issue.
After reassembly, tighten the connections securely but do not overtighten. Reconnect the positive cable first and the ground last. To help prevent future corrosion, use an appropriate terminal protectant or corrosion inhibitor and make sure the battery is not overcharging, venting excessively, or leaking. Corrosion is often treated like a cosmetic nuisance, but on a classic car it is really a warning sign. It can indicate poor charging control, loose connections, acid seepage, or neglected maintenance that will eventually affect starting and electrical reliability.
Should I keep an original-style battery, or upgrade to a modern battery for better reliability?
That depends on how the car is used and what matters most to you: authenticity, convenience, or maximum dependability. For concours-level restorations or highly original engine bays, an original-style battery may be the best fit visually and historically. It preserves the period-correct appearance and can be an important detail for judged events. However, owners should understand that appearance-correct batteries may still require the same disciplined maintenance as any traditional lead-acid battery, especially if the car sits often.
If the car is driven regularly, used for touring, or expected to start reliably after longer idle periods, many owners prefer a modern battery design with improved construction and lower maintenance demands. Depending on the vehicle and available space, that could mean a higher-quality flooded battery, an AGM battery, or another modern option that offers better vibration resistance, reduced leakage risk, and improved charge retention. These advantages can be especially valuable in classic cars with older wiring or limited charging output, where a stable and healthy battery contributes directly to overall system performance.
The most important point is compatibility. The battery must match the car’s voltage, physical dimensions, terminal orientation, hold-down arrangement, and charging-system requirements. An upgrade is only beneficial if it fits correctly and works with the car’s generator or alternator setup. Many owners strike a balance by using a modern battery hidden inside an original-looking case or choosing a battery that visually suits the engine bay while delivering better service life. In practical terms, the best battery for a classic car is the one that supports the vehicle’s electrical system properly, protects surrounding components, and matches the owner’s goals for originality and use.




