
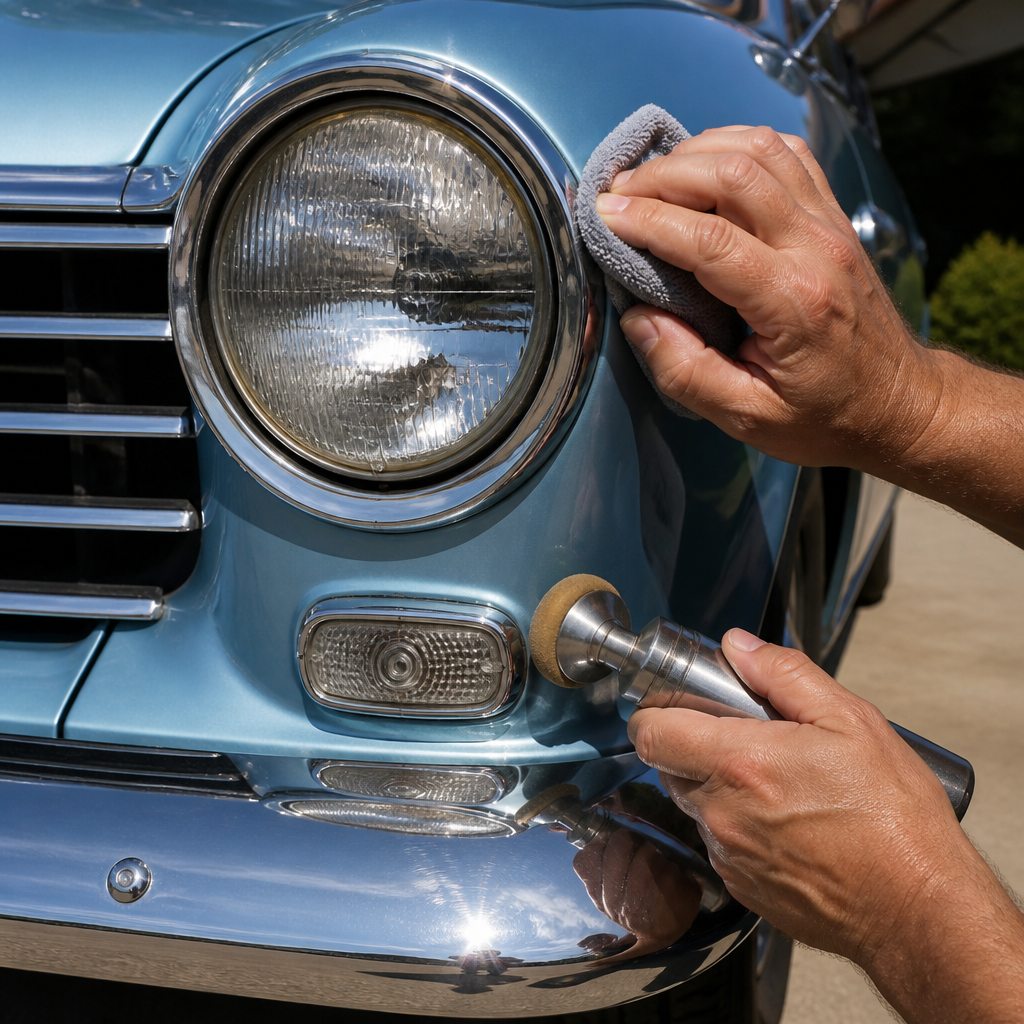
Classic car headlights and exterior trim shape a vehicle’s face, and when they are cloudy, pitted, faded, or rusty, even an otherwise solid restoration looks unfinished. In restoration shops and home garages alike, I have seen owners spend months rebuilding engines and suspensions, then lose visual impact because bezels, lenses, stainless moldings, and chrome details were left dull or damaged. Learning how to restore classic car headlights and trim is one of the highest-value cosmetic upgrades in any DIY restoration plan because it improves appearance, preserves original parts, and often boosts nighttime safety at the same time.
In practical terms, headlights include sealed beams, replaceable-bulb housings, buckets, retaining rings, adjusters, wiring connectors, and the glass or plastic lenses surrounding them, depending on era and design. Trim covers stainless steel moldings, anodized aluminum pieces, chrome-plated pot metal, painted bezels, emblems, and rubber fillers that frame the body lines. Restoration means more than making parts shiny. It involves inspection, cleaning, corrosion control, straightening, refinishing, polishing, reassembly, and protection with methods matched to each material. Using the wrong abrasive on anodized aluminum, for example, can permanently alter the finish, while aggressive buffing on plated pot metal can quickly cut through thin chrome.
This hub article explains the complete DIY restoration workflow and shows where each task fits within a broader restoration and maintenance strategy. It also serves as a central guide to related projects such as chrome polishing, aluminum trim repair, headlight wiring refreshes, lens refinishing, weatherstrip replacement, and paint-safe detailing around delicate moldings. If you want a classic that looks correct, performs well, and ages gracefully, headlights and trim deserve methodical attention rather than a quick weekend polish.
Start with inspection, originality, and a restoration plan
The first step is deciding what you have, what can be saved, and what should be sent out for specialist work. On a driver-quality car, you may only need cleaning, light straightening, and polishing. On a concours-level restoration, condition standards are much tighter, and original textures, plating finishes, fastener styles, and date-coded headlight components matter. I always begin with photos from multiple angles, close-ups of fasteners, and labels on every removed part. This prevents guesswork later and helps when ordering reproduction clips, springs, gaskets, or adjustment screws.
Inspect headlights for cracked lenses, silver reflector loss, rust in buckets, brittle pigtails, seized adjusters, and damaged aiming hardware. Inspect trim for dents, kinks, corrosion blooms, lifting chrome, pitting in pot metal, loose studs, and missing attaching hardware. Magnet testing is useful because many owners assume every bright piece is chrome-plated steel when it may actually be stainless or die-cast zinc. Material identification determines the repair path. Stainless can be filed, sanded, and polished. Pot metal often requires copper buildup and replating by a specialist. Anodized aluminum may need de-anodizing and refinishing if heavily damaged.
Set your goal before touching a tool. Do you want a reliable weekend driver, an original survivor, or a judged show car? That decision affects every choice, from whether to preserve patina to whether reproduction headlight bezels are acceptable. Good DIY restoration guides always start here because planning prevents wasted labor and protects irreplaceable original components.
Safe removal, cleaning, and workbench setup
Most damage to trim happens during removal, not polishing. Use trim tools made from nylon, a clip release tool set, painter’s tape along paint edges, and penetrating oil on studs and nuts before turning anything. On old headlight assemblies, soak bucket fasteners, retaining ring screws, and adjusters with a penetrant such as Kroil or PB Blaster a day ahead. If a screw resists, work it gently back and forth. Twisting harder usually snaps the captive nut or breaks fragile pot-metal ears.
Once removed, wash everything before evaluation. I use warm water, car shampoo, soft brushes, and degreaser only where necessary. Heavy solvents can stain surviving paint marks or degrade rubber. For trim, clay bars can remove bonded contamination on solid metal surfaces before polishing. For headlights, avoid letting water sit inside housings or on exposed reflectors. Reflective coatings are delicate and should never be scrubbed with standard polish.
A proper bench setup matters. Use separate towels and compounds for stainless, aluminum, chrome, and glass to prevent cross-contamination. Keep zip bags for hardware, index cards for notes, and a dedicated tray for left-right matched parts. A variable-speed buffer, microfiber cloths, mini polishers, body spoons, dollies, wet-or-dry paper, masking tape, contact cleaner, dielectric grease, and a multimeter cover most headlight and trim jobs. Organization is what turns a cosmetic refresh into repeatable restoration work instead of a box of mystery pieces.
Headlight restoration: lenses, reflectors, wiring, and aiming
Classic headlight restoration varies by era. Many American cars through the 1970s used sealed-beam units, which means the lens and reflector were one replaceable assembly. If the glass is intact but output is weak, the problem may be poor voltage delivery rather than a bad lamp. I routinely see one to two volts lost through aged switches, corroded connectors, and thin factory wiring. On a 12-volt system, that reduction significantly cuts light output. Measure voltage at the battery and at the headlight connector with lights on. If the drop is excessive, clean grounds, replace terminals, and consider a relay harness that lets the lamps draw power directly from the battery through fused circuits.
For cars with serviceable housings, inspect the reflector bowl. Tarnished or peeling reflective surfaces should be resilvered or vacuum-metalized by a specialist; home paint products do not match true optical reflectivity. Glass lenses can be cleaned with mild glass cleaner and a soft cloth. Plastic lenses, more common on later classics and some auxiliary lamps, can often be wet sanded and polished if oxidation is surface-level. Start conservatively, usually 2000 or 3000 grit, then polish with a plastic-safe compound and protect with a UV-resistant coating.
Mechanical hardware matters as much as optics. Replace rusted buckets, springs, and adjusters if movement is seized or aiming cannot be held. Then aim the headlights correctly. Park on level ground, verify tire pressure, bounce the suspension, mark centerlines on a wall, and adjust according to factory service manual specifications or standard aiming procedures. A restored headlight that is too high, too low, or cross-eyed is still a poor restoration.
Trim restoration by material: stainless, aluminum, chrome, and pot metal
Different metals require different methods, and this is where many DIY restorers make costly mistakes. Stainless steel is forgiving and ideal for home repair. Minor dents can often be worked out from the back with spoons and soft supports. Scratches are removed progressively with abrasives, typically starting as fine as the damage allows, then moving through grits before machine polishing. Match the original grain where a piece was satin-finished rather than mirror-polished.
Aluminum trim needs lighter pressure because it cuts quickly and can wave from heat. If anodized, polishing through the surface changes the appearance permanently. Some pieces are best cleaned only; others can be stripped and refinished, but then all matching pieces may need the same treatment for visual consistency. Chrome-plated steel can often be cleaned with gentle metal polish and 0000 steel wool used carefully with lubricant on rust specks, but deep corrosion usually means replating or replacement.
Pot metal, common in bezels and ornaments, is the trickiest. Pits cannot be polished away without destroying shape. Proper repair usually involves stripping, copper plating, filling and leveling, then nickel and chrome plating. This is rarely a successful home process. The best DIY role is safe disassembly, stud repair assessment, and prep for a reputable plating shop.
| Material | Common Issues | Best DIY Approach | When to Outsource |
|---|---|---|---|
| Stainless steel | Dents, scratches, dullness | Straighten, sand progressively, polish | Severe kinks or missing sections |
| Aluminum | Oxidation, haze, worn anodizing | Clean gently, polish only if finish allows | Re-anodizing or complex reshaping |
| Chrome-plated steel | Rust specks, dullness, flaking | Clean, decontaminate, light polish | Peeling chrome or deep rust |
| Pot metal | Pitting, blistering, broken studs | Assess, stabilize, prep for shipment | Plating, pit repair, structural restoration |
Polishing, refinishing, and protecting restored parts
Polishing is controlled abrasion, not magic. The goal is to remove the least material necessary to create a uniform surface. On trim, I prefer test spots on the back or an inconspicuous edge because some compounds are much more aggressive than their labels suggest. Menzerna, 3D, Mothers, and Meguiar’s all make products that can work well when matched to the metal and pad. Keep wheel speed moderate, move constantly, and avoid sharp edges where plating is thinnest. Heat is the enemy. It warps aluminum, burns fingers, and can discolor surfaces.
Refinishing may also include repainting blackout sections in grilles or bezels, recoloring recessed details on emblems, and replacing lens-to-body gaskets to stop moisture intrusion. Use epoxy or self-etch primer only where appropriate, and verify compatibility with bare metal and topcoat systems. For hardware, phosphate-coated or zinc-plated replacements often look more authentic than generic shiny fasteners from a hardware store.
Protection is what keeps restoration work from fading in one season. Apply quality wax or sealant to polished metal, corrosion inhibitor inside buckets and hidden cavities, and dielectric grease on electrical terminals. Avoid ammonia-heavy cleaners on sensitive finishes. If the car is stored, use a breathable cover and control humidity where possible. Good maintenance intervals are simple: wash contaminants off quickly, inspect drain paths and seals, and recheck trim fasteners and headlight aim after the first few drives.
How this hub connects to your broader DIY restoration guides
Headlights and trim sit at the intersection of cosmetic restoration, electrical reliability, and parts preservation, which is why this page functions as a hub within restoration and maintenance. From here, the most useful next-step guides are chrome care and rust spotting, stainless trim dent removal, aluminum brightwork polishing, classic headlight wiring upgrades, bulb selection, bezel painting, emblem restoration, and weatherstrip replacement around lamps and moldings. Each of those subtopics deserves dedicated instructions, but the sequence stays consistent: inspect, document, remove safely, repair by material, refinish correctly, and protect for long-term use.
The biggest benefit of approaching these jobs systematically is that you avoid irreversible mistakes while getting visible results fast. Clean, bright headlights improve safety. Straight, well-finished trim sharpens body lines and makes paintwork look better. Preserved original parts often fit better than reproductions and retain more of the car’s character. Start with one assembly, follow factory references, and build skill piece by piece. If you are planning a classic car refresh, use this hub to map the work, gather the right tools, and restore the details that make the whole car look complete.
Frequently Asked Questions
What is the best way to restore classic car headlights without damaging original parts?
The best approach is to identify exactly what type of headlight components your classic car uses before doing any sanding, polishing, or disassembly. Many older vehicles have glass headlight lenses, metal buckets, chrome or painted bezels, and separate adjustment hardware, while some later classics may include plastic lenses or trim pieces that require different products and techniques. Start by removing loose dirt, grease, and oxidation with a gentle automotive soap and soft brushes. Once the parts are clean, inspect them closely for cracks, deep pitting, rust around mounting points, moisture intrusion, and worn seals. This inspection stage matters because not every part should be aggressively refinished; in some cases, preserving original finish is more valuable than chasing a like-new appearance.
For glass lenses, avoid harsh abrasives unless there is heavy mineral staining or stubborn film. Glass can often be improved with a dedicated glass polish and careful hand work. Plastic lenses, if your vehicle has them, usually respond well to a staged wet-sanding and polishing process using progressively finer grits followed by a plastic-safe compound and UV protection. Metal bezels and headlight doors should be treated according to their finish. Stainless trim can often be straightened, lightly sanded, and polished, while chrome-plated parts need a more cautious touch because once the plating is worn through, polishing alone will not restore it. Rusty steel headlight buckets should be stripped, treated for corrosion, primed, and refinished in the proper low-gloss or semi-gloss coating used originally.
The biggest mistake restorers make is trying to force all parts through the same process. Original hardware, aiming screws, springs, and retainers may look rough but can often be cleaned, lubricated, and reused. Label everything during disassembly, take reference photos, and replace gaskets and seals where needed to prevent future fogging and corrosion. If a part is rare or date-coded, err on the side of preservation rather than over-restoration. A careful, methodical restoration protects originality, improves appearance, and avoids turning hard-to-find headlight components into expensive replacements.
Can pitted chrome trim and stainless moldings be repaired, or do they need to be replaced?
In many cases, they can be repaired, but the answer depends on the material, the severity of the damage, and your restoration goals. Stainless steel trim is usually much more forgiving than chrome-plated parts. Dull stainless moldings, light scratches, and even small dents can often be corrected through patient metal finishing. That may include gentle straightening, hammer-and-dolly work, filing high spots, sanding with increasingly fine grits, and machine or hand polishing. Because stainless is solid material rather than a thin decorative coating, it gives you more room to work and can often be brought back to a brilliant finish that looks nearly new.
Chrome trim is different. Chrome is typically a layered plating system over steel or pot metal, and pitting usually means corrosion has already compromised that surface. Light tarnish and minor surface staining can sometimes be cleaned and polished, but true pitting will not simply buff out. Once pits are visible, the permanent solution is often professional replating. That process generally involves stripping the old finish, repairing the base metal, filling imperfections where possible, and applying new layers of copper, nickel, and chrome. Pot metal pieces, which are common on classic cars, are especially challenging because they can corrode, blister, and deform, requiring specialized restoration work.
Replacement is sometimes the practical option if the part is reproduced accurately and the original is too far gone. However, many reproduction trim pieces lack the fit, weight, and crisp detail of factory parts, so repair and replate are often worth considering for visible components like grille surrounds, headlight bezels, and body moldings. If authenticity matters, keep your original pieces whenever possible. A professional evaluation can help you decide whether polishing, metal repair, replating, or replacement offers the best balance of cost, originality, and final appearance.
How do you remove oxidation, fading, and rust from exterior trim during a classic car restoration?
The correct method depends on the material you are working with, because oxidation, fading, and rust each affect trim differently. For stainless steel and aluminum trim, oxidation usually appears as dullness, chalkiness, or light staining. Begin with a thorough cleaning to remove wax buildup, grime, and embedded contaminants. After that, test a mild metal polish on a small hidden area. If the trim still looks tired, move to a more structured correction process using very fine abrasives or polishing compounds designed for the specific metal. The goal is to remove the oxidized outer layer while preserving the contours and factory lines of the part. Rushing this stage can round edges and erase detail, especially on narrow moldings.
Faded painted trim, argent accents, and blackout sections need a different approach. These areas often look worn because the original finish has degraded, not because the part simply needs polishing. In that case, the trim may need to be stripped, lightly sanded, primed if appropriate, and refinished in the proper color and sheen. This is especially common on bezels and grille details where semi-gloss black or silver accents were originally used to create contrast around headlights and body lines. Matching the factory appearance matters more than making every piece overly shiny.
Rust must be handled decisively because it continues to spread beneath the surface. On steel trim supports, brackets, and headlight buckets, remove loose corrosion mechanically with brushes, abrasive pads, blasting, or sanding, depending on how severe it is. Then apply a rust treatment or conversion product if needed, followed by primer and a durable topcoat. Surface rust on chrome may be improved cosmetically with very gentle cleaning, but if corrosion has penetrated the plating, a full replate or replacement is the real fix. The key is to stop treating all trim problems as cosmetic only. Oxidation can often be polished, fading often requires refinishing, and rust usually demands material repair and protective coatings to prevent recurrence.
Should you restore original headlight and trim parts or buy reproduction replacements?
For most classic car projects, restoring original parts is the preferred starting point, especially when the pieces are structurally sound and specific to the vehicle. Original headlight bezels, stainless moldings, and trim hardware typically fit better than reproduction parts because they were made to factory tolerances and designed for the exact body contours of the car. They also preserve authenticity, which matters for show judging, resale value, and overall character. Even on driver-quality restorations, original parts often have sharper lines, better metal quality, and more accurate finishes than aftermarket replacements.
That said, reproduction parts can be a smart solution when original components are missing, badly broken, or too deteriorated to restore economically. This is especially true for lenses, seals, clips, and common trim items that are available from reputable suppliers. The caution is that not all reproduction parts are created equal. Some fit beautifully and save substantial labor, while others require reshaping, slotting mounting holes, refinishing, or reusing original hardware just to install properly. Whenever possible, compare new parts against your originals before painting or plating anything. That allows you to catch differences in profile, mounting depth, and finish quality early.
The best restorations often use a combination of both. Restore the original pieces that define the car’s appearance and are hard to duplicate correctly, such as unique bezels, moldings, and emblems. Use high-quality reproductions for consumable or heavily damaged items like seals, retaining rings, hardware kits, and sometimes lenses. This balanced strategy protects originality where it counts most while keeping the project practical and manageable. If the car is rare or high-value, original parts are usually worth saving whenever feasible.
What tools and supplies are most important for restoring classic car headlights and exterior trim at home?
A successful home restoration does not require a full professional shop, but it does require the right tools, the right products, and the discipline to work slowly. Start with basic cleaning supplies: automotive soap, degreaser, microfiber towels, soft detail brushes, and compressed air if available. For disassembly and reassembly, a good set of screwdrivers, nut drivers, trim tools, small picks, magnetic trays, and labeled storage bags are essential. Classic headlight assemblies often use small clips, springs, aiming screws, and retainers that are easy to lose or mix up, so organization is every bit as important as polishing skill.
For restoration work itself, useful supplies include metal polish, chrome cleaner, plastic lens polish if applicable, fine abrasive paper for wet sanding, polishing pads, buffing compounds, masking tape, rust remover, rust converter, primer, and correct topcoat paints for buckets or blackout trim sections. A bench buffer can speed up stainless polishing, but hand tools and a variable-speed drill with polishing attachments can also do excellent work when used carefully. If you plan to straighten stainless moldings, basic bodywork tools such as light hammers, dollies, sanding blocks, and files can be very helpful. Always use the least aggressive method first, especially on visible trim.
Just as important are safety and reference materials. Wear eye protection, gloves, and a respirator when sanding, stripping, or spraying finishes. Keep factory manuals, assembly guides, and reference photos nearby so you can confirm how parts




