
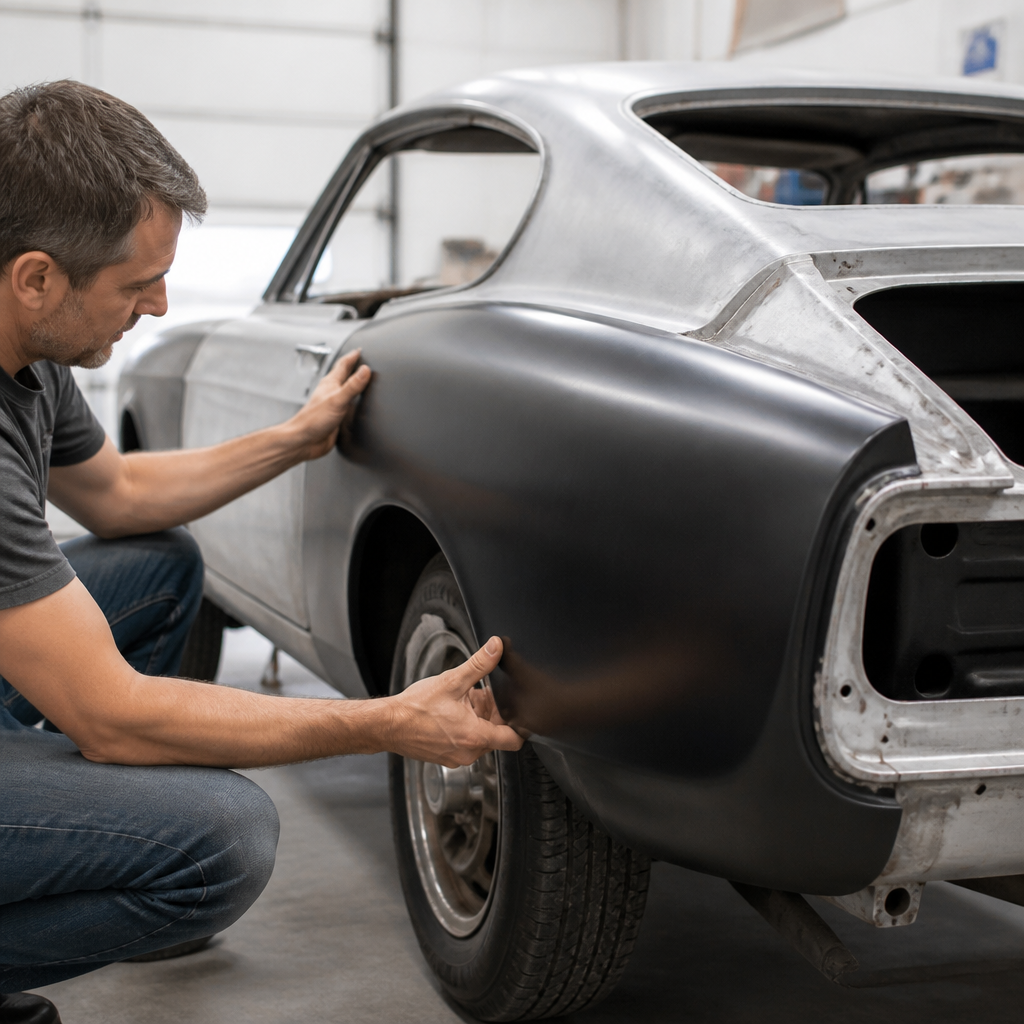
Replacing classic car panels is one of the most important skills in bodywork and paint because rust, collision damage, and old repairs often hide beneath otherwise attractive sheet metal. In restoration shops, panel replacement is rarely just a cosmetic task; it is structural correction, corrosion control, metal finishing, and paint preparation rolled into one process. When I assess an older shell, I am not simply asking whether a fender looks bad. I am checking panel gaps, spot-weld seams, filler thickness, previous patch quality, flange integrity, and how replacement work will affect adjacent primer, seam sealer, and final paint. Understanding how to replace classic car panels correctly matters because poor work telegraphs through paint, traps moisture, weakens mounting points, and lowers the car’s long-term value.
A classic car panel can mean a bolt-on part such as a hood, door skin, front fender, deck lid, or valance, or a welded section such as a quarter panel, rocker, floor pan, trunk floor, wheel arch, or lower door patch. The replacement method depends on which type you are dealing with. Bolt-on panels are primarily alignment exercises with some metal correction. Welded panels require cutting, measuring, drilling factory spot welds, protecting hidden cavities, and controlling heat distortion. Bodywork and paint are inseparable here. Even a perfectly welded quarter panel will fail visually if the metal finishing is rough, if skim filler is applied over contaminated steel, or if epoxy primer is delayed long enough for flash rust to form.
This hub article covers the full panel replacement workflow so it can anchor the wider restoration and maintenance topic. If you are planning rust repair, collision restoration, paint stripping, lead loading removal, primer selection, seam sealing, or panel alignment, every one of those jobs connects back to the quality of the panel install. The goal is simple: restore factory shape, preserve structural integrity, minimize filler, and leave a surface that can move cleanly into bodywork, primer, blocking, and paint. Whether you are fitting reproduction sheet metal to a muscle car, hand-finishing a repair section for a British sports car, or replacing a rusted sill on a unibody coupe, the principles are the same.
Assess the Damage Before You Cut Anything
The first rule in classic car panel replacement is diagnosis before disassembly. Rust rarely ends where the bubbles stop, and collision damage often travels into braces, hinges, apron sections, and mounting flanges. I start by stripping paint in the suspect area with a poly strip disc or chemical stripper where appropriate, then probing seams with a pick and checking for soft metal. A magnet, contour gauge, and straightedge help reveal filler-heavy areas and waves. On unibody cars, I measure door openings, diagonal dimensions, and reference points before a single cut is made. If those numbers are off, replacing the visible panel without correcting the structure underneath only locks misalignment into the shell.
Common hidden trouble spots include lower fenders behind splash shields, quarter panel doglegs, window channels, trunk drop-offs, cowl corners, rocker inners, and floor braces. Older restorations can be worse than original corrosion. I have removed quarter panels to find overlapping patches pop-riveted over rust, seams buried in polyester filler, and brazed repairs that contaminate adjacent steel. Those discoveries change the repair plan. Instead of replacing only a skin, you may need an inner wheelhouse lip, a trunk extension, and a brace end to create a sound welding edge. This is why experienced restorers buy panels after inspection, not before.
Choose the Right Replacement Panel and Repair Strategy
Not every replacement panel is equal. New old stock pieces usually fit best but are expensive and rare. Licensed reproduction panels can be excellent, especially for popular American classics, but stampings vary by manufacturer. Economy import panels may have soft character lines, thin flanges, or incorrect hole locations. Used original panels can solve fit issues, yet they often bring hidden rust or old repairs. The smartest approach is to buy the best metal you can verify, then test-fit before modifying anything irreversible. If possible, compare the replacement to the factory panel at multiple points: crown, edge roll, body line height, flange angle, and brace attachment points.
Full panel replacement is not always superior to a sectional repair. If only the lower six inches of a quarter panel are rotten and the upper body line is crisp, a high-quality patch can preserve more original metal and reduce fit risk around the roof sail, trunk gap, and door opening. On the other hand, if rust extends into multiple seams or the panel has broad oil-canning from previous damage, replacing the whole assembly often saves time and produces a straighter result. The decision should be based on metal condition, available replacement quality, your welding skill, and how visible the seam will be after paint.
| Panel Type | Best Replacement Method | Main Risk | Best Practice |
|---|---|---|---|
| Bolt-on fender | Repair or replace complete panel | Poor gap alignment | Shim and fit with hood and door installed |
| Door skin | Skin replacement over repaired frame | Edge distortion | Bonding flange prep and gradual hem folding |
| Quarter panel | Full panel or sectioned butt-weld repair | Heat warpage | Short staggered welds and repeated test-fit |
| Floor pan | Section replacement at factory seams | Weak overlap or missed brace rust | Repair supports first and plug-weld like factory |
| Rocker panel | Outer panel after bracing shell | Body sag and door misfit | Brace opening and measure before cutting |
Tools, Safety, and Workshop Setup
Panel replacement quality depends heavily on tooling. A 220-volt MIG welder with shielding gas is the standard for most classic car sheet metal because it provides controllable plug welds and manageable tack sequences. TIG can produce cleaner butt welds in skilled hands, but it is slower and less forgiving on awkward car bodies. Essential tools include a spot-weld cutter, Blair-style hole cutter, pneumatic saw, cutoff wheel, body hammer and dolly set, locking panel clamps, Cleco fasteners, shrinker-stretcher for fabricated edges, angle grinder, carbide burr, weld-through primer, epoxy primer, seam sealer, and cavity wax. Measuring tools matter just as much as cutting tools: tram gauge, tape, profile templates, and gap sticks prevent expensive guesswork.
Safety is non-negotiable. Grinding old paint can expose lead, filler dust, and rust scale, so a proper respirator is mandatory. Fire risk is constant when sparks reach old seam sealer, undercoating, insulation, and trapped debris inside quarter panels and rockers. I keep trim removed, glass protected, a fire watch in place, and a spray bottle plus extinguisher within reach. Battery disconnection is basic practice, but on restored cars I also verify where fuel lines, brake lines, and wiring looms run behind the work area. Clean, bright access saves hours. If the shell is on a rotisserie, support points must be secure and the body must be braced before structural panels are cut.
Remove the Old Panel Without Damaging the Car
Factory panels were assembled in a sequence, and understanding that sequence makes removal cleaner. Spot welds usually sit along flanges at wheel arches, rocker tops, trunk gutters, drip rails, and door jamb returns. Rather than slicing through everything, I expose the spot welds with a wire wheel, center-punch each one, and drill only through the top layer when possible. This preserves the mating flange beneath and reduces later fabrication. Adhesive seam sealers and leaded joints on some older cars complicate access, especially at sail panels and roof seams. Heat and mechanical scraping may be needed, but care is critical because thinning surrounding metal creates welding problems later.
When removing large welded panels such as quarters or floors, I cut the old panel in stages. First, I remove the central area to gain access to hidden flanges. Then I separate the edges methodically. This reduces leverage on the shell and helps identify where the factory joined reinforcements. Doors, trunk lids, and adjacent panels should remain on the car during much of this process because they provide reference for final fit. It is a mistake to strip the shell completely and trust memory. Original gaps, even imperfect ones, are valuable guides. Photograph every seam and brace before disassembly; those images often solve reassembly questions months later during paint prep.
Test-Fit, Align, and Weld the New Panel Correctly
Test-fitting is where good restorations separate from fast repairs. A replacement panel should be trimmed gradually, clamped in place, and checked against adjacent panels multiple times. On bolt-on fenders and hoods, alignment starts with the fixed points: cowl, radiator support, hinge geometry, and door edge. On welded panels, I install the panel with screws, Clecos, or locking clamps and verify body lines, wheel opening symmetry, and gap consistency before welding. Reproduction panels often need flange adjustment or relief cuts to sit naturally. Never force a panel into shape with welds. If the metal is under tension when clamped, it will move after welding and create waves that are difficult to metal-finish.
For butt-welded repairs, panel gap should be tight and consistent, usually around the thickness of the cutting wheel or slightly less depending on process and welder settings. I tack every few inches, move across the panel to spread heat, and continue filling the spaces only after the previous tacks cool. Compressed air, a copper backing spoon, and patient pacing help control distortion. Continuous beads on thin automotive sheet metal are almost always wrong. Plug welds should replicate factory spot-weld spacing and fully fuse to the backing flange. After welding, I dress the seam carefully with a flap disc, then use hammer and dolly work to relieve shrinkage and keep the panel contour true before filler ever touches the surface.
Corrosion Protection, Surface Prep, and Paint Readiness
Once the metalwork is complete, corrosion protection must happen quickly. Bare steel begins oxidizing fast, especially in humid shops. I clean the repair with wax and grease remover, abrade as needed, and apply epoxy primer to both sides wherever possible. Hidden cavities receive cavity wax after final paint or once access allows. Weld-through primer has value on lap joints before assembly, but it is not a substitute for epoxy on finished metal. Seam sealer belongs over properly primed joints, not over raw steel. Factory-style brushable sealers are useful on trunk seams, floor overlaps, and wheelhouse joints because they block moisture and duplicate original appearance for judged restorations.
Body filler should be minimal and strategic. If panel replacement was done accurately, most repairs need only a skim coat to refine grind marks and tiny low spots. Polyester filler over clean epoxy or properly prepared bare metal, depending on product system, can produce durable results, but the technical data sheet should dictate the sequence. After filler shaping, high-build primer supports block sanding and final surfacing. This is where many hobby restorations lose quality. A panel can be welded well and still look poor if waves are not identified under guide coat and long-board sanding. Straight reflections come from disciplined blocking, not from heavy primer alone. Before color, recheck all gaps, edges, and sealer lines under direct light.
Common Mistakes, Costs, and When to Outsource the Job
The most common mistakes in classic car panel replacement are cutting too much too early, trusting poor reproduction panels without test-fitting, welding too hot and too long, ignoring hidden rust in supporting structures, and skipping corrosion protection inside enclosed sections. Another frequent problem is chasing perfect gaps before the shell is structurally stable. If rockers, floors, or body mounts are weak, doors may align one day and drop the next. Cost also surprises first-time restorers. Even when a quarter panel costs a few hundred dollars, labor to fit, weld, metal-finish, seal, prime, and block it can multiply that number several times. Quality panel replacement is labor-intensive because precision, not part price, drives the final result.
Outsourcing makes sense when the repair affects structural alignment, involves rare body lines, or requires specialized fabrication beyond your current skill. A professional shop with a frame bench, measuring system, and experience in lead seam removal can save a valuable shell from avoidable distortion. Still, informed owners get better results because they can evaluate process, not just promises. Ask how the shop handles overlap seams, what primer system it uses, whether cavities are waxed, and how much filler is acceptable after replacement. The best outcome in bodywork and paint is not simply a shiny surface. It is a classic car with correctly fitted panels, protected seams, stable structure, and straight metal that will still look right years after the restoration is finished.
Replacing classic car panels successfully comes down to discipline at every stage: inspect thoroughly, choose the right panel, brace and measure the shell, remove old metal carefully, test-fit repeatedly, weld with heat control, and protect the repair from future corrosion. Those steps are the foundation of good bodywork and paint, whether you are restoring a weekend driver or a concours candidate. Shortcuts usually reappear as cracked filler, rust bleed, poor gaps, or waviness under glossy paint. Careful work preserves both appearance and value.
As the hub for bodywork and paint within restoration and maintenance, this topic connects directly to rust repair, panel alignment, welding methods, fillers, primers, seam sealers, blocking, and final paint finishing. If you approach panel replacement as a complete system instead of an isolated patch, every later stage becomes easier and the finished car looks more original. Start with one panel, follow proven methods, and build your skills methodically. That investment pays off every time the reflections down the side of the car stay straight.
Frequently Asked Questions
What should you inspect before replacing a classic car panel?
Before replacing any panel on a classic car, the first step is a thorough inspection of the surrounding structure, not just the visible outer skin. Rust, previous collision repairs, heavy body filler, stretched metal, and poor weld work often extend well beyond the damaged area. Check panel gaps at doors, hood, trunk, and adjacent fenders to see whether the body is sitting square. Examine factory seams, spot-weld lines, braces, inner structures, and mounting points for hidden corrosion or distortion. It is also important to strip suspect areas to bare metal whenever possible, because old paint and filler can hide pinholes, brazed repairs, and overlapping patches that affect how the new panel will fit.
You should also determine whether the panel is cosmetic, structural, or both. On many classic cars, what appears to be a simple quarter panel or rocker replacement can affect body alignment, door fit, chassis rigidity, and even suspension geometry if rust has spread into inner reinforcements. Measure carefully before cutting anything out, and record factory dimensions, body lines, and gap relationships. In professional restoration work, replacing a panel starts with diagnosis. The better your assessment, the less likely you are to remove too much metal, miss underlying damage, or create fitment problems that are much harder to correct later.
Is it better to repair an original panel or replace it with a reproduction panel?
That depends on the condition of the original metal, the availability and quality of replacement parts, and the goals of the restoration. In many cases, repairing an original factory panel is preferable because original stampings usually fit better, have sharper body lines, and preserve the authenticity of the vehicle. Small rust sections, dents, and localized damage can often be repaired with patch panels or hand-fabricated metal rather than replacing the entire panel. This approach can reduce alignment issues and keep more of the car’s original structure intact, which matters for both value and fit.
However, if the panel has severe rust, multiple layers of old repairs, major collision damage, or widespread metal thinning, replacement is often the better long-term solution. A reproduction panel can save many hours of fabrication, but it should never be assumed to fit perfectly out of the box. Many aftermarket panels require trimming, reworking of flanges, adjustment of body lines, and test fitting with neighboring panels before final installation. The smartest approach is to compare cost, labor, fit, originality, and durability. A solid repair on original metal is usually better than a poor-fitting replacement, but a clean, properly installed new panel is better than trying to save metal that is structurally compromised.
How do you properly remove and fit a replacement panel on a classic car?
Proper panel replacement begins with bracing, measuring, and test fitting before final removal or welding. If the panel contributes to body strength or affects openings such as doors and trunk lids, support the shell correctly and install temporary bracing if needed. Mark reference points, photograph factory seams, and identify original spot welds so you can separate the old panel without damaging the underlying structure. Spot-weld cutters, seam splitters, and careful drilling are usually better than aggressive cutting because they preserve the mating flanges that the new panel must attach to. The goal is controlled disassembly, not simply removing metal as quickly as possible.
Once the damaged panel is off, clean and repair the hidden inner structure before installing anything new. That includes treating rust, straightening flanges, repairing braces, and applying weld-through primer where appropriate. Then test fit the new panel multiple times with adjacent panels installed. Check door gaps, body line continuity, wheel opening shape, seam placement, and overall contour from several angles. Do not rely on the panel’s stamped edges alone; use the car itself as the guide. Clamp the panel in place, make small adjustments, and only begin welding when you are satisfied with fit and alignment. A professional-looking result depends far more on patient fitting than on the final welds alone.
What welding and finishing methods help prevent warping and future rust?
Heat control is one of the most important parts of replacing classic car panels. Thin automotive sheet metal warps easily, so welding should be done slowly and strategically. Instead of running long beads, use a series of tack welds spaced out across the seam, then gradually connect them while allowing the panel to cool between passes. Move around the panel rather than concentrating heat in one area. MIG welding is common for panel work, while TIG may be used when precise control is needed, but in either case the principle is the same: low distortion comes from patience, not speed. Hammer and dolly work between welds can also help relieve shrinkage and keep the seam flush.
Corrosion protection is just as important as welding technique. Bare metal hidden behind the new panel should be cleaned, treated, and protected before final closure. Use weld-through primer on mating flanges where appropriate, then after welding, grind and metal-finish the seam carefully without thinning the surrounding steel. Seam sealer should be applied to factory-style joints to keep out moisture, and the backside of the repair should be coated with epoxy primer, cavity wax, or another suitable rust inhibitor. On the exterior, epoxy primer over properly prepared bare metal gives a strong foundation for filler, primer surfacer, and paint. A panel replacement that looks good on day one but is not protected internally will often fail early, so rust prevention must be built into every stage of the process.
How can you tell whether a finished panel replacement was done correctly?
A correctly replaced panel should look factory in both appearance and structure. Start by checking the panel gaps: they should be consistent, parallel, and appropriate to the vehicle. Body lines should flow smoothly into adjacent panels without abrupt changes in height or shape. Doors, hood, and trunk should open and close properly without rubbing or needing to be forced. Look closely at weld seams, flanges, and attachment points from both the exterior and interior sides if possible. Clean spot-weld replication, solid seam finishing, and properly restored edges are all signs that the installer understood more than just surface cosmetics.
You should also look for evidence of proper corrosion control and metal finishing. The backside of the repair should not be left raw, and seam sealer should appear neat and intentional, not like an afterthought. Excessive filler thickness, wavy reflections, mismatched contours, and uneven primer blocking can all indicate poor preparation under the paint. On a high-quality restoration, the replaced panel should not draw attention to itself at all. It should align with the rest of the body, preserve the car’s original shape, and be durable enough to support years of use and exposure. In other words, a good panel replacement is not just invisible in the paint; it is sound in the structure underneath.




