
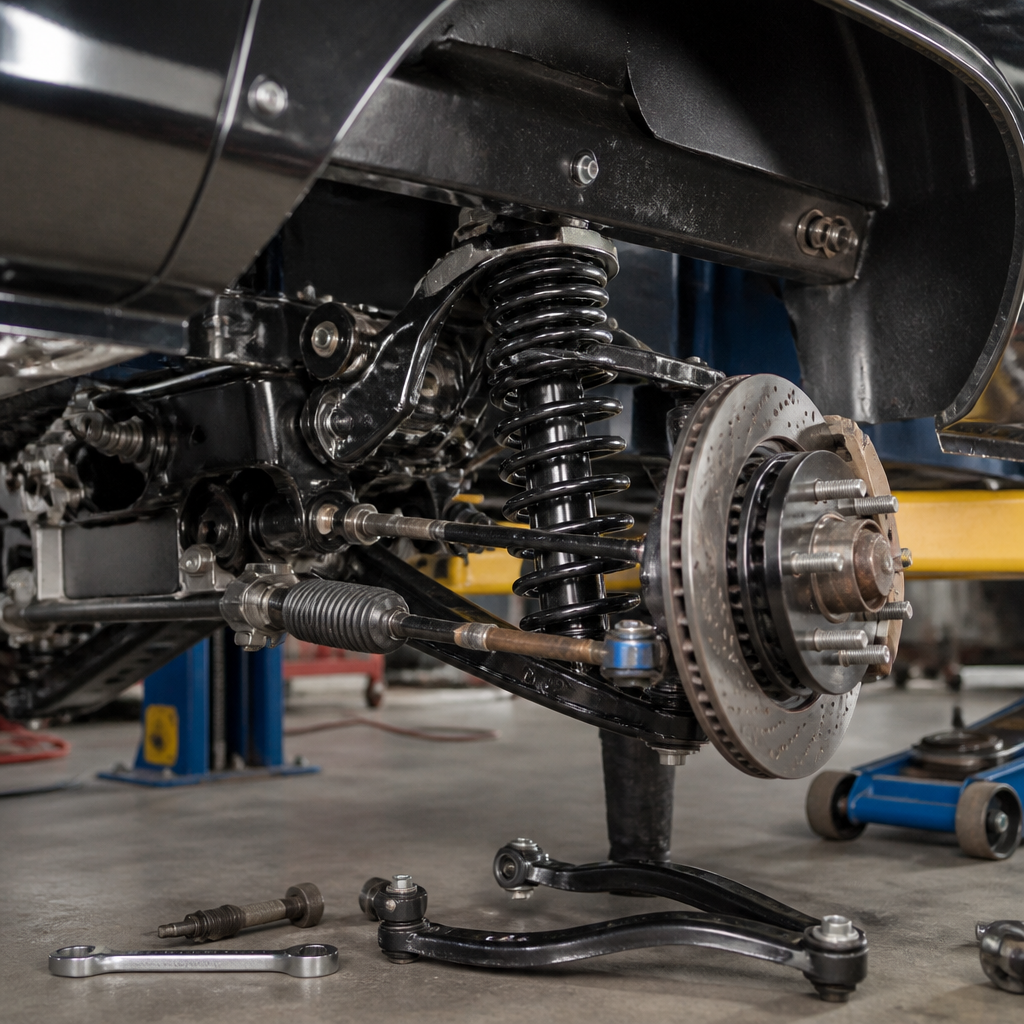
Rebuilding a classic car suspension system is one of the most important jobs in any restoration because suspension condition affects safety, ride quality, steering response, tire wear, and how faithfully the car drives compared with its original design. In restoration shops, suspension work often reveals the true condition of a vehicle more clearly than paint or trim ever can. A polished body can hide worn control arm bushings, sagging leaf springs, leaking shocks, and ball joints with dangerous play. For anyone working through DIY restoration guides, suspension rebuilding deserves hub-level attention because it connects to chassis inspection, brake service, steering repair, wheel alignment, and road testing.
A classic car suspension system is the collection of springs, dampers, control arms, bushings, steering links, mounts, and related hardware that supports the vehicle, keeps tires in contact with the road, and manages weight transfer during braking, cornering, and acceleration. Most classics use one of several common layouts: double wishbone front suspension, coil spring and solid axle rear suspension, leaf spring rear suspension, torsion bar front suspension, or strut-based designs on later models. Each layout has unique service procedures, but the rebuild principles stay consistent: inspect everything, measure before disassembly, replace wear components as matched sets, torque fasteners at correct ride height, and finish with a proper alignment.
This matters because old suspension parts rarely fail all at once. They degrade gradually, which lets owners adapt to poor handling without realizing how far the chassis has drifted from safe operation. I have torn down suspensions that looked acceptable until the first pry bar check exposed split bushings and tie rod ends loose enough to affect braking stability. A methodical rebuild restores confidence and creates a foundation for every other restoration task. If your goal is a dependable weekend cruiser, a factory-correct concours project, or a mild restomod, understanding how to rebuild a classic car suspension system will save money, prevent repeat labor, and help every related DIY restoration guide make more sense.
Start with identification, inspection, and a realistic build plan
Before ordering parts, identify the exact suspension configuration on the car. Factory service manuals, assembly manuals, and parts books are essential because classic vehicles frequently changed spring rates, sway bar diameters, bushing materials, and steering geometry within a single generation. Record the VIN, body style, engine, transmission, axle ratio, and any factory handling package. Then inspect the complete chassis on level ground. Measure ride height at all four corners, check tire wear patterns, note steering wheel center, and photograph brake hose routing, shim locations, and hardware orientation. On cars with alignment shims, especially vintage GM and Ford double wishbone fronts, that documentation prevents guesswork later.
Inspection should be systematic. Use jack stands under the frame, let the suspension hang, and check for vertical and horizontal movement at each wheel. A dial indicator is ideal for measuring ball joint or wheel bearing play against service limits in the manual. Examine bushings for cracking, oil saturation, and metal-to-metal contact. Leaf spring cars deserve close attention at front eye bushings, shackles, spring clamps, and axle pad corrosion. Coil spring cars often hide broken spring ends inside pockets. If the car sat for years, expect seized fasteners and flattened rubber. Also inspect adjacent systems. Steering boxes, idler arms, center links, caliper brackets, and body mounts all influence how a suspension rebuild turns out.
A realistic plan separates restoration from modification. If the goal is originality, use stock-style rubber bushings, factory-rate springs, and reproduction hardware from model-specific suppliers such as Eaton Detroit Spring, Moog legacy lines, TRW-spec components, or marque specialists. If the car will see modern radial tires and highway miles, modest upgrades like gas shocks, thicker sway bars, or improved caster settings can make a major difference without changing the vehicle’s character. Do not mix random aftermarket pieces. A classic suspension works as a system, and mismatched spring rates with overly stiff shocks can create a car that feels worse than it did before teardown.
Disassembly, cleaning, and deciding what to replace
Safe disassembly begins with the service manual procedure for spring removal. Coil springs store enormous energy, and the wrong compressor can cause serious injury. On many American classics, an internal spring compressor used through the shock opening is safer than external hooks. Support control arms with a jack, separate ball joints with the proper puller, and release tension gradually. Leaf spring removal seems simpler, but rusted shackle bolts and captured nuts inside frame rails often consume more time than front suspension work. Penetrating oil, induction heat, and patience matter more than brute force if you want to preserve original brackets.
Once parts are off the car, clean everything thoroughly before deciding what stays. Media blasting control arms, spindles, spring plates, and crossmembers exposes cracks, previous accident damage, and worn mounting holes. I prefer to chase every threaded hole and compare hardware lengths and grades against the parts book because prior repairs often introduce incorrect bolts. Replace any fastener that shows necking, severe pitting, damaged threads, or evidence of stretching. Suspension hardware is not a place to economize. Grade markings, shoulder length, and washer style affect clamping load and articulation.
The replacement decision usually follows a simple rule: wear items get replaced, structural items get measured and reused only if they meet specification. Ball joints, tie rod ends, idler arms, strut rod bushings, sway bar links, bump stops, spring insulators, shock absorbers, and most rubber bushings should generally be new in a serious rebuild. Coil springs and leaf springs require judgment. Springs can look intact yet have lost free height and rate after decades of carrying weight. If ride height was low, side-to-side balance was uneven, or the car bottomed out easily, replace them. Re-arching old leaf springs can help temporarily, but new correctly rated springs are usually the better long-term solution.
| Component | Replace When | Preferred Check | Typical Result if Ignored |
|---|---|---|---|
| Ball joints | Any play beyond specification, torn boots, dry movement | Dial indicator and pry bar test | Wandering, uneven tire wear, safety risk |
| Control arm bushings | Cracked rubber, sleeve separation, oil damage | Visual inspection and loaded pry test | Poor alignment stability, braking pull |
| Coil or leaf springs | Sagging ride height, visible cracks, asymmetry | Ride height measurement and free-height comparison | Bottoming, nose dive, altered handling |
| Shock absorbers | Leaks, weak damping, dented bodies | Bench compression and road symptom review | Bounce, reduced tire contact, longer stops |
| Tie rods and idler arm | Looseness, split boots, binding | Steering linkage movement inspection | Loose steering, shimmy, poor alignment hold |
Rebuilding front suspension assemblies the right way
Front suspension rebuilds demand precision because small errors multiply into steering and tire problems. Begin with the control arms. Press out old bushings using the correct adapters so the arm is not distorted. Inspect the bushing shells and pivot shafts for scoring or oval wear. On many classic designs, especially Mopar torsion bar and GM A-body platforms, aftermarket bushings vary in fit and hardness, so buy from suppliers with consistent machining. Rubber bushings provide the best noise isolation and correct deflection for stock cars. Polyurethane reduces compliance but can squeak, bind if not lubricated with the proper waterproof grease, and transmit more harshness through the chassis.
Ball joints and kingpins require layout-specific methods. If your car uses kingpins, measure spindle bushings and ream them to fit after pressing in new parts. That job is exacting; too tight and steering effort rises, too loose and the rebuild is wasted. Ball joint suspensions are easier but still require attention to riveted factory joints, press-in orientation, and torque values. Always verify whether the spring load acts through the upper or lower ball joint before separating components. Installing new dust boots and cotter pins is mandatory, and castellated nuts should never be backed off excessively to chase cotter pin alignment.
Springs and shocks determine how the rebuild feels on the road. Match spring rates to actual vehicle weight and intended use. Big-block, air-conditioned, and convertible cars often used different rates than small-block coupes. Reproduction suppliers can build springs from factory data if you provide trim and option details. For shocks, twin-tube hydraulic units give a period-correct feel, while modern low-pressure gas shocks usually improve control without making the car harsh. Avoid over-shocking a light front end. I have driven classics with aggressive shocks that felt skittish on patched roads because rebound damping overpowered the spring.
Steering linkage should be renewed as part of the same job, not treated as separate maintenance. Replace tie rod ends in matched pairs, center links if worn, idler arms with any vertical movement, and steering couplers showing cracked fabric or deteriorated rubber. Adjust wheel bearings to factory preload and inspect spindle surfaces where bearings ride. On recirculating-ball steering boxes, set lash only after confirming linkage wear is eliminated. Many owners overtighten a worn steering box to hide slop, then wonder why it binds off center. Correct sequence matters: suspension first, steering second, alignment last.
Rear suspension, hardware finishing, and final setup
Rear suspension work varies widely by platform, but the core goal is identical: restore axle location, spring control, and load capacity. On leaf spring cars, inspect the leaves for cracks around the center bolt hole and eyes, replace spring eye and shackle bushings, and check hangers for elongation. New U-bolts should always be used because old ones stretch and lose clamping force. Verify pinion angle before tightening everything. On coil spring solid axle cars, inspect trailing arm bushings, upper arm mounts, spring seats, and differential brackets for fatigue. Worn rear bushings can mimic transmission vibration or driveshaft imbalance because they allow the axle to rotate under load.
Finishing details separate a lasting rebuild from a cosmetic one. After blasting, coat bare suspension parts with epoxy primer and a durable chassis paint, or use the correct phosphate, bare steel, or semi-gloss finishes if authenticity matters. Grease fittings should be open and functional, not filled with paint. Use anti-seize sparingly on non-tapered hardware exposed to corrosion, but never on fasteners where the torque specification assumes dry threads unless you recalculate clamp load. Rubber-bushed pivot bolts must be torqued at ride height so the bushing rests in a neutral position. Tightening them at full droop preloads the rubber and shortens service life dramatically.
The final setup is where a rebuilt suspension becomes a restored driving experience. Set the vehicle on its wheels, bounce it to settle the springs, roll it forward and back, and recheck ride height before alignment. Then perform a full four-wheel alignment if the chassis design allows it, using specifications suited to modern radial tires when appropriate. Many classics drive better with more positive caster than original bias-ply settings, provided steering effort remains acceptable. After alignment, road test on varied surfaces, listen for clunks, verify straight-line braking, and retorque critical hardware after the first 100 to 300 miles. For anyone building skills through DIY restoration guides, suspension rebuilding teaches the discipline that every successful restoration requires: inspect carefully, follow specifications, and never assume a shiny part is a good part.
Rebuilding a classic car suspension system is not just another maintenance task; it is the mechanical reset that makes the rest of a restoration worthwhile. When the springs hold the car at the correct height, the bushings control movement without binding, the shocks damp motion properly, and the steering linkage stays tight, the vehicle becomes safer, quieter, and far more enjoyable to drive. Just as important, a proper suspension rebuild protects tires, reduces stress on steering and brake components, and gives you an accurate baseline for future tuning or factory-correct preservation.
The essential lessons are consistent across nearly every vintage platform. Identify the exact suspension design before buying parts. Measure ride height and document everything during teardown. Replace wear items as complete sets instead of chasing one failed piece at a time. Use quality components from reputable suppliers, follow the factory manual for spring handling and torque procedures, and tighten rubber-bushed pivots at normal ride height. Finish with a precise alignment and a disciplined road test. Those steps prevent the most common DIY mistakes, including premature bushing failure, poor steering return, uneven tire wear, and the frustrating need to disassemble fresh work.
As the hub for DIY restoration guides under Restoration & Maintenance, this topic also points naturally to related jobs: steering box adjustment, brake system renewal, wheel bearing service, chassis rust repair, and alignment setup for radial tires. If you are planning a project car, start by evaluating the suspension before spending heavily on cosmetic work. Build a parts list, get the factory manual, and rebuild the chassis methodically. A classic car that drives right will always feel more finished than one that only looks restored.
Frequently Asked Questions
What are the most important parts to inspect before rebuilding a classic car suspension system?
Start with a complete inspection of every wear item and every structural mounting point, because suspension problems rarely exist in isolation. On a classic car, the obvious trouble spots usually include control arm bushings, ball joints, tie rod ends, idler arms, pitman arms, shock absorbers, coil springs or leaf springs, sway bar links, spring shackles, and wheel bearings. However, the inspection should go further than replacing visibly worn parts. You also need to examine the frame, crossmember, suspension mounting brackets, and fastener holes for cracks, rust damage, elongation, and signs of previous accident repair. On many older vehicles, decades of use, moisture, and poor storage conditions can weaken metal around mounting points long before the problem becomes visible from a casual glance.
It is also important to check ride height, tire wear patterns, and steering behavior before disassembly if the car is still drivable. Uneven tire wear can point to alignment issues, bent components, or collapsed bushings. A car that wanders, pulls, clunks over bumps, or sits lower on one corner is already giving useful diagnostic information. In restoration work, this baseline matters because it helps you decide whether you are dealing with normal age-related wear or deeper geometry problems caused by damage or incorrect previous repairs. Taking measurements, photos, and notes before removing parts will make reassembly more accurate and help preserve the vehicle’s original suspension layout where appropriate.
Should I rebuild the suspension to original factory specifications or upgrade it with modern components?
That depends on the car’s purpose, your budget, and how much originality matters to you. If the goal is a factory-correct restoration, then rebuilding to original specifications is usually the right path. That means using stock-style springs, bushings, shocks, steering components, and hardware that match the vehicle’s original ride height and handling characteristics. For collector cars, concours restorations, and historically significant models, staying close to original design can protect value and preserve the way the car was intended to drive. It also avoids the common mistake of mixing aftermarket parts that alter suspension geometry in ways the chassis was never designed to handle.
If the car will be driven regularly, especially in modern traffic, carefully chosen upgrades can make sense. Improved shock absorbers, modern radial-compatible alignment settings, better sway bar bushings, upgraded steering components, or disc brake conversions can enhance stability, comfort, and safety without ruining the character of the vehicle. The key is to avoid random modifications and instead choose a balanced system. For example, installing stiffer springs without matching shocks can produce a harsh, unsettled ride. Likewise, lowering a classic car without correcting suspension geometry can increase bump steer and accelerate tire wear. The best approach is often a sympathetic restoration: maintain the original architecture while improving known weak points with quality parts that fit the car’s intended use.
How do I know if springs and shocks need to be replaced during a classic car suspension rebuild?
Springs and shocks should be evaluated as separate components because they do different jobs. Springs support the vehicle’s weight and establish ride height, while shocks control spring movement and prevent excessive bouncing. On a classic car, springs often weaken slowly over time, which means owners can get used to the vehicle sitting too low or leaning from side to side. Signs of worn springs include sagging stance, uneven ride height, bottoming out over bumps, poor load support, and visible corrosion, broken leaves, cracked coils, or damaged spring seats. Leaf springs can also lose arch, develop worn eye bushings, or show separation between leaves that affects both ride and axle control.
Shock absorbers are easier to identify as worn if they are leaking fluid, dented, seized, or allow the car to continue bouncing after a bump. But even dry shocks can be ineffective if the internal valving has deteriorated. During a rebuild, replacing old shocks is usually wise unless there is proof they are recent, high-quality units. As for springs, replacement should be based on measured ride height, physical condition, and intended use rather than appearance alone. A suspension rebuilt with new bushings and joints but tired springs and weak shocks will still feel old, unstable, and inaccurate. Since access is often easiest during full disassembly, this is the ideal time to restore the system completely instead of leaving key load-bearing and damping components untouched.
Why is alignment so critical after rebuilding a classic car suspension system?
Alignment is the final step that makes all the rebuilt parts work together correctly. Even if every component is brand new, a classic car can still steer poorly, wear out tires quickly, and feel unsafe if camber, caster, toe, and thrust angle are not set properly. During a suspension rebuild, control arms, bushings, tie rods, springs, and steering components are often removed or replaced, which changes the geometry. In addition, many classic cars were originally aligned for bias-ply tires, not modern radials, so the factory settings may not always deliver the best road manners for today’s driving conditions. A knowledgeable alignment technician can often recommend period-appropriate adjustments that improve stability without compromising the car’s character.
Alignment also helps reveal hidden issues that new parts alone cannot solve. If a shop cannot bring the vehicle into specification, that may indicate bent control arms, a shifted crossmember, frame damage, or incorrect replacement parts. This is especially common with older cars that have seen previous repairs, aftermarket lowering attempts, or front-end collisions. Proper alignment should only be performed after the suspension is fully assembled, the car is at correct ride height, and all components have been torqued as required, ideally with rubber bushings loaded at normal ride position. Skipping this step can undo much of the value of the rebuild, because the car may still wander, feel twitchy, or chew through expensive tires despite all the new hardware.
Is rebuilding a classic car suspension system a DIY job, or should it be left to a professional?
A classic car suspension rebuild can be a very satisfying DIY project, but it is not automatically a beginner-level repair. The job often involves heavy springs under tension, rusted fasteners, specialty pullers and presses, precise torque procedures, and the ability to identify worn or damaged structural components. On many vehicles, removing coil springs, pressing bushings, setting preload, and reassembling steering linkage require both correct tools and sound judgment. Mistakes can affect not only ride quality but also braking stability, steering control, and occupant safety. If the project includes frame rust, damaged mounts, or uncertainty about correct parts and geometry, professional help is strongly recommended.
That said, an experienced home restorer with a factory service manual, proper safety equipment, and patience can handle much of the work successfully. The smartest approach is often a hybrid one: perform the disassembly, cleaning, painting, and basic component replacement yourself, then rely on a trusted machine shop or restoration specialist for spring work, bushing pressing, inspection of questionable parts, and final alignment. This keeps costs manageable while ensuring critical operations are done correctly. Suspension systems determine how the entire car feels on the road, and on a classic vehicle they are often more revealing of overall condition than cosmetic appearance. If you are in doubt about any step, treat that as a signal to slow down and get expert input rather than guessing.




