
Rust removal is the turning point in any classic car restoration because corrosion is never just a cosmetic problem; it is a material failure that spreads under paint, weakens panels, and destroys originality if it is handled too late or handled badly. In the workshop, I have seen two identical-looking fenders take completely different paths: one cleaned, stabilized, and saved with careful metal treatment, the other patched over with filler and primer only to blister again within a season. That gap is why understanding the best methods for removing rust from classic cars matters so much for anyone working in restoration and maintenance.
For classic car owners, “rust removal” covers several related tasks: identifying the type and depth of corrosion, choosing a removal method that matches the panel and finish, repairing any lost metal, and protecting the surface so rust does not return. Surface rust usually appears as light orange or brown oxidation with limited pitting. Scale rust is heavier, flaky corrosion that has eaten into the steel. Perforation means the metal is structurally compromised and no longer repairable by cleaning alone. Those distinctions determine whether you should use hand sanding, chemical rust dissolvers, media blasting, cut-and-weld repair, or full panel replacement.
This topic sits at the center of bodywork and paint because every finish system depends on stable metal underneath. Epoxy primer, seam sealer, filler, high-build primer, and topcoat all fail if corrosion remains active below them. Rust also affects value. Buyers and appraisers know the difference between honest preservation and hidden corrosion, and they inspect common trap areas such as rocker panels, wheel arches, lower doors, cowl drains, trunk drop-offs, battery trays, windshield channels, and frame attachment points. A proper rust strategy protects both safety and authenticity.
As a hub within restoration and maintenance, this guide covers the full decision-making process behind rust removal on classic cars: inspection, method selection, tool choice, repair thresholds, post-treatment protection, and mistakes to avoid. It also connects naturally with deeper work in bodywork and paint, including metal fabrication, primer selection, paint preparation, underbody coating, and cavity wax application. If you want durable results instead of a temporary cosmetic fix, the right rust removal method must match the metal, the damage, and the final standard you are trying to achieve.
How to assess rust before choosing a removal method
The best rust removal process starts with diagnosis, not with a wire wheel. I begin every classic car bodywork job by mapping corrosion across the entire shell and then separating visible rust from hidden rust. Outer paint bubbles often indicate backside corrosion where moisture was trapped by seam sealer, insulation, or clogged drains. Magnet checks can reveal thick filler over previous repairs, while a pick hammer and bright inspection light help expose thin metal. On unibody cars, rust near suspension mounts, subframes, torque boxes, floor braces, and rocker reinforcements must be treated as a structural issue first, cosmetic issue second.
You also need to understand the panel material and coating history. Most classic cars use mild steel, but galvanized replacement panels, lead-loaded seams, old lacquer systems, and previous body filler repairs all change the safe removal method. Aggressive blasting can warp large flat panels such as hoods and roofs. Strong acids can creep into seams if not neutralized properly. Mechanical grinding can remove good metal along with rust if used carelessly. Measuring the actual extent of pitting helps determine whether the panel can be cleaned and sealed or whether welding is unavoidable.
Good inspection answers four direct questions: how deep is the rust, can the backside be accessed, is the panel structural, and what finish level is planned? A local driver-quality repair on an inner trunk floor can tolerate a different method than a concours repair on a numbers-matching quarter panel. If the corrosion has already perforated the metal, rust converters alone are not a valid repair. The oxide may be transformed on the surface, but the missing steel has not returned. In bodywork and paint, durability always starts with honest assessment.
Mechanical rust removal methods and where they work best
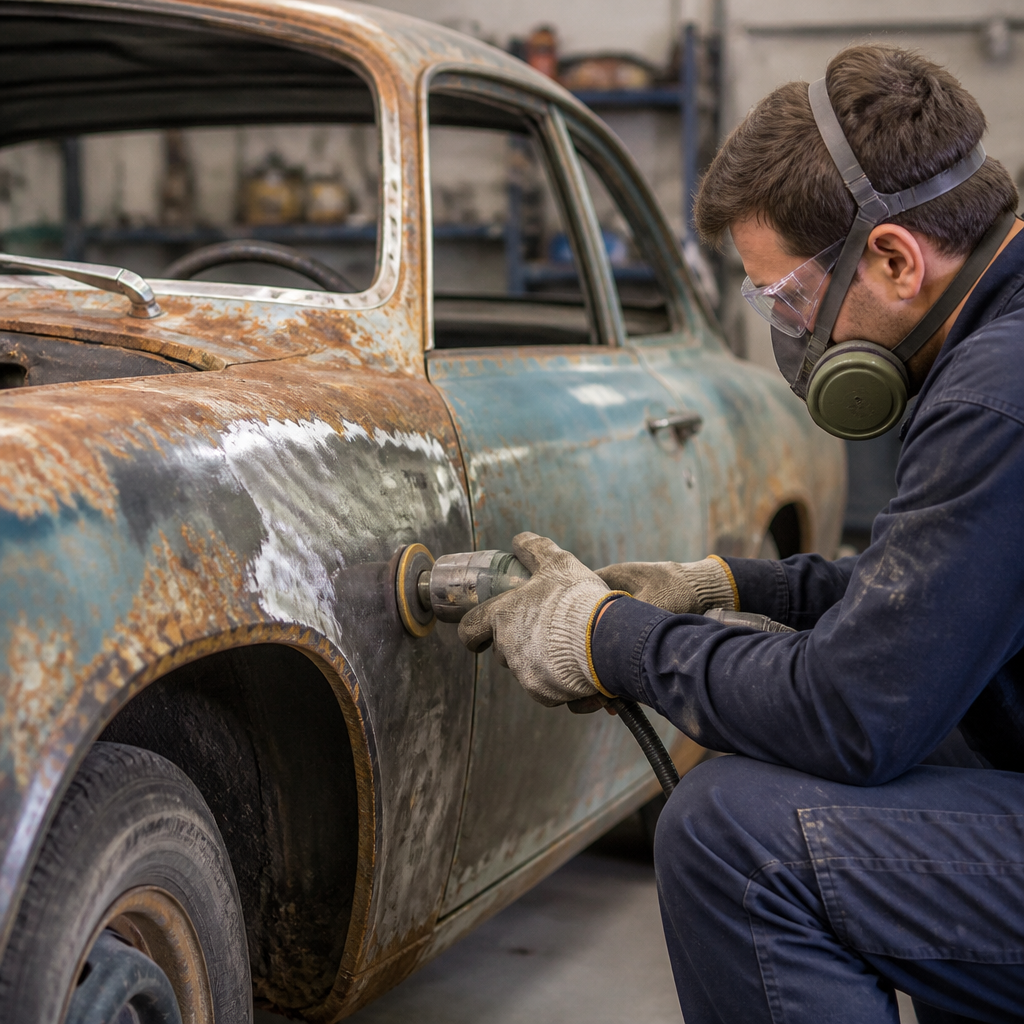
Mechanical removal is often the fastest and most controllable approach for surface rust and moderate scale, especially when you can see the damage clearly and monitor metal thickness. Common tools include abrasive discs, strip discs, wire wheels, flap wheels, needle scalers, scrapers, and dual-action sanders. On flat external panels, I prefer non-woven clean-and-strip discs or 80-grit sanding on a DA because they remove oxidation without gouging the steel as aggressively as hard grinding discs. For tight edges and seams, a twisted wire cup on a variable-speed grinder can be effective, but only with a light hand.
The main advantage of mechanical rust removal is certainty. You can see bright metal appear, inspect pits directly, and stop before excess heat builds. This matters on doors, fenders, decklids, and roofs where panel distortion can create more work than the rust itself. The limitation is that mechanical methods cannot reliably reach the bottom of lap seams, boxed sections, pinch welds, and internal cavities. They also do not restore thickness lost to corrosion. If pitting remains, follow-up treatment with a metal conditioner or epoxy-friendly rust treatment may still be needed before primer.
For underbody parts, suspension arms, brackets, crossmembers, and frames, mechanical cleaning is often paired with blasting or chemical treatment. Heavy scale on a chassis component may need a needle scaler first, then abrasive blasting to clean the pores of the metal. Safety matters here. Rust dust, old paint, lead residue, and filler particles should be controlled with extraction, gloves, eye protection, and a properly rated respirator. Classic cars frequently carry decades of coatings, and some imported or industrially repaired vehicles may contain hazardous materials that should not be dry-ground casually.
Chemical rust removal, rust converters, and metal conditioning
Chemical methods are valuable when rust is too intricate for sanding alone or when preserving delicate shapes is more important than speed. The two main categories are rust removers and rust converters. Rust removers, often based on phosphoric acid or chelating chemistry, dissolve or lift iron oxide so it can be rinsed or scrubbed away. Products such as Evapo-Rust use chelation and are popular for removable parts because they attack rust without aggressively stripping sound steel. Phosphoric acid products are common in body shops because they clean metal and can leave a phosphate layer that improves primer adhesion when used correctly.
Rust converters work differently. They react with oxidation and turn it into a more stable black layer, typically iron tannate or a similar compound, creating a paintable surface. This makes them useful in inaccessible pits or seams where full removal is impractical. However, a converter is not a substitute for metal repair, and product compatibility matters. Some epoxy primers require fully cleaned and properly prepped metal rather than heavy converter residue. Always follow the technical data sheet, especially for recoat windows, neutralization, surface profile, and whether sanding is required before primer.
In practice, I reserve soak tanks and chelation baths for small parts, brackets, fasteners, and removable hardware; phosphoric metal treatment for lightly pitted body steel after mechanical cleaning; and converters for carefully selected areas where complete abrasion is impossible. The reason is simple: chemical methods are excellent assistants, not universal answers. They can save intricate stampings, preserve factory contours, and reach porous corrosion, but they require strict rinsing, drying, and coating discipline. Any moisture left in seams after chemical treatment can start the rust cycle again under fresh paint.
Media blasting for shells, panels, and hard-to-reach rust
Media blasting is one of the most effective ways to remove rust from classic cars, especially in textured areas, complex stampings, and underbody structures. It is also one of the easiest ways to ruin a panel if the wrong media, pressure, or operator is used. Abrasive choices include crushed glass, aluminum oxide, garnet, coal slag, walnut shell, soda, and fine specialty media. Each behaves differently. Crushed glass cuts rust efficiently and leaves a profile suitable for epoxy. Soda is gentle and useful for paint stripping, but it does not profile metal well and residue control is critical before paint.
Large exterior panels demand caution because heat and impact can stretch thin sheet metal. Experienced restorers often avoid blasting expansive hoods, roofs, and quarter panels with aggressive media, choosing chemical stripping or controlled mechanical stripping instead. Where blasting shines is in wheel housings, floors, inner fenders, frames, brackets, seat mounts, firewall details, and suspension components. Dustless systems reduce airborne dust, but they introduce water, which means immediate drying and priming are essential to prevent flash rust, especially in humid climates.
| Method | Best use | Main advantage | Main risk |
|---|---|---|---|
| DA sanding/strip disc | Surface rust on outer panels | Good control, low distortion risk | Can miss deep pits and seams |
| Wire wheel or cup | Edges, brackets, spot areas | Fast and accessible | Can polish over rust or thin metal |
| Phosphoric treatment | Light pitting after cleaning | Cleans pores and conditions steel | Improper residue handling affects primer |
| Chelation soak | Small removable parts | Preserves detail, non-aggressive | Limited to parts that can be immersed |
| Media blasting | Frames, floors, complex structures | Reaches texture and tight geometry | Panel warping if done incorrectly |
| Cut and weld repair | Perforation or severe thinning | Restores structural integrity | Requires fabrication and corrosion protection |
Professional blasting shops should be able to explain media selection, nozzle pressure, stand-off distance, and post-blast cleaning. If they cannot, keep looking. On valuable classic cars, process control matters as much as the blasting itself. After blasting, bare steel should be blown clean, degreased if required, and coated quickly with quality epoxy primer from systems such as PPG, Glasurit, BASF, Axalta, or SPI. Bare steel left overnight in damp air can flash rust enough to compromise adhesion and force the whole step to be repeated.
When rust must be cut out and repaired with new metal
The best method for removing rust from classic cars is sometimes not removal at all, but replacement of the damaged section. Once corrosion has perforated the steel, spread through a seam, or thinned a structural panel significantly, the metal has lost strength and reliability. No converter, filler, or fiberglass-backed patch restores what is gone. Proper repair means cutting back to clean, solid steel, fabricating or fitting a correct patch panel, welding it in with controlled heat, dressing the weld, and then protecting both sides of the repair.
This is especially important in rocker panels, floor pans, trunk floors, door bottoms, wheel arches, lower fenders, windshield channels, and frame-adjacent structures. On many classic cars, the visible rust hole is much smaller than the real corrosion footprint behind it. I routinely cut exploratory windows larger than owners expect because the backside tells the truth. Once open, you can remove trapped debris, repair inner layers, restore drain paths, and coat hidden cavities. Skipping those steps is why many apparently fresh repairs bubble again in two or three years.
Patch quality matters. Butt-welded repairs generally create cleaner, less moisture-trapping results than overlapped patches on outer body panels, though factory-style lap construction may still be correct in hidden areas. Weld-through primers can help in flanges, but they are not magic; cavity wax and seam sealer after welding are still essential. For visible bodywork and paint, metal finishing should minimize filler thickness, not eliminate filler entirely at the expense of warped steel. The goal is sound metal, proper shape, and corrosion protection that lasts.
Protecting cleaned metal so rust does not come back
Rust removal is only half the job. Long-term success depends on how quickly and correctly the cleaned metal is sealed. For bare steel, epoxy primer is the foundation I trust most because it provides strong adhesion, moisture resistance, and compatibility with modern refinishing systems when applied within spec. Self-etch primer has uses, but on restoration work I generally favor epoxy over properly prepared steel, then seam sealer, filler where needed, high-build primer, and topcoat according to the paint system. The exact stack matters less than staying within one manufacturer’s technical recommendations.
Hidden areas deserve equal attention. Inside doors, rockers, quarter cavities, cowl sections, and boxed frame members should receive cavity wax or an internal-frame coating after repairs are complete and paint has cured appropriately. Products from 3M, Eastwood, and Transtar are widely used because they creep into seams and displace moisture. Undersides need chip-resistant coatings, but heavy underseal should never be used to hide poor metalwork. If you cover active rust without full cleaning and sealing, you trap moisture and delay visible failure, not prevent it.
Maintenance keeps the repair alive. Classic cars stored in garages still accumulate condensation, especially under covers or over concrete floors without vapor barriers. Clean drain holes, wash road salt promptly, inspect weatherstrips, and dry the car after rain. A dehumidifier in a sealed garage can reduce corrosion risk significantly in damp climates. In my experience, the owners who get ten or fifteen stable years from a rust repair are not always the ones who spent the most; they are the ones who followed through with sealing, cavity protection, and regular inspection.
Common rust removal mistakes in classic car restoration
The most common mistake is confusing appearance with condition. Shiny metal on the surface does not guarantee that rust is gone from seams, spot-weld flanges, and panel backsides. The second mistake is using the same method everywhere. A roof skin, a frame rail, and a battery tray do not need identical treatment. Another frequent failure is applying filler or primer over contamination, including blasting dust, acid residue, silicone, or flash rust. Paint systems are chemically unforgiving, and shortcuts at the metal stage almost always telegraph through later.
Another costly error is over-restoration without preserving originality. Not every panel with light pitting needs replacement, and not every factory seam should be smoothed for show-car aesthetics. Good bodywork and paint on a classic car balances authenticity, structural integrity, and future serviceability. Finally, many hobbyists underestimate documentation. Photograph rust before repair, record products used, and save invoices for blasting, panels, and coatings. That record supports resale value, guides future maintenance, and proves that rust removal was performed as a genuine restoration process rather than a cosmetic cover-up.
Removing rust from a classic car successfully means matching the method to the damage, then protecting the repair with the same care used to clean it. Light surface corrosion often responds well to controlled mechanical removal and proper priming. Intricate parts and pitted sections may benefit from chemical treatment. Complex structures and chassis pieces are strong candidates for blasting. Perforated or structurally weakened steel must be cut out and replaced. Across every scenario, the rule is consistent: clean metal honestly, repair missing steel correctly, and seal the result immediately.
As the hub for bodywork and paint within restoration and maintenance, this guide provides the framework for every related task, from panel inspection and media choice to welding strategy, primer selection, seam sealing, and cavity protection. The main benefit of using the best rust removal methods is not just a cleaner panel today; it is a restoration that stays sound, looks right, and protects the value of the car over time. Use this page as your starting point, inspect your car carefully, and choose the method that delivers a durable repair rather than a temporary finish.
Frequently Asked Questions
What is the best way to remove rust from a classic car without damaging original metal?
The best method depends on how deep the corrosion has gone, but the guiding principle is always the same: remove the rust completely while preserving as much sound original steel as possible. On a classic car, that usually means starting with careful inspection rather than reaching immediately for the most aggressive tool in the shop. Surface rust can often be handled with mechanical abrasion such as sanding, wire wheels, abrasive pads, or media blasting with an appropriate material and pressure. Heavier scale may require more aggressive removal, but even then, you want to avoid thinning or warping the panel. Thin body panels, especially on vintage cars, can be damaged quickly by coarse grinding discs or improper blasting.
For light to moderate rust, a combination approach is often the safest and most effective. First remove loose paint, scale, and oxidation mechanically so you can see the true condition of the metal. Then use a rust remover or rust converter only where it makes sense. Chemical treatments can help neutralize corrosion in pits and seams that sanding alone cannot fully reach, but they are not a substitute for proper cleaning. Once the rust is gone or stabilized, the metal should be cleaned, dried, and protected immediately with epoxy primer or another high-quality corrosion-resistant coating. Bare steel left exposed, even overnight in a humid shop, can begin flashing back into rust.
The biggest mistake is treating all rust the same. A fender with orange surface oxidation is a very different job from a lower quarter panel that has rust bleeding from the inside out. The best restorations come from accurately judging whether the panel can be saved, then choosing the least destructive method that still removes the corrosion fully. That is how you protect both the integrity and originality of the car.
When should rust be sanded or blasted off, and when does the panel need to be cut out and replaced?
This is one of the most important judgment calls in classic car restoration. If the rust is only on the surface and the metal underneath is still solid, sanding, stripping, or blasting can be enough. That includes discoloration, shallow pitting, and scale that has not eaten through the panel. After cleaning, the metal should feel firm, maintain its original thickness, and show no perforation, soft spots, or severe delamination. If that is the case, the panel can often be saved with proper metal prep, rust treatment where necessary, and a high-quality primer system.
If the rust has perforated the metal, caused swelling along seams, created pinholes, or left the panel thin and brittle, repair by cleaning alone is no longer enough. At that point, the corrosion has become structural material loss, not just surface contamination. Filling over that kind of damage with body filler and primer may make the panel look acceptable temporarily, but moisture and oxidation will continue underneath. That is why patched-over rust so often returns within months or a few seasons. The correct fix is to cut out the affected metal back to clean, solid steel and weld in properly shaped replacement material.
Areas such as rocker panels, floor pans, trunk floors, wheel arches, lower doors, and windshield channels deserve extra caution because rust there often extends beyond what is visible from the outside. If you see bubbling under paint, staining around trim, or corrosion at drain points, assume the problem may be larger underneath until proven otherwise. In restoration, saving metal is always good, but saving bad metal is not. The rule is simple: if the panel is still structurally sound after rust removal, preserve it; if corrosion has compromised strength or continuity, replace the affected section properly.
Are chemical rust removers and rust converters a good choice for classic car restoration?
They can be very useful, but only when used correctly and for the right stage of repair. Chemical rust removers are designed to dissolve oxidation, often working well on small parts, brackets, hardware, and complex shapes where mechanical tools cannot reach every corner. Rust converters work differently. Instead of fully removing the corrosion, they chemically transform remaining rust into a more stable surface that can be coated. Both products have their place, especially in pits, seams, boxed sections, and awkward recesses, but neither should be treated as a magic fix for severe body corrosion.
On classic cars, the main advantage of chemical treatment is precision. It can help preserve delicate stampings, spot weld flanges, and hard-to-reach details that would be easy to damage with heavy grinding. That said, the surface still has to be prepared properly. Loose rust, grease, undercoating residue, and paint need to be removed first so the product can actually contact the oxidized metal. After treatment, the manufacturer’s instructions matter. Some products require rinsing, some need neutralizing, and some are designed to be top-coated directly. Skipping those steps can cause adhesion problems later, which means even a well-done paint job can fail.
Where people go wrong is relying on converters over rust that should have been removed or cut out. If a panel is flaking, perforated, or rusting from the back side through a seam, a converter may slow the problem but will not restore lost metal. In professional-quality restoration, chemicals are support tools, not shortcuts. They work best as part of a system: inspect, clean mechanically, treat where appropriate, seal the metal quickly, and then protect both sides of the panel whenever possible.
What is the safest blasting method for removing rust from classic car panels?
Blasting can be extremely effective, but it has to be matched to the part. The safest blasting method for delicate classic car sheet metal is one that removes corrosion efficiently without generating too much heat, impact stress, or panel distortion. Exterior body panels are especially vulnerable to warping if blasted aggressively with the wrong media, nozzle distance, or air pressure. That is why experienced restorers are cautious with hoods, roofs, doors, deck lids, and large quarter panels. A blasting method that works fine on a frame or suspension arm can ruin a thin body skin.
For sheet metal, lower-pressure media blasting with suitable material is generally preferred over aggressive sandblasting. Depending on the job, restorers may use crushed glass, aluminum oxide, garnet, soda, or other specialized media, each with different cutting characteristics. The “best” media depends on whether the goal is stripping paint, removing light rust, or cleaning heavy corrosion. The operator’s technique matters just as much as the media itself. Keeping the nozzle moving, avoiding prolonged blasting in one area, and working at the correct angle can make the difference between a clean panel and a warped one.
Heavier components such as frames, control arms, brackets, wheels, and axle housings can usually tolerate more aggressive blasting and are often ideal candidates for it. But on body panels, blasting should be seen as a precision process, not brute force. If there is any doubt, test a small hidden area first or leave the job to a shop experienced specifically with classic car sheet metal. Done properly, blasting reveals the true extent of corrosion and gives coatings an excellent surface to grip. Done poorly, it can create more repair work than the rust ever did.
How do you keep rust from coming back after it has been removed from a classic car?
Preventing rust from returning is just as important as removing it in the first place. Once the metal has been cleaned, stabilized, or repaired, it needs to be sealed quickly and completely. The best first layer on properly prepared bare steel is usually an epoxy primer because it provides strong adhesion and excellent moisture resistance. From there, the repair should be built with compatible primers, seam sealers, topcoats, and underbody protection as needed. If the rusted area was repaired by welding in new metal, the back side of the repair must also be protected, not just the visible face. Too many restorations fail because the outside looks perfect while the inside of the seam is left vulnerable.
Moisture control is the long-term key. Water gets into classic cars through window seals, cowl vents, weatherstripping, body seams, drain holes, and condensation inside enclosed cavities. That means rust prevention often involves more than paint. Clean and open drain paths, renew damaged seals, and apply cavity wax or internal frame coating to enclosed sections such as rockers, doors, quarter cavities, and frame rails. If the car is stored, keep it in a dry, ventilated space rather than under a cover that traps moisture. Even the best metalwork can deteriorate again if the environment stays damp.
Routine inspection also matters more than many owners realize. Check lower panels, wheel arches, trunk corners, and windshield channels regularly for chips, bubbling paint, or staining. Addressing a small paint break or seam issue early can prevent a major metal repair later. In practical terms, the best rust removal method is not finished when the rust is gone; it is finished when the metal is cleaned, sealed, protected on both sides, and maintained so corrosion does not get a second chance.




