
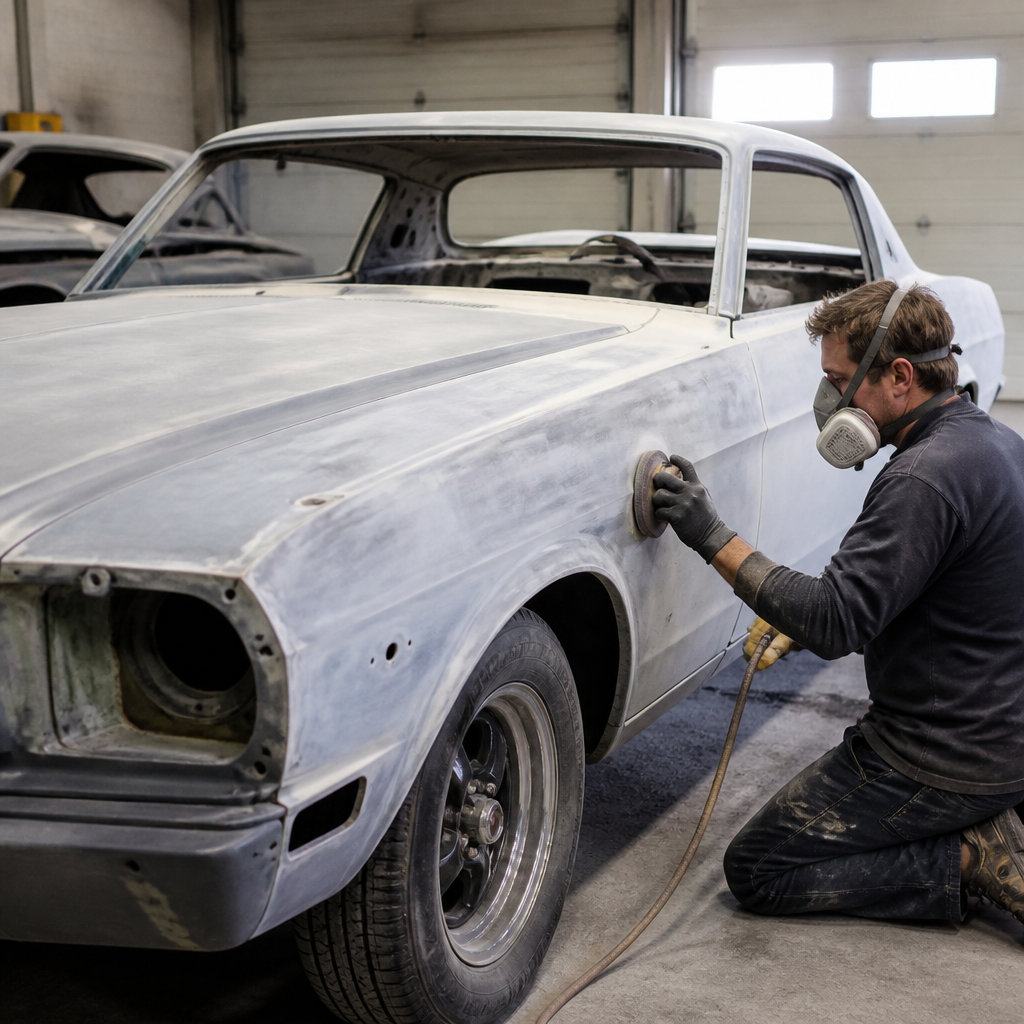
Preparing a classic car for painting is the stage that determines whether the final finish looks deep, straight, and durable or wavy, chipped, and disappointing. In restoration work, paint preparation is not a cosmetic side task; it is the core bodywork process that reveals hidden rust, corrects old repairs, aligns panels, and creates the surface profile that primer, sealer, color, and clear coat need to bond properly. When restorers talk about “Bodywork & Paint,” they mean the complete sequence from inspection and metal repair to filler shaping, block sanding, priming, masking, and booth-ready cleaning. I have learned across full restorations and partial resprays that expensive paint cannot rescue poor preparation. A modest paint system over disciplined prep almost always outperforms premium materials sprayed over unstable filler, contaminated metal, or badly feathered edges.
This matters even more with classic cars because they rarely arrive with uniform substrates. One fender may still wear factory lacquer, the door may hide polyester filler from a 1980s repair, and the quarter panel may contain brazed patches, lead seams, or modern epoxy from a recent rust fix. Older bodies also flex differently, and many panels are thicker, flatter, and less forgiving than those on modern cars, so ripples show clearly after gloss is applied. Good preparation protects originality where possible, identifies what must be replaced, and creates a documented roadmap for the rest of the restoration. As the hub for bodywork and paint within restoration and maintenance, this guide explains the full preparation workflow, the tools and materials that matter, the common mistakes that cost time later, and how to decide when a job is ready for color.
Start With Inspection, Documentation, and a Realistic Paint Plan
The first step in preparing a classic car for painting is a complete inspection under bright, directional light. Wash the car with wax and grease remover-safe soap, dry it thoroughly, and then inspect every panel for rust bubbles, cracking filler, pinholes, panel mismatch, hail dents, stone chips, door edge swelling, and previous sanding scratches. Use a paint thickness gauge if possible; uneven readings often reveal buried repairs. A magnet wrapped in cloth can help identify heavy filler on steel panels. Photograph every area before disassembly. Those photos become your reference when reassembling trim, confirming body lines, and justifying repair decisions if the project scope expands.
A realistic paint plan defines the finish level and prevents wasted work. A driver-quality repaint, a high-end street restoration, and a concours build do not require the same degree of stripping, metal finishing, or panel refinement. Decide early whether you are repainting the exterior only, changing color, refinishing jambs and undersides, or restoring the body shell completely. That choice affects disassembly, media blasting, seam sealing, and how far repairs must extend. On classics with vinyl tops, stainless trim, or bonded glass, the smartest plan often includes removing more parts than owners expect. Masking around old seals saves time briefly but usually leaves hard edges, trapped polish residue, and future lifting points.
Disassembly Exposes Problems You Cannot Repair Around
Proper disassembly is where serious paint preparation begins. Remove bumpers, lights, mirrors, handles, emblems, side moldings, weatherstrips, wheel opening trim, grille parts, and as much glass as the budget allows. Bag and label fasteners by location. On many American classics and European coupes, trim clips rust from behind and stain fresh paint if reused. Removing panels also exposes corrosion in flanges, lower corners, and seams that look fine when assembled. I have seen apparently solid quarter panels reveal scale around wheel lip welds only after trim and undercoating were removed.
Doors, hood, and deck lid should be test-fitted before major bodywork starts. Check hinge wear, latch position, and striker alignment, then establish consistent gaps. Body filler should never be used to fake a panel edge that is fundamentally misaligned. If the car has been hit before, measure diagonals and verify that openings are square. Classics with body-on-frame construction can shift when mounts collapse, so replacing body bushings before final alignment can save weeks of corrective work. Preparation is not just about making surfaces smooth; it is about ensuring the body geometry is stable before you lock it under primer and paint.
Strip, Clean, and Stabilize the Substrate Correctly
Once the car is apart and inspected, choose a stripping method based on the panel condition and substrate. Chemical stripper works well on layered repaint jobs but must be neutralized completely and kept out of seams. DA sanding with 80-grit is controlled and safe for localized removal. Media blasting is useful for rusted brackets, inner structures, and heavily pitted steel, but aggressive media on large exterior panels can warp them. Crushed glass, aluminum oxide, plastic media, soda, and garnet all behave differently; there is no universal blasting setup for every panel. Thin hoods, roofs, and deck lids demand caution, lower pressure, and an operator who understands heat buildup and panel stretch.
After stripping, clean the bare metal immediately. Surface rust can flash within hours, especially in humid shops. Blow out seams, vacuum dust, wipe with solvent-based wax and grease remover, then switch to waterborne cleaner if recommended by the paint manufacturer. Contamination from silicone polish, oily fingerprints, adhesive residue, and blasting dust is a common cause of fisheyes and adhesion failure. For bare steel, epoxy primer is the standard foundation because it seals the metal, provides corrosion resistance, and creates a compatible base for filler or primer-surfacer depending on the product data sheet. Always follow the technical data sheet from systems such as PPG, BASF Glasurit, Axalta Cromax, or Sherwin-Williams; recoat windows and mixing ratios are not suggestions.
Repair Rust and Metal Damage Before Filler Work
Rust repair means removing corrosion completely, not grinding the surface until it looks cleaner. If steel is perforated, deeply pitted at structural edges, or swollen between spot-welded layers, cut it out and weld in sound metal. Patch panels should match gauge and shape, with butt welds preferred on visible exterior skins when executed properly. Lap joints trap moisture and print through over time unless used in hidden areas with proper corrosion protection. After welding, dress the bead carefully, hammer and dolly high spots, and protect the backside with epoxy, weld-through strategy where appropriate, and cavity wax after paint.
Metal finishing reduces the amount of filler needed. Use body hammers, dollies, shrinking techniques, stud welders, and slapping files to restore contour before reaching for polyester filler. Thin, well-bonded filler over stable metal is acceptable and standard in restoration, but thick filler over rust, shiny unscuffed steel, or flexible seams is a guaranteed failure point. Lead seams on older classics deserve special attention. If original lead remains stable and regulations allow handling with proper safety controls, preserve or repair thoughtfully. If it must be removed, replace its function with welded metal finishing and appropriate modern materials, not casual filler over contaminated residue.
Use the Right Materials in the Right Order
Successful bodywork follows a disciplined material sequence. Different products solve different problems, and using them out of order creates sinkage, mapping, and adhesion issues later. A typical workflow looks like this:
| Stage | Purpose | Typical Material | Key Caution |
|---|---|---|---|
| Bare metal protection | Seal steel and resist corrosion | Epoxy primer | Observe induction and recoat windows |
| Surface correction | Restore contour | Polyester body filler | Apply over properly prepared substrate only |
| Pinhole correction | Refine minor imperfections | Glazing putty | Do not use as a substitute for filler shaping |
| Build coat | Fill sanding scratches and minor waves | 2K primer-surfacer | Allow full cure before blocking |
| Final foundation | Create uniform color and holdout | Sealer | Match shade to topcoat system |
Compatibility matters. Polyester filler usually adheres best over properly abraded metal or over epoxy within the manufacturer’s approved window. Spray polyester primers can build fast on rough panels, but they are not a substitute for metal correction and should not be trapped under incompatible layers. Read technical sheets, not forum myths. If one brand requires scuffing cured epoxy before filler and another allows wet-on-wet application, follow the specific system. Mixing products casually across brands can work, but it also shifts risk onto the technician.
Block Sanding Creates Straight Panels and Visible Quality
Block sanding is the difference between a shiny old car and a truly straight classic. Long blocks bridge low spots and cut high spots, revealing the actual shape of the panel instead of following its flaws like a soft pad or hand pressure will. Guide coat is essential at every stage because it exposes ripples, scratches, and sand-throughs instantly. On broad panels such as hoods, roofs, quarter panels, and long doors, sand in controlled patterns that cross the panel rather than tracing body lines only. Start with the grit recommended by the primer manufacturer, often 80 to 180 during filler shaping and 180 to 320 during primer refinement, then move toward final paint prep grits depending on whether the topcoat is single-stage or basecoat-clearcoat.
Edges and character lines need special care. They burn through first and often reveal poor previous repairs. Re-prime break-through areas instead of pretending sealer will hide them. Flexible blocks, round blocks, and custom-made sanding tools help match factory contours around wheel arches and sail panels. If a guide coat keeps returning in the same low area, stop sanding and correct the panel. Endless sanding without adding or removing material strategically is how hobbyists waste time and make panels thinner without making them straighter.
Prime, Recheck, and Control the Surface Before Paint
High-build primer-surfacer gives you the film thickness needed to level final imperfections, but it only works when applied evenly and cured fully. Most restoration shops apply multiple coats, allow proper flash time, then let the primer cure before blocking. Forced drying can help, but trapped solvent causes shrinkage later, especially under dark colors. Recheck the body after primer in different light angles, including low side lighting. Glossy black and deep metallic colors expose flaws most severely, while lighter solid colors are slightly more forgiving. That does not reduce the prep standard; it changes how visible mistakes become.
Before paint, finish-sand the entire surface uniformly, clean every seam, and inspect the car like an outsider would. Run your hand lightly across transitions, door edges, repaired arches, and pillar blends. If your fingernail catches an edge, it will show under paint. Mask carefully using automotive-grade tape and paper, not household substitutes that bleed or leave adhesive. Blow out dust from rocker hems, cowl vents, trunk channels, and drip rails repeatedly. Final wipe procedures should match the paint system, and tack cloth use should be light to avoid residue. The booth, air supply, and spray equipment matter too; water or oil contamination from neglected compressors can ruin a month of preparation in one pass.
Know the Common Mistakes and When the Car Is Ready
The most common preparation mistakes are predictable: painting over hidden rust, relying on filler to correct alignment, skipping epoxy on bare metal, sanding panels with fingers instead of blocks, rushing primer cure, mixing incompatible products, and leaving trim or glass in place to save labor. Another frequent error is failing to test-fit parts after bodywork. A freshly painted hood that chips because the hinges were never adjusted is not a paint problem; it is a preparation failure. The same is true for doors that hit striker plates, stainless trim that no longer fits filled edges, or weatherstrips that roll over fresh jamb paint because channel thickness changed.
A classic car is ready for painting when the structure is sound, rust repairs are complete, panel gaps are set, body lines are consistent, all substrates are compatible and fully cured, and every panel passes visual and tactile inspection under proper lighting. At that point, color becomes the reward for preparation, not a gamble. The main benefit of doing this work thoroughly is durability: straighter panels, better adhesion, fewer comebacks, and a finish that still looks right years later instead of only on delivery day. If you are planning a restoration under the restoration and maintenance umbrella, use this article as your bodywork and paint hub, then build your project outward from metal repair, priming, sanding, materials selection, and final finishing with the same discipline.
Take the next step by assessing your car honestly, documenting what you find, and creating a preparation checklist before buying paint. That single decision will improve every result that follows.
Frequently Asked Questions
What is the most important first step when preparing a classic car for paint?
The most important first step is a complete evaluation of the car’s body and previous repair history before any sanding, priming, or spraying begins. On a classic car, the visible paint surface rarely tells the whole story. Old restorations, hidden rust, filler over corrosion, mismatched panels, and prior collision damage are often buried under layers of primer and paint. A proper inspection helps you decide whether the car needs spot repair, full stripping, rust replacement, metal finishing, or panel realignment before paint prep can even start. This is why experienced restorers treat preparation as the foundation of the finish, not just a preliminary chore.
A careful first-step inspection usually includes checking panel gaps, looking for bubbling or cracking, testing for thick body filler, identifying lacquer versus enamel versus modern coatings, and examining known rust-prone areas such as lower fenders, rocker panels, wheel arches, trunk floors, and window channels. If the car has been repainted several times, you also need to know whether the underlying materials are compatible with the paint system you plan to use. Paint failure often starts when unstable layers are left in place. If the substrate is weak, contaminated, or poorly bonded, even the best topcoat will eventually shrink, chip, lift, or crack. Starting with a full assessment gives the entire restoration process a clear direction and prevents expensive rework later.
Should a classic car be stripped to bare metal before painting?
Not every classic car must be stripped to bare metal, but many should be, especially if the vehicle has multiple old paint layers, unknown materials underneath, visible rust, failing filler work, or signs of previous poor-quality repairs. Bare-metal stripping gives you the clearest view of the actual condition of the body and removes the uncertainty that causes many paint jobs to fail months or years later. On a true restoration, this step often reveals pinholes, brazed seams, skim-coated panels, hidden collision repairs, and corrosion that would have remained trapped beneath fresh paint.
That said, stripping to bare metal is not automatically required if the existing finish is stable, properly bonded, and compatible with the new coating system. In some cases, sound original or earlier refinished surfaces can be feathered, repaired, sealed, and built up correctly without total removal. The decision depends on the age and condition of the finish, the goals of the project, and the level of quality expected. A driver-quality repaint may allow more preservation of existing surfaces, while a show-quality classic usually benefits from a more complete reset.
When stripping is necessary, the method matters. Chemical stripping, media blasting, mechanical sanding, or a combination approach may be used depending on the panel type and the amount of rust or filler present. Thin body panels require caution because aggressive blasting or excessive heat from grinding can warp metal. Once the panel is stripped, it should be cleaned and protected quickly, typically with epoxy primer, to prevent flash rust. The real value of bare-metal preparation is not simply removing paint. It is creating a clean, trustworthy foundation that allows every layer afterward—filler, primer, sealer, color, and clear—to perform as intended.
How do you deal with rust, dents, and old body filler before primer is applied?
Rust, dents, and failed filler must be fully corrected before primer goes on, because primer is not a repair material. It is a refining and surfacing material. If rust remains active under the surface, it will continue spreading and eventually ruin the finish from beneath. If dents are left too deep, they will require excessive filler, which increases the risk of shrinking, cracking, or contour distortion over time. If old filler is loose, moisture-damaged, or applied over rust or paint instead of properly prepared metal, it should be removed and redone correctly. In restoration work, the goal is to make the body straight and stable before the high-build stages begin.
The proper approach starts with identifying the severity of the rust. Surface rust may be removable through sanding or blasting, but perforation, deep scale, or rust-through usually means the metal should be cut out and replaced with new steel. Patching over compromised metal may save time in the short term, but it almost always creates long-term problems. Dents should be metal-worked as close to final shape as possible using hammer and dolly work, stud pulling, shrinking, and careful panel correction techniques. The better the metal is finished, the less filler is needed, and the stronger and straighter the repair will be.
Body filler should only be applied over properly prepared, clean substrate according to the product manufacturer’s recommendation—often over bare metal or epoxy-coated surfaces that are within the approved application window. It must be spread in thin, controlled layers and blocked to shape, not used as a shortcut to hide major damage. After filler work is complete, glazing putty can refine minor imperfections, followed by primer surfacer and guide coat for block sanding. This sequence is what separates durable bodywork from cosmetic cover-up. A beautiful paint finish depends on the quality of the repair work underneath it.
Why are panel alignment and block sanding so critical before painting a classic car?
Panel alignment and block sanding are critical because paint does not hide flaws—it highlights them. On a classic car, reflections traveling across long hoods, curved fenders, doors, and quarter panels will immediately reveal waves, uneven transitions, poor gaps, and distorted body lines if the preparation is not precise. Many people focus on the color coat, but the reason a high-end classic finish looks deep, straight, and expensive is that the body was properly aligned and block sanded long before the spray gun came out. Straightness is built during the bodywork stage, not created by the final paint application.
Panel alignment means setting consistent and visually correct gaps at the doors, hood, trunk, fenders, and other openings while accounting for how the car will sit when fully assembled. On restoration projects, this often involves repairing hinge points, adjusting shims, correcting old collision damage, and test-fitting trim, weatherstripping, and bolt-on parts before final paint. If alignment is ignored until the end, you risk chipped edges, rubbing panels, uneven reveal lines, and a finished car that simply looks “off,” even if the paint itself is glossy.
Block sanding is equally important because it levels the primer and reveals high and low spots across the body. Using long blocks, guide coats, and progressively finer grits allows the technician to shape the panel accurately rather than following the natural waves of the hand. This is especially important on classic cars, which often have broad panels and distinctive styling lines that demand crisp definition. Repeated priming, guide coating, and blocking may seem time-consuming, but it is what produces a surface that appears flat, straight, and professional under paint. In restoration, the phrase “the paint is only as good as the bodywork” is absolutely true.
What final preparation should be done right before a classic car is painted?
Right before painting, the car should go through a meticulous final preparation process focused on cleanliness, consistency, and control. By this stage, the bodywork, filler shaping, primer surfacing, guide-coat blocking, and panel fitment should already be complete. The final prep is about making sure the surface is uniformly sanded, free of contamination, properly sealed if required, and ready to accept the paint system exactly as the manufacturer intends. This is the stage where small oversights can cause fisheyes, poor adhesion, dieback, texture issues, or visible defects in the final finish.
Typical final prep includes sanding the surface to the correct grit for sealer or topcoat, blowing dust from seams and body gaps, vacuuming the vehicle, thoroughly cleaning with the proper wax and grease remover, and wiping down with clean lint-free towels using the correct method so contaminants are lifted rather than smeared around. The vehicle then needs to be carefully masked, including jambs, openings, engine bay areas, glass, trim edges, and any components not being painted. A tack cloth may be used immediately before spraying, but only according to paint-system recommendations and only after the surface is otherwise fully clean.
Environmental control matters as much as surface prep. The booth or spray area should be clean, dry, well ventilated, and within the correct temperature and humidity range. Compressed air should be moisture-free, and the painter should make a final inspection under strong lighting to catch scratches, pinholes, edge mapping, or dust in critical areas. If the system calls for sealer, it should be applied over a properly prepared substrate to create a uniform color base and absorption rate across repairs, bare-metal areas, filler zones, and primered panels. That consistency helps the color coat lay down evenly and improves the overall appearance of the finish. In short, final prep is about removing every variable possible so the paint can perform at its highest level.




