
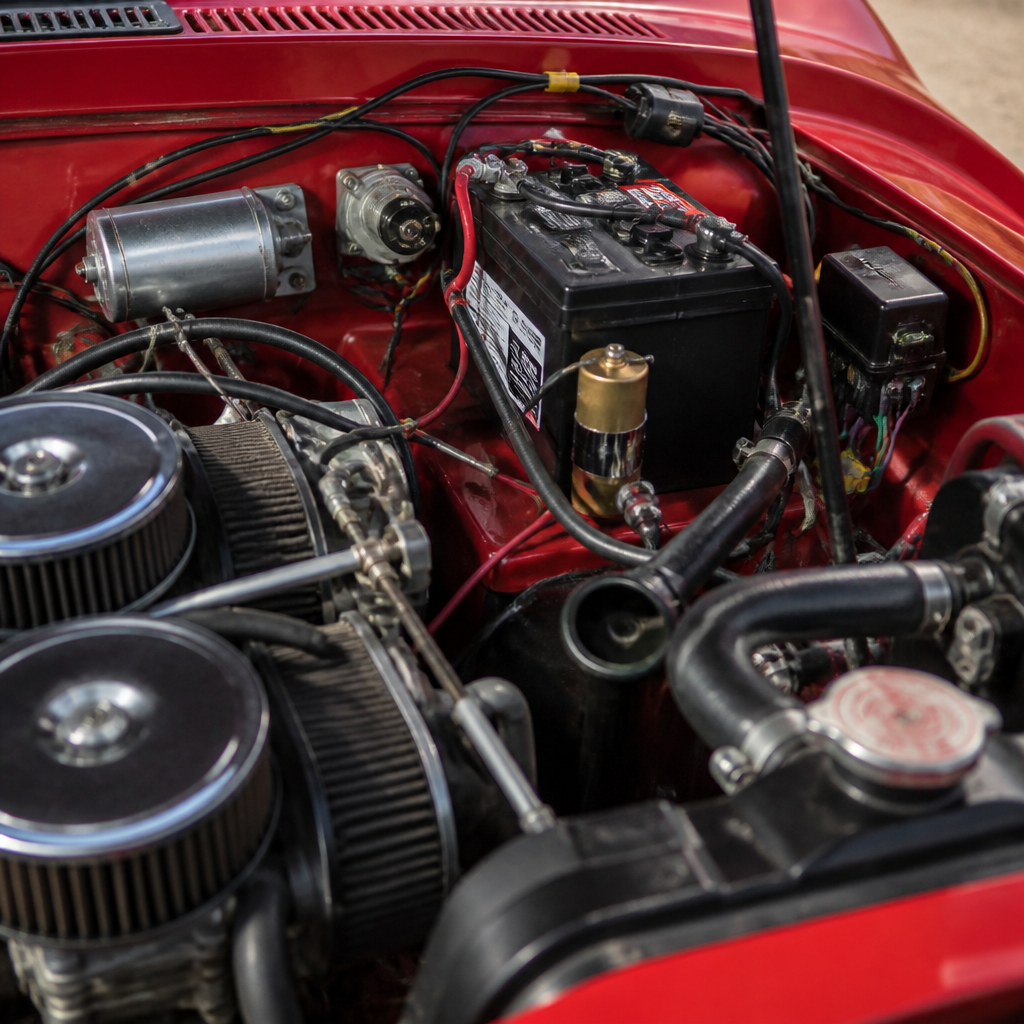
Electrical systems in classic cars are simple by modern standards, yet they sit at the center of reliable engine and mechanical work during any restoration. In practical terms, a classic car electrical system includes the battery, charging system, starting circuit, ignition, lighting, grounding paths, switches, gauges, wiring harnesses, and protective devices such as fuses or circuit breakers. When enthusiasts talk about restoration and maintenance, they often separate wiring from mechanical tasks, but in the workshop those systems constantly overlap. A weak ground can mimic a carburetor problem, low charging voltage can create rough running, and a poor starter cable can make a healthy engine seem seized. That is why understanding electrical systems is essential for anyone working on engine and mechanical restoration in vintage vehicles.
Classic cars generally use either six-volt or twelve-volt electrical architecture, most often with a negative ground on later models and positive ground on some earlier British and American vehicles. The basics are straightforward: the battery stores energy, the starter uses high current to crank the engine, the generator or alternator replenishes the battery, and the ignition system converts low battery voltage into high voltage for the spark plugs. Gauges, senders, relays, and switches then support operation and monitoring. Compared with modern multiplexed networks, these systems are direct and traceable, which makes them ideal for careful diagnosis. Still, age introduces complications including brittle insulation, corroded terminals, worn ignition switches, resistance in connectors, and modifications made over decades by previous owners. Those issues affect engine starting, charging, and drivability more than many first restorers expect.
This hub article explains how classic car electrical systems work and why they matter specifically to engine and mechanical work. It also serves as a practical map for related restoration and maintenance tasks, from ignition timing to charging system upgrades and gauge troubleshooting. I have learned repeatedly that the fastest route to solving a no-start or poor-running complaint is not replacing parts at random; it is understanding current flow, voltage drop, and correct component matching. If you grasp those fundamentals, you can protect originality where it matters, make sensible upgrades where safety and reliability demand them, and avoid the expensive cycle of chasing symptoms instead of causes.
How classic car electrical systems support engine and mechanical work
Electrical systems are inseparable from engine function because every gasoline classic relies on electrical energy to start, ignite fuel, and monitor operating conditions. The starter motor turns the crankshaft fast enough for combustion to begin. The ignition coil, breaker points or electronic module, distributor, rotor, wires, and plugs then deliver spark in the correct firing order. The charging system keeps battery voltage stable so ignition performance does not fall off at idle or under accessory load. Temperature, oil pressure, and charging indicators provide the driver with essential warnings that protect mechanical components from damage.
In restoration work, electrical faults often present as mechanical failures. I have seen a slow-cranking small-block Chevrolet blamed on internal engine drag when the true problem was a corroded ground strap between the block and chassis. I have also seen a British roadster with intermittent misfire receive carburetor rebuilds, a new fuel pump, and fresh plugs before anyone measured coil feed voltage through an aging ballast resistor circuit. Once voltage was restored, the engine ran cleanly. These examples matter because a proper engine and mechanical diagnosis in a classic car should always include battery condition, cable integrity, ignition health, and charging output before deeper teardown begins.
Classic dashboards and engine bays also reveal design priorities that affect restoration choices. Many American cars from the 1950s and 1960s used ammeters, external voltage regulators, and straightforward color-coded harnesses. European classics frequently combined compact packaging with less forgiving grounds and connector layouts. Muscle cars, trucks, and luxury sedans all vary in how accessible their harness routing, bulkhead connectors, and starter circuits are. A good hub article on engine and mechanical work must acknowledge this variety while reinforcing one rule: if voltage cannot travel efficiently to the component and return through a clean ground path, the mechanical system depending on it will underperform.
Battery, starting, and charging fundamentals
The battery, starter, generator or alternator, and regulator form the electrical backbone of engine operation. Battery capacity is commonly described in cold cranking amps and reserve capacity. In six-volt systems especially, cable size is critical; using thin modern replacement cables on a six-volt car is a common mistake because those systems require heavier conductors to carry higher current with minimal voltage loss. Thick, properly crimped cables, clean terminal surfaces, and secure grounds are non-negotiable if you want consistent starts.
The starter circuit is simple but demanding. When the driver turns the key or presses the starter pedal, a relay or solenoid connects battery power to the starter motor. Any resistance in that path creates heat and steals voltage. A healthy battery at rest should read about 12.6 volts in a fully charged twelve-volt system, but the more important test during cranking is voltage drop. If battery voltage collapses well below expected levels, or if there is a large drop across either the positive cable or the ground side, cranking speed suffers. Slow cranking can prevent adequate oil pressure buildup and cause hard starts that are mistaken for fuel problems.
Charging systems in classic cars use either a generator with a regulator or an alternator with internal or external regulation. Generators are period-correct and function well when properly maintained, but alternators generally provide stronger output at idle and support added electrical loads such as electric fans, halogen headlamps, or modern audio. The tradeoff is originality. For a concours restoration, retaining a generator may be the right decision. For a regularly driven classic in traffic, a discreet alternator conversion is often the better mechanical support choice because stable charging voltage protects ignition performance and reduces battery stress.
| Component | Main job | Common failure | Typical symptom |
|---|---|---|---|
| Battery | Stores and delivers starting power | Sulfation or low charge | Slow crank, clicking solenoid |
| Starter | Cranks engine | Worn brushes or solenoid | No crank or intermittent crank |
| Generator/Alternator | Recharges battery | Low output | Battery warning light, dim lamps |
| Voltage regulator | Controls charging voltage | Overcharge or undercharge | Boiled battery or chronic discharge |
| Ground straps | Completes return path | Corrosion or looseness | Heat, erratic gauges, hard starting |
Ignition systems: points, coils, timing, and spark delivery
The ignition system is where electrical diagnosis directly meets engine performance. Most classic cars originally used a conventional breaker-point ignition system with a coil, condenser, distributor, vacuum advance, and mechanical advance. The coil steps battery voltage up to many thousands of volts, while the points open and close to trigger spark. Dwell angle, point gap, timing advance, and coil resistance all matter. If any one of those values is wrong, the engine may idle poorly, hesitate under load, run hot, or lose power at higher rpm.
Points ignition is not obsolete junk; when adjusted correctly, it works well. However, it requires maintenance. Point faces wear, rubbing blocks degrade, and condensers vary in quality. I have had excellent results preserving original distributors while upgrading only the internal trigger to a reputable electronic conversion from PerTronix or similar suppliers. That approach keeps the stock appearance and advance curve while reducing maintenance. Even so, not every conversion is automatically better. Some modules are sensitive to incorrect coil resistance or reversed polarity, and a badly curved distributor will still perform badly with electronic triggering.
Ignition timing deserves special attention in any engine and mechanical work hub because it influences starting, drivability, fuel economy, and engine temperature. Base timing must be checked alongside total advance and vacuum advance function. A rebuilt carburetor cannot compensate for a frozen mechanical advance, and new spark plugs will not fix an ignition switch that drops coil feed voltage while cranking. On ballast-resistor systems, bypass circuits often provide full battery voltage during start, then reduced voltage in run mode to protect the points. If that bypass fails, the engine may start and die or refuse to light cleanly when hot.
Spark plug wires, cap condition, rotor integrity, and correct heat range plugs also belong in a complete electrical understanding. Carbon-tracked caps, cracked insulators, and high-resistance wires commonly create misfires under load. The lesson is consistent: before assuming compression or fuel issues, verify spark quality, timing stability, and voltage supply with a test light, multimeter, and timing light.
Wiring harnesses, grounds, and protection devices
Wiring harness condition determines whether every other component can perform properly. Original harnesses often suffer from oil saturation, heat damage near exhaust manifolds, brittle insulation, and amateur repairs using household connectors. Cloth-wrapped or PVC-insulated wires may look intact while hiding green corrosion under the insulation. Resistance rises, current falls, and intermittent problems appear. If a car has multiple unexplained issues, replacing the main harness with a model-specific reproduction from suppliers such as American Autowire, Rhode Island Wiring Service, or Autosparks can save many hours of troubleshooting.
Grounding is the most underestimated part of classic car electrical work. The battery must ground properly to the engine block, and the body and frame need bonding straps so lights, gauges, and accessories have a reliable return path. Painted restoration surfaces can actually create new electrical problems if star washers, bare-metal contact points, and anti-corrosion treatments are not used thoughtfully. I always verify ground integrity early because poor grounds create false readings, dim lamps, erratic fuel gauges, weak horn operation, and charging complaints that lead owners toward unnecessary component replacement.
Protection devices matter just as much. Older vehicles may use glass fuses, fusible links, circuit breakers, or in some cases almost no meaningful protection in high-load circuits. During restoration, adding correct fuse protection to accessory circuits is wise, but it should be done without overfusing the system. A fuse protects the wire, not the device. Installing a larger fuse to stop repeated failures simply shifts the risk toward melted insulation or fire. Relay upgrades for headlamps, electric fuel pumps, or cooling fans are also worthwhile because they reduce current through old switches and improve voltage at the load.
Common faults, testing methods, and practical restoration choices
The most common classic car electrical faults are low battery state of charge, poor grounds, degraded connectors, worn switches, incorrect replacement parts, charging imbalance, and ignition component mismatch. Effective testing starts with a wiring diagram specific to the exact year and model. Factory service manuals, marque club literature, and diagrams from suppliers are invaluable because wire colors, routing, and terminal designations can change within a single generation. Guesswork wastes time. Documentation speeds diagnosis.
Use a digital multimeter for static voltage checks, continuity checks, and charging tests, but do not rely on continuity alone. A wire can show continuity and still fail under load because of internal corrosion. That is why voltage drop testing is so important. Measure across a cable, connection, or ground path while the circuit is operating. Excessive drop pinpoints resistance immediately. A test light remains useful because it loads a circuit lightly and can reveal weak feeds that a high-impedance meter might not expose as clearly. For ignition analysis, a timing light and dwell meter are still relevant tools on point-equipped engines.
During restoration, decide early whether the car will be judged, toured, or driven daily. That choice affects wiring and charging strategy. A judged restoration may retain cloth harness wrapping, a generator, original terminals, and stock fuse capacity. A driver-focused build may benefit from relays, an alternator, electronic ignition, improved battery cutoffs, and discreet additional grounds. Neither approach is inherently superior. The correct solution is the one aligned with the vehicle’s purpose, installed neatly, documented well, and reversible where possible. Good restoration and maintenance work respects originality without sacrificing safety.
When planning engine and mechanical work across the wider project, treat electrical health as a prerequisite. Before adjusting valves, rebuilding carburetors, or diagnosing overheating, confirm battery condition, cranking speed, coil feed voltage, charging output, and sender accuracy. This hub should lead naturally to deeper topics such as starter rebuilds, distributor recurving, generator polarization, ammeter safety, wiring harness replacement, and gauge calibration, because those jobs all influence how well the engine starts, runs, and survives on the road.
Conclusion
Electrical systems in classic cars are not mysterious. They are logical networks that power starting, ignition, charging, and critical engine monitoring, and they deserve the same disciplined attention as carburetion, compression, and lubrication. Once you understand battery capacity, cable sizing, grounds, voltage drop, ignition timing, regulator behavior, and harness condition, many stubborn drivability problems become straightforward to solve. That knowledge also prevents unnecessary parts replacement and protects expensive mechanical components from damage caused by low voltage, weak spark, or inaccurate gauges.
For restoration and maintenance work, the main benefit of learning classic car electrical systems is confidence. You can diagnose problems methodically, choose upgrades that match the car’s purpose, and preserve originality where it counts. Start with the basics: obtain the correct wiring diagram, inspect every major ground, test the battery and charging system under load, and verify ignition health before chasing fuel or mechanical faults. From there, build out your engine and mechanical work plan one tested circuit at a time, and your classic will be easier to restore, easier to maintain, and far more enjoyable to drive.
Frequently Asked Questions
What components make up the electrical system in a classic car?
The electrical system in a classic car is made up of several closely connected parts that work together to start the engine, keep it running, and power the vehicle’s basic functions. At the center is the battery, which stores electrical energy for starting and low-speed or engine-off operation. The charging system, usually made up of a generator or alternator and a voltage regulator, replenishes the battery while the engine runs. The starting circuit includes the battery cables, ignition switch, starter solenoid, and starter motor, all of which must carry high current reliably to crank the engine.
Beyond starting and charging, the ignition system is another critical area. In many classic cars, this includes the ignition switch, coil, distributor, points or electronic trigger, spark plug wires, and spark plugs. Lighting circuits power headlights, brake lights, turn signals, dash illumination, and sometimes auxiliary lamps. Gauges and sending units handle temperature, oil pressure, fuel level, and charging status. Wiring harnesses connect all of these systems, while switches and relays direct current where it needs to go.
Equally important are the parts owners often overlook: grounding paths, connectors, terminals, and protective devices such as fuses or circuit breakers. In older vehicles, a poor ground can cause symptoms that look like failed components, including dim lights, weak cranking, erratic gauges, or intermittent ignition trouble. That is why understanding the full system matters during restoration. A classic car’s electrical setup may be simpler than a modern vehicle’s, but every component has a job, and reliability depends on all of them working together as a complete circuit.
Why are electrical systems so important during classic car restoration?
Electrical systems are fundamental to classic car restoration because they affect nearly every aspect of whether the vehicle starts, runs, charges properly, and operates safely on the road. Even if the engine, transmission, fuel system, and brakes have been carefully rebuilt, the car may still be unreliable if the wiring is brittle, the grounds are corroded, or the charging system is weak. In practical restoration work, electrical condition often determines whether a finished car feels dependable or constantly frustrating.
One reason electrical work deserves special attention is that age affects wiring differently than it affects mechanical parts. Original insulation can harden, crack, or absorb oil and moisture over time. Connectors corrode, terminals loosen, switches wear internally, and previous owners may have added accessories with poor splices or incorrect wire sizes. These issues can create voltage drops, parasitic drains, blown fuses, overheating wires, or random intermittent faults that are difficult to diagnose if the system is approached casually.
Electrical restoration also matters because classic cars rely on simple but direct circuits, so one weak point can affect multiple systems. For example, a poor engine ground strap may cause slow cranking, unstable charging readings, and ignition problems all at once. A weak voltage regulator can shorten battery life and leave the car stranded. Rebuilding or verifying the electrical system early in the process helps establish a solid foundation for tuning and road testing. In other words, electrical work should not be treated as a finishing detail. It is central to making the mechanical restoration actually function in real-world driving.
What are the most common electrical problems in classic cars?
The most common electrical problems in classic cars usually come down to age, corrosion, wear, and earlier repair shortcuts rather than complicated system design. Bad grounds are at the top of the list. Because classic cars often depend on the body and frame as return paths, rust, paint buildup, oxidized fasteners, or missing ground straps can interrupt current flow. This can lead to dim headlights, slow starter operation, inaccurate gauges, weak horn performance, or strange interactions between circuits.
Another frequent issue is deteriorated wiring. Over decades, insulation can become brittle, melt near heat sources, or crack where it passes through the firewall or under clamps. Exposed conductors may short to ground or to other wires, causing blown fuses, battery drain, or even fire risk. Connectors and terminals are also common failure points. Corrosion raises resistance, while loose crimp connections create intermittent faults that may only show up during vibration or temperature changes.
Charging and starting problems are also very common. A battery may test fine at rest but fail under load. Generator and alternator output can be inconsistent, and older voltage regulators may drift out of specification. Starter solenoids, ignition switches, and heavy battery cables can all develop high resistance that reduces cranking performance. On ignition systems with breaker points, worn points, condenser issues, coil weakness, or distributor wear can create hard starting and misfires. It is also common to find mismatched parts from old repairs, such as the wrong fuse ratings, non-original wiring routes, or accessory additions wired without proper protection. In classic cars, small electrical defects tend to accumulate, so systematic inspection is usually more effective than replacing random parts.
How do you diagnose electrical issues in a classic car effectively?
The best way to diagnose electrical issues in a classic car is to work methodically and treat the system as a series of complete circuits rather than a collection of isolated parts. Start with the basics: verify battery condition, check battery cable integrity, inspect all main grounds, and confirm that the car has the correct polarity and charging setup for its configuration. Many problems that appear complex turn out to be caused by low battery voltage, dirty terminals, or inadequate grounding between the engine, body, and frame.
A wiring diagram is one of the most valuable tools you can use. With it, you can trace power from the source through switches, connectors, loads, and back to ground. A digital multimeter is essential for measuring voltage, resistance, and continuity, while a test light can quickly confirm whether power is present under load. Voltage drop testing is especially useful on older vehicles because it reveals hidden resistance in cables, terminals, switches, and grounds. For example, if a starter receives less voltage than expected during cranking, the problem may be in the battery cables, solenoid contacts, ignition switch, or ground path rather than the starter motor itself.
It also helps to inspect the system visually before replacing anything. Look for overheated wires, non-factory splices, mismatched wire colors, loose connectors, damaged insulation, and signs of prior modifications. Separate the problem by system: starting, charging, ignition, lighting, or instruments. Then test one section at a time. If a fault is intermittent, gently moving harness sections or operating switches repeatedly can expose weak connections. The key is discipline. In classic car electrical work, careful testing usually saves time, money, and unnecessary parts replacement.
Should you keep the original wiring in a classic car or replace the harness during restoration?
The answer depends on the condition of the original wiring, the goals of the restoration, and how the car will be used. If the harness is complete, correctly routed, largely unmodified, and the insulation remains flexible and intact, it may be possible to preserve and repair the original wiring. This approach is often preferred in highly authentic restorations where originality matters. Cleaning terminals, repairing limited damaged sections, restoring grounds, replacing connectors, and rewrapping the harness can return a sound original system to reliable service if the underlying wire quality is still good.
However, many classic cars benefit from a full harness replacement. If the wiring has widespread cracking, brittle insulation, burned sections, heavy corrosion, repeated amateur splices, or poorly integrated accessory additions, replacement is usually the better long-term choice. A new harness can restore correct color coding, proper wire gauge, original routing, and dependable connections. It also reduces the chance of hidden faults appearing after the car is back on the road. For cars that will be driven regularly, reliability and safety often outweigh the value of retaining severely aged wiring.
Some owners choose a middle path by installing a reproduction-style harness that preserves the original layout while improving dependability. Others opt for an upgraded harness if they plan to add electric cooling fans, modern audio, auxiliary lighting, or additional fused circuits. The important point is to make the decision based on evidence, not sentiment alone. Electrical systems in classic cars may be simple, but they are too important to ignore. Whether you preserve or replace, the goal should be the same: safe, correct, and consistent operation that supports the rest of the restoration.




