
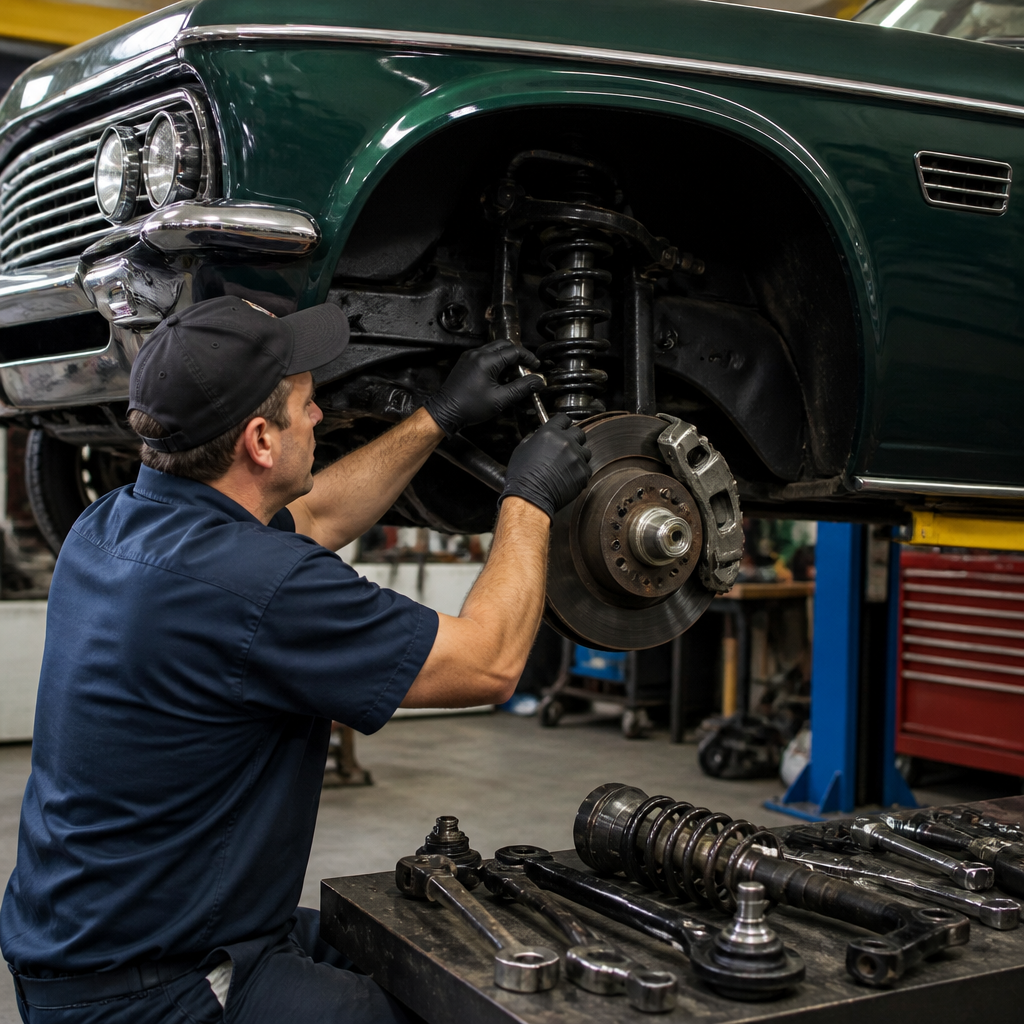
Restoring a classic car suspension system is one of the most important jobs in any full mechanical rebuild because suspension determines ride quality, steering stability, braking confidence, and how safely the car puts power to the road. In restoration work, suspension refers to the network of springs, dampers, control arms, bushings, steering links, and mounting points that connect the chassis to the wheels while controlling movement. On vintage vehicles, those parts are often fifty or more years old, which means rubber hardens, grease dries out, shocks lose damping, leaf packs sag, and alignment geometry drifts far from factory specification. I have seen beautifully painted classics drive terribly because the suspension was ignored, while modest cars with correctly rebuilt underpinnings felt composed, precise, and trustworthy. For owners planning broader engine and mechanical work, suspension restoration is a natural hub topic because it affects driveline angles, braking balance, tire wear, steering effort, and the way every other mechanical system performs.
A proper classic car suspension restoration is not just a matter of replacing worn parts. It starts with identifying the original design, understanding common failure points, and deciding whether the goal is concours originality, road touring comfort, or improved performance with period-correct character. Most classics use one of several layouts: double wishbone front suspension, MacPherson struts on later models, solid rear axles with leaf springs, or coil-spring live axles with trailing arms and a Panhard rod. Each has predictable wear patterns and service requirements. The work also connects directly to wider restoration and maintenance priorities, including steering system rebuilds, chassis rust repair, wheel bearing service, brake overhauls, differential inspection, and even engine mount replacement. When done methodically, a suspension rebuild transforms a project car from something that merely runs into something that can be confidently driven, aligned, tested, and enjoyed on modern roads.
Start with inspection, documentation, and the restoration goal
The first step in restoring a classic car suspension system is a complete inspection before any disassembly. I always begin with the car at ride height, on level ground, and record fender-to-hub measurements at all four corners, tire sizes, visible lean, and signs of prior repairs. Then I check ball joints, kingpins, tie-rod ends, idler arms, steering boxes or racks, control arm bushings, sway bar links, spring condition, shock leakage, leaf spring arch, axle location, bump stops, and frame mounting points. Uneven tire wear tells its own story: feathering points to toe issues, outer-edge wear suggests underinflation or aggressive cornering, and cupping often means poor damping. Rust around spring perches, crossmembers, and control arm mounts is especially critical because structural corrosion changes alignment under load.
Documentation matters as much as the wrench work. Factory service manuals, assembly manuals, and period alignment charts provide torque values, preload procedures, ride-height references, and bushing orientation details that aftermarket summaries often omit. If the car is a Mustang, Camaro, Tri-Five Chevrolet, MGB, W113 Mercedes, or air-cooled Porsche, there is usually strong parts support and known upgrade paths. Less common vehicles may require rebuilding original components rather than replacing them. At this stage, define the goal clearly. A concours restoration prioritizes original finishes, factory spring rates, and correct fasteners. A dependable driver build may use modern gas shocks, improved bushings, and radial-tire-friendly alignment settings. A touring or restomod project may justify thicker anti-roll bars, revised caster settings, or upgraded steering geometry. The correct path depends on how the car will actually be used.
Disassembly, cleaning, and evaluating reusable parts
Once the inspection is complete, disassemble carefully and label everything. Suspension work often reveals stacked tolerances from decades of repairs, so photos, paint marks, and bagged hardware save time later. Springs store dangerous energy, so use a proper internal or external spring compressor where applicable and support live axles securely before removing U-bolts or shackles. On cars with torsion bars, follow the manual’s unloading procedure exactly. During teardown, look for elongated bolt holes, cracked brackets, mushroomed studs, seized shafts, and evidence of collision damage. Many classic cars have had curbs, potholes, and poor jack placement reshape suspension components in subtle ways.
Cleaning parts is not cosmetic; it is diagnostic. After degreasing and media blasting, fatigue cracks, poor welds, bent arms, and worn threads become visible. Measure control arm shafts, spindle journals, and spring free height against specifications. Inspect kingpin bushings for scoring and proper fit, check spindle tapers for damage, and verify that shock mounts are not wallowed out. Leaf springs deserve close attention because cracked leaves, worn center bolts, and collapsed bushings can create rear steer and axle wrap. Coil springs should be replaced if ride height is low, coils are pitted, or prior heating and cutting are evident. In my experience, trying to save marginal springs and shocks almost always leads to doing the job twice. Reuse hard parts only when they are structurally sound, dimensionally correct, and worth the labor involved in refinishing them.
Rebuilding front suspension components for safe, accurate handling
The front suspension does most of the work a driver feels, so its rebuild quality has an outsized effect on the finished car. On double-wishbone setups, replace or rebuild upper and lower control arms, ball joints, bushings, spring seats, bump stops, and anti-roll bar links. If the car uses kingpins instead of ball joints, inspect spindles carefully and fit new bushings with proper reaming to final clearance. Steering linkage should be restored at the same time because new control arm bushings paired with worn tie-rod ends still produce vague handling. Idler arms on older American cars are frequent offenders, and steering rag joints often crack or delaminate. If the steering box has play beyond adjustment range, rebuild it before alignment.
Bushing material deserves careful thought. Rubber delivers the quietest ride and best matches original compliance. Polyurethane sharpens response and resists oil contamination, but it can bind if installed dry or in pivots not designed for it. On street-driven classics, I usually prefer quality rubber or bonded OE-style bushings for control arms and reserve polyurethane for sway bar mounts where articulation demands are lower. Shock choice also matters. Twin-tube hydraulic shocks often preserve period ride quality, while gas-charged units reduce float and improve control on modern roads. Avoid over-shocking a light classic car; too much damping makes the ride brittle and can overwhelm old chassis structures. Every fastener should be torqued to specification, and bonded bushings must be tightened at normal ride height to prevent preload and early failure.
Restoring rear suspension, axle control, and driveline alignment
Rear suspension restoration is often underestimated, yet it governs traction, stability, and driveline smoothness. On leaf-spring cars, remove the spring packs, inspect each leaf, and decide whether to replace, re-arch, or rebuild with new liners, clips, and center bolts. Re-arching can restore stance, but replacement springs from a reputable supplier are often more consistent for a driver-grade build. New bushings and shackles are essential, and U-bolts should generally be replaced rather than reused because they stretch in service. Check axle pads, spring perches, and shock plates for distortion. If the car suffered wheel hop in the past, inspect the differential housing for cracked brackets and the driveshaft for worn universal joints.
Coil-spring rear suspensions need equal scrutiny. Trailing arm bushings, control arm mounts, Panhard rod bushings, and upper axle locating points wear gradually, creating rear steer that drivers often misdiagnose as loose front suspension. On GM A-body cars, for example, worn rear control arm bushings can make the car feel nervous under throttle transitions. On Jaguars with independent rear suspension, cage mounts, inboard brakes, and output shaft bearings add complexity but reward precision. Driveline angles should be checked before final tightening because altered spring height changes pinion angle and can create vibration under load. If the project includes engine and transmission work, coordinate mount heights with suspension setup. A classic car that accelerates smoothly, tracks straight, and does not clunk on gear changes usually has a correctly restored rear suspension, not just a strong engine.
How suspension restoration connects to the full engine and mechanical work plan
Suspension restoration sits at the center of engine and mechanical work because nearly every major system touches it. Brake overhauls rely on stable control arm geometry, sound wheel bearings, and predictable tire contact. Steering restoration depends on the same crossmember, bushings, and fastener integrity. Engine mounts and transmission mounts influence driveline angle, while differential condition affects how the rear suspension reacts under torque. Cooling, exhaust routing, and oil pan clearance can also be suspension-related, especially on cars that have sagged for years and sit lower than designed. I have had projects where owners blamed carburetion for poor road manners, only to discover that collapsed front springs and seized shocks were making the car dart and nose-dive, masking the real behavior of the powertrain.
This hub topic also supports related restoration and maintenance articles that owners should read alongside suspension work: steering box rebuilds, wheel alignment basics, chassis rust repair, brake system restoration, wheel bearing service, differential setup, driveshaft balancing, and engine mount replacement. For example, installing rebuilt suspension under a chassis with untreated rust around control arm mounts is wasted effort. Likewise, replacing leaf springs without inspecting rear brake hoses, axle seals, and parking brake cables misses accessible maintenance while the assembly is apart. A practical mechanical restoration plan sequences work to minimize duplication: chassis repairs first, suspension and steering second, brakes and wheel bearings third, then drivetrain installation, fluids, alignment, and road testing. That order reduces rework and gives each system a clean baseline for diagnosis.
Parts choices, costs, and common mistakes to avoid
Choosing parts for a classic car suspension restoration requires balancing originality, quality, availability, and budget. Cheap kits can be tempting, but inconsistent metallurgy, poorly machined ball joints, soft hardware, and incorrect bushing dimensions create expensive problems. I recommend buying from marque specialists or established manufacturers such as Moog, Lemforder, KYB, Bilstein, Koni, Eaton Detroit Spring, or model-specific restoration suppliers with documented fitment. Not every premium part is right for every car. Bilstein monotubes can be excellent on heavier European sedans, while a softer hydraulic shock may suit a lightweight British roadster better. Matching spring rate, damping, tire sidewall, and vehicle weight is more important than buying the firmest option.
| Component | Best choice for originality | Best choice for dependable road use | Common mistake |
|---|---|---|---|
| Control arm bushings | OE-style rubber | High-quality rubber or selective polyurethane | Mixing materials without checking articulation needs |
| Springs | Factory-rate replacements | Correct-rate new springs matched to intended load | Cutting old coils or reusing sagged leaf packs |
| Shocks | Period-type hydraulic units | Matched modern shocks from known brands | Over-shocking the chassis |
| Steering linkage | Rebuilt original where appropriate | New quality components | Aligning the car with worn tie-rod ends or idler arms |
Common mistakes are consistent across almost every platform. People paint over worn components instead of measuring them, torque suspension bolts with the car hanging, forget to replace bump stops and rebound pads, and skip alignment because the steering wheel feels centered. Another frequent error is upgrading one end of the car only. Stiff front springs with an untouched rear suspension usually make a classic less balanced, not more capable. Wheel and tire changes can also create clearance and scrub-radius problems that owners attribute to bad alignment. Finally, never judge suspension solely in the shop. A proper post-restoration evaluation includes ride-height verification, corner balance awareness on performance builds, and road testing over smooth pavement, broken surfaces, braking zones, and highway speeds.
Alignment, testing, and finishing the restoration correctly
The final stage of classic car suspension restoration is alignment and testing, and it determines whether all previous work performs as intended. Begin by settling the suspension with a short drive or by rolling the car, then verify ride height, tire pressures, and fuel load before alignment. Use factory specifications as a starting point, but recognize that many classics drive better on radial tires with slightly more positive caster and modest camber changes than original bias-ply settings allowed. For example, a 1960s American car that originally ran near-zero caster may track better with additional positive caster if steering effort remains acceptable. Toe must be set precisely because even small errors make a restored car wander or scrub expensive tires.
Road testing should be structured, not casual. Listen for clunks over low-speed bumps, note brake dive, steering return-to-center, body roll, axle tramp, and any vibration under acceleration or deceleration. Recheck torque on wheel nuts, U-bolts where specified by the manufacturer, and accessible suspension fasteners after initial miles. Inspect for witness marks showing contact between tires, shocks, sway bars, or bodywork. If the car still feels unsettled, do not assume that is just old-car character. Well-restored classics should feel mechanically coherent even when their designs are old. The biggest benefit of doing the suspension correctly is confidence: the car steers consistently, brakes in a straight line, uses its power cleanly, and no longer asks the driver to compensate for hidden wear. If you are planning broader restoration and maintenance work, make suspension the foundation, then build the rest of your engine and mechanical project on a chassis that is finally right.
Frequently Asked Questions
What parts should be inspected first when restoring a classic car suspension system?
The first step is a complete inspection of every major suspension and steering component, because on a classic vehicle, wear is usually widespread rather than limited to one failed part. Start with the springs, shock absorbers or dampers, control arms, ball joints, kingpins if applicable, tie-rod ends, idler arms, sway bar links, bushings, wheel bearings, and all mounting brackets. Just as important, inspect the chassis pickup points where the suspension bolts to the frame or unibody. Rust, cracked welds, elongated bolt holes, and old collision damage can undermine the entire restoration if they are missed early.
You should also look closely at rubber and metal-to-metal wear surfaces. Bushings often dry out, split, compress, or deform after decades of heat and age. Springs may sag even if they are not visibly broken. Dampers can lose effectiveness gradually, so a car may feel normal to the owner while still riding poorly by proper standards. Steering components deserve equal attention because suspension and steering work together; excessive play in linkages can mimic suspension problems and make the vehicle unsafe.
Document everything before disassembly. Take photos, measure ride height, note shim locations, and record hardware orientation. That makes reassembly more accurate and preserves factory geometry as a reference point. In many restorations, the smartest approach is to assume that all consumable wear items will need replacement and then decide which major hard parts can be safely reused after cleaning, measuring, and crack inspection.
Is it better to rebuild original suspension components or replace them with new parts?
That depends on the condition of the original parts, the availability of quality replacements, and the goal of the restoration. If originality matters most, rebuilding factory components is often the best path, especially on rare or historically significant cars. Original control arms, spindles, spring seats, and steering housings were designed specifically for the chassis and, when restored correctly, usually fit and function better than cheap reproduction parts. Rebuilding may include blasting, crack checking, repainting or coating, pressing in new bushings, installing new ball joints, and restoring hardware to proper specifications.
Replacement becomes the better option when original parts are structurally compromised, heavily corroded, bent, or simply worn beyond service limits. Springs that have lost rate, shocks that are leaking, bushings that have deteriorated, and steering joints with measurable play are usually not worth preserving just for the sake of originality. The key is part quality. In classic car work, not all aftermarket components are equal. Some are excellent, while others have poor tolerances, incorrect materials, or geometry that creates fitment and alignment problems.
A balanced restoration often uses both strategies: restore reusable factory hard parts and replace all wear items with the best available equivalents. If you are considering upgrades such as polyurethane bushings, performance shocks, or larger sway bars, think carefully about how you want the car to drive. A stock-style restoration preserves original ride character, while modernized components can sharpen handling but may increase harshness and change the vehicle’s personality. For many owners, the best result is a suspension that looks period-correct but performs reliably with subtle safety and durability improvements.
How do I know if the springs and shocks on a classic car need to be replaced?
Springs and shocks should be evaluated as a system because each affects how the other performs. Springs support the vehicle’s weight and establish ride height, while shocks control spring movement. On a classic car, the most common spring issues are sagging, uneven ride height, corrosion, cracked leaves on leaf-spring setups, and loss of tension after decades of use. If the car sits low on one corner, bottoms out easily, leans excessively, or no longer matches factory ride-height specifications, the springs may be tired even if they do not look obviously damaged.
Shock absorbers or dampers usually show their age through leaking fluid, weak rebound control, excessive bouncing, poor braking stability, and a floating or wallowing ride. A car with worn shocks may dive hard under braking, squat excessively during acceleration, and feel unsettled over bumps. In older vehicles, shocks can degrade so gradually that poor ride quality becomes the accepted norm. Once fresh dampers are installed, the improvement in control is often dramatic.
Testing should include visual inspection, ride-height measurement, comparison side to side, and checking how the suspension moves through its travel. Leaf springs should be examined for cracked leaves, worn shackles, seized bushings, and distorted packs. Coil springs should be checked for pitting, fractures, and signs of previous heating or cutting. Torsion bars should be inspected for corrosion and proper adjustment. In a full restoration, replacing old shocks is almost always a wise decision, and replacing springs is often justified when the goal is safe, predictable handling rather than simply getting the car back on the road.
Should suspension bushings stay rubber, or is polyurethane a better choice for a classic car?
Rubber bushings are usually the best choice if you want the car to retain its original ride quality, noise isolation, and factory driving feel. They absorb vibration well, allow the suspension to articulate as intended, and are generally the closest match to how the vehicle left the factory. For many classic street cars, especially cruisers and luxury models, fresh rubber bushings provide more than enough precision while keeping harshness to a minimum.
Polyurethane bushings are stiffer and can improve steering response and handling sharpness, but they are not automatically better for every restoration. Because they deflect less, they can make the suspension feel more direct and stable during cornering. However, they can also transmit more road noise and vibration into the chassis, and on some applications they may bind if the suspension design relies on the compliance of rubber to move naturally. Poorly fitted or unlubricated polyurethane bushings can also squeak and wear inconsistently.
The right answer depends on the vehicle and how it will be used. A lightly driven show car or a stock weekend cruiser usually benefits from high-quality rubber. A classic muscle car, restomod, or performance-oriented build may respond well to selective polyurethane use in sway bar mounts or specific control arm locations. The most important thing is to use bushings that match the suspension design and intended purpose of the car. Mixing materials strategically often produces the best result: comfort where compliance is needed and firmer control where precision matters most.
Why is alignment so important after restoring a classic car suspension system?
Alignment is the final step that makes all the restoration work function properly. Even if every suspension part is new or rebuilt, the car will not drive correctly unless caster, camber, and toe are set to proper specifications. Alignment affects steering feel, straight-line stability, cornering behavior, tire wear, and braking confidence. On a classic car, small geometry errors can create wandering, pull, bump steer, or rapid tire wear that makes the restoration feel disappointing despite excellent parts.
After suspension restoration, alignment is especially important because many components that influence geometry have just been disturbed or replaced. New bushings, springs, ball joints, tie-rod ends, and control arm hardware can all alter ride height and suspension angles. In addition, classic cars sometimes carry hidden frame variation from age, previous repairs, or old accident damage, so alignment can reveal issues that were not obvious during assembly. Ride height should always be set first, because a car that sits too high or too low will not align correctly.
It is also important to understand that factory alignment specifications were often written around bias-ply tires, period handling expectations, and softer original parts. If the car now runs radial tires or subtle suspension upgrades, a knowledgeable alignment technician may recommend settings that improve stability and steering feel while still respecting the vehicle’s design. The goal is not just getting the numbers “in the green,” but making the car drive safely, predictably, and comfortably on modern roads. A careful alignment is what turns a rebuilt suspension into a finished suspension.




