
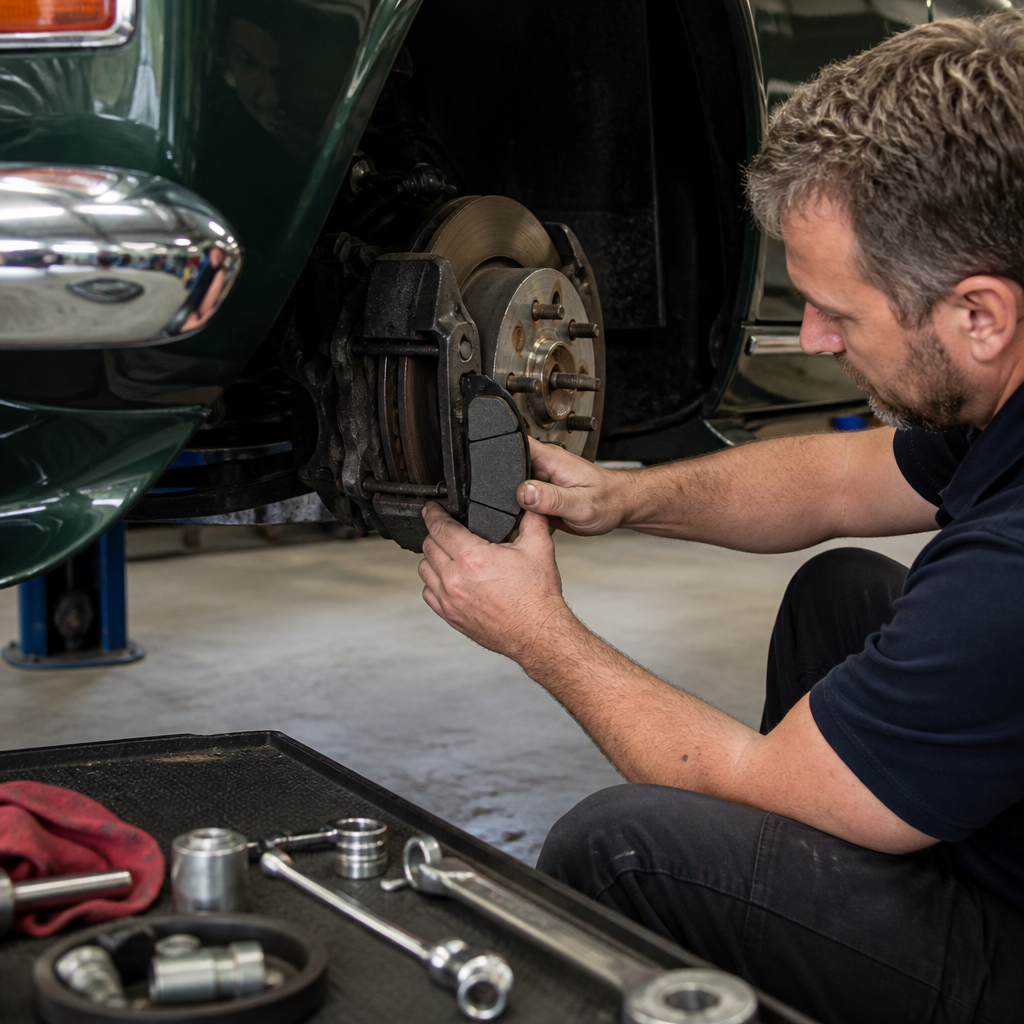
Classic car brakes demand a different maintenance mindset than modern systems because age, materials, and original engineering all influence stopping performance. In restoration and maintenance work, braking is the first mechanical system I inspect, often before I touch ignition, fueling, or cosmetics, because a beautiful car that cannot stop safely is not roadworthy. A classic brake system usually refers to drum brakes, early disc brakes, single-circuit hydraulics, vacuum-assisted components, steel hard lines, rubber flex hoses, wheel cylinders, calipers, shoes, pads, and a mechanical parking brake. On many vintage vehicles, those parts may be decades old, rebuilt with mixed-quality components, or altered by previous owners. That makes careful, methodical service essential.
Understanding how to maintain classic car brakes matters for three reasons. First, safety is obvious: degraded fluid, worn friction material, seized cylinders, and cracked hoses can turn a routine drive into an emergency. Second, correct maintenance protects originality. Owners often assume upgrades are always better, but many braking complaints come from poor adjustment or contaminated hardware, not flawed factory design. Third, brake health affects the rest of engine and mechanical work. A dragging caliper loads the drivetrain, overheats wheel bearings, masks suspension issues, and can even mislead diagnosis during road tests. If you are building a restoration and maintenance plan, brake service belongs alongside steering, suspension, tires, wheel bearings, hydraulics, and drivetrain inspection as a core mechanical priority.
The good news is that classic brake systems are usually straightforward once you know what to inspect. The basic process is inspection, cleaning, measurement, hydraulic renewal, adjustment, bedding, and controlled road testing. The challenge is nuance. A 1965 sedan with four-wheel drums has different service needs than a 1972 muscle car with front discs and rear drums, and both differ from a British roadster with remote servo assistance. This hub article explains the complete approach, from identifying system type and common failure points to choosing fluid, rebuilding components, bleeding brakes, and deciding when originality should give way to carefully engineered upgrades. It also connects brake care to the broader engine and mechanical work that keeps a classic car reliable.
Identify the Brake System Before Turning a Wrench
Before ordering parts or opening a bleeder screw, identify exactly what system the car has today, not just what the factory brochure listed. I have seen restored cars wearing later master cylinders, aftermarket proportioning valves, non-original front disc conversions, and mismatched wheel cylinders installed by well-meaning owners. Start with the workshop manual, then verify bore sizes, line routing, drum diameter, rotor thickness, booster type, and whether the car uses a single- or dual-circuit master cylinder. Photograph everything. Label left and right hardware. If the car has been stored for years, assume fluid contamination and internal corrosion until proven otherwise.
Brake system identification also means understanding design limitations. Single-circuit systems send hydraulic pressure through one circuit, so a leak anywhere can result in major brake loss. Drum brakes rely on correct adjustment and clean, free-moving hardware to maintain pedal height. Early disc systems often use fixed calipers or unusual pad retention hardware that is easy to assemble incorrectly. Many classics also use residual pressure valves, distribution blocks, and pedal pushrod geometries that must remain within specification. These details matter because a poor-quality replacement or small adjustment error can create dragging brakes, long pedal travel, or dangerous imbalance under hard stops.
Inspect the Entire Mechanical and Hydraulic Path
A proper brake inspection follows the force path from the pedal to the tire contact patch. Begin inside the car. Check pedal free play, pedal pivot wear, return spring condition, and firewall flex on power-assist cars. Then inspect the master cylinder for leakage at the rear seal and under the cap. Brake fluid should be clear to light amber; dark fluid often signals moisture absorption, rubber breakdown, or corrosion. Move to the steel lines and look for rust pitting, kinks, poor flares, wet unions, and unsupported sections. Any questionable hard line should be replaced, not patched.
At the wheels, inspect rubber flex hoses for cracking, swelling, date age, and internal collapse. An old hose can look acceptable outside yet act like a one-way valve, applying pressure but not releasing it fully. Remove drums or wheels and inspect friction surfaces. Drums should be measured with a drum micrometer against the maximum diameter stamped on the casting. Rotors should be checked for minimum thickness, runout, heat checking, and lip wear. Shoes and pads must be inspected for taper wear, contamination from grease or fluid, glazing, and separation from the backing plate. Wheel cylinders and calipers should be dry, smooth in operation, and free of seized pistons.
Do not ignore related hardware. Weak return springs, grooved backing plate pads, seized adjusters, frozen caliper slides, and worn wheel bearings all affect braking. In the shop, I treat every disassembled brake corner as a system rather than a pile of parts. If a front rotor is blue from heat, I inspect the hose, wheel bearing preload, caliper piston, and master cylinder compensating port, because replacing the rotor alone will not solve the underlying problem. Thorough inspection prevents repeat failures and creates a reliable baseline for all later restoration and maintenance work.
Common Brake Problems in Classic Cars and What Causes Them
Classic car brake complaints are remarkably consistent. A low pedal usually points to poor shoe adjustment, air in the system, rear drum wear, or excessive caliper piston travel. A hard pedal often indicates loss of vacuum assist, a blocked vacuum hose, an incorrect pedal ratio, or seized front calipers. Pulling under braking can come from contaminated linings, uneven adjustment, a stuck wheel cylinder, tire differences, or suspension geometry issues. Pulsation suggests rotor runout, drum out-of-round, or bearing play. A car that slows itself after several miles commonly has blocked flex hoses or a master cylinder pushrod adjusted too tight, preventing fluid from returning.
The most overlooked cause is inactivity. Brake systems deteriorate when they sit. Moisture in glycol-based fluid corrodes bores. Pistons seize in one position. Drum hardware loses tension. Surface rust forms on rotor faces and inside drums. Rubber cups harden. Parking brake cables stick. Even the vacuum booster diaphragm can degrade with long storage. That is why reviving a dormant classic car without opening the brakes is a gamble. Another common issue is incompatible parts. I have corrected many cars fitted with bargain remanufactured calipers, unknown friction materials, and generic hoses that technically fit but altered routing or flow. Consistent, matched components from reputable suppliers dramatically improve results.
| Symptom | Likely Cause | Best First Check |
|---|---|---|
| Low or spongy pedal | Air, poor drum adjustment, fluid leaks | Inspect for leaks and adjust rear shoes |
| Hard pedal | Booster fault, vacuum loss, seized components | Test engine vacuum and booster operation |
| Vehicle pulls while braking | Stuck cylinder, contaminated lining, hose restriction | Compare wheel temperatures after short drive |
| Brake drag | Collapsed hose, tight pushrod, seized slides | Open bleeder and see whether wheel releases |
| Pulsation | Rotor runout, drum variation, loose bearings | Measure runout with dial indicator |
Rebuild, Replace, or Upgrade: Making the Right Decision
Whether to rebuild original brake parts or replace them depends on condition, originality goals, and parts quality. Original cast-iron master cylinders, wheel cylinders, and calipers are often worth rebuilding if bores can be safely honed within limits or sleeved in stainless steel by a specialist. I prefer rebuilding original cores over using anonymous remanufactured parts when authenticity and fit matter, especially on low-volume classics. However, deep pitting, cracked castings, or unavailable seals justify replacement. Hard lines should usually be renewed if corrosion is advanced. Cunifer line is easier to shape and more corrosion-resistant than plain steel, though owners focused on strict factory appearance may choose coated steel.
Upgrades are justified when they are engineered, not improvised. A dual-circuit master cylinder is one of the most sensible safety improvements for many single-circuit classics, but pedal ratio, bore size, residual valves, and line routing must be calculated correctly. Front disc conversions can shorten stopping distances and improve fade resistance, yet a poor kit can upset balance, create wheel-clearance issues, or introduce parts-sourcing problems on the road. A vacuum booster will not compensate for incorrect friction material or bad adjustment. For most street-driven classics, the best results come from restoring the original system to full specification first, then upgrading only if the car’s use truly demands it.
Fluid, Bleeding, Adjustment, and Bedding Procedures
Brake fluid choice matters because classic systems use materials and seals that may not respond well to casual experimentation. Most classics designed for hydraulic brakes use DOT 3 or DOT 4 glycol-based fluid. DOT 4 generally offers a higher dry boiling point and is suitable for many restored street cars. DOT 5 silicone fluid is non-hygroscopic and protects paint better, but it can trap air more easily, may not suit every rebuilt component, and should never be mixed with glycol fluid. If converting to silicone, the entire system must be thoroughly cleaned and all rubber parts evaluated for compatibility. Whatever fluid you use, change it on schedule; I recommend every two years for regularly driven classics.
Bleeding should be done only after confirming mechanical setup. On drum systems, adjust shoes first so the pedal does not waste travel taking up clearance. Bench-bleed a new master cylinder, then bleed the system in the sequence specified by the service manual, often starting with the wheel farthest from the master cylinder. Pressure bleeding works well on many classics, but vacuum bleeding can help when stubborn air hides in high spots. During the final stage, I prefer a manual pedal bleed to confirm pedal feel. If the pedal slowly sinks under steady pressure, suspect an internal master cylinder bypass or an external leak.
Bedding is equally important. New shoes or pads need controlled heat cycles to transfer an even friction layer and stabilize performance. Avoid hard panic stops immediately after installation unless safety demands it. Make a series of moderate decelerations, allowing cooling time between runs. Recheck adjustment on drum brakes after the first drives, because hardware settles. A classic car with correctly bled hydraulics but poorly adjusted rear drums will still feel disappointing. Good maintenance is not just replacing parts; it is setting clearances, confirming response, and verifying that pedal effort, braking balance, and release all match the design intent.
How Brake Maintenance Fits the Larger Engine and Mechanical Work Plan
Brakes are a hub topic because they intersect with nearly every area of restoration and maintenance. During road testing, brake feel helps diagnose engine vacuum quality, wheel bearing condition, suspension wear, alignment settings, axle seal leaks, and tire age. A weak engine with unstable idle can reduce booster performance. Leaking rear axle seals can contaminate brake shoes. Excessive kingpin or ball-joint play can mimic brake pull. Incorrect wheel offset from restoration modifications can alter scrub radius and steering behavior under braking. That is why experienced mechanics do not isolate brake service from the rest of the vehicle’s mechanical condition.
A complete maintenance plan should link brake inspection intervals with tire rotation, wheel bearing service, chassis lubrication, suspension bushing checks, steering linkage inspection, and driveline evaluation. If you are building a restoration and maintenance library, supporting articles should include master cylinder rebuilding, drum brake adjustment, disc brake conversion planning, vacuum booster diagnosis, wheel bearing setup, steel line fabrication, parking brake restoration, and post-restoration road-test procedures. The benefit of treating brakes as the center of engine and mechanical work is simple: you find problems earlier, avoid duplicate labor, and create a classic car that feels coherent and trustworthy on the road, not merely functional in the garage.
Maintaining classic car brakes is ultimately about disciplined inspection, correct parts choices, and respect for original engineering. Start by identifying the exact system on the car today, then inspect every component from pedal to wheel. Measure drums and rotors, replace aged hoses and questionable lines, rebuild quality original components when practical, and avoid random upgrades that ignore balance or geometry. Use the correct brake fluid, bleed methodically, adjust drum brakes precisely, and bed friction materials before judging results. Most importantly, remember that brake performance is connected to the wider mechanical health of the car, including vacuum supply, wheel bearings, tires, suspension, and axle sealing.
For owners working through restoration and maintenance priorities, brakes should sit at the top of the list because they directly affect safety, confidence, and the accuracy of every road test that follows. A well-maintained classic brake system does not need to feel modern to be dependable; it needs to be correctly restored, carefully adjusted, and routinely serviced. Build your maintenance plan around documented inspections, quality components, and factory specifications, then expand into related engine and mechanical work with a known-safe baseline. If your classic has unknown history or long storage behind it, make brake inspection your next job before the next drive.
Frequently Asked Questions
How often should I inspect the brakes on a classic car?
Classic car brakes should be inspected more often than the brakes on a modern daily driver because age affects every part of the system, even when the car is not being used regularly. As a baseline, I recommend a full visual and functional brake inspection at least once a year, with a more immediate check any time the car has been sitting for several months, develops a pull while braking, feels soft at the pedal, or makes unusual noises. If the car is driven frequently, inspected before long trips, or used in parades, touring events, or stop-and-go traffic, the interval should be even shorter.
What matters most is not just mileage, but time, storage conditions, and the condition of original components. Rubber brake hoses can deteriorate internally without looking damaged from the outside. Wheel cylinders and master cylinders can begin leaking after long periods of inactivity because seals dry out or corrosion forms in the bores. Drum brake hardware can weaken, springs can lose tension, and old fluid can absorb moisture and contribute to internal rust. On cars with single-circuit hydraulic systems, routine inspection becomes even more important because there is less redundancy if a failure occurs.
A proper inspection should include checking brake fluid condition and level, examining steel lines and hoses, looking for leaks at wheel cylinders, calipers, backing plates, and the master cylinder, measuring brake shoe or pad wear, inspecting drums or rotors for scoring and heat damage, and confirming that the parking brake operates correctly. If the car has a vacuum booster, inspect the vacuum hose, check valve, and booster operation as well. In a classic car, brakes are not a system to glance at casually. They are a system to evaluate methodically and conservatively.
What makes classic car brake maintenance different from maintaining modern brakes?
The biggest difference is that classic brake systems were designed around older materials, different performance expectations, and much simpler engineering. Many classic cars rely on drum brakes, single-reservoir master cylinders, and early hydraulic designs that do not provide the stopping power, heat management, or built-in safety redundancy found in modern braking systems. That does not automatically make them unsafe, but it does mean they require a more informed maintenance approach and realistic expectations on the road.
Age is the second major factor. Even if a classic car has low mileage, time itself can damage the brake system. Brake fluid absorbs moisture, internal corrosion can develop inside steel lines and cylinders, and rubber seals may harden, swell, or crack. Friction materials may also be decades old, glazed, contaminated, or separating from their backing. A classic car that has been stored indoors and looks immaculate can still have a dangerously compromised brake system underneath.
Another important difference is parts variation. With classic vehicles, replacement parts may not always match original dimensions or quality, and previous repair work may have introduced mixed components from different years or trim levels. It is common to find a car with non-original wheel cylinders, aftermarket master cylinders, or altered brake shoe materials that affect feel and braking balance. That means maintenance often involves confirming what is actually on the car, not just what the factory service manual says should be there.
Finally, driving technique and maintenance philosophy both differ with a classic car. You maintain classic brakes to preserve safe, predictable performance, not to chase modern braking feel. Good maintenance means making sure the car stops straight, consistently, and confidently within the limits of its original design. That often requires preventive service before obvious symptoms appear, because waiting for failure is especially risky on an older brake system.
Should I replace old brake fluid even if the car is rarely driven?
Yes, absolutely. Brake fluid should be replaced on a time basis in a classic car, even if the vehicle sees very little road use. One of the most misunderstood aspects of brake maintenance is that inactivity does not protect the hydraulic system. In fact, long storage can make things worse. Most conventional brake fluids are hygroscopic, which means they absorb moisture from the air over time. That moisture lowers boiling point, encourages internal corrosion, and can damage the master cylinder, wheel cylinders, calipers, and steel lines from the inside out.
In a classic car, this is particularly important because many components are harder to replace, more expensive to rebuild, or part of an original system you may want to preserve. Old fluid often turns dark, but even fluid that still looks passable can contain moisture and contaminants. If a car has been sitting for years, the fluid should not be trusted. It should be flushed, the system inspected carefully, and any questionable hydraulic parts addressed before the car is returned to the road.
As a general rule, replacing brake fluid every two to three years is a sensible minimum for most classic cars, and more often is reasonable if the car is driven in humid conditions or has a history of hydraulic problems. During the flush, it is wise to inspect for uneven flow, bleeder screw issues, signs of internal hose collapse, or seepage at cylinders and line fittings. If the fluid comes out rusty, cloudy, or heavily discolored, that is a warning sign that a simple fluid change may not be enough and deeper inspection is warranted.
Using the correct fluid type matters as well. Always confirm what the system is designed to use, especially if seals have been replaced or if the car has undergone restoration work. Mixing incompatible fluids or switching types without understanding the seal materials can create expensive problems. In short, fresh fluid is cheap insurance, and on a classic brake system, it is one of the most important maintenance steps you can take.
What are the warning signs that a classic car brake system needs immediate attention?
Any change in brake feel, sound, stopping behavior, or fluid condition deserves attention right away, but some symptoms should be treated as immediate safety concerns. A soft or sinking brake pedal is one of the most serious warnings because it may indicate air in the system, a failing master cylinder, fluid loss, or internal hydraulic bypass. If the pedal suddenly travels farther than usual, feels spongy, or slowly drops under pressure, the car should not be driven until the cause is identified and repaired.
Pulling to one side during braking is another urgent sign. On a classic car, that can point to a seized wheel cylinder, contaminated brake linings, a sticking caliper, unequal shoe adjustment, or a collapsed hose restricting fluid movement. Grinding, scraping, or harsh metal-on-metal noises suggest severely worn friction material or damaged drums or rotors. A hard pedal combined with weak stopping can indicate vacuum booster problems, vacuum leaks, or binding mechanical components. If the parking brake no longer holds properly, that may also signal excessive wear or rear brake adjustment issues.
Visible fluid leaks should always be taken seriously. Check around the master cylinder, backing plates, tire sidewalls near wheel cylinders, flexible hose connections, and the inside surfaces of wheels. Brake fluid on painted surfaces can also damage finishes, so leaks should be addressed quickly for both safety and preservation reasons. Burning smells, smoke from a wheel, or excessive heat after a short drive may indicate a dragging brake, frozen hardware, or a return problem in the hydraulic system.
One of the best habits in classic car ownership is learning the car’s normal feel. Older brakes often have more pedal travel and less bite than modern systems, but they should still behave consistently. The moment that consistency changes, the car is telling you something. With vintage brake systems, early diagnosis is far less costly and far safer than waiting for a small symptom to become a major failure.
Is it better to keep original classic car brakes or upgrade them?
That depends on how the car is used, how original you want it to remain, and whether the existing system is being restored correctly. A properly rebuilt original brake system can perform very well within the design limits of the vehicle. For many collectors, preserving factory-correct drum brakes or early disc setups is part of the car’s authenticity and value. If the car is driven occasionally, shown, or used for moderate touring on secondary roads, well-maintained original brakes are often entirely appropriate.
However, originality should never come at the expense of safety. If the car will be driven regularly in modern traffic, on faster roads, or in hilly areas, an upgrade may be worth considering. Dual-circuit master cylinder conversions, improved friction materials, stainless or cunifer brake lines, rebuilt or upgraded boosters, and front disc conversions on cars originally equipped with drums can all improve confidence and reduce risk. The key is to choose upgrades that are engineered properly and compatible with the car’s weight, suspension, wheel size, and hydraulic balance.
Many problems blamed on “old-fashioned brakes” are actually the result of neglected maintenance or poorly matched replacement parts. Before deciding to upgrade, make sure the original system has been evaluated honestly. Correct drum adjustment, round drums, quality shoes, healthy hydraulic components, and proper line condition can transform how a classic car stops. If the system still falls short of your intended use after being restored to proper condition, then a thoughtful upgrade becomes easier to justify.
My general advice is this: preserve originality when it supports safe use, and modify carefully when your driving conditions demand more capability. The best approach is not emotional or cosmetic. It is functional. Whether original or upgraded, the brake system should stop the car straight, predictably, and repeatedly, with parts that can be




