
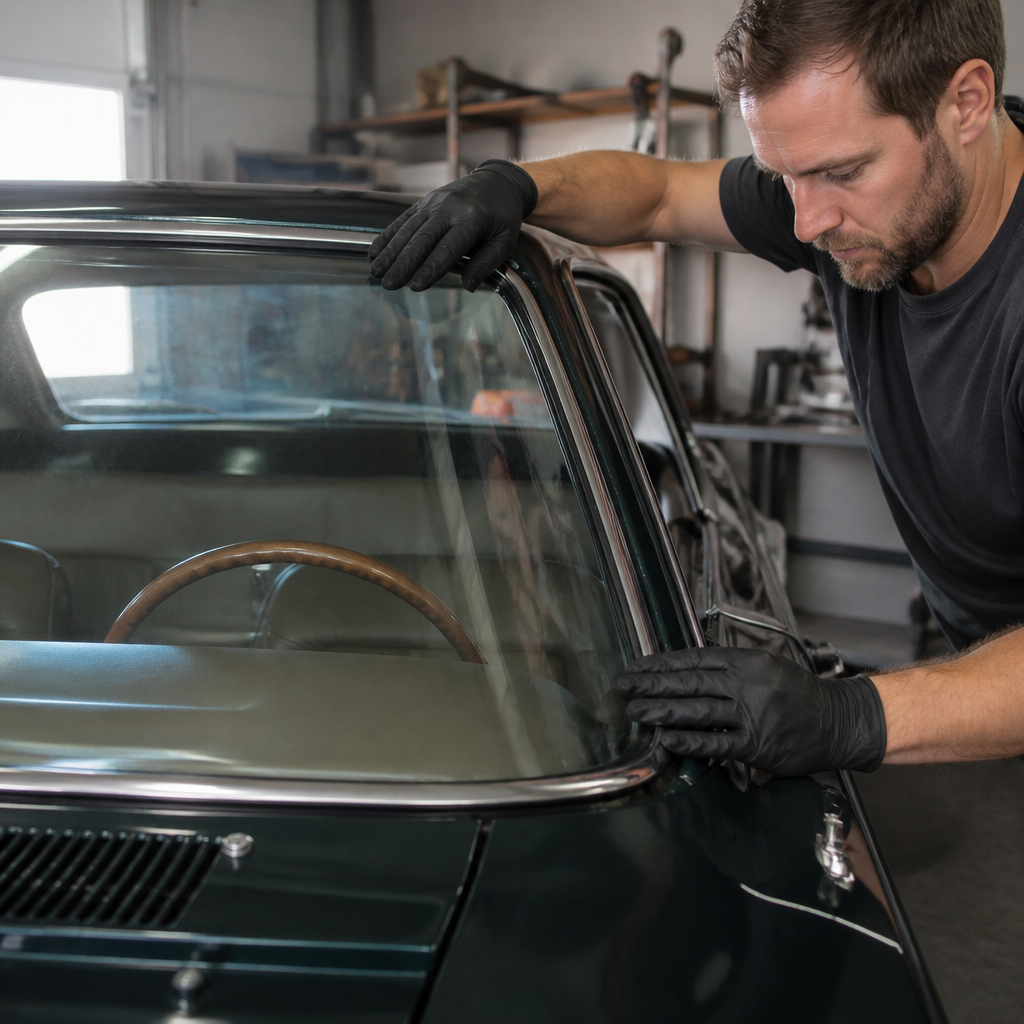
Replacing classic car glass is one of the most satisfying jobs in vintage vehicle restoration because it improves safety, weather sealing, visibility, and originality in a single project. In restoration shops, I have seen tired builds transformed the moment scratched windshields, delaminated vent panes, and hardened rubber seals were replaced with properly fitted glass. For owners working under the broader Restoration & Maintenance umbrella, this DIY guide also serves as a hub for DIY restoration guides, connecting the glass job to related tasks such as rust repair around window channels, interior trim removal, weatherstrip replacement, and final leak testing. Classic car glass refers to laminated windshields, tempered side and rear glass, vent windows, quarter windows, and the rubber, stainless trim, setting blocks, channels, and adhesives that hold them in place.
Why this matters is straightforward: old glass often hides structural and cosmetic problems. A windshield opening can trap moisture, leading to pinchweld rust. Side glass that rattles usually points to worn rollers, dry felt channels, or bent regulators. Rear windows can leak into trunk floors and package trays for years before the damage is visible. Unlike many cosmetic upgrades, replacing classic car glass directly affects roadworthiness. Clear sightlines reduce driver fatigue. Correct sealing lowers wind noise and prevents water intrusion. Proper installation also protects irreplaceable trim and reduces the risk of stress cracks. For a restorer, glass work sits at the intersection of bodywork, trim, weatherproofing, and mechanical adjustment, which is why it deserves careful planning rather than rushed installation.
Before starting, define the job accurately. A gasket-set windshield uses a molded rubber seal, often with a locking strip, and is installed with cord and lubricant rather than modern urethane alone. A bonded windshield uses automotive urethane adhesive and requires specific curing practices. Many American cars from the 1940s through the 1970s rely on gasket-mounted glass, while later classics may use bonded systems. Tempered glass cannot be cut after tempering, so side and rear panes must match exactly. Laminated windshields can sometimes be custom cut, but edge finish, thickness, tint band, and curvature still matter. If this article is your starting point for DIY restoration guides, treat it as the overview that helps you decide what to inspect, what to buy, and which related restoration articles you need next.
Assess the Car Before You Order Glass
The most common mistake in classic car glass replacement is ordering parts before inspecting the opening, trim, and hardware. Start with the factory service manual, assembly manual, or a trusted marque guide. Identify body style, production year, and whether the car uses date-coded or tinted glass, reveal moldings, clips, division bars, vent assemblies, or a locking gasket. Small production changes matter. A hardtop may use different quarter glass than a sedan from the same year. A truck cab may have multiple seal profiles depending on plant or trim package. Measure the existing pane and photograph all edges, logos, etchings, and hardware before removal.
Then inspect the entire system, not just the broken pane. Look for rust in the windshield pinchweld, pitting on stainless trim, seized regulator tracks, cracked vent window frames, and brittle anti-rattle bumpers. On door glass, run the window through its full travel. If it tilts forward, binds halfway, or drops at the rear edge, expect regulator, roller, sash channel, or guide wear. On gasket-mounted windshields and backlights, inspect the seal lip for shrinkage and the corners for evidence of old sealant. Water stains on the headliner, dash top rust, or damp carpets usually confirm leakage. This inspection determines whether the project is a straightforward replacement or part of a deeper restoration sequence.
Ordering the correct parts means using reputable suppliers that understand classic applications. Pilkington Classics, Auto City Classic, Steele Rubber Products, Metro Moulded Parts, and marque-specific vendors are widely used because they publish fitment details and know the difference between similar seals. Ask whether the glass is OEM-pattern, what tint and logo options are available, and whether the rubber is molded or universal. Cheap universal seals create fit problems that waste more time than they save. If your trim clips, setting blocks, flocked channels, or rollers are worn, replace them during the same job. Reusing marginal hardware is how a fresh glass installation becomes a noisy, leaking, or chipped one within months.
Tools, Materials, and Safety Requirements
Classic car glass work demands patience more than brute force, but the right tools prevent damage. For gasket installations, you need nylon cord, plastic trim sticks, glass lubricant or diluted dish soap where appropriate, masking tape, suction cups, a rubber mallet used sparingly, sealant approved for non-hardening bedding if specified, and plenty of clean towels. For bonded glass, add a cold knife or wire-out tool for removal, pinchweld scraper, primer system specified by the urethane manufacturer, caulking gun, and setting blocks. For side glass and vent windows, expect screwdrivers, small sockets, rivet tools in some applications, regulator grease, flocked run channel adhesive, and sometimes a sash-setting compound for mounting the glass in the lower channel.
Safety is not optional. Laminated windshields can crack into sharp-edged sheets; tempered side glass can explode into pellets under hidden stress. Wear cut-resistant gloves, eye protection, and long sleeves. Support large panes on padded stands, never directly on concrete. If the car still has original date-coded glass that might be reusable, remove it with the assumption that replacement will be harder to source than the surrounding trim. Disconnect the battery when working around power windows or hidden defroster connections. If urethane is involved, follow the manufacturer’s safe drive-away time and primer instructions exactly. Sika, 3M, and Dow all publish detailed technical data sheets, and those instructions outrank forum advice every time.
| Task | Recommended Tools | Common Risk | Best Practice |
|---|---|---|---|
| Windshield removal | Plastic sticks, cord, suction cups | Trim bending, pinchweld scratches | Remove trim first and protect painted edges with tape |
| Gasket installation | Nylon cord, lubricant, helper | Seal lip rolling under | Work evenly from center outward with light pressure |
| Bonded glass installation | Urethane gun, primer, setting blocks | Poor adhesion, leaks | Follow bead height and curing specifications exactly |
| Door glass service | Sockets, trim tools, grease | Misalignment, chipped edges | Replace worn rollers and adjust guides before final tightening |
Removing Windshields and Backlights Without Damaging the Car
On most classic gasket-set windshields, the safest removal method is to strip any reveal moldings first, then push the glass outward while a helper supports it from outside. Moldings usually release with a dedicated clip tool or careful prying at known clip points; guessing with a screwdriver is how stainless gets kinked. Once trim is removed, cut any old sealer at the outer edge. From inside the car, use firm palm pressure near the top corners and upper edge, not concentrated force at one point. If the gasket is rock hard, cut it rather than fighting it. Saving a fifty-year-old seal is rarely worth risking an irreplaceable windshield or original paint.
Bonded windshields require a different approach. Use a wire-out system or cold knife to cut the urethane bead while protecting the dashboard and pillars. Leave a thin layer of old urethane on the pinchweld if the adhesive manufacturer calls for bonding fresh urethane to properly prepared existing urethane. Do not grind to bare metal unless rust repair is necessary, because unnecessary paint damage creates more work and corrosion risk. Once the glass is out, vacuum debris and inspect the aperture carefully. I often find hidden rust in lower corners, especially on cars that sat under trees or had dried cowl drains. If rust is present, stop the glass installation and complete metal repair, epoxy priming, seam sealing, and paint curing before proceeding.
Backlights and rear windows can be more awkward than windshields because access is tighter and trim may be more fragile. Defroster wires on later classics deserve special care. Label every connector and photograph routing before removal. Heated rear glass is expensive and often model-specific, so never pry directly against the edge. Whether front or rear, store removed trim in labeled sleeves and keep fasteners grouped by opening. This sounds basic, but organized parts handling is a major dividing line between smooth restorations and frustrating reassembly days.
Installing New Glass, Seals, and Stainless Trim Correctly
For a gasket-mounted windshield or backlight, dry-fit the new seal to the body and the glass before using any sealant. The molded corners should sit naturally without stretching. Install the gasket onto the glass, then place nylon cord into the body lip channel with the ends overlapping at the bottom center. With a helper applying even pressure from outside using open palms, pull the cord from inside to roll the gasket lip over the pinchweld. Work slowly up each side, alternating as needed so the glass seats evenly. If the glass hangs high on one side, stop and correct it before continuing. Forcing the last corner is a classic way to crack a new windshield.
Some applications call for non-hardening bedding compound between the gasket and body or between the gasket and glass. Use only what the service manual or seal manufacturer specifies. Excess sealant creates mess, traps dirt, and can complicate future service. After seating the glass, install the locking strip if used, then verify that the reveal around the opening is uniform. Stainless trim often goes in during a specific stage, depending on design. Certain gaskets require trim to be fitted into the seal before the assembly is roped into the opening. Others accept trim afterward. This detail is easy to miss and can determine whether the job takes one afternoon or two frustrating weekends.
For bonded glass, prepare the pinchweld exactly as required by the adhesive system. That means cleaning, priming bare metal where needed, applying glass primer where specified, placing setting blocks in the correct locations, and laying a continuous urethane bead of proper height and width. Set the glass once. Sliding it around after contact can smear the bead and create leaks. Use tape or temporary retention methods to prevent movement during curing. After installation, check reveal gaps, wiper clearance, mirror mount stability, and cowl trim fit. Then honor the adhesive cure time before driving. Skipping cure time is not being efficient; it is defeating the installation.
Door Glass, Vent Windows, and Quarter Windows
Side glass restoration is where a simple replacement often becomes a mechanism rebuild. To access the glass, remove handles, armrests, panels, moisture barriers, and upper trim carefully. Many doors contain sharp access holes, so move slowly. Once inside, inspect the regulator teeth, rollers, tracks, anti-rattle guides, and lower sash channel. If the felt run channels are worn through or packed with debris, new glass will still rattle and drag. Replace the channels before setting final window adjustments. On many GM, Ford, and Chrysler classics, proper side glass operation depends on coordinated adjustment of front and rear guides, up-stops, and vent frame position. The glass should meet the roof rail and weatherstrip squarely without excessive upward pressure.
Vent windows deserve special mention because they combine glass, frame, pivot, division bar, and seal into one assembly. Riveted pivots often loosen over time, causing wind noise and water leaks at speed. Rebuilding the assembly with fresh rubber and correct rivets can restore a surprisingly modern feel. Use caution when separating old glass from stainless or plated frames, since corrosion in the channel can grip the glass tightly. Light heat, penetrating oil on hardware only, and patient disassembly work better than prying. Quarter windows on coupes and convertibles add another layer because top alignment, body flex, and weatherstrip compression all affect fit. Always adjust the glass to the restored seals, not to flattened old rubber.
If this hub is guiding your broader DIY restoration work, pair side glass service with related projects in a logical order: repair rust in the window opening first, paint and cure second, install channels and seals third, then align the glass and final trim last. That sequence prevents doing the same labor twice. It also reduces the chance of contaminating fresh adhesive or scratching new glass during later bodywork.
Leak Testing, Troubleshooting, and Long-Term Care
A professional-looking installation is not complete until it passes a controlled leak test. Wait until the sealant or adhesive has cured as required, then use low-pressure water, not a high-pressure washer. Start at the bottom and work upward while a helper watches from inside with a bright light. If water appears, identify the exact path before applying more sealant. Randomly smearing sealer around the perimeter is poor practice and usually fails. Gasket leaks often come from a lip that did not fully roll over the pinchweld, a corner that is not fully seated, or missing bedding compound in a specified area. Bonded leaks usually trace back to a gap in the bead, contamination, or improper glass set.
Wind noise, rattles, and regulator strain also reveal problems. A whistle at the vent window usually means the frame angle or latch tension is off. A side window that slows near the top often has guide misalignment or dried regulator grease. A rear window that leaks only while driving may indicate body pressure changes exposing a weak seal rather than a constant opening. Diagnose carefully and correct the root cause. For long-term care, keep drain holes clear, clean rubber with mild soap, and avoid petroleum dressings that can swell or degrade some compounds. If the car is stored, use a breathable cover and maintain interior humidity control. Good glass installation lasts years, but only if the surrounding channels, drains, and weatherstrips are maintained with the same discipline as paint and chrome.
Classic car glass replacement rewards careful owners because it combines immediate visual improvement with lasting functional gains. Clear, properly fitted glass makes driving safer, cuts leaks and wind noise, protects restored interiors, and preserves the structure around vulnerable window openings. The key lessons are consistent across nearly every make and era: identify the exact glass system before ordering parts, inspect the opening and hardware thoroughly, use the right tools and manufacturer-approved materials, and follow the installation sequence without shortcuts. When side glass is involved, rebuild worn channels, regulators, and vent assemblies at the same time so the whole system works as designed.
As a hub for DIY restoration guides within Restoration & Maintenance, this article should help you map the next jobs around any glass project: rust repair, weatherstrip selection, trim restoration, door mechanism service, and leak testing. Treat glass work as part of a restoration system rather than an isolated replacement, and the results are dramatically better. Start by inspecting your car’s seals, channels, and pinchwelds, gather the correct manual and parts sources, and plan the job in the proper order. Done well, replacing classic car glass is not just a repair. It is one of the clearest signs that a restoration is being built to last.
Frequently Asked Questions
Can I replace classic car glass myself, or should I leave it to a professional?
In many cases, yes, you can replace classic car glass yourself, especially if you are patient, organized, and comfortable working carefully with trim, seals, and fragile parts. Older vehicles are often more DIY-friendly than modern cars because many used gasket-set glass rather than the bonded urethane systems common today. That said, whether the job is truly a good candidate for home installation depends on the specific piece of glass, the vehicle design, and the condition of the surrounding bodywork. Flat side glass, vent glass assemblies, and some gasket-mounted windshields are often manageable for a hands-on restorer. Large curved windshields, rare back glass, or cars with delicate stainless trim may justify professional help if the replacement part is hard to source or extremely expensive to break.
The most important factor is not just skill, but preparation. A successful installation starts with confirming the exact glass type, checking whether the opening is free of rust distortion, and using the correct rubber seals, setting blocks, clips, and bedding materials for the car. A lot of frustration comes from trying to reuse brittle seals or forcing reproduction parts that are slightly off. If you approach the project as part of a full restoration and maintenance process rather than a simple swap, your odds of success improve dramatically. Take measurements, test-fit components, label trim, and protect painted surfaces before you begin.
A good rule is this: if the car uses a traditional rubber gasket system and replacement glass is available, a careful DIYer can often do the work with basic specialty tools and an extra set of hands. If the body opening has rust repair issues, the trim is unobtainable, or the glass is rare and valuable, paying an experienced installer can be cheaper than making one mistake. The job is very satisfying when done correctly, but classic car glass rewards precision more than speed.
What tools and materials do I need to replace classic car glass the right way?
The exact tool list depends on whether you are working on a windshield, back glass, door glass, quarter glass, or vent window, but several items are almost always essential. At minimum, plan on having trim removal tools, plastic scrapers, a hook tool, glass suction cups, a razor blade or utility knife, gasket lubricant or glass installation soap, painter’s tape, clean microfiber towels, and proper safety gear such as gloves and eye protection. If the car uses a rope-in gasket installation, you will also need strong nylon cord, usually around 1/8 inch thick, to help pull the gasket lip over the body flange. For door and vent glass work, expect to need screwdrivers, nut drivers, small sockets, rivet tools or channel-setting tools depending on the assembly design, and possibly a service manual or exploded diagram.
Materials matter just as much as tools. New glass should match the original shape, thickness, tint, and edge finish for the application. High-quality reproduction or correctly dated restoration glass is worth the investment because poor fit causes leaks, stress cracks, and trim alignment problems. New weatherstripping is strongly recommended, as old rubber usually hardens, shrinks, and loses sealing ability even if it still looks usable. You may also need setting tape, glazing compound, butyl sealant, anti-rattle material, division bar rubber, fuzzies, sash channel liner, and regulator rollers if you are refreshing side glass systems. For cars with stainless reveal moldings, new clips may be needed as well.
One overlooked item is a way to document disassembly. Photos, labeled bags, and masking-tape tags save a tremendous amount of time during reassembly, especially on vent windows and side glass frames where small shims and stops affect operation. Another smart addition is a helper. Even when the task seems simple, classic car glass can be awkward to hold and easy to chip at the edges. Using the right tools and fresh materials is what separates a durable, leak-free installation from a job that has to be redone after the first rainstorm.
How do I remove old classic car glass without damaging the body, trim, or surrounding parts?
The safest approach is to slow down and first determine exactly how the glass is retained. Many classic cars use rubber gaskets with stainless trim captured in the seal, while others use framed side glass, setting channels, or adhesive-assisted assemblies. Before touching anything, remove interior garnish moldings, inspect the flange area, and study how the trim is attached. Stainless trim should never be pried randomly, because it bends easily and can be very difficult to straighten without visible distortion. Proper trim tools and gentle, progressive release are essential. If the trim is rare, take extra time and work section by section.
For gasket-mounted windshields and back glass, many restorers cut the old rubber from the inside if the seal is being discarded anyway. This reduces stress on the glass and lowers the chance of damaging the pinchweld. Once the tension is relieved, the glass can often be pushed outward carefully while a helper supports it from outside. If the glass is to be reused, avoid excessive twisting and never push hard on one corner. Older laminated windshields can delaminate further or crack if uneven pressure is applied. Protect the cowl, dash, and painted edges with tape and blankets before removal.
Side glass and vent windows require a different mindset because the glass usually comes out as part of a regulator or frame assembly. Remove door panels, moisture barriers, and access stops methodically, then lower or reposition the regulator as needed. In many doors, the frame and glass have to come out in a specific sequence. Forcing the assembly can scratch fresh paint, chip the glass edge, or bend window channels. If corrosion is present, treat the area gently because rusted fasteners and swollen channels can lock parts in place. The key is to regard removal as an inspection phase, not just a teardown step. This is when you discover hidden rust, worn rollers, dried channels, and bent guides that would compromise the new installation if ignored.
Why do classic car glass installations leak, whistle, or fit poorly after replacement?
Most post-installation problems come down to fit, preparation, or seal quality rather than the glass itself. Leaks are commonly caused by reusing old rubber, installing the wrong gasket profile, failing to clean and repair the pinchweld, or skipping the bedding compound where the factory design required it. On a classic car, the body opening may have decades of rust, previous collision repair, or excessive paint buildup that changes how the seal sits. Even small irregularities can prevent the rubber from seating evenly, which then creates water paths and wind noise. If the opening is not straight and clean, no amount of pushing on the glass will fix the underlying issue.
Whistling at speed usually points to poor seal compression, trim not seated correctly, or misaligned vent and side glass rather than a defective windshield. Door glass and vent windows are especially sensitive to channel condition and adjustment. If the division bar, upper channel, or regulator stops are off, the glass may close at a slight angle and leave a small gap that creates noise and water intrusion. On restorations, this often happens when new weatherstripping is installed but the window alignment is not rechecked afterward. Fresh seals are thicker and change the closing position of the glass.
Poor fit can also come from low-quality reproduction parts. Not all aftermarket seals and glass are equal, and classic vehicles are less forgiving than modern cars in this area. A gasket that is slightly too soft, too hard, or dimensionally off can fight the installation from start to finish. The solution is to source parts from reputable specialists, test-fit whenever possible, and compare new parts to the originals before installation. If problems show up after the job is complete, do not ignore them. A minor leak can quickly lead to floor pan rust, moldy interiors, damaged headliners, and corrosion around the window opening. A careful redo with the correct materials is far better than living with a compromised seal.
What should I inspect and restore while the glass is out of a classic car?
This is one of the biggest opportunities in the entire project. Once the glass is removed, you have direct access to areas that are often hidden for decades, and it makes sense to inspect them thoroughly before installing anything new. Start with the window opening or pinchweld and look for rust, old sealer, pitting, pinholes, cracked paint, and signs of prior body repair. Any corrosion around a windshield or back glass opening should be addressed properly, because trapped moisture will continue to spread under the new seal. Clean the area completely, repair metal as needed, apply appropriate rust treatment or primer, and make sure the flange shape is correct before moving forward.
On side and vent glass jobs, inspect the entire operating system. Check window regulators for play, missing rollers, worn teeth, and hardened grease. Examine sash channels, division bars, run channels, anti-rattle strips, felt guides, vent pivots, and latches. These parts work together, and replacing only the glass while leaving the rest of the mechanism worn out usually leads to poor operation. If the glass was scratched because the felt channels were gone or the rollers were seized, simply installing a new pane will not solve the root problem. This is the right time to rebuild or lubricate everything while access is easy.




