
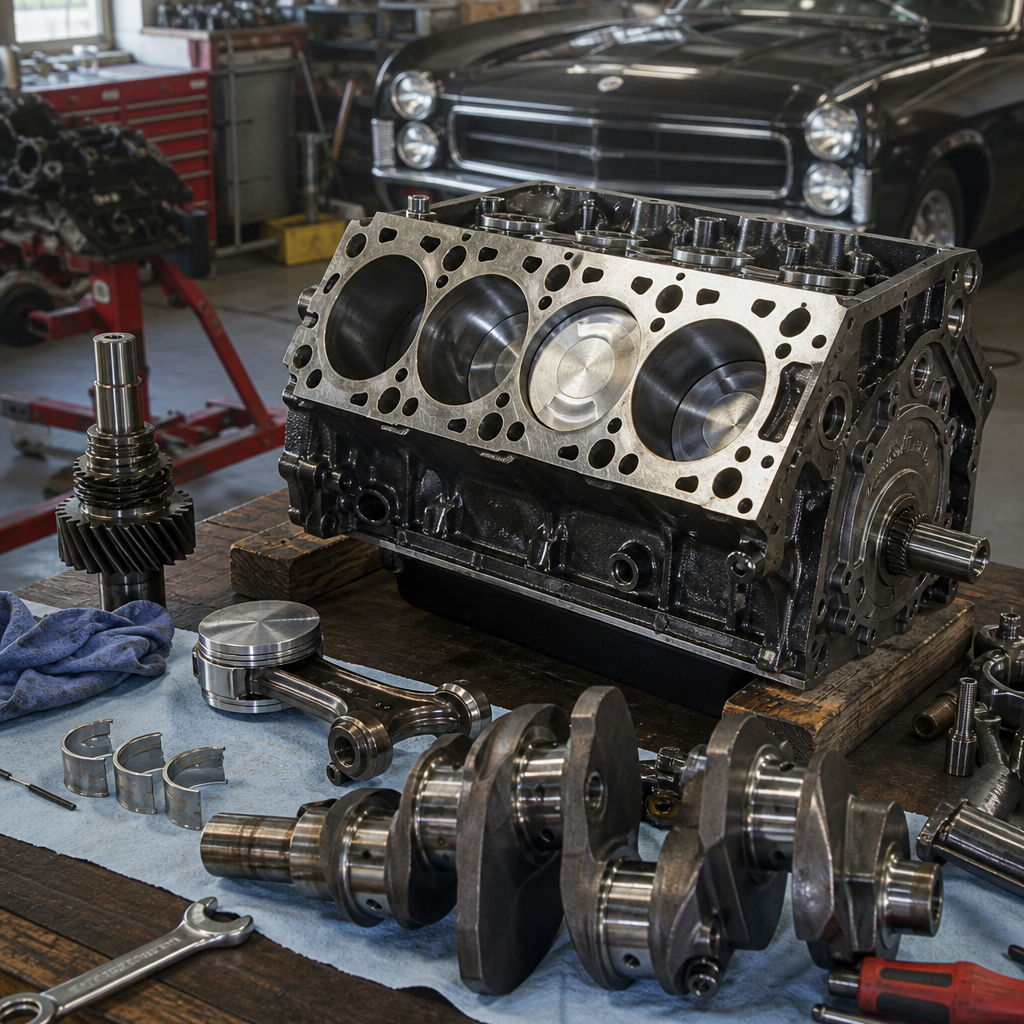
Rebuilding a classic car engine is the most important mechanical job in any serious restoration because the engine determines reliability, drivability, originality, and long term value. In the restoration and maintenance world, engine and mechanical work covers diagnosis, teardown, machining, parts selection, assembly, break in, tuning, and the supporting systems that let a rebuilt engine survive on modern roads. A proper rebuild is not just replacing worn parts. It is a structured process of measuring, inspecting, correcting tolerances, and matching components so the engine performs as designed. I have worked on small block V8s, inline sixes, flathead engines, and overhead cam classics, and the lesson is always the same: careful preparation saves thousands of dollars and prevents failures that appear only after the car is back on the road.
For owners, the phrase classic car engine rebuild can mean several different levels of work. A refresh usually involves gaskets, bearings, rings, and a valve service when the major hard parts remain usable. A full rebuild means complete disassembly, block and head machining, new wear components, and precise reassembly to factory or upgraded specifications. A restoration corrects not only wear but also previous poor repairs, missing emissions or vacuum hardware, incorrect fasteners, damaged threads, and unsafe fuel, ignition, and cooling components. This distinction matters because budget, timeline, and originality goals change the scope. Matching numbers collectors may prioritize factory casting dates and finishes, while drivers may choose hardened valve seats, improved oiling parts, or electronic ignition for durability.
This article serves as a hub for engine and mechanical work across a classic car project. It explains what happens before the first bolt is removed, how machine shops fit into the process, what parts deserve extra scrutiny, and which systems must be rebuilt alongside the long block. It also answers the questions owners ask most often: when should you rebuild instead of repair, what tools do you need, how much machining is normal, and how do you avoid a fresh engine that leaks, overheats, or wipes a camshaft during break in. If you understand the full workflow, you can plan jobs intelligently, speak clearly with a machinist, and decide which tasks belong in your garage and which require specialized equipment.
Start with diagnosis, documentation, and a rebuild plan
The best engine rebuild begins before teardown. First confirm why the engine needs work. Low compression, high leakdown, bearing noise, metal in the oil, chronic overheating, blue exhaust smoke, low oil pressure, and coolant contamination all point to different root causes. A compression test identifies weak cylinders. A leakdown test shows whether pressure escapes past rings, intake valves, exhaust valves, or head gaskets. Hot idle oil pressure tells you about bearing clearance and pump condition. Spark plug reading reveals oil control issues, mixture imbalance, or detonation. On engines that still run, vacuum gauge behavior is also useful; a steady low reading can indicate late valve timing, while a fluttering needle often points to valve sealing problems.
Documentation is equally important. Photograph casting numbers, hose routing, bracket locations, linkage geometry, and accessory spacers. Bag and label hardware by subsystem. Record main and rod bearing markings, piston orientation, and any shim packs. Factory service manuals, parts books, and assembly manuals are the authoritative references here. For many American engines, manuals from Ford, General Motors, and Chrysler provide torque sequences and clearances that aftermarket guides sometimes omit. For British and European classics, workshop manuals from Bentley, Haynes, and marque specialists are essential because fastener grades, sealants, and valve train designs differ significantly. If the car has already been apart in the past, expect surprises such as mixed fasteners, incorrect head gaskets, and nonstandard overbores.
Set the rebuild goal before spending money. A stock cruiser, concours restoration, period performance build, and dependable touring car do not require the same camshaft, compression ratio, piston material, or balancing work. This is also where a hub approach helps. Engine and mechanical work connects directly to cooling system restoration, fuel system renewal, ignition upgrades, transmission service, differential setup, brake vacuum supply, and exhaust fitment. If the engine is coming out, now is the time to inspect motor mounts, clutch components, flexplates, torque converters, steering couplers, and engine bay wiring. A rebuild plan prevents the common mistake of installing a fresh engine into a car with a clogged radiator, brittle fuel hoses, and a distributor that still has worn bushings.
Teardown, cleaning, and machine shop inspection
Disassembly should be methodical, not fast. Rotate the engine during teardown and note stiff spots, endplay, and timing slack. Once apart, keep each piston and rod assembly matched to its cylinder until measurements are complete. Look for witness marks on bearings, uneven carbon patterns, broken ring lands, worn timing sets, and sludge packed in oil galleries. Classic engines often show damage caused by infrequent oil changes, lead substitute myths, overheating, or years of sitting with moisture inside the cylinders. Rust pitting above ring travel can make an otherwise usable block unsuitable without boring. On cylinder heads, recessed valve seats, cracked exhaust bridges, and worn guides are common.
After teardown, every component must be cleaned before it can be measured accurately. Hot tanking, jet washing, bead blasting, ultrasonic cleaning, and media selection matter because trapped abrasive will destroy a rebuilt engine quickly. I insist on pulling all oil gallery plugs whenever possible so the galleries can be brushed and flushed. Machine shops should magnaflux or dye check cast iron parts for cracks, pressure test heads, measure bores for taper and out of round, inspect deck flatness, and check main tunnel alignment. Crankshafts need journal measurements, crack inspection, and hardness evaluation if damage is suspected. Connecting rods should be checked for twist, bend, big end roundness, and small end condition. This is where guesswork ends and actual numbers begin.
| Component | What the shop checks | Typical corrective work |
|---|---|---|
| Block | Bore wear, deck flatness, main alignment, cracks | Bore and hone, deck, align hone, thread repair |
| Crankshaft | Journal size, runout, cracks, surface finish | Polish or grind, straighten if needed, clean oil passages |
| Connecting rods | Big end roundness, bend, twist, pin fit | Resize rods, replace bolts, install bushings |
| Cylinder heads | Cracks, guide wear, seat condition, spring pressure | Valve job, guides, seats, resurfacing, spring replacement |
Choose the machine shop as carefully as the parts supplier. Ask what measuring equipment they use, whether they torque plate hone engines that require it, how they finish bores for moly versus cast rings, and whether they understand your specific engine family. A shop experienced with small block Chevrolets may not automatically know the quirks of an MG B-series, Jaguar XK, or Cadillac flathead. Good shops provide written measurements, not just verbal assurances. They also ask how the engine will be used because piston to wall clearance, ring gap, bearing clearance, and balancing targets depend on fuel quality, rpm range, and intended load.
Selecting parts and matching tolerances
Parts selection determines whether the finished engine behaves like a factory original or a temperamental compromise. Bearings, pistons, rings, timing components, oil pumps, gaskets, valve train parts, and fasteners all need to match the application. Use reputable brands with traceable specifications. For many domestic V8s, names such as Sealed Power, Clevite, Mahle, Speed-Pro, Cloyes, Melling, Fel-Pro, ARP, and Comp Cams are common because data and availability are strong. On European engines, AE Hepolite, Glyco, Elring, Payen, Kolbenschmidt, and Goetze may be more appropriate. The right part is not the cheapest one on a marketplace listing. It is the part with known material quality, correct dimensions, and support from builders who have used it successfully.
Tolerances matter more than catalog descriptions. Bearing clearance controls oil film stability. Ring end gap affects sealing and heat expansion. Piston skirt clearance affects noise and scuff resistance. Valve spring installed height affects seat pressure and camshaft survival. Flat tappet camshafts deserve special attention because modern oils contain lower zinc and phosphorus levels than many older designs expected. If your engine uses a flat tappet cam, proper lifter crown, lobe taper, break in lubricant, correct spring pressure, and suitable break in oil are nonnegotiable. Where originality allows, hardened exhaust valve seats are usually wise for engines that will see sustained highway use on unleaded fuel, though some low mileage hobby cars operate acceptably without them.
Resist the urge to over-cam, over-carburete, or over-compress a street driven classic. Big duration cams reduce idle vacuum, hurt brake booster performance, and often make heavy cars less pleasant in traffic. Oversized carburetors can weaken throttle response. Excess compression invites detonation, especially with iron heads and modern pump fuel. A balanced build usually means stock or mild cam timing, conservative compression, accurate quench, a recurved distributor, and a cooling system restored to full efficiency. Reliability gains often come from invisible improvements: precise balancing, improved rear main seals where available, better valve stem materials, and careful attention to oil control, not dramatic catalog upgrades.
Assembly, supporting systems, and first start success
Engine assembly is where discipline matters most. Cleanliness must be absolute. Wash machined parts with hot soapy water until white towels show no residue, then oil exposed surfaces immediately. Chase threads, verify fastener lengths, and dry fit major components before final assembly. Measure every bearing clearance with micrometers and bore gauges, then confirm with Plastigage if desired. Check crankshaft endplay, rod side clearance, piston deck height, ring orientation, ring end gap, valve to piston clearance where cam or head specs changed, and timing set indexing. Use assembly lube where appropriate, engine oil where specified, and the sealant recommended by the gasket manufacturer. More sealant is not safer; excess squeezes out and can block oil passages.
The engine will only be as dependable as the systems around it. Rebuild or replace the oil pump when appropriate, inspect the pickup to pan clearance, and confirm the pan is clean and dent free. Overhaul the cooling system with a flow tested radiator, correct thermostat, sound fan clutch or fixed fan, proper shroud, fresh hoses, and a verified water pump. Renew fuel lines, filters, rubber connections, and the tank pickup if contaminated. Service the distributor completely, including bushings, advance mechanisms, vacuum advance canister, cap, rotor, wires, plugs, and coil compatibility. Charging and starting systems also matter because weak voltage during cranking can mask tuning issues and damage a new starter or ring gear.
Before first start, prime the oiling system until oil reaches all rocker arms or valvetrain feed points, depending on design. Static time the ignition. Fill the carburetor bowls if safe to do so, confirm fuel pressure, and verify coolant level. The first start is not a casual event. For flat tappet engines, bring rpm promptly to the cam maker’s recommended break in range, commonly around 2000 to 2500 rpm, and vary it while watching oil pressure, coolant temperature, fuel leaks, and ignition timing. Have a timing light, cooling fan, fire extinguisher, and helper ready. After break in, change oil and filter, cut the filter open to inspect for debris, retorque fasteners where required by the manufacturer, and begin carburetor mixture and ignition advance tuning. Then road test gradually, listening for detonation, checking hot restart behavior, and confirming stable temperatures at idle and cruise.
Common mistakes, costs, and when to seek specialist help
The most expensive mistakes in classic car engine rebuilding are usually basic ones: skipping measurements, mixing valvetrain parts, reusing questionable fasteners, failing to clean oil galleries, and assuming the machine shop “handled everything.” Other frequent failures include incorrect ring gaps, mismatched pushrod lengths, excessive silicone sealant, improper distributor gear compatibility, and trying to tune around vacuum leaks or clogged exhausts. Budgeting honestly helps avoid rushed decisions. Costs vary widely by engine family and region, but a quality rebuild commonly includes machine work, rotating assembly parts, valve train components, gasket sets, pumps, ignition service, and cooling system work. Rare engines cost more because parts and machining knowledge are less available.
Some jobs are realistic for careful home builders; others belong with specialists. Short block assembly, cylinder head fitting, and final installation are possible in a well equipped garage if you own measuring tools and follow the manual exactly. Crank grinding, align honing, valve seat machining, balancing, crack repair, and babbitt work require dedicated equipment and experience. Certain engines also have known specialist areas. Jaguar XK engines, air cooled Porsche flats, Buick Nailheads, and early hemis benefit from builders who know their oiling paths, head torque patterns, and parts interchange issues. If originality affects value, consult a marque expert before replacing date coded components or factory finishes.
A successful rebuild transforms the entire ownership experience. The car starts predictably, holds oil pressure, runs at the correct temperature, and responds cleanly under load. Just as important, you gain a mechanical baseline for every other restoration and maintenance task. Treat this hub as your roadmap for engine and mechanical work, then go deeper into each linked subtopic: diagnostics, machine shop preparation, cylinder head rebuilding, ignition tuning, carburetor setup, cooling system restoration, lubrication, drivetrain interfaces, and break in procedures. Plan carefully, measure everything, and use proven parts. Do that, and your classic car engine rebuild will reward you with reliability, authenticity, and miles of confident driving.
Frequently Asked Questions
1. What does a proper classic car engine rebuild actually include?
A proper classic car engine rebuild is a complete mechanical process, not just a quick refresh with new gaskets and bearings. At a minimum, it starts with diagnosis and careful disassembly so you understand the condition of the engine before any parts are ordered. Every major component should be cleaned, measured, and inspected, including the block, crankshaft, connecting rods, pistons, cylinder heads, valvetrain, oiling system, and timing components. That inspection phase is what separates a reliable rebuild from a short-lived one, because wear, hidden cracks, poor machine work, and oiling issues often do not reveal themselves until everything is apart.
From there, a true rebuild usually includes machine shop work such as cylinder boring or honing, crankshaft polishing or grinding, deck inspection, connecting rod resizing if needed, valve seat and guide work, and pressure testing or crack checking of castings. The parts selection phase is equally important. You need the correct pistons, rings, bearings, camshaft, timing set, gaskets, oil pump, and fasteners for your exact engine family and build goals. In a classic car, that often means balancing originality with durability, especially if the car will be driven regularly on modern roads.
Assembly must be done with measured clearances, proper lubrication, correct torque values, and attention to details like ring orientation, piston-to-wall clearance, bearing oil clearance, cam timing, and end play. Once assembled, the engine still is not “done.” A proper rebuild also includes installation checks, priming the oil system, initial startup, camshaft break-in where applicable, ignition timing, carburetor or fuel system tuning, cooling system verification, and follow-up inspection after the first hours of operation. In short, a proper rebuild restores the engine as a complete operating system so it can be reliable, drivable, and true to the character of the car.
2. How do I know whether my classic car engine needs a full rebuild or just repairs?
The answer depends on the engine’s wear, history, and symptoms, and the only reliable way to decide is through systematic testing and inspection. Many classic engines show signs like low oil pressure, excessive blow-by, blue exhaust smoke, knocking noises, poor compression, hard starting, coolant contamination, metal in the oil, or persistent overheating. Any one of those can point to serious internal wear, but they do not automatically mean the engine must be fully rebuilt. Sometimes a tuning issue, bad valve seals, ignition problems, or a leaking head gasket can mimic deeper engine trouble.
Before committing to a rebuild, it is smart to perform a compression test, leak-down test, oil pressure check, cooling system inspection, and, if possible, a close review of service records. Those tests help identify whether the problem is in the rings, valves, head gasket, bearings, or related systems. However, with classic engines, age matters almost as much as mileage. An engine that sat for years can have stuck rings, corrosion in the cylinders, dried seals, sludge buildup, or internal rust even if it ran reasonably well before storage. Likewise, a high-mileage engine with unknown maintenance history may technically run, but still have enough wear to justify a full teardown if long-term reliability is the goal.
If the engine is original to a valuable classic and the restoration is being done seriously, a full rebuild is often the wiser choice because it gives you a known mechanical baseline. Rather than fixing one problem at a time, you address the entire engine and supporting systems in a planned way. That protects originality, prevents repeated labor, and reduces the risk of a failure after the car is back on the road. In other words, if you want dependable operation and not just a temporary improvement, a full rebuild is usually the best path when the engine shows multiple signs of age or internal wear.
3. How important is machine shop work when rebuilding a classic car engine?
Machine shop work is absolutely critical because modern engine rebuilding is based on measurement, precision, and surface condition, not guesswork. Even if an engine looks decent after teardown, the tolerances that matter most cannot be judged by eye. Cylinder walls may be tapered or out of round, crankshaft journals may be worn or scored, rods may be out of spec, decks may be uneven, and valve guides may have more play than they appear to. If those issues are not corrected, new parts can wear out quickly, oil control can suffer, compression may be inconsistent, and the engine may never perform the way it should.
A qualified machine shop will clean the components properly, inspect for cracks, and measure every critical surface. Depending on the engine’s condition, they may bore and hone the cylinders to match new pistons, resize rods, polish or grind the crankshaft, install cam bearings, surface the heads or block, perform valve jobs, replace guides or seats, and check spring pressures. On classic engines, this work is especially important because tolerances, metallurgy, and prior repair quality can vary widely. Many old engines have already been rebuilt once or twice, and it is common to find mismatched parts, excessive overbores, improvised repairs, or wear patterns caused by outdated machining methods.
Just as important, the machine shop must understand the needs of a classic engine rather than treating it like a generic modern rebuild. Some older engines have known weak points in oiling, cooling, or valvetrain geometry that must be accounted for during machining and assembly. The best results come from a shop that measures everything, communicates clearly, and provides specs rather than assumptions. In practice, skilled machine work is what turns a pile of cleaned parts into a solid foundation for an engine that starts easily, runs smoothly, and survives for years.
4. Should I keep the engine completely original, or upgrade parts for modern reliability?
That depends on how the car will be used, how important factory originality is to its value, and what weaknesses are known in that specific engine design. For a show-focused or highly collectible car, preserving original specifications is often the right move. That means using stock-style pistons, factory camshaft profiles, correct finishes, date-appropriate components, and rebuild methods that retain the car’s historical character. Collectors often value engines that look, sound, and perform as they did when new, especially if the car still has its numbers-matching drivetrain.
For a driver-quality restoration, though, selective upgrades can make a major difference in reliability and usability without ruining originality. Common improvements include hardened valve seats for compatibility with modern fuel, improved gasket materials, better-quality bearings, upgraded fasteners in known problem areas, electronic ignition hidden in a stock distributor, and a carefully chosen oil pump or timing set. In some engines, improved cooling components or minor oiling system upgrades are worthwhile because they address known weaknesses that become more noticeable in modern traffic and higher ambient temperatures.
The key is to make thoughtful upgrades, not random modifications. A classic engine should be built as a system. If you add compression, camshaft duration, or aftermarket induction without understanding the effect on fuel quality, idle quality, cooling demand, and drivability, you can easily make the car less enjoyable. A well-rebuilt mostly stock engine often feels better on the road than a poorly planned “performance” build. The smartest approach is usually to preserve the engine’s original character while quietly improving durability where experience has shown it matters most. That gives you a car that feels authentic but is better suited to regular use.
5. What are the biggest mistakes people make when rebuilding a classic car engine?
The most common mistake is rushing past inspection and measurement. People often assume that if the engine turned freely or ran before teardown, the major parts are probably fine. That is how worn cylinders, out-of-round journals, cracked heads, weak springs, bad oil pumps, and incorrect clearances get overlooked. Another major mistake is ordering parts too early. In a proper rebuild, you do not finalize pistons, bearings, rings, or valvetrain components until the engine has been inspected and the machine work plan is clear. Buying parts before measuring often leads to mismatches, delays, or compromises during assembly.
Assembly errors are another frequent problem. Incorrect bearing clearances, poor ring installation, improper torque procedures, dirty oil passages, missed galley plugs, wrong seal orientation, and inaccurate cam timing can all ruin a rebuild quickly. Classic engines also suffer when rebuilders focus only on the long block and ignore the surrounding systems. A freshly rebuilt engine can still fail if the radiator is restricted, the fuel system is dirty, the distributor is worn, the exhaust is blocked, or the oil cooler and lines contain debris from the previous engine failure. Supporting systems are not optional details; they are part of engine survival.
Finally, many failures happen after the engine is already built because break-in and tuning are treated casually. Initial startup procedures matter. Oil pressure should be verified immediately, timing and fuel delivery should be close before cranking, and flat-tappet camshafts require special care during break-in. After startup, the engine still needs proper tuning, leak checks, fluid changes, and monitoring for heat cycles and fastener settling where applicable. The best rebuilds succeed because they follow a disciplined process from diagnosis to final tune. That process is what protects reliability, drivability, originality, and long-term value in a classic car restoration.




