
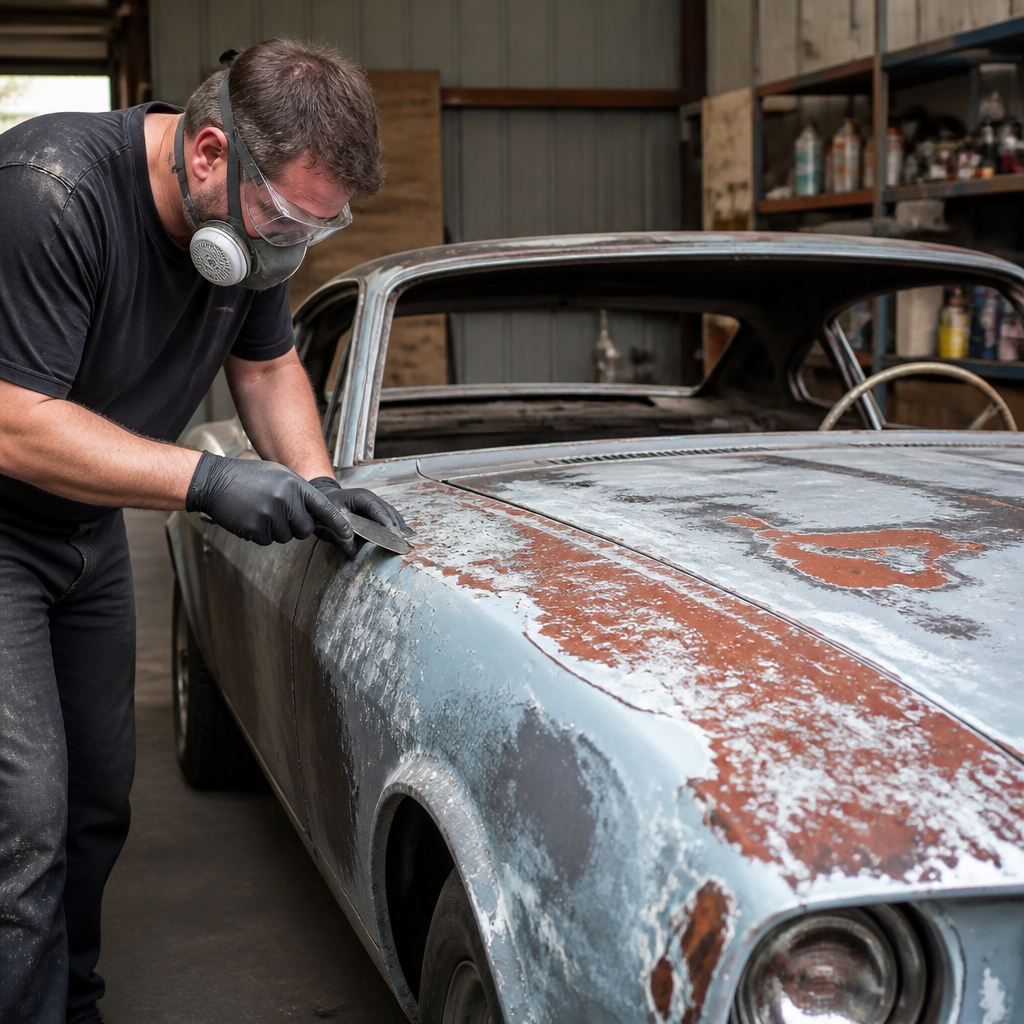
Stripping paint from a classic car safely is the foundation of any durable restoration, because every repair, primer coat, and final finish depends on what happens when the old layers come off. In restoration shops and home garages alike, I have seen excellent bodywork ruined by rushed paint removal, and I have also seen tired, oxidized panels transformed when the stripping stage was handled methodically. Paint stripping means removing old paint, primer, filler residue, and contamination from sheet metal, fiberglass, or aluminum without warping panels, gouging surfaces, or exposing the car to unnecessary chemical, fire, or dust hazards. On a classic car, that matters more than on a modern daily driver because the steel is often thinner from age, body seams trap residue, and replacement panels can be expensive or impossible to source.
This guide serves as a hub for DIY restoration guides within restoration and maintenance, so it covers the full decision-making process rather than a single technique in isolation. You will learn how to inspect a vehicle before stripping, choose between chemical stripper, mechanical abrasion, media blasting, or a hybrid approach, protect yourself and your workspace, and prepare bare metal for the next restoration step. The goal is not simply to get paint off. The goal is to preserve original metal, reveal hidden damage, and create a stable surface for epoxy primer, metal repair, and refinishing. If you understand those priorities from the start, you avoid the common mistakes that cost hobbyists time, money, and irreplaceable factory steel.
Most classic cars have been painted more than once. A 1967 Mustang, 1972 Chevelle, or Series II Land Rover may carry factory primer, an old enamel respray, body filler from previous repairs, and spot repairs in lacquer or urethane. Those layers respond differently to heat, sanding, and solvents. Safety is equally important. Older coatings may contain lead, and every stripping method creates its own risks, from airborne dust to skin burns to panel distortion. That is why safe paint stripping is not one universal recipe. It is a controlled sequence built around the car’s materials, condition, and your workspace. As the central DIY restoration guide for paint removal, this article will help you select the right method and connect it to the larger restoration workflow.
Inspect the Car Before You Remove a Single Layer
The first step is assessment, not action. Before touching a sander or opening a chemical stripper, inspect every panel in bright angled light and with a paint thickness gauge if you have one. On restorations I have managed, this early inspection often changes the entire stripping plan. Thick readings around quarter panels, rocker panels, and lower fenders usually indicate previous filler work. Cracking around seams may signal old repairs hiding rust. Bubbling under paint almost always means corrosion is active below the surface, not simply cosmetic failure. If the car has fiberglass panels, as on a Corvette, aggressive sanding or the wrong stripper can damage the resin. If it has aluminum panels, such as on some British classics, you need products and abrasives that will not contaminate or excessively scratch softer metal.
Document what you find with photos and masking notes on the car itself. Mark suspected filler areas, rust perforation, lead-loaded seams, brazed repairs, and trim holes. Remove badges, weatherstrips, lights, glass if practical, and anything else that could trap stripper or blasting media. Stripping with trim in place saves a few hours up front and often creates weeks of cleanup later. This is also the stage to decide whether the car should be stripped panel by panel or body-off. A solid driver getting partial refinishing may only need exterior panels taken to bare metal. A full concours restoration often justifies complete disassembly. The better your inspection, the safer and more efficient every downstream restoration and maintenance task becomes.
Choose the Right Paint Stripping Method for Each Area
No single method is best for an entire classic car. The safest professional approach is usually mixed-method stripping based on panel shape, coating thickness, and substrate. Flat steel panels such as doors, roofs, and hoods often respond well to dual-action sanding with 80-grit discs or surface conditioning discs used carefully at controlled speed. Tight channels, drip rails, and jambs are better candidates for chemical stripper and hand scraping. Heavy rust scale on frames and suspension parts may justify abrasive blasting, while delicate outer body panels often should not be blasted with aggressive media at all. When hobbyists get into trouble, it is usually because they commit to one tool and force it onto every surface.
Chemical stripper works by softening paint so it can be scraped off, and modern formulas vary widely. Methylene chloride products were once common and fast, but many regions now restrict them because of serious health risks. Safer alternatives based on benzyl alcohol or N-methyl-2-pyrrolidone substitutes tend to work more slowly but are more manageable for home use. Mechanical stripping includes sanding discs, stripping wheels, and razor scraping. It is direct and inexpensive, but excessive pressure can heat and warp metal. Media blasting includes crushed glass, garnet, soda, walnut shell, or plastic media propelled under pressure. It is excellent for rust in complex shapes, but the wrong operator can stretch sheet metal quickly. Safe stripping means matching the method to the panel, not the other way around.
| Method | Best Uses | Main Advantages | Main Risks |
|---|---|---|---|
| Chemical stripper | Jambs, contours, multiple paint layers | Low heat, reaches crevices | Chemical burns, residue in seams |
| DA sanding | Large flat steel panels | Controlled removal, easy to source tools | Heat buildup, gouging edges |
| Strip discs | Localized removal, stubborn coatings | Fast cutting without digging deeply | Can smear coatings if overworked |
| Media blasting | Rusty brackets, frames, hidden cavities | Cleans rust thoroughly | Panel warping, trapped media |
Set Up a Safe Workspace and Use Proper Protection
Paint stripping safety starts with containment and personal protection. At minimum, use chemical-resistant gloves, sealed eye protection, long sleeves, and a properly fitted respirator matched to the hazard. For sanding old finishes, a P100 particulate filter is the baseline. For chemical stripping with solvent vapors, use an organic vapor cartridge approved for that exposure and change cartridges on schedule. A loose paper dust mask is not enough. If there is any chance the existing paint predates lead bans in your country, treat the dust as hazardous. In the United States, EPA renovation guidance and OSHA respiratory principles are useful references even for serious DIY restorers working in private shops.
Ventilation matters just as much as protective gear. Work with cross-flow air, explosion-safe fans where solvents are present, and zero ignition sources. Water heater pilot lights, grinders throwing sparks, and extension cords near stripper-soaked rags have started more than a few garage fires. Cover nearby tools, shelving, and finished parts because paint dust settles everywhere. Keep a dedicated waste container for used stripper, sludge, and contaminated abrasives, and follow local disposal rules. On a practical level, a clean organized workspace also improves results. When tools, scrapers, masking supplies, wax and grease remover, and epoxy primer are staged before you start, you are far less likely to leave bare metal exposed overnight and invite flash rust.
How to Strip Paint with Chemicals Without Damaging the Car
Chemical stripping is often the safest choice for intricate areas because it removes paint with minimal friction and heat. Apply the product to a cool panel out of direct sun, using a disposable brush to lay on a thick, even coat. Do not brush it thin like paint. Most effective strippers need film build so they stay wet long enough to break down the coating. Covering the area loosely with plastic sheeting can extend dwell time and improve lifting on stubborn enamel or urethane. Once the paint wrinkles, use a plastic or non-marring scraper and work gently. Metal putty knives can dig into steel and leave sharp gouges that later print through primer.
After the first pass, expect to repeat the process. Few classic cars go to bare metal in one application because they usually carry several generations of coatings. Clean residue exactly as the product manufacturer directs. Some require water rinse, others require solvent wipe or proprietary neutralizer. This step is critical. Residue trapped in seams, around spot welds, or under old seam sealer can attack new coatings months later. I use compressed air, nylon brushes, and absorbent towels to purge channels thoroughly, then follow with wax and grease remover before any sanding. Chemical stripper is especially useful around cowl vents, door jambs, and windshield openings, but only if you commit to complete cleanup afterward.
How to Strip Paint Mechanically While Avoiding Warped Panels
Mechanical stripping is the default method for many DIY restorers because the tools are affordable and the process feels straightforward. The safest setup for outer panels is usually a dual-action sander with quality discs from brands such as 3M, Norton, or Mirka. Keep the tool moving, use moderate pressure, and avoid dwelling on crowns, body lines, and panel edges. Heat is the enemy. When a panel gets hot enough that you cannot rest your hand on it comfortably, stop and let it cool. Warping does not always happen dramatically in the moment. Sometimes it appears later as subtle waviness visible only after primer.
Use the coarsest grit that removes the coating efficiently without cutting deep scratches you will struggle to refine later. For many steel panels, 80-grit is a practical starting point; 60-grit may be justified on heavy coatings, while 120-grit can work on thin old lacquer. Strip discs mounted on an angle grinder should be used cautiously and preferably at reduced speed with a variable-speed tool. They are effective on heavy paint and filler remnants, but they can quickly thin edges and create heat. Never use hard grinding discs for paint removal on body panels. They remove metal, not just paint. For jambs and corners, hand sanding, abrasive pads, and detail tools are slower but much safer than forcing a large machine into a tight space.
When Media Blasting Makes Sense and When It Does Not
Media blasting has a strong place in DIY restoration guides, but it is not a blanket answer for body shells. Used correctly, blasting is unmatched for rusty brackets, control arms, subframes, wheel housings, floor pans, and heavily pitted chassis parts. It can also clean complex stampings and weld seams that sanding cannot reach. The problem is that many first-time restorers blast large exterior panels with excessive pressure and aggressive media, then discover stretched metal that requires extensive hammer and dolly work or filler correction. Hoods, roofs, deck lids, and door skins are especially vulnerable because they are broad, thin, and easy to heat.
If you outsource blasting, choose a shop with documented classic car experience and ask exactly what media, nozzle size, and pressure they use on each substrate. Crushed glass and garnet cut fast but can be harsh on sheet metal. Soda is gentle and leaves less profile, but it can interfere with coating adhesion if residue is not removed fully. Walnut shell and plastic media are useful for delicate surfaces and fiberglass components. Even when blasting is done well, media gets everywhere. Expect to spend significant time vacuuming, blowing out seams, and rotating the shell to remove trapped material. In many restorations, the best compromise is blasting the underside, engine bay, and loose parts while using chemical and mechanical stripping on outer skins.
Protect Bare Metal and Connect Paint Stripping to the Full Restoration Plan
Once the paint is off, the job changes immediately from stripping to preservation. Bare steel can flash rust within hours in humid conditions, and hand oils can stain clean metal. Vacuum dust, wipe with a dedicated surface cleaner, and inspect again under good light. This is when hidden problems reveal themselves clearly: pinholes in lower fenders, poor lap repairs under filler, cracked lead seams, or stretched areas from old collision work. Do not rush into high-build primer to cover defects. Carry out metal finishing, welding, rust repair, and seam sealer replacement first. In every successful restoration and maintenance workflow I have followed, epoxy primer goes on as soon as the metal is clean and stable because it locks out moisture and gives you a reliable base for later filler and surfacer according to the product system.
As the hub page for DIY restoration guides, this topic links naturally to rust repair, panel replacement, body filler shaping, epoxy primer application, seam sealer restoration, underbody cleaning, and paint prep articles. Paint stripping sits at the center because every one of those jobs starts with honest access to the substrate. The safest method is usually a hybrid: inspect carefully, strip gently, clean thoroughly, and protect immediately. That approach preserves original metal, reduces rework, and produces a finish that lasts. If you are planning a classic car restoration, build your process around safe paint removal first, then move step by step through the rest of the restoration system with the same discipline.
Frequently Asked Questions
What is the safest way to strip paint from a classic car without damaging the metal?
The safest approach is to match the stripping method to the panel, the condition of the car, and the type of coating you are removing rather than trying to use one aggressive technique everywhere. In most restorations, that means working in stages. Start by cleaning the surface so grease, wax, and road contamination do not get ground into the metal. Then choose a removal method based on the area. Chemical stripper is often a good option for broad exterior panels because it can lift multiple paint layers with less heat and less risk of warping than aggressive grinding. Plastic media blasting or other low-heat, low-aggression blasting methods can also be effective when performed by an experienced operator. For edges, tight seams, and stubborn residue, hand scraping, abrasive pads, and careful sanding are usually safer than forcing a power tool into places it does not belong.
The biggest mistakes usually come from heat and pressure. Coarse grinding discs, heavy sanding pressure, and uncontrolled blasting can stretch or warp old sheet metal surprisingly fast, especially on large flat panels like hoods, roofs, and doors. Classic car metal is often thinner than people expect, and decades of repairs may have already weakened certain sections. A methodical process protects that metal. Remove coatings gradually, inspect often, and stop as soon as you reach clean bare steel or the next layer you need to evaluate. The goal is not simply to get the paint off; the goal is to reveal the true condition of the body while preserving the original panel as much as possible.
Should I use chemical stripper, sanding, or media blasting on a classic car?
Each method has strengths, and the best results usually come from combining them strategically. Chemical stripper is useful when you want to soften and lift old paint layers without generating the friction and heat that can deform sheet metal. It is especially helpful on large exterior panels and on cars with several old repaint layers. The downside is that chemical stripper requires careful cleanup. Any residue left in seams, overlaps, body joints, or pinholes can later interfere with primer and paint adhesion. If you use it, thorough neutralizing and cleaning according to the product directions are essential.
Sanding is the most controlled option for many hobbyists because it lets you remove material slowly and inspect the surface as you go. Dual-action sanders, stripping discs designed for automotive use, and hand sanding blocks can all be safe tools when used properly. Sanding is excellent for feathering transitions, cleaning up residue, and preparing metal for epoxy primer after stripping. Its limitation is time, especially if the car has many layers of old paint, heavy filler, or rust scale.
Media blasting can be extremely effective, but it is also the easiest method to misuse. Used correctly, it can clean rust from hard-to-reach areas, inner structures, brackets, and complex shapes better than almost anything else. Used incorrectly, it can warp panels, peen the metal surface, force media into cavities, and create cleanup problems that last for months. For delicate exterior panels, many restorers avoid traditional aggressive sandblasting entirely and instead use gentler media and experienced operators. In practice, many high-quality restorations use chemical stripping or controlled sanding on outer body panels, then reserve blasting for rusted areas, chassis components, jambs, undersides, and structural sections where access is limited.
How do I avoid warping body panels while removing old paint?
Avoiding panel warpage comes down to controlling heat, pressure, and dwell time in one spot. Thin steel expands quickly when overheated, and once a panel has been distorted, correcting it can become far more difficult than the paint removal itself. The safest habit is to keep every tool moving. If you are sanding with a machine, do not lean into it. Let the abrasive do the work, use moderate speed, and move across the panel in overlapping passes rather than hovering in one area. If you are using a stripping disc, choose one designed for coating removal rather than heavy stock removal, and check the panel temperature with your hand frequently. If it is getting hot, stop and let it cool.
Blasting requires even more caution. Large flat panels are the highest-risk areas, and excessive air pressure or overly aggressive media can distort them rapidly. A skilled operator will use appropriate media, reduced pressure, proper distance, and shallow blasting angles to minimize stress on the surface. Even then, many restorers prefer not to blast roofs, hoods, decklids, and door skins unless absolutely necessary. Chemical stripping reduces heat-related risk, but it still requires patience and careful scraping so you do not gouge the metal.
It also helps to work panel by panel rather than trying to strip the whole car in a rush. That makes it easier to inspect for filler, hidden repairs, rust perforation, and lead work before moving on. Classic cars often contain a mix of factory metal, old body repairs, and unknown coatings. A slow, controlled pace gives you the best chance of protecting what is solid and identifying what truly needs repair.
What safety precautions should I take when stripping paint from an older car?
Paint stripping creates several hazards at once: dust, fumes, sharp debris, chemical exposure, and the possibility of uncovering lead-based coatings or old repair materials. At a minimum, wear eye protection, chemical-resistant gloves when using stripper, hearing protection around power tools, and a respirator suited to the task. A simple dust mask is not enough for many stripping jobs. If you are sanding old finishes, using chemical products, or disturbing unknown coatings, use the correct respirator cartridges and make sure the mask fits properly. Good ventilation is also essential, especially in a home garage where fumes can accumulate quickly.
Older vehicles demand extra caution because you often do not know exactly what previous owners or body shops used. Old lacquer systems, enamel repaint layers, filler dust, seam sealer residue, and possible lead in older coatings all change the risk profile. That is why containment and cleanup matter. Use drop cloths or floor covering to catch debris, vacuum dust with equipment designed for fine particles, and avoid sweeping contaminated dust into the air. If you are using chemical stripper, keep it off your skin, follow the manufacturer’s instructions for dwell time and removal, and dispose of waste safely according to local regulations.
Fire safety should not be overlooked either. Some stripping processes generate sparks, and many garages contain solvents, rags, fuel vapors, and old undercoating that can ignite. Keep a fire extinguisher nearby, disconnect the battery if you are working around the shell, and remove interior materials or trim that could be damaged by chemicals or dust. Safe paint stripping is not only about preserving the car’s metal; it is also about protecting your lungs, skin, eyes, and workspace from unnecessary risk.
What should I do after the paint is stripped to prevent flash rust and ensure a good finish?
Once the paint is off, the clock starts ticking, especially on bare steel. Freshly stripped metal can begin to oxidize very quickly depending on humidity, temperature, and how clean the surface is. The first step is to remove all residue from the stripping process. If you used chemical stripper, clean and neutralize the surface exactly as directed by the product manufacturer, paying close attention to seams, spot-weld flanges, drip rails, and body gaps where residue can hide. If you sanded or blasted the panel, blow off dust, vacuum thoroughly, and wipe the metal with an appropriate wax and grease remover or surface cleaner compatible with your next coating system.
After cleaning, inspect the metal carefully in good light. This is the stage where hidden filler, pitting, pinholes, brazed repairs, previous patch panels, and rust damage become visible. Make your metal repairs before sealing the surface whenever possible. Once the panel is clean and dry, apply a high-quality epoxy primer as soon as practical. Epoxy primer is widely used in restoration because it seals bare metal well and provides a stable foundation for later bodywork, filler work in many systems, high-build primer, and topcoat preparation. Letting stripped metal sit exposed for days or weeks is one of the most common mistakes in restoration work.
Just as important, keep the metal clean after stripping. Bare steel picks up fingerprints, moisture, and shop contamination easily. Handle panels with clean gloves when possible, store the vehicle in a dry environment, and avoid using compressed air contaminated with oil or water. A durable paint job begins long before the color coat is sprayed. It starts with clean stripping, careful inspection, and fast, correct protection of the newly exposed metal.




