
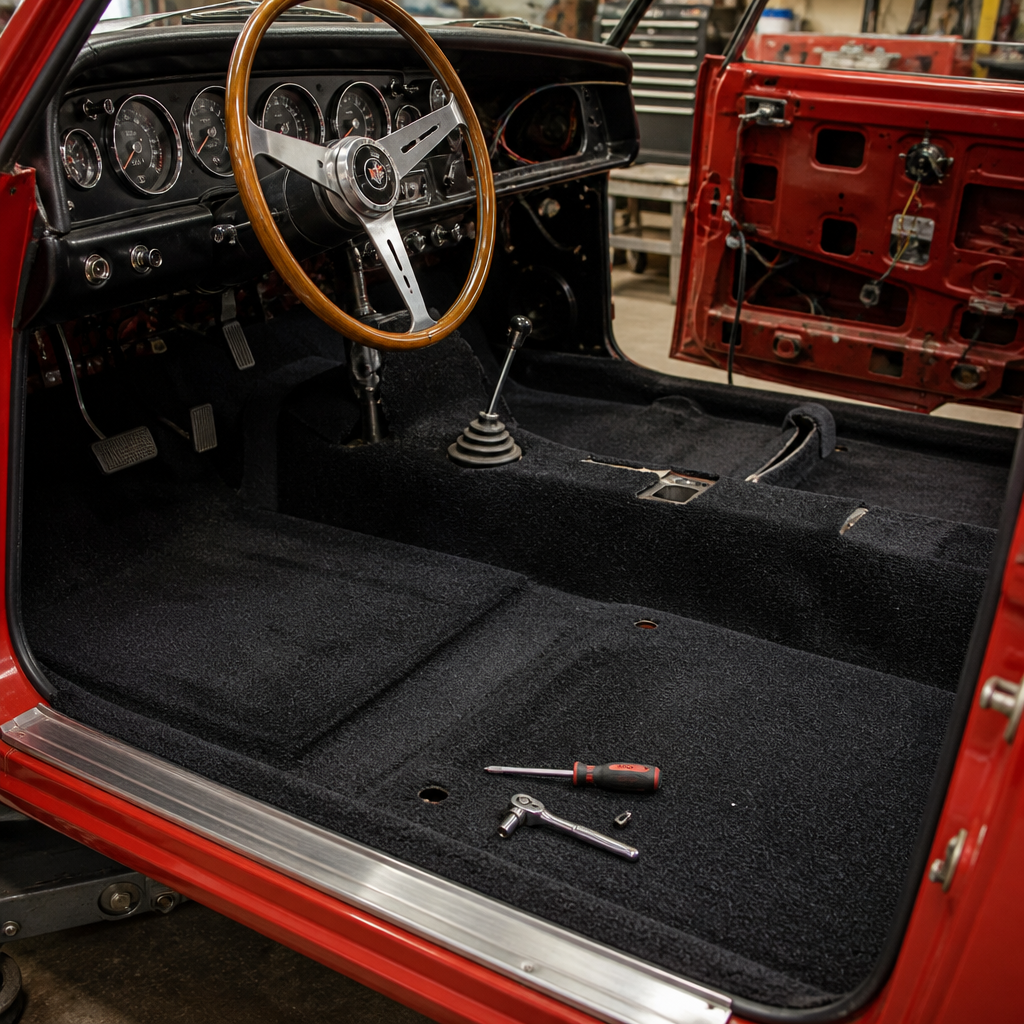
Replacing carpet in a classic car is one of the most transformative interior restoration jobs because it changes how the cabin looks, smells, sounds, and feels every time you open the door. In restoration work, “carpet replacement” means removing worn floor covering, correcting the floor beneath it, and installing a correctly fitted new carpet set with proper insulation, trim alignment, and finish work. “Interior restoration” is broader: it includes carpet, sound deadening, underlayment, seat upholstery, door panels, headliner, package tray, weatherstripping, and the small hardware that makes the cabin feel complete. I have replaced carpet in everything from driver-grade muscle cars to body-on-frame full-size sedans, and the pattern is always the same: careful prep determines whether the final result looks factory-correct or obviously redone. This matters because the carpet sits at the center of the interior. It touches the sill plates, seat mounts, kick panels, console, pedals, and lower rear trim, so every mistake becomes visible. A well-executed carpet job also protects against rust, road noise, heat transfer, and moisture retention, making it a foundational task within classic car interior restoration.
Owners often ask whether replacing carpet is purely cosmetic. The direct answer is no. Old jute padding absorbs water, holds odors, and can hide pinholes, seam rust, or previous patchwork. Sun-faded loop pile might still look acceptable in photos, yet underneath it can be brittle tar paper, missing floor plugs, or loose seat reinforcements. During restoration, carpet replacement becomes an inspection window into the condition of the floor pan and transmission tunnel. It is also one of the best opportunities to improve comfort without changing the character of the car. Adding butyl sound deadener under a reproduction molded carpet, for example, can reduce resonance while preserving the original appearance. For a hub article on interior restoration, carpet is the logical starting point because it connects structural integrity, authenticity, comfort, and resale value. If you understand how to replace carpet correctly, you understand many of the principles that govern the rest of the cabin.
Plan the job before you order parts
The first step is deciding the restoration standard you want: concours-correct, factory-style driver, or upgraded touring. That choice affects material, color, insulation, heel pad style, and fit expectations. Most American classics originally used either loop or cut pile, while many luxury models used denser plush carpeting and more substantial underlayment. A 1960s muscle car with molded loop carpet should not automatically receive modern cut pile simply because it feels softer. If originality matters, verify the trim code on the cowl tag, build sheet, or factory literature, then cross-check with a supplier such as ACC, Trim Parts, Legendary Interiors, or SMS Auto Fabrics depending on the vehicle. For imported classics, consult marque-specific vendors and club documentation because factory materials often differed by market and trim level.
You also need a realistic parts list. At minimum, most jobs require molded carpet, underlayment or jute, sill plate screws, seat mounting hardware if existing bolts are corroded, body plugs if any are missing, spray adhesive where appropriate, and seam or edge tape in areas the factory used it. On console cars, inspect the console brackets and side seals. On four-speed cars, verify the shifter porch boot, lower seal, and retainer. On automatic cars, inspect the indicator cable pass-through and column seal area. Interior restoration succeeds when you treat related parts as a system rather than replacing only what is visible.
Inspect the floor pan and remove the old interior carefully
Disassembly should be methodical, photographed, and labeled. Remove the battery connection first if any courtesy light wiring, power seat wiring, or aftermarket stereo wiring runs under the carpet. Then remove front and rear seats, console, seat belts, sill plates, kick panels if needed, lower rear side trim where required, and threshold weatherstrip sections that trap carpet edges. Bag hardware by component and note bolt locations because seat track spacers, inner and outer washers, and shoulder belt anchors are not always interchangeable. I mark every hidden cutout in painter’s tape on the old carpet before lifting it out, including seat studs, dimmer switch clearance, pedal bracket areas, and console mount points. That old carpet becomes the most useful rough template you have.
Once the carpet is out, inspect the floor pan with bright light and a pick. Surface rust can often be cleaned and stabilized, but soft metal around seat mounts, body braces, or drain areas needs welding, not filler or thick undercoating. Check all factory seams, toe boards, rocker edges, and rear footwells. Moisture often enters through windshield seals, cowl vents, heater boxes, rear glass channels, quarter window seals, or missing floor plugs, so identify the source before installing anything new. A replacement carpet over an active leak will fail quickly and may create mold, odor, and hidden corrosion. Vacuum thoroughly, degrease where needed, and finish with epoxy primer or a proven rust encapsulating coating on properly prepared metal. This is the stage where interior restoration intersects with body preservation.
Choose the right carpet, padding, and insulation
Classic car carpet sets are usually sold as molded kits shaped to the front footwells and transmission tunnel, plus rear sections when the application requires them. “Molded” does not mean drop-in perfect. Heat, trimming, and careful positioning are still required because reproduction tooling must accommodate production tolerances, aftermarket floor repairs, and decades of chassis movement. Material selection matters. Loop carpet is period-correct for many 1950s through early 1970s domestic cars and offers a firmer, more authentic look. Cut pile is common on later cars and some replacement sets because it hides slight imperfections better and feels richer underfoot. Essex-style plush exists for owners prioritizing comfort over originality.
| Component | Best choice for originality | Best choice for comfort | Key caution |
|---|---|---|---|
| Carpet material | Factory-correct loop or OEM-style cut pile | Premium cut pile or plush | Verify trim code before ordering |
| Underlayment | Jute in factory thickness | Mass-backed insulation or layered jute and butyl | Too much thickness can affect trim fit |
| Sound deadening | Minimal, hidden application | Butyl mat on pans and tunnel | Do not block drains or wiring paths |
| Heat barrier | As originally equipped | Foil-faced thermal barrier over tunnel | Keep clear of exhaust heat intrusion points |
Padding and insulation deserve equal attention. Factory jute padding provided softness and some thermal control, but modern butyl sheets and closed-cell foam can significantly improve comfort if applied intelligently. I avoid asphalt-based peel-and-stick products in restorations that may sit in heat because they can soften, smell, and become messy. Quality butyl mats from established manufacturers perform better and remain stable. Use them primarily on flat floor sections and the transmission tunnel, then add jute or mass-backed underlayment where the carpet needs support. The limitation is thickness: too much material causes sill plates not to sit flat, console edges to ride high, and seat tracks to bind.
Test-fit, trim gradually, and use heat to shape the carpet
The most common mistake in classic car carpet replacement is cutting openings too early. Lay the molded carpet in the sun first or warm it with a heat gun carefully to relax shipping folds. Set it in the car and center it on the transmission tunnel, then work outward into the footwells and rocker areas. The goal is tension without distortion. On some cars, especially full-size coupes and wagons, the rear section must tuck under side trim in a very specific sequence, so do a full dry fit before adhesive or final cuts. Weight the carpet in place overnight if needed. Time spent here saves irreversible errors later.
When it is time to cut, locate holes from underneath or by feel from above, then make the smallest possible X-shaped incision. Start with seat studs, console brackets, and shifter openings because these anchor the carpet’s position. Enlarge openings only as required. Never cut a large rectangle because trim rings and boots rarely cover as much as you think. Around the accelerator pedal, dimmer switch, and parking brake, make relief cuts incrementally and check operation repeatedly. Heat helps the molded shape conform to the tunnel and toe boards, but use it sparingly. Excess heat can shrink synthetic fibers, distort heel pads, or create shiny spots.
Install around seats, belts, console, and trim without creating tension points
Reassembly is where a good carpet set becomes a finished interior. Start by confirming that wiring harnesses, seat belt anchors, and body plugs are in their correct channels and not trapped under insulation. Reinstall sill plates only after the carpet edge is evenly positioned along both rockers. If one side is slightly short, revisit the tunnel alignment before forcing the plate down. On bucket-seat cars, seat track openings must allow the tracks to sit flat against reinforced floor sections. If the carpet bunches under a track, the seat can rock and the bolt torque reading becomes misleading. Factory seat belt anchor points should be fully visible and free of carpet fibers under the washer surface for secure clamping.
Console cars require extra patience. The console base often hides minor carpet trimming, but it also amplifies asymmetry if the tunnel alignment is off-center. Before tightening console hardware, check the fit against dash lower trim, shifter bezel, and rear bracket. On manual-transmission cars, install the lower shift boot and sealing retainer correctly before the decorative boot. This reduces heat and fumes entering the cabin. For rear seat areas, ensure the lower cushion and backrest lock into place without compressing the carpet unevenly. If the rear seat is difficult to latch after new padding, trim or reshape the underlayment rather than forcing the frame.
Make the carpet replacement part of a complete interior restoration plan
As a hub topic within interior restoration, carpet replacement should lead naturally into related upgrades and repairs. Once the seats are out, inspect seat foam, burlap, springs, tracks, and release mechanisms. Worn seat buns flatten the cabin profile and can make even new carpet look cheap because the seating position appears collapsed. Door sill plates and kick panels should be cleaned, polished, or replaced before final installation. Weatherstripping around doors and roof rails affects how often moisture reaches the carpet. Heater boxes, cowl drains, and air conditioning evaporator drains should be serviced because hidden water intrusion ruins interior work faster than ordinary wear.
This is also the ideal time to evaluate sound and heat management across the entire cabin. On big-block cars, trucks, and any classic with long-tube headers or marginal exhaust routing, transmission tunnel heat can be severe. Adding a quality thermal barrier beneath the carpet can make summer driving dramatically more tolerable. Convertibles deserve special attention because top seals and rear well areas often allow water migration into rear footwells. If you are building a driver rather than a points car, consider pairing carpet replacement with new package tray material, fresh firewall pad, and rebuilt pedal seals. Those details sharpen the appearance and eliminate many of the drafts, rattles, and smells owners mistakenly blame on old carpet alone.
Cost, timeline, and common mistakes to avoid
A classic car carpet replacement can range from a few hundred dollars for a basic molded kit in a simple coupe to well over a thousand when premium materials, insulation, new hardware, and related trim pieces are included. Professional installation adds labor because proper fitment is hands-on and model-specific. In my experience, a clean, rust-free car with straightforward front and rear sections can be done in a day, while a car needing floor repair, console fitting, adhesive work, and careful trim restoration can stretch across a weekend or longer. Budget extra for hidden issues because old interiors nearly always reveal something once disassembled.
The biggest mistakes are predictable: ordering the wrong material for the model year, skipping leak diagnosis, failing to repair rust at seat mounts, overbuilding the underlayment, making oversized cuts, and rushing reassembly. Another common error is judging fit before the carpet has relaxed in warmth. Molded sets often look wrong out of the box and settle into shape with time, heat, and anchoring. Finally, do not ignore documentation. Photos taken during disassembly save hours when routing belts, locating brackets, and placing trim screws. Interior restoration rewards patience more than brute force, and carpet replacement is where that lesson becomes obvious.
Replacing carpet in a classic car is more than swapping old material for new; it is a central interior restoration task that improves appearance, comfort, originality, and durability at the same time. The process starts with planning, correct material selection, and careful disassembly. It succeeds when you inspect the floor pan honestly, eliminate leaks, choose insulation with restraint, and test-fit before cutting. The best results come from treating the carpet as part of a connected system that includes seats, belts, console hardware, trim, weather seals, and heat management. That systems approach is what separates a quick cosmetic refresh from a restoration that still looks right years later.
If you are building an interior restoration roadmap, use carpet replacement as your foundation. It gives you direct access to the cabin structure, reveals hidden problems, and creates the right moment to address seat hardware, sound deadening, pedal seals, and moisture control. Whether your goal is concours correctness or a more comfortable driver, the principles remain the same: verify, repair, fit, then finish. Start by documenting your existing interior, decoding the trim specifications, and inspecting the floor beneath the old carpet. A careful first step here makes every other interior restoration job easier, cleaner, and more professional.
Frequently Asked Questions
What is involved in replacing carpet in a classic car?
Replacing carpet in a classic car involves much more than simply pulling out old material and laying in a new kit. A proper carpet replacement starts with removing seats, seat belts, sill plates, consoles, kick panels, and any trim that overlaps the flooring. Once the old carpet is out, the floor pan needs to be inspected carefully for rust, moisture damage, old adhesive, missing plugs, or previous repair work. This is an important stage because new carpet should never be installed over hidden corrosion or damp insulation.
After the floor is cleaned and repaired as needed, many restorers install sound deadening and jute or mass-backed underlayment to improve comfort and reduce road noise and heat. The replacement carpet is then test-fitted before any cutting is done. In a classic car, accuracy matters because molded sections, heel pads, shifter openings, seat mounts, and pedal locations all need to align correctly. Final installation usually includes trimming edges gradually, securing the carpet with adhesive in the appropriate areas, reinstalling trim pieces, and making sure transitions at the rocker panels, toe boards, and rear floor are neat and factory-looking. In short, carpet replacement is one of the key interior restoration tasks because it affects appearance, cabin smell, insulation, and overall finish quality every time the doors open.
Should I choose a pre-cut carpet kit or have carpet custom fitted for my classic car?
For most classic car restorations, a high-quality pre-cut or molded carpet kit is the best starting point, especially if it is designed specifically for the exact year, make, model, body style, and transmission layout of the vehicle. Good kits save time, provide a more original appearance, and typically include important features such as correctly placed heel pads and shaped front floor sections. However, not all carpet kits are equal. Material type, backing style, edge binding, color accuracy, and how well the molded contours match the floor pan can vary significantly between suppliers.
Custom fitting may be a better option if the car has been modified, if the original floor has changed during restoration, or if factory-correct kits are unavailable. For example, transmission swaps, custom consoles, patched floor pans, or non-original seating arrangements can all affect fit. Even when using a pre-cut kit, expect some custom trimming around seat studs, shifter openings, dimmer switches, and mounting points. The best approach is usually to buy the most accurate kit available and then fine-tune the fit during installation. If originality is the priority, choose materials and pile style that match the era of the car. If comfort and durability matter more than concours correctness, you may prefer upgraded backing, additional insulation, or a more resilient carpet material.
Do I need to remove rust or repair the floor before installing new carpet?
Yes, absolutely. One of the biggest mistakes in classic car interior restoration is installing new carpet over a floor that has not been properly inspected and repaired. Carpet can hide serious rust, pinholes, weak seams, and old moisture damage. If those issues are ignored, the new carpet may trap humidity, develop odors, fit poorly, or deteriorate prematurely. More importantly, hidden floor damage can become a structural and safety problem, especially around seat mounts and seat belt anchor points.
At a minimum, the floor should be vacuumed, stripped of loose debris and old padding, and checked for corrosion, previous patchwork, cracked seam sealer, and water entry points. Surface rust should be cleaned and treated correctly. Any perforated metal, soft spots, or compromised mounting areas should be welded or professionally repaired before the carpet goes in. It is also wise to verify that door seals, windshield seals, cowl drains, and heater box components are not allowing water into the cabin. Once repairs are complete, the floor should be sealed and protected so the new insulation and carpet are going onto a dry, stable surface. Doing the unseen work first is what separates a quick cosmetic refresh from a lasting restoration.
What type of insulation or underlayment should go under classic car carpet?
The right insulation depends on your goals, but in most cases a layered approach works best. Classic cars often benefit from sound deadening, heat control, and a cushioning underlayment beneath the carpet. Sound deadening mats help reduce vibration and resonance from the floor pan, firewall, and transmission tunnel. On top of that, many restorers use jute padding, mass-backed carpet, or a thermal barrier to improve ride quality and cabin comfort. This can make a major difference in how the car feels on the road, particularly in vehicles with little factory insulation.
That said, it is important not to overbuild the floor. Too much material can create fitment problems around trim, seat brackets, sill plates, pedals, and console mounts. Thickness must be balanced with originality and practical installation concerns. Moisture resistance also matters. Some traditional jute products are authentic-looking, but modern materials may offer better resistance to mold and water retention. If the car is driven regularly in varying conditions, using quality products that resist absorbing moisture can help preserve both the carpet and the underlying metal. The best result usually comes from choosing insulation that matches the car’s intended use, whether that is concours display, fair-weather cruising, or regular road use.
Can I replace classic car carpet myself, or should I hire a professional?
A capable do-it-yourself owner can absolutely replace carpet in a classic car, but success depends on patience, preparation, and attention to detail. The job is very manageable if you are comfortable removing interior components, labeling hardware, test-fitting material, and trimming carefully in small increments. Many classic car carpet kits are designed to make installation easier, but they still require judgment. You only get one chance to cut openings for seat mounts, shifters, and brackets cleanly, and a rushed install can leave gaps, wrinkles, or exposed edges that are difficult to hide later.
Hiring a professional is a smart choice if the car is high-value, the interior has many custom or delicate components, or you want the most factory-correct finish possible. An experienced trim or restoration shop can also spot floor issues, improve fit around complex contours, and ensure that the carpet works properly with insulation, seat tracks, and trim alignment. In general, if the project also involves broader interior restoration work such as sound deadening, underlayment replacement, seat upholstery removal, or floor repair, professional help may save time and reduce costly mistakes. If you do it yourself, take photos during disassembly, dry-fit everything before cutting, and treat the installation as precision finish work rather than a quick cosmetic upgrade.




