
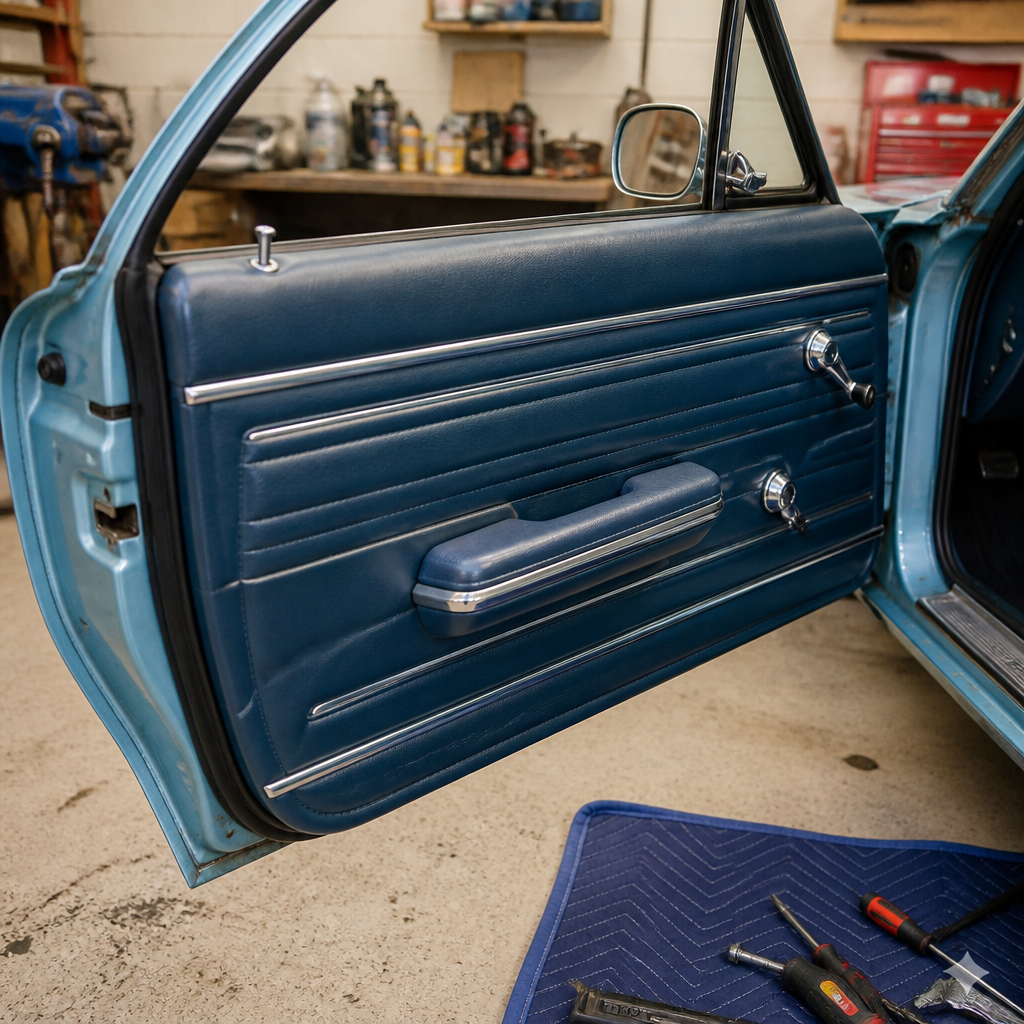
Restoring classic car door panels is one of the most visible parts of interior restoration because worn vinyl, warped backing boards, broken clips, and faded trim instantly age an otherwise solid build. In practical terms, a door panel is the finished interior trim assembly that covers the inner door shell, supports armrests and handles, manages moisture with a barrier, and ties the cabin’s materials together. When I evaluate a vintage interior, I look at the door panels early because they reveal how the car was stored, whether leaks were ignored, and whether earlier repairs respected original construction. For owners working within a broader restoration and maintenance plan, learning how to restore classic car door panels matters because the job sits at the intersection of upholstery, trim, corrosion control, weather sealing, hardware service, and historical accuracy.
Interior restoration is broader than replacing seat covers or adding fresh carpet. It includes cleaning and preserving original materials, repairing structural substrates, reattaching trim, rebuilding mechanisms, replacing seals, refinishing metal accents, and matching factory grain, stitch lines, and fastener placement. Door panels touch all of those disciplines. A proper restoration can quiet rattles, improve window operation, reduce water intrusion, and protect value by keeping the cabin consistent with the vehicle’s era. A poor restoration does the opposite: mismatched textures, universal fasteners, missing vapor barriers, and overpadded sections telegraph shortcuts immediately. This hub article explains the full process, the tools and decisions involved, and the related interior restoration subjects every classic car owner should understand before ordering parts or removing a single clip.
Assess the panel before disassembly
The first step in classic car door panel restoration is diagnosis, not removal. I photograph every door from multiple angles, including screw locations, trim spacing, armrest placement, handle escutcheons, and weatherstrip interfaces. Many vehicles from the 1950s through the 1980s used model-specific combinations of hardboard, foam scrim, stitched vinyl, carpet inserts, stainless moldings, and heat-seamed details. Once a panel is off, orientation marks and original fastener order can be lost quickly, especially if the car was previously apart. Good reference photos save hours later and help preserve originality.
Inspect condition systematically. Check whether the backing board is fiberboard, Masonite, ABS replacement plastic, or stamped composite. Fiberboard often swells from water entering past worn window felts or failed moisture barriers. Feel along the lower edge for softness, delamination, or clip holes pulling through. Examine the upholstery skin for shrinking, chalking, split seams, detached heat pleats, and adhesive bleed-through. Metal trim should be checked for kinks, corrosion, and missing spring clips. Armrests frequently crack around mounting studs, while pull straps tear at hidden reinforcement plates. Also test window regulators, lock rods, and inner handles before teardown because panel removal often exposes deeper service needs.
Originality is a major decision point. Concours restoration aims to match factory grain, embossing, stitch count, welt size, and even the board thickness. A driver-quality restoration can prioritize durability with hidden upgrades such as marine-grade vapor barriers or laser-cut ABS substrates. Both approaches are valid if chosen deliberately. The key is to document what the car had and decide where authenticity or longevity matters most.
Remove trim and preserve hardware correctly
Door panel removal sounds simple, but careless work causes most of the breakage. Use the right tools: a window crank clip tool for horseshoe clips, a broad panel popper to release hidden retainers, a magnetic parts tray, and labeled bags for screws and spacers. Classic GM, Ford, Chrysler, Mercedes-Benz, Jaguar, and Porsche door panels all differ in clip style and trim sequence. Some require removing stainless upper reveals first; others hide screws behind medallions, map pockets, or pull cups. Never pry where you have not confirmed a fastener location.
As the panel comes free, note how the moisture barrier was installed and where harnesses, courtesy lights, and drain paths sit. Many old cars have no intact barrier left, which explains warped lower boards and mildew odor. Save every reusable clip as a sample even if replacements are planned. In my shop, I also mark each clip position on a paper outline of the panel. It sounds old-fashioned, but it prevents wrong spacing during reassembly and helps when a reproduction board arrives undrilled.
This is also the stage to evaluate linked interior restoration tasks. If the door shell shows surface rust, address it before the fresh panel goes back on. If the window channels are hard, felts missing, or regulator grease dried, service them now. Door panel restoration works best when paired with weatherstrip replacement, glass adjustment, latch lubrication, and wind-noise control. Treat the door cavity as a system, not just a trim mounting surface.
Repair substrates, moisture barriers, and panel structure
The backing board determines whether the finished panel fits tightly and survives use. Mildly warped original boards can sometimes be flattened with controlled humidity, weights, and new reinforcement strips. Severely swollen boards usually need replacement. Restoration suppliers for popular models such as first-generation Mustangs, Tri-Five Chevrolets, C10 trucks, and air-cooled Volkswagens often sell pre-cut boards. For rarer vehicles, upholstery shops trace the original onto tempered hardboard, water-resistant panel board, or ABS. ABS resists moisture well, but it may require different clip solutions and can feel less authentic in certain concours applications.
A correct moisture barrier is nonnegotiable. Water enters most door shells by design around the glass and exits through drains at the bottom. The barrier keeps that water from reaching the finished panel. Modern restorers often use clear polyethylene sheeting with butyl tape, which outperforms old tar paper while remaining serviceable. Leave proper openings for handle shafts, wiring, and service access, but keep the seal continuous around the perimeter. If drains are clogged, clear them before reinstalling anything.
| Component | Common failure | Best restoration approach |
|---|---|---|
| Backing board | Warping, swollen clip holes | Reuse if stable; replace if soft or distorted |
| Moisture barrier | Missing, torn, poorly sealed | Install new polyethylene barrier with butyl tape |
| Foam padding | Crumbled, compressed, uneven | Replace with matching density and thickness |
| Retainer clips | Rust, looseness, mismatch | Use correct reproduction clips by model |
| Armrest reinforcement | Cracks around studs or screws | Plate or rebuild before recovering |
Foam and scrim layers affect both appearance and tactile feel. Too much foam rounds off crisp factory lines; too little leaves every imperfection visible. Matching density matters more than owners expect. Many 1960s domestic panels used minimal padding, while later luxury cars relied on softer foam under expanded vinyl. If pleats were heat-pressed originally, they should be replicated using the right process rather than sewn indiscriminately, because stitch lines change the look and can identify a restoration instantly.
Choose materials that match the car and the goal
Successful interior restoration depends on material discipline. Vinyl is not just vinyl: grain pattern, gloss level, stretch characteristics, backing cloth, and colorfastness all vary. Leather was used on some high-end classics but often only on seating surfaces, not door panels, where manufacturers preferred durable vinyl or leatherette. Cloth inserts may require custom weaving or sourcing donor fabric if reproduction yardage is unavailable. Carpet kick sections need the correct pile and binding. Even chrome Mylar strips, welting, and embossed medallions can define whether a panel looks factory correct.
Color matching deserves extra care because doors sit at eye level beside seats, dash pads, and rear side panels. Sun fading means the “original” color on one surviving panel may not represent the cabin’s true factory tone. Compare protected areas under trim, behind armrests, or beneath garnish moldings. Suppliers such as SMS Auto Fabrics, Legendary Auto Interiors, PUI Interiors, and TMI Products support many American applications, while specialist trimmers often support British, German, and Italian cars with bespoke materials. Ordering samples before committing saves expensive rework.
Adhesives matter just as much as trim material. High-temperature contact adhesive is essential because door panels live next to glass and metal that heat up dramatically in sun. General spray adhesive from a hardware store often fails, allowing edges to lift and inserts to bubble. For high-value restorations, I rely on products specified for automotive trim and test adhesion on scrap first. Mechanical retention, where originally used, should be preserved rather than replaced entirely with glue.
Recover panels and rebuild trim details
Recovering a panel is the point where craftsmanship becomes visible. Start by dry-fitting the new skin over the repaired board and marking all openings from the back side. Pull direction matters. If the material is tensioned unevenly, grain can skew, pleats can drift, and edge wraps can telegraph clip locations. Work from the most visible central features outward, especially around insert lines and upper cap transitions. Relief cuts must be clean and minimal so the wrapped edge stays strong.
Decorative trim should be restored separately and only reinstalled after the substrate is stable. Stainless moldings can often be straightened with trim hammers and polished on a dedicated wheel. Die-cast pieces may need careful stripping and replating. Woodgrain appliqués on 1970s and 1980s luxury cars are a specialty category; some can be reproduced with hydrographic or printed films, but the best results come from pattern-matched refacing by trim specialists. Emblems and medallions should align exactly with original witness marks.
Armrests, map pockets, pull handles, and switch bezels are not accessories; they are structural wear points. Reinforce hidden mounting areas before final covering, especially on heavy coupe doors. Replace brittle plastic inserts and broken clips while parts remain accessible. This is also the best time to refresh related interior restoration areas such as kick panels, rear quarter panels, package trays, and console side trims so material sheen and color remain consistent throughout the cabin.
Reinstall with attention to function, fit, and long-term durability
Reinstallation is where many otherwise strong restorations lose quality. Test-fit the bare board, then the covered panel, before committing all clips and screws. Confirm that door lock rods move freely, handles return properly, courtesy lights function, and window cranks clear escutcheons without rubbing. Power window switches should sit flush and harnesses should be routed to avoid chafing. If the panel bows near the top rail, the board thickness, clip depth, or weatherstrip stack-up may be incorrect.
Use the correct fasteners whenever possible. Universal tree clips may fit the hole but rarely support the panel the same way as factory retainers. Missing anti-rattle pads, clip sleeves, or paper washers can create squeaks that owners misdiagnose as regulator noise. Tighten armrests and pulls firmly but do not crush fresh boards. After assembly, water-test the door with a hose aimed at the outer glass seal, then inspect the inner shell and panel edge for leaks. This simple step catches barrier gaps before they damage finished trim.
Maintenance should be part of every restoration plan. Clean vinyl with a mild interior cleaner, not harsh solvents. Condition leather with products appropriate to finished automotive leather, not oily dressings that attract dust. Keep drain holes open, replace outer window felts when hardened, and address windshield or vent-window leaks early because door panels often suffer from water traveling from other sources. With correct materials and moisture control, a restored panel can stay stable for decades.
Build the interior restoration roadmap around the door panels
As a hub topic within restoration and maintenance, classic car door panel work connects to nearly every other interior restoration decision. Seats establish the benchmark for material and stitch style. Carpets affect lower panel transitions. Headliners influence how fresh the rest of the cabin must look. Dash pad condition and steering wheel finish can either support or undermine the quality of the doors. If you restore the panels in isolation, mismatches stand out. If you sequence the whole interior intelligently, the result feels cohesive and period correct.
The smartest roadmap begins with leak diagnosis and structural repairs, then moves to glass channels, regulators, weatherstrips, and door latches. After that, restore visible trim pieces, then coordinate seats, rear side panels, carpet, kick panels, package tray, and headliner using the same color references and material samples. This approach avoids duplicated labor and ensures the door panels align with the wider interior restoration standard you want, whether that is survivor preservation, factory-stock restoration, or durable touring use.
Classic car owners who take time to assess, document, repair, and material-match their door panels get more than better appearance. They gain quieter operation, improved weather resistance, more reliable hardware, and an interior that supports the car’s authenticity and value. Start by inspecting your doors carefully, sourcing the right materials, and treating panel restoration as the anchor point of a complete interior restoration plan.
Frequently Asked Questions
What is the first step in restoring classic car door panels properly?
The first step is a careful inspection and documentation process before you remove or replace anything. On a classic car, door panels often hide several problems at once, including brittle vinyl, warped fiberboard backing, rust around clip holes, missing moisture barriers, damaged armrest mounts, and faded or mismatched trim pieces. Start by taking detailed photos of the panel installed on the door, then photograph the back side once it is removed. Measure panel thickness, note the location of clips and fasteners, and label every handle, trim strip, screw, and spacer. This matters because many older cars used model-specific hardware and spacing, and guessing during reassembly can lead to poor fitment, rattles, or damage to fresh upholstery.
After documentation, remove the panel carefully using trim tools rather than screwdrivers, which can crack old boards or scar painted surfaces. Once the panel is off, inspect the inner door shell as closely as the panel itself. Check for rust, water intrusion, window channel issues, and damaged regulators or latch rods. A lot of door panel failures begin because moisture entered the door for years and softened the backing board from behind. If you skip that diagnosis and only recover the visible surface, the new panel may fail again quickly. A proper restoration always treats the panel as part of a complete door system, not just a cosmetic cover.
Can original classic car door panels be restored, or is replacement usually better?
In many cases, original door panels can and should be restored, especially if you are trying to preserve factory authenticity, original grain patterns, embossing, stitching layouts, or rare trim details. Original panels often fit better than reproduction pieces because they were made for that exact door shell and hardware arrangement. If the backing board is only mildly distorted, the upholstery is salvageable, and the trim components are intact, restoration is often the better route. This may involve flattening the board, reattaching loose material, replacing localized foam, redyeing vinyl, polishing trim, and installing fresh mounting clips and a new moisture barrier.
Replacement becomes more practical when the board has extensively crumbled, the vinyl has shrunk beyond reuse, chrome or stainless moldings are missing, or the panel has been altered over the years with speaker holes, non-original hardware, or poor prior repairs. Even then, many restorers still use the original panel as a pattern to reproduce the correct shape, openings, and fastening points. The best choice depends on your goals. For a concours-level project, retaining as much original structure and appearance as possible may add value. For a driver-quality restoration, a well-made reproduction or a custom-built panel that matches the original style may provide better durability and appearance. The key is not assuming replacement is automatically easier, because bad reproduction panels can create fit issues that take just as much time to correct as restoring originals.
What materials and tools are best for restoring classic car door panels?
The best materials depend on the vehicle’s original construction, but a strong restoration usually starts with quality backing material, correct upholstery, proper adhesives, fresh panel clips, and a durable moisture barrier. Many original panels were made from pressed fiberboard, which is authentic but vulnerable to moisture. For some restorations, specialty automotive panel board is a smart replacement because it offers a similar look while improving stability. Upholstery materials should match the car’s original grain, color, pleat pattern, and finish as closely as possible. That may mean vinyl, cloth, leather, or a combination, depending on the era and trim level. If foam padding is part of the design, use automotive-grade foam that holds shape without creating an overstuffed look.
For tools, you will want trim removal tools, a staple gun if the design requires stapled wraps, sharp shears or upholstery knives, contact adhesive rated for automotive heat, clip installation tools, a heat gun used carefully for shaping material, and straightedges or flexible rulers for layout work. Small awls and punches are especially helpful for locating holes cleanly without tearing fresh vinyl. Avoid generic household glues or low-temperature adhesives, because interior temperatures inside a classic car can become extreme and cause bubbling or delamination. If the project includes repainting metal trim or recoloring vinyl, use products designed specifically for automotive interiors. A successful result comes from using materials that look correct and survive long term, not just materials that are convenient on the bench.
Why is a moisture barrier so important when restoring door panels?
A moisture barrier is critical because car doors are naturally wet environments. Water passes the outer window seals and enters the inside of the door during rain, washing, or condensation cycles. The factory designed the door so that water drains out through the bottom, but the interior panel still needs protection from that moisture. Without a proper barrier between the inner door shell and the finished panel, water vapor and direct splash can soak the backing board, loosen adhesive, stain upholstery, warp the panel, and cause mold or odor problems. This is one of the biggest reasons beautifully restored door panels fail prematurely.
When restoring a classic car, install a fresh barrier made from suitable automotive plastic sheeting or a purpose-made membrane, and seal it properly without blocking factory drain paths or service access. The barrier should sit behind the finished panel and around openings in a way that directs moisture back into the door rather than toward the upholstery. It is also important to inspect and clear door drains, replace worn window felts or seals when necessary, and check for rust that may have opened unwanted water paths. Think of the moisture barrier as cheap insurance. It does not get much attention once the panel is installed, but it protects nearly all the visible work you just paid for or spent hours completing.
How do you make restored classic car door panels look original and fit correctly?
Correct fit and factory-like appearance come from precision in patterning, hole placement, material selection, and assembly order. Start by confirming the panel shape against the bare door before applying finish materials. Small errors in the backing board can become major alignment problems once vinyl, padding, and trim are installed. Every opening for window cranks, door handles, armrests, courtesy lights, and trim clips must be located accurately. If any of these points are off, the panel may bow, the hardware may bind, or the trim may sit crooked. Always test-fit with clips, handles, and armrest brackets before finalizing edges and decorative surfaces.
Original appearance also depends on subtle details. Match the grain direction, seam spacing, stitch style, heat-pleat pattern, chrome strip placement, and edge wrapping method used by the manufacturer. On many classics, these details are what separate a correct restoration from one that simply looks new. Refinish or reuse original trim whenever possible, because the profile and finish quality often exceed modern substitutes. If the car had a specific panel contour, use the right foam thickness so the finished surface does not look too flat or overly padded. Finally, install new clips of the correct type and tension, because even a beautifully restored panel can look wrong if it sits loose or uneven against the door shell. The best restorations are the ones that do not call attention to themselves—they simply look like the interior was always meant to look that way.




