
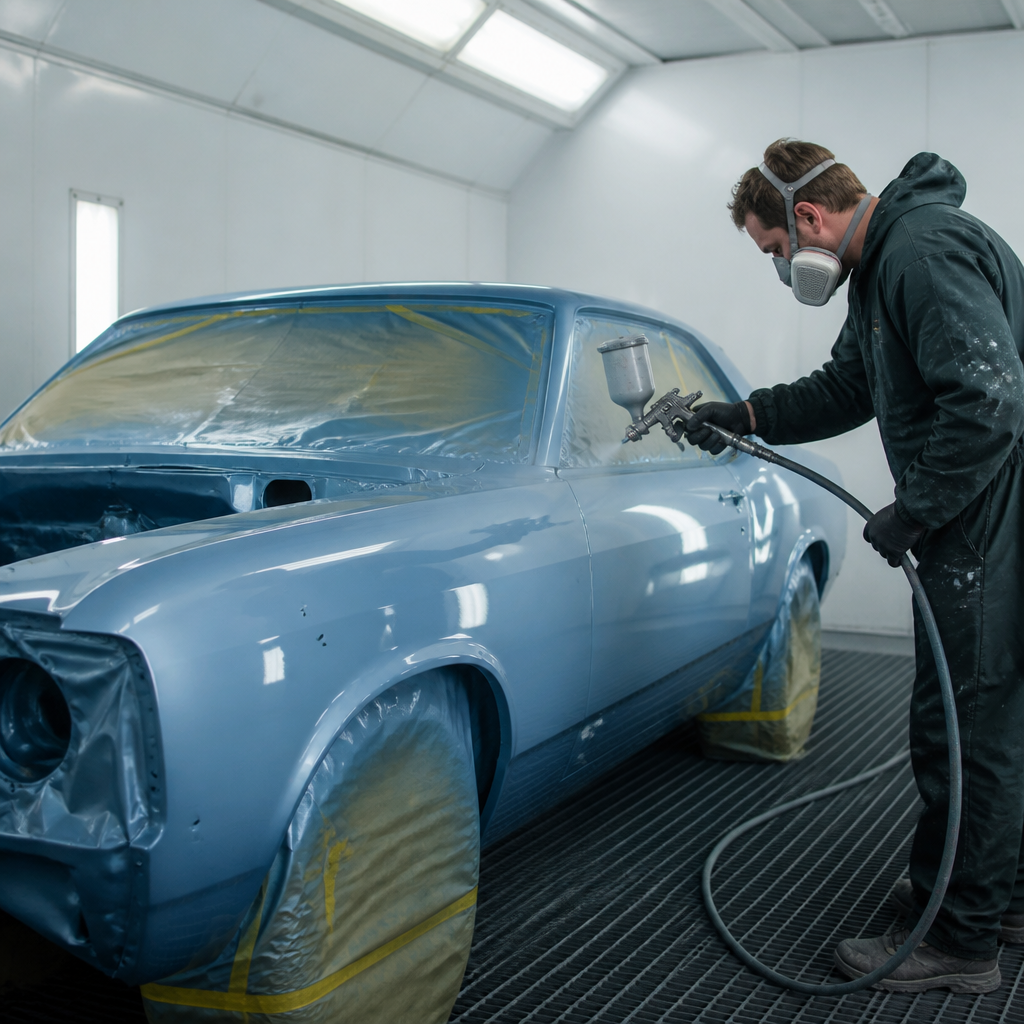
DIY classic car painting is the part of restoration where patience, preparation, and process matter more than expensive equipment. In a restoration shop, I learned quickly that paint does not hide mistakes; it magnifies them. For owners working under the broader restoration and maintenance umbrella, bodywork and paint form a connected system that includes rust repair, panel alignment, surface preparation, primer selection, color application, polishing, and long-term protection. This guide explains that system step by step so you can plan a successful home paint job, understand where each task fits, and know when to tackle work yourself or send a stage to a specialist.
Classic car paintwork matters for more than appearance. A correct paint process seals bare metal, protects repaired panels, slows corrosion, and preserves vehicle value. On older steel-bodied cars, moisture intrusion around seams, filler edges, and chipped paint can restart rust within months if coatings are wrong or rushed. That is why bodywork and paint should be treated as one workflow, not isolated jobs. Sanding scratches, primer chemistry, gun setup, booth cleanliness, flash times, and final curing all affect the finish you see and the durability you do not. If your goal is a driver-quality respray or a high-end restoration finish, the fundamentals are the same: sound substrate, compatible materials, controlled application, and disciplined finishing.
For most hobbyists, the biggest questions are practical. Can you paint a classic car at home? Yes, if you have a clean space, proper respiratory protection, enough air supply, and the willingness to spend far more time on preparation than spraying. Should you strip to bare metal? Sometimes, but not always. Single-stage or basecoat-clearcoat? It depends on the car, the original look, the color, and your polishing experience. This article serves as a hub for bodywork and paint, tying together the essential decisions and tasks you will encounter during a classic car restoration. Use it to map the full project, avoid common failures, and build a finish that looks right and lasts.
Assess the Car Before You Buy Paint
The first step in DIY classic car painting is evaluation. Before ordering materials, inspect the entire shell in bright light and with trim removed where possible. Look for blistering near wheel arches, bubbling at lower door skins, cracking over old filler, mismatched panel gaps, lacquer checking, and signs of previous accident repair. A paint job is only as good as the surface beneath it. I always start with a written defect map, dividing the car into roof, hood, decklid, quarters, fenders, doors, jambs, valances, and underside edges. That prevents the common mistake of discovering hidden bodywork halfway through primer.
Use a magnet and a paint thickness gauge if available. Magnets reveal deep filler; a gauge helps identify repainted areas and heavy build. Factory finishes often vary, but extreme readings suggest prior repair. Check for rust in cowl vents, windshield channels, trunk drops, rocker panels, and seam-sealed joints. On many classics, especially 1960s and 1970s American cars, trapped moisture in overlapping steel creates corrosion from the inside out. If rust perforation exists, no amount of filler or high-build primer is a durable answer. Cut out the damaged metal and weld in patches before any paint planning begins.
At this stage, decide the target finish level. A weekend driver may justify spot metal repairs, quality filler work, epoxy primer, and a tidy two-stage paint job with minor orange peel. A show restoration demands far stricter panel straightness, edge refinement, and block sanding. Setting that standard early controls your budget, time, and tool list. It also helps determine whether you will paint the exterior only, include jambs and engine bay, or perform a body-off restoration where every painted surface is refinished separately.
Plan Materials, Safety, and Workspace
Bodywork and paint failures often start with poor compatibility or unsafe working conditions. Buy a complete coating system from one manufacturer whenever possible: epoxy primer, polyester filler, urethane primer-surfacer, sealer, basecoat, and clearcoat or single-stage topcoat. Major systems from PPG, Axalta, BASF Glasurit, Standox, and Sherwin-Williams are engineered to work together. Read technical data sheets, not just labels. Those sheets specify mix ratios, induction times, tip sizes, flash windows, and temperature limits. Ignoring them is one of the fastest ways to create solvent pop, dieback, adhesion loss, or wrinkling over old finishes.
Safety is non-negotiable. Modern catalyzed urethanes contain isocyanates, and standard cartridge masks are not enough for all spraying situations. A fresh-air supplied respirator is the safest choice; at minimum, follow the paint manufacturer’s requirements exactly. Wear gloves, goggles, paint suit protection, and hearing protection while sanding. Ventilation should move overspray away without pulling dirt onto wet panels. Home garages can work if thoroughly cleaned, sealed from dust sources, and fitted with filtered intake and exhaust. Temperature matters too. Most coatings spray best around 65 to 80 degrees Fahrenheit with controlled humidity.
Air supply and lighting deserve equal attention. A compressor that cannot sustain gun pressure creates inconsistent atomization and patchy metallic laydown. Use water separators, a desiccant dryer if possible, and dedicated paint hoses. Bright side lighting helps reveal waves during bodywork and wetness during spraying. Before painting a car, test your gun pattern on masking paper and spray a scrap panel with your chosen primer and topcoat system. That practice run teaches gun distance, overlap, and how the material behaves in your environment.
Strip, Repair, and Straighten the Body
Once the car is assessed and the workspace is ready, move into correction. Remove trim, lights, weatherstrips, handles, mirrors, badges, and as much glass as practical. Masking around parts always leaves hard paint edges and hidden old finish lines. For stripping, choose the least aggressive method that gets you to a stable substrate. Dual-action sanding with 80-grit works well for failing topcoats. Chemical stripper can be useful on heavy paint buildup, but it must be neutralized fully and kept out of seams. Media blasting is effective for frames and some panels, yet thin sheet metal can warp if the operator is careless.
After exposing defects, complete all metal repairs first. Weld patches flush, metal-finish accessible areas, and protect the back side of repairs with epoxy or weld-through strategies appropriate to the stage of work. Apply body filler only over properly prepared metal or epoxy primer, depending on the filler and coating manufacturer’s system. Keep filler thin and purposeful. The goal is contour correction, not sculpting whole panels from plastic. Long sanding blocks are essential because they bridge highs and lows. Short blocks follow waves instead of removing them.
Guide coat every primer-surfacer stage and block in alternating directions. This is where straight panels are made. If you can feel a ripple with your palm under raking light, the paint will show it. I prefer to fit doors, hood, and trunk before final blocking so body lines continue cleanly across gaps. Align gaps now, not after color. Consistent spacing around panels often makes more visual difference than the extra gloss many hobbyists chase.
| Stage | Main Goal | Typical Grit Range | Common Mistake |
|---|---|---|---|
| Paint removal | Reach stable substrate | 80–120 | Overheating thin panels |
| Filler shaping | Restore contour | 40–80 | Using filler too thick |
| Primer blocking | Flatten surface | 180–320 | Skipping guide coat |
| Pre-sealer sanding | Refine scratches | 400–600 | Leaving coarse sand marks |
| Cut and polish | Remove texture and defects | 1000–3000+ | Burning edges |
Prime and Prepare for Color
Primer is not one product; it is a sequence with different jobs. Epoxy primer provides adhesion, corrosion resistance, and a sealed foundation over bare metal. Polyester primer builds quickly over rough bodywork but must be blocked thoroughly. Urethane primer-surfacer refines the panel and creates a sandable surface before sealer and color. If old paint remains and is stable, a sealer can create uniform holdout and color consistency. Problems happen when hobbyists use high-build primer as a rust barrier or spray color over filler repairs that were never sealed properly.
Follow recoat windows exactly. Many epoxies allow filler or primer-surfacer application within a chemical adhesion period; outside that window they must be scuffed. Cleanliness becomes critical here. Blow off dust, vacuum seams, wipe with the correct solvent-based cleaner before sanding and water-based cleaner before final spray if recommended by the system. Tack cloths should be used lightly. Heavy pressure can smear residue. Mask carefully, especially wheel openings, jamb edges, and engine bay transitions, because overspray travels farther than most first-time painters expect.
Before color, inspect every panel under direct and angled light. This is the last cheap chance to fix pinholes, sand scratches, feather-edge rings, and edge build. Paint magnifies these issues. A test spray-out card is worth the effort, especially with metallics, pearls, or non-original colors. Spray-out cards confirm color, hiding, and clear appearance over different sealer shades. Professional refinishers rely on them because a sealer that is too dark or too light can shift the final look and require extra coats.
Spray Technique: Basecoat, Clearcoat, and Single-Stage Options
When people ask how to paint a classic car, they usually mean how to spray the topcoat. Technique matters, but by this point the job is mostly won or lost. For period-correct solid colors on many classics, single-stage urethane can be an excellent choice. It reproduces the look of older finishes more naturally than a thick modern clear, and minor scratches can often be polished from the color layer. Basecoat-clearcoat is more forgiving for metallic control and typically offers deeper gloss and easier repair blending. Neither system is universally better; the right one matches the vehicle, color, and desired authenticity.
Set gun pressure at the gun, not only at the regulator on the wall. Follow the manufacturer’s recommendation for cap pressure, fluid adjustment, and fan width. Hold the gun perpendicular to the panel, maintain consistent distance, and overlap passes about 70 percent. Start moving before pulling the trigger and release the trigger before stopping to avoid heavy spots. Roof, pillars, hood, decklid, upper quarters, then lower sections is a practical sequence that keeps a wet edge. For metallic basecoat, consistency is everything. Uneven speed or arc creates striping and mottling.
Respect flash time between coats. If you rush clear over a solvent-heavy base, you risk solvent pop or dieback later. If you wait too long, you may exceed the intercoat window and compromise adhesion. Watch the surface, not just the clock. In my experience, painters improve fastest by focusing on wetness control rather than chasing maximum gloss out of the gun. A slightly textured but even clearcoat can be corrected later; runs, dry spray, and patchy metallic orientation are harder to rescue cleanly.
Drying, Defect Repair, and Final Finishing
Fresh paint needs controlled curing. Forced drying can help if the product sheet allows it, but do not rush reassembly. Urethane coatings may be dust-free quickly while remaining soft underneath for days. During that period, masking tape can imprint, weatherstrips can mark edges, and polishing too early can cause smearing. Let the paint cure fully according to the technical data sheet before heavy correction. Also remember that solvent evaporation continues after the car looks dry, which is one reason some finishes lose gloss weeks later if film build was excessive.
Most home paint jobs need some finishing. Dirt nibs, minor orange peel, and the occasional run are normal, even in professional shops. Start by nib-sanding isolated defects carefully, then level the broader surface with appropriate paper, commonly 1500 to 3000 grit depending on texture and product hardness. Use a soft interface where needed, keep the surface lubricated if wet-sanding, and protect edges aggressively. Rotary polishers cut faster; dual-action machines finish more safely. A standard correction path is compound, polish, then final refining pad and polish matched to the paint system.
Reassembly is part of paintwork, not an afterthought. Use fender covers, fresh hardware where appropriate, and masking tape on tool contact points. Install trim only after checking clip condition and alignment. Poor trim installation can chip new paint instantly. After the car is assembled, avoid wax for the curing period specified by the manufacturer. For protection, wash gently, store dry, and correct chips quickly before moisture gets underneath. If you maintain the finish properly, a well-executed DIY classic car paint job can remain attractive for years.
Build a Long-Term Bodywork and Paint Plan
As a restoration and maintenance hub, bodywork and paint should guide your next steps, not stand alone. Every future article or project in this area will connect back to the same fundamentals: diagnose corrosion early, choose compatible materials, refine panel shape before primer, and treat spraying as the reward for disciplined preparation. If you are restoring a classic in stages, create a sequence that avoids rework. Finish rust repair before upholstery, test-fit trim before final color, and complete suspension or drivetrain jobs that could damage fresh paint while access is easy.
The main benefit of learning DIY classic car painting is control. You control the pace, the standards, the materials, and the details that make an old car look right. You also gain the ability to judge outside work intelligently when a task exceeds your tools or experience. Start with honest evaluation, practice on smaller panels, and build skill methodically. If your car needs paint, use this guide as the hub for your bodywork and paint plan, then move step by step. Good paint is not a mystery. It is a process, and process is learnable.
Frequently Asked Questions
What is the most important part of a DIY classic car paint job?
The most important part of a DIY classic car paint job is preparation. In practice, the final finish is determined long before color ever comes out of the spray gun. A classic car’s paint system depends on the quality of the surface underneath it, which means rust repair, dent correction, filler shaping, panel alignment, sanding, cleaning, and primer work all matter more than the brand of paint gun or the size of the compressor. Paint does not hide flaws. It highlights waves, pinholes, sanding scratches, poor body lines, and uneven panel gaps, especially on older cars with long, flat surfaces.
Good preparation starts with an honest inspection of the body. Any rust needs to be fully removed or properly cut out and repaired, because painting over corrosion only traps the problem and allows it to return. From there, body filler should be kept thin and shaped carefully, with guide coats used throughout sanding to reveal highs and lows. Primer selection is also critical. Epoxy primer is excellent for sealing bare metal and providing corrosion resistance, while high-build primer helps level minor imperfections before final sanding. Every step should build on the previous one, not cover for it.
Cleanliness and patience are just as important as sanding technique. Oils from hands, leftover sanding dust, silicone contamination, and moisture in the air system can ruin an otherwise well-prepared panel. Before spraying color, the surface should be straight, smooth, sealed if needed, and thoroughly cleaned with wax and grease remover and tack cloths. If you want a paint job that looks professional, the real secret is not a shortcut or expensive equipment. It is disciplined prep work done slowly and correctly.
Can I paint a classic car at home without professional shop equipment?
Yes, you can paint a classic car at home without a fully equipped professional shop, but success depends on controlling the process rather than simply buying paint and spraying it. Many solid DIY paint jobs have been done in home garages, temporary paint spaces, and well-prepared workshops. The key is understanding the limitations of your environment and compensating for them with careful planning. You do not need a commercial spray booth to get a respectable result, but you do need clean air, good lighting, stable temperatures, dust control, and enough ventilation to work safely.
Your air system matters more than many beginners expect. Even a decent spray gun will struggle if the compressor cannot maintain consistent pressure and airflow. Moisture separators, filters, and proper hose setup are essential, because water or oil contamination can create fisheyes, blushing, and adhesion problems. Just as important is the workspace itself. The floor should be cleaned, loose dust removed, and nearby clutter minimized. Many home painters lightly wet the floor before spraying to help keep dust down, although that should be done carefully so excess moisture does not become part of the problem.
That said, home painting does come with tradeoffs. You may have more dust nibs, less ideal temperature control, and more post-paint correction work than a professional booth would produce. For that reason, many DIY restorers focus on doing excellent bodywork and primer stages at home, then either spray the color themselves or outsource only the final paint application if they want a show-level finish. If you decide to do everything yourself, use proper respiratory protection and follow the paint manufacturer’s technical sheets exactly. With realistic expectations, good prep, and attention to safety, a home-painted classic can look very good and hold up well over time.
What steps should I follow when painting a classic car from bare metal to final finish?
A proper classic car paint process follows a sequence, and each stage should be completed fully before moving to the next. The basic order is inspection and disassembly, rust repair, metalwork, filler work, panel alignment, sanding, priming, block sanding, sealing if required, color application, clear coat if using a base-clear system, curing, color sanding, polishing, and final protection. Skipping steps or rushing between them almost always leads to visible flaws later.
Begin by stripping or sanding the car down as needed to expose the true condition of the metal. If the existing finish is unstable, cracked, heavily layered, or hiding previous repairs, it is often better to go farther back rather than trust what is underneath. Rust must be repaired correctly before anything else. After metal repair comes hammer and dolly work, followed by filler only where needed to refine the shape. Once the major bodywork is complete, test-fit panels and correct door, hood, trunk, and fender alignment. This is a crucial part of restoration because straight paint will only emphasize bad gaps and uneven body lines.
Next comes primer. Bare metal is commonly protected first with epoxy primer, then surfaced with high-build primer to allow block sanding. Guide coat should be used repeatedly during block sanding to reveal low spots and ensure straightness. Once the body is smooth and final-sanded to the paint system’s required grit, the surface should be cleaned thoroughly and masked carefully. At that point, some systems call for a sealer to create a uniform foundation before color. Then the color coats are applied using the correct flash times, gun settings, overlap technique, and environmental conditions. If you are spraying base coat and clear coat, the base should be applied evenly and allowed to flash properly before the clear goes on.
After the paint cures, the job is not necessarily finished. Many quality restorations include color sanding and machine polishing to remove orange peel, dust nibs, and minor texture differences. The final result should then be protected and maintained properly, especially during the early curing period. This full process may sound long, but that is exactly the point. Great paint on a classic car comes from system-based thinking, where bodywork, primer, paint, and finishing all work together.
How do I avoid common paint problems like orange peel, fisheyes, runs, and sanding marks?
Avoiding common paint defects starts with understanding what causes them. Orange peel is usually tied to spray technique, gun setup, air pressure, paint viscosity, temperature, or reducer choice. Fisheyes often come from contamination such as silicone, oil, wax, or grease. Runs and sags usually result from applying too much material too quickly, holding the gun too close, or moving too slowly. Sanding marks show up when scratches are too coarse, not fully removed before the next stage, or not properly covered by primer and final sanding. These problems may appear during spraying, but most of them are rooted in preparation and process control.
For orange peel, make sure the gun is adjusted correctly, the paint is mixed to the manufacturer’s specifications, and the reducer and activator match the shop temperature. Maintain a consistent gun distance and overlap pattern, and avoid trying to make the surface look overly wet in one heavy pass. Fisheyes are best prevented through strict cleanliness. Use wax and grease remover properly, wear clean gloves when handling prepped panels, keep the airline dry and filtered, and avoid using silicone-based products anywhere near the paint area. If the car has been exposed to years of detailing products, contamination can be especially stubborn, so extra cleaning may be necessary.
To prevent runs, spray medium-wet coats instead of flooding the panel. Watch panel edges and vertical surfaces carefully, because that is where material builds fastest. Follow proper flash times between coats, and do not try to fix dry appearance by overloading the next pass. For sanding marks, move through grits logically and do not assume primer will hide deep scratches. Use guide coat during block sanding, and inspect the surface under strong lighting from multiple angles before paint goes on. If a flaw is still visible in primer, it will usually be worse after topcoat.
Even with good technique, small issues can still happen, especially in DIY conditions. The goal is not perfection on the first pass every time. The goal is to reduce preventable problems and know how to correct minor defects later through denibbing, color sanding, and polishing. A controlled, methodical process will eliminate the vast majority of the mistakes that frustrate first-time painters.
How long should I wait before sanding, polishing, and protecting fresh paint on a classic car?
The answer depends on the paint system, the shop temperature, and the manufacturer’s instructions, but in general, you should always let the product’s technical data sheet guide your timing. Different primers, single-stage paints, base-clear systems, and urethane products all cure at different rates. Some clears can be sanded and polished within a day or two under the right conditions, while others benefit from more time to harden fully. Rushing this stage can lead to dieback, swirl sensitivity, edge damage, or marks that reappear as the paint continues to cure.
Color sanding and polishing should only begin after the finish has cured enough to handle abrasion and heat without smearing or deforming. When the paint is ready, use a measured approach: start with the least aggressive grit needed to level dust nibs or texture, keep the surface lubricated, protect edges and body lines, and polish in stages rather than trying to achieve full gloss with an aggressive compound alone. Classic car panels often have sharp creases and delicate contours, so it is very easy to burn through high spots if you are impatient with a machine polisher.
As for protection, fresh paint usually should not be sealed immediately




