
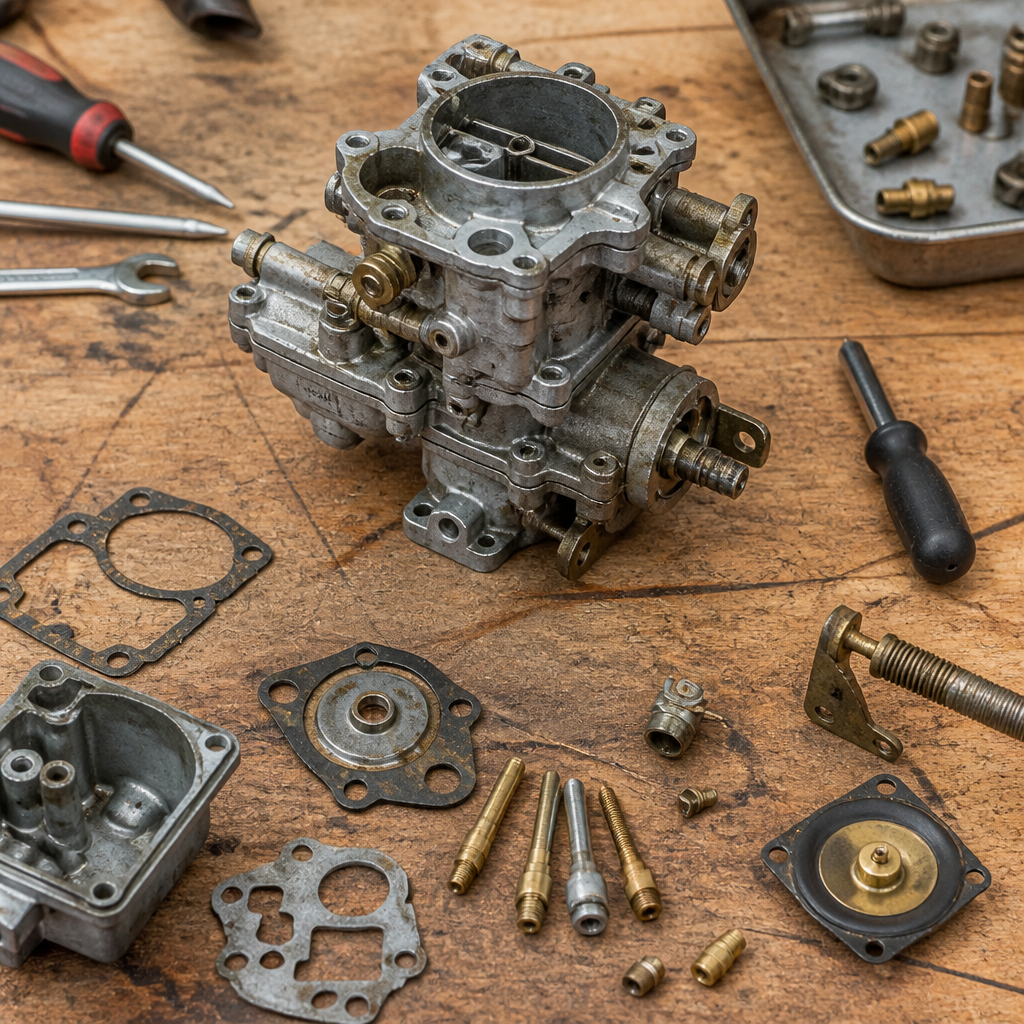
Rebuilding a carburetor is one of the most useful skills in engine and mechanical work because it restores fuel delivery, improves starting, and often brings an old machine back to life without expensive replacement parts. In restoration and maintenance, a carburetor rebuild means disassembling the unit, cleaning internal passages, inspecting wear items, and installing new gaskets, seals, and calibrated components so the carburetor meters air and fuel correctly again. I have rebuilt carburetors on lawn tractors, classic motorcycles, small-block V8s, and outboard engines, and the pattern is always the same: varnish, dirt, dried accelerator pump cups, sunk floats, and misadjusted linkages create problems that look major but are often solved with careful bench work. This matters because the carburetor sits at the center of engine behavior. If mixture control is wrong, ignition tuning, compression testing, and valve adjustment can only do so much. A good rebuild supports every other engine task in restoration and maintenance, from cold-start diagnosis to drivability tuning under load.
Carburetors vary in design, but the core principle never changes. Airflow through a venturi creates a pressure drop that pulls fuel through jets and passages. The float system maintains fuel level in the bowl, the idle circuit meters fuel at closed throttle, the main circuit takes over as airflow rises, and enrichment devices such as a choke or power valve add fuel when needed. Common types include fixed-venturi downdraft carburetors on cars, sidedraft units on performance engines, and compact float-bowl carburetors on motorcycles and small engines. A rebuild is not simply replacing gaskets. It is a calibration exercise. Needle-and-seat condition affects bowl level, bowl level affects mixture, and mixture affects plug color, idle quality, throttle response, and exhaust temperature. Understanding these relationships is what separates a successful rebuild from a temporary fix. As a hub within engine and mechanical work, this guide connects directly to related maintenance areas such as fuel tank cleaning, vacuum leak testing, ignition timing, compression checks, and safe first-start procedures after long storage.
Diagnose Before You Remove Anything
The best carburetor rebuild starts with diagnosis, not disassembly. Before removing the carburetor, confirm that fuel quality, ignition health, and mechanical condition are at least basically sound. Old gasoline can oxidize in as little as a few months, and ethanol-blended fuel absorbs water that corrodes internal passages. I always smell and inspect the fuel first. Dark fuel with a sour varnish odor is enough reason to drain the tank and clean the system before rebuilding the carburetor. Then check for spark quality, battery voltage, and compression. A weak ignition coil or a sticking valve can mimic rich or lean carburetor symptoms. If the engine runs, note the exact behavior: hard cold starts point toward choke or idle issues, hesitation under throttle suggests accelerator pump or transition circuit faults, black smoke indicates richness, and surging at steady speed often means a lean condition or vacuum leak.
External inspection gives important clues. Look for fuel stains around the bowl gasket, warped flanges, stripped screw heads, cracked vacuum ports, and loose throttle shafts. Shaft wear is a common source of unmetered air on older carburetors, especially on engines that sat for years with dry bushings. Spray testing around the shaft can hint at leakage, but bench inspection is more reliable. Also inspect the air cleaner assembly and intake manifold. A missing heat stove, blocked hot-air tube, or failed manifold gasket can distort your diagnosis. On four-barrel automotive carburetors, verify secondary operation and choke pull-off movement before removal. On motorcycle carburetors, note synchronization settings and cable routing. On small engines, inspect governor linkages and primer systems. Taking clear reference photos now saves time later and prevents common reassembly mistakes.
Tools, Parts, and Work Area Setup
A controlled work area makes carburetor rebuilding more accurate and far less frustrating. You need a rebuild kit matched to the exact carburetor list number or model code, not a visually similar substitute. Reputable sources include Walker Products, Holley, Keihin, Mikuni, Edelbrock, and OEM kits for vintage applications. Keep a service manual at hand because torque values, float height, and baseline screw settings vary widely. Essential tools include hollow-ground screwdrivers, JIS drivers for many Japanese carbs, small picks, needle-nose pliers, calipers or a float gauge, a straightedge, compressed air, aerosol carburetor cleaner, and a dedicated parts tray. For serious restoration work, an ultrasonic cleaner with a heated water-based solution is worth the investment. It cleans idle circuits and emulsion passages more safely than aggressive wire probing, which can enlarge calibrated orifices.
Safety and organization matter because carburetor components are small, spring-loaded, and easy to mix up. Work on a clean white towel so check balls and clips are visible if dropped. Separate jets and screws by circuit location, and label left and right carburetors on multi-carb engines. Replace soft parts automatically, but inspect hard parts individually. Main jets, metering rods, floats, and emulsion tubes are not universal wear items and should only be replaced when damaged, corroded, or known to be out of specification. Never chase a clogged jet with a steel drill bit or torch tip cleaner. That shortcut permanently changes fuel flow. If corrosion has eaten away zinc castings or throttle bores, replacement may be more sensible than rebuilding. This is also the stage to decide whether related maintenance belongs in the same job, such as fuel filter replacement, tank flushing, or vacuum hose renewal.
| Task | What to Check | Why It Matters |
|---|---|---|
| Fuel system prep | Old fuel, rust, filter condition, hose cracks | Contamination will quickly ruin a fresh rebuild |
| Disassembly | Linkages, jet locations, check balls, springs | Correct reassembly depends on exact part placement |
| Cleaning | Idle passages, emulsion tubes, bowl vents | Most drivability faults come from blocked internal circuits |
| Inspection | Throttle shaft play, float integrity, warped surfaces | Wear and distortion cause vacuum leaks and flooding |
| Setup | Float height, mixture screws, fast idle, choke pull-off | Bench settings determine first-start success |
| Final tuning | Idle speed, vacuum reading, plug color, throttle response | Engine-specific adjustment finishes the rebuild properly |
Disassembly Without Losing Calibration
Remove the carburetor carefully and cap open fuel lines immediately. On many restorations, intake studs and flange ears are already stressed, so avoid prying against castings. Once the carburetor is on the bench, document everything. I photograph every side, count turns on adjustable mixture screws as a reference, and note the installed jet sizes before I lift them out. Start with external parts: choke housing, vacuum diaphragms, accelerator pump linkage, dashpot, and return springs. Then separate the air horn or top cover from the main body evenly to avoid warping. Float hinges, needle clips, and small check weights can fall out unexpectedly, especially on Rochester, Solex, and motorcycle constant-velocity designs. Keep each subassembly grouped together. If the rebuild kit includes alternate gaskets or pump springs, compare them against the originals rather than assuming the packaged option is correct.
Pay close attention to known problem areas. Brass floats can develop pinholes and fill with fuel; nitrophyl floats can absorb fuel and gain weight over time. Needle-and-seat assemblies often show wear rings that cause intermittent flooding. Accelerator pump bores may be scored, and leather pump cups may be dried or shrunken. Power valves on Holley carburetors can rupture from backfire, while diaphragm slide tops on CV motorcycle carbs can hide tears that cause severe hesitation. If you encounter staked throttle plate screws, remove them cautiously because damaging the shaft can create more work than the original issue. During disassembly, resist polishing internal surfaces or mixing parts from another carburetor for convenience. Calibration depends on exact geometry. Even similar-looking metering rods or air bleeds can alter drivability dramatically.
Cleaning Passages and Inspecting Wear
Cleaning is where most rebuilds succeed or fail. The visible varnish in the bowl is only part of the problem; the critical restriction usually lives in tiny idle bleeds, transition slots, and emulsion circuits. Begin by soaking approved metal parts according to the cleaner manufacturer’s instructions. Remove rubber, plastic, and diaphragm materials first unless the solution is specifically safe for them. After soaking, rinse thoroughly, blow out every passage with compressed air, and confirm flow through corresponding openings. I verify each idle passage by spraying cleaner through the inlet and watching for discharge at the mixture screw port and transfer slot. If flow is weak, return to the cleaner or use soft nylon filament, never hard steel. Ultrasonic cleaning works especially well for motorcycle carburetor racks and two-stroke applications where dried oil leaves stubborn residue.
Inspection should be systematic. Use a straightedge to check bowl covers and air horns for warping, especially on models overtightened over decades. Measure throttle shaft play; obvious radial movement usually means a vacuum leak that a basic kit will not cure. Check the float for leakage or fuel absorption. Inspect the needle seat threads, bowl vent, and fuel inlet screen. Look for corrosion bloom in aluminum castings and white deposits around brass components, both signs of water exposure. Threads for fuel fittings and mixture screws deserve special attention because previous repairs often cross-thread them. Also inspect gasket surfaces for pitting, which can create seepage despite new seals. If a carburetor sat on an engine with a deteriorated fuel tank, expect abrasive rust dust to have worn the needle and seat. In that case, rebuilding the carburetor without fixing upstream contamination is wasted effort.
Reassembly, Adjustments, and Bench Setup
Reassembly should follow the manual exactly because bench settings are part of the rebuild, not an afterthought. Install jets, emulsion tubes, and seats in their original locations unless a documented calibration change is required. Use the correct gasket orientation; many look reversible but are not, and one blocked bleed hole can ruin the idle circuit. Set float height with the carburetor at the specified angle so the needle just contacts the seat without compressing any spring-loaded tip. This detail is critical. Too high a float level makes the engine rich, drippy, and difficult to hot start. Too low causes lean stumble and fuel starvation on acceleration. On side-draft and motorcycle units, also set float drop because insufficient drop can limit refill rate under sustained load.
Next, install accelerator pump parts, power valve or enrichment components, and the choke system. Lubricate leather pump cups lightly if the manufacturer recommends it. Set idle mixture screws to the baseline specified by the manual, usually measured in turns out from lightly seated. Lightly seated means exactly that; overtightening damages the tapered tip and the seat. Verify throttle plate position against transfer slot exposure if the carburetor design makes that visible. Excessively opening the throttle to force idle speed usually masks another issue and compromises the transition circuit. On electric chokes, align the housing to the index mark as a starting point. On mechanical or cable chokes, verify full travel. Before installation, operate every linkage by hand. The throttle should snap shut, the pump should deliver a clear shot, and the float should move freely without binding.
Installation, First Start, and Final Tuning
Install the rebuilt carburetor on a flat, clean mounting surface with the correct base gasket and proper torque. Overtightening can warp the throttle body or crack mounting ears, especially on older castings. Before cranking, prime the carburetor safely if the system has been dry, and verify there are no fuel leaks at the inlet, accelerator pump cover, or bowl screws. The first start should be deliberate. Have a fire extinguisher nearby, set the choke according to temperature, and bring the engine to operating temperature before making final adjustments. Initial smoke or roughness is normal if cleaning solvent remains, but persistent flooding, fuel drip from boosters, or runaway idle means stop and correct the fault immediately. Use a vacuum gauge and tachometer whenever possible. On most engines, highest steady manifold vacuum at proper idle speed is the right target for mixture adjustment.
Fine tuning completes the rebuild. Adjust idle mixture in small, equal increments on multi-screw systems, then reset idle speed. Confirm off-idle response with a quick throttle snap and road test under load. Spark plug reading still has value when interpreted carefully: dry black soot indicates richness, while chalky white insulators paired with surge or pinging suggest lean operation. On classic cars, verify ignition timing and distributor advance after carburetor settings are stable because the systems interact closely. On motorcycles with multiple carburetors, synchronize them with vacuum gauges or an electronic balancer after mixture and idle are in range. Finally, make the rebuild durable by stabilizing stored fuel, replacing brittle hoses, and documenting jet sizes, float settings, and final screw positions for future service. If you are building a complete restoration and maintenance plan, use this carburetor guide as the starting point, then move next to fuel tank cleaning, vacuum leak testing, ignition setup, and compression verification so the entire engine and mechanical work package supports reliable running.
Frequently Asked Questions
What are the signs that a carburetor needs to be rebuilt instead of just adjusted?
A simple adjustment can correct minor idle speed or mixture issues, but a rebuild is usually the better solution when the carburetor has age-related wear, contamination, or deteriorated internal parts. Common signs include hard starting, fuel leaking from the bowl or gaskets, erratic idle, hesitation under throttle, flooding, surging, poor fuel economy, and an engine that only runs with the choke partly closed. These symptoms often point to clogged passages, a sticking float needle, worn seals, dried-out gaskets, or internal varnish from old fuel. If the machine has been sitting for months or years, rebuilding is especially worthwhile because gasoline residue can harden inside jets and passages where external cleaning and adjustment will not reach. In practical terms, if you have already checked ignition, fuel supply, and basic adjustments and the carburetor still behaves inconsistently, rebuilding restores the internal sealing and metering accuracy that adjustment screws alone cannot fix.
What parts are usually replaced during a carburetor rebuild?
A proper rebuild normally includes all soft and wear-sensitive parts that affect sealing and fuel control. At minimum, that means new bowl gaskets, O-rings, seals, welch plugs if applicable, and a new needle-and-seat assembly. Many kits also include accelerator pump diaphragms or cups, power valve components on certain automotive carburetors, check balls, clips, idle mixture screw seals, and sometimes a new float if the original is damaged or fuel-soaked. Depending on the design and condition, calibrated parts such as jets, metering rods, or emulsion tubes may be reused if they are correct for the application and not worn, damaged, or modified. It is important not to replace parts blindly with incorrect sizes; carburetors rely on precise metering, so matching the rebuild kit to the exact model is critical. The goal is not just to make the carburetor look clean, but to restore reliable fuel metering, prevent vacuum or fuel leaks, and bring moving components back within normal operating condition.
How do you clean a carburetor correctly during a rebuild?
Correct cleaning is one of the most important parts of the rebuild because even a perfectly assembled carburetor will not perform well if its internal passages remain restricted. Start by fully disassembling the carburetor and keeping small parts organized so they return to their original locations. Remove old gaskets and deposits carefully without gouging the mating surfaces. Clean metal components with an appropriate carburetor cleaner or soak solution, then flush all passages thoroughly. Compressed air is extremely useful for clearing idle circuits, main passages, and air bleeds, but it should be used carefully and only after confirming the path is open. Never force wire drills or hard steel picks through jets and metering orifices because enlarging them, even slightly, can permanently alter fuel delivery. Inspect every passage visually where possible and verify that cleaner and air pass from one opening to the next. Plastic, rubber, and diaphragm parts should only be cleaned in ways that will not damage them, and many of those items are replaced rather than reused. The standard to aim for is internal cleanliness, not just external appearance, because the smallest obstruction in an idle or transition circuit can cause major running problems.
Can a beginner rebuild a carburetor successfully, or is it better left to a professional?
Many beginners can rebuild a carburetor successfully if they work carefully, stay organized, and use the correct manual or exploded diagram for the exact carburetor model. A carburetor rebuild is very manageable when approached methodically: document linkage positions before disassembly, lay parts out in order, compare old and new components closely, and avoid mixing jets or screws between locations. Beginners usually run into trouble when they rush, overlook tiny check balls and springs, install gaskets backward, or make float-setting errors. Those details matter because carburetors are precision fuel-metering devices, and a small mistake can produce hard starting, flooding, or lean running. That said, rebuilding is one of the most useful hands-on skills in small engine, motorcycle, and automotive maintenance, and it is often more cost-effective than replacing the whole unit. A professional is a good choice when the carburetor body is warped, throttle shafts are badly worn, corrosion has damaged internal passages, or the unit is rare and expensive. For everything else, a patient first-timer with the right kit, cleaning supplies, and reference information can often get excellent results.
What should you check after reassembling a rebuilt carburetor?
After reassembly, the most important checks are float setting, free movement of the throttle and choke linkages, proper gasket placement, and any baseline adjustment specifications for idle mixture and idle speed. Before installing the carburetor, confirm that the float moves freely, the needle seats properly, and there are no leftover parts. Once installed, check for fuel leaks immediately when the bowl fills. Verify that fuel is not overflowing, the throttle returns smoothly, and the choke operates correctly from fully open to fully closed. Start the engine and let it warm up before making final adjustments. Then set idle speed and mixture according to the service specification, listening for a stable idle and crisp throttle response. If the engine still hesitates, stumbles, or loads up with fuel, recheck vacuum leaks, ignition condition, fuel level, and whether all passages were truly cleaned. A rebuilt carburetor should improve starting, idle quality, throttle response, and overall drivability, but final tuning and careful inspection are what turn a rebuilt unit into a reliably performing one.




