
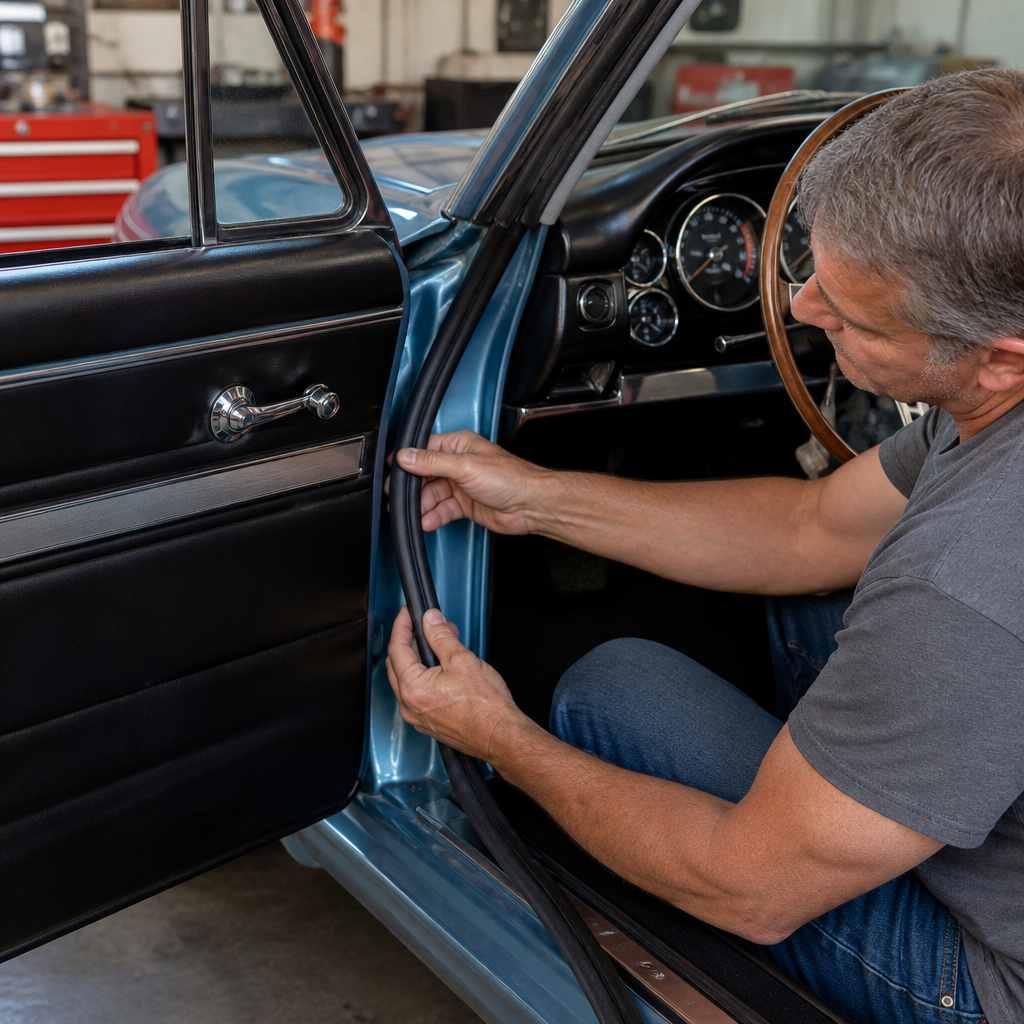
Replacing weather stripping on a classic car is one of the highest-value restoration jobs you can do because it improves comfort, reduces leaks, protects interior materials, and makes doors, windows, and trunks close the way the factory intended. Weather stripping is the flexible rubber, foam, or felt sealing material fitted around doors, vent windows, trunk lids, hoods, roof rails, and glass channels to keep out water, air, dust, and noise. On a classic car, those seals are often decades old, flattened by compression, hardened by ultraviolet exposure, or swollen by oil and incorrect adhesives. I have replaced weather stripping on coupes, convertibles, and station wagons, and the pattern is always the same: owners chase wind noise, wet carpets, or rattles for months when the root cause is simply failed sealing material. This guide explains how to replace weather stripping on a classic car, what tools and materials to use, where restorers make mistakes, and how this job fits into a broader DIY restoration plan. It also serves as a hub for DIY restoration guides because weather stripping touches body alignment, rust prevention, interior preservation, glass adjustment, and finishing details that define a professional result.
Classic car weather stripping replacement matters for more than comfort. Water entering through a poor door seal can soak jute padding, rot floor pans from the inside, fog glass, corrode wiring under thresholds, and create mold in seat foam. A bad trunk gasket lets moisture collect around the spare tire well, one of the most common rust traps on older cars. Dried roof rail seals on hardtops and convertibles create wind roar at speed, while worn window felts can scratch side glass and overload window regulators. Good seals also affect panel fit. When a fresh door seal is too thick or incorrectly installed, the door may sit proud, requiring striker and hinge adjustment. When the correct profile is installed properly and allowed to compress, the car feels tighter, quieter, and more finished. For restorers working through DIY restoration guides, weather stripping is a foundational maintenance task because it protects the results of paint, interior, and metalwork investments.
Assess the car before ordering parts
The first step in any weather stripping replacement is diagnosis, not disassembly. Identify exactly which seals have failed and confirm whether the problem is the rubber itself, body alignment, or glass adjustment. Inspect door openings for flattened sections, tears at corners, loose adhesive, shiny wear marks, and water trails. Dust the seals lightly with talc and close the panel; uneven transfer patterns show where compression is missing or excessive. On doors with frameless glass, check window alignment before blaming the seal. On convertibles, inspect header and pillar seals together because a leak at the top corner is often caused by multiple marginal components rather than one obvious tear. Trunks and hoods should be checked for witness marks where the seal contacts the lid. If there is no contact, new rubber alone will not solve the issue.
Ordering correct parts is critical because classic cars often changed seal profiles across years, body styles, and trim levels. A 1967 hardtop may use different roof rail and vent window seals than a convertible from the same model line, and production changes can alter clip spacing or cross-section shape. Use factory parts books, assembly manuals, and reputable suppliers such as Steele Rubber Products, Metro Moulded Parts, SoffSeal, or model-specific specialists. Compare part numbers, measurements, and cross-section drawings. I always photograph each opening, count clips, and measure bulb diameter and channel width before buying. Cheap universal seals are tempting, but they often cause doors to require slamming, leave gaps at corners, or degrade quickly. Good reproduction weather stripping is molded with correct corner geometry and durometer, which is the hardness rating that determines how the seal compresses.
Tools, materials, and preparation
A clean installation depends on preparation more than force. Gather plastic scrapers, adhesive remover safe for paint, lint-free towels, weather strip adhesive, masking tape, trim tools, clips if required, rust converter or epoxy primer for repaired flanges, scissors or a razor for minor trimming, and silicone-free rubber lubricant. For adhesives, 3M Black Super Weatherstrip Adhesive and 3M Yellow Weatherstrip Adhesive remain common standards, though many restorers prefer black because squeeze-out is less visible. If the seal installs dry into a channel, use the lubricant recommended by the manufacturer rather than general-purpose grease. Have a body manual available if window or striker adjustment may be needed afterward. Before removing anything, test-close each panel and note alignment. Measure door-to-quarter gaps, observe latch effort, and record whether the glass meets the seal evenly.
Preparation also means creating a stable work environment. Old adhesive releases best at moderate temperatures, generally around 65 to 80 degrees Fahrenheit. In colder conditions, seals stiffen and adhesives cure slowly; in high heat, solvents flash too fast and can stain fresh paint. If the car has recent paint, verify the finish is fully cured before using aggressive removers. Protect interior trim with towels and remove threshold plates or garnish moldings as needed for access. Label each removed fastener and clip. On many classics, the weather stripping sequence matters. For example, vent window seals may need to come out before division bar felts, and some trunk channels are easier to clean with the latch striker removed. Good preparation saves time and prevents accidental damage to irreplaceable trim pieces.
Remove old weather stripping without damaging the body
Original weather stripping can be attached with adhesive, metal clips, molded pins, or a combination of all three. Start at a seam or damaged section and peel carefully to learn how the seal is retained. Never yank aggressively because it can tear spot-welded pinch weld flanges or distort delicate stainless trim near window openings. Use plastic scrapers and adhesive remover in small sections. If the adhesive is stubborn, allow the solvent to dwell, then roll softened residue away with your thumb or a plastic blade. Metal scrapers should be avoided on painted flanges because even small gouges become future rust points under the new seal.
Once the rubber is off, inspect the mounting surface closely. This is where many restoration shortcuts fail. Surface rust under old adhesive is common, especially at lower door corners, trunk gutters, and windshield channels. Remove all corrosion, treat it appropriately, and seal bare metal with epoxy primer or the coating specified for that area before installing new material. Weather stripping should never hide active rust. Also inspect drain paths. Door bottoms need open drains, trunk gutters need clean corners, and cowl areas must move water as designed. A new seal on a blocked drainage system simply redirects water to another weak point. In DIY restoration guides, this is the broader lesson: every sealing repair is also an opportunity for corrosion prevention and structural preservation.
Install the new seals with correct fit and compression
Test-fit every piece before opening adhesive. Compare length, molded corners, clip locations, and profile orientation to the original. Start with one component at a time and follow the manufacturer’s instructions because some seals are designed to be glued continuously while others only need adhesive at corners or ends. Apply a thin, even coat to both the flange and the weather stripping where required, allow proper tack time, then press the seal into place progressively. Do not stretch the material. Stretching causes shrink-back at corners weeks later, which creates leaks and visible gaps. Instead, lay the seal naturally, especially around radii. Use masking tape to hold molded corners and vertical runs while the adhesive cures.
Compression is the key principle. The seal must be compressed enough to block air and water, but not so much that it buckles, rolls, or permanently deforms on first closure. Close doors gently during test fit, looking for rolled lips, pinched corners, and latch resistance. It is normal for fresh weather stripping to require slightly firmer closing for a break-in period, but it should not require slamming. If it does, confirm that the seal profile is correct before adjusting the striker. On a classic car, improper striker adjustment to compensate for wrong weather stripping can create chipped paint on latch edges and poor body lines. For trunks and hoods, use paper-strip tests at multiple points to confirm even grip around the perimeter.
| Area | Common symptom | Likely cause | Best fix |
|---|---|---|---|
| Door opening | Wind noise at top front corner | Roof rail seal shrinkage or glass misalignment | Replace seal and adjust glass angle |
| Trunk lid | Wet spare tire well | Flattened gasket or rusted gutter seam | Repair seam, install molded trunk seal |
| Vent window | Whistle at speed | Hardened division bar and vent seal | Replace both seals as a set |
| Window channel | Slow window movement | Worn felt, swollen rubber, dirty tracks | Renew channel and clean regulators |
| Convertible top header | Drip over windshield | Compressed header seal or latch tension issue | Replace seal and verify latch adjustment |
Troubleshooting leaks, wind noise, and fitment problems
If the new weather stripping is installed and the car still leaks, diagnose methodically. Water testing should be done with low-pressure flow, not a pressure washer, because driving water past any seal does not replicate real conditions. Have one person sit inside with a bright light while another runs water over one area at a time, starting low and moving upward. Mark entry points with painter’s tape. Door leaks often come from vapor barriers and drain issues rather than the perimeter seal. Wind noise usually points to glass alignment, vent frame fit, or roof rail geometry. Use a strip of masking tape to temporarily bridge suspected gaps during a road test; if the noise changes, you have found the zone that needs adjustment.
Some fitment complaints come from reproduction part variation. Even quality suppliers occasionally produce seals that are slightly oversized, and old body shells are rarely perfect after decades of use or collision repairs. This is why patient adjustment matters. Let doors remain closed for several days so the seals can take an initial set, then recheck latch effort. On side glass, adjust fore-aft position, up-stop height, and inward tilt according to the factory service manual. On trunks, verify hinge alignment before assuming the gasket is wrong. A practical restorer knows when the issue is installation, body alignment, or part quality. Document what works. Those notes become valuable references for later DIY restoration guides on door alignment, window adjustment, rust repair, and interior water leak diagnosis.
How weather stripping fits into broader DIY restoration guides
As a sub-pillar in Restoration and Maintenance, weather stripping replacement connects directly to many other classic car repair tasks. If you are planning paintwork, install seals after final curing and after any body gap adjustments. If you are restoring the interior, replace door and trunk seals before laying carpet so you can verify the car stays dry. If side windows are scratched or loose, renew felts and channels while the door panels are already off. If floor pans or trunk pans were recently welded, weather stripping is part of the final water-management check. In project planning, I place seal work after metal repair and paint correction, but before final trim detailing. That sequence protects finished surfaces and reduces rework.
This hub for DIY restoration guides should also point readers toward adjacent jobs that determine success. Door alignment guides help when new seals change latch feel. Rust prevention articles explain how to treat hidden corrosion found under old adhesive. Glass adjustment guides matter for hardtops, coupes, and convertibles where seals and windows operate as a system. Convertible top maintenance belongs in the same cluster because top tension and header seals are inseparable. Adhesive selection, clip restoration, and trim removal techniques all deserve their own detailed coverage. The core principle is simple: weather stripping is not an isolated cosmetic replacement. It is part of the vehicle’s sealing system, and that system protects metal, upholstery, wiring, and driving comfort. When approached with accurate parts, careful surface preparation, and proper adjustment, replacing weather stripping on a classic car delivers one of the most noticeable improvements in everyday usability and long-term preservation.
Replacing weather stripping on a classic car is a manageable DIY restoration project that pays off immediately in quieter driving, drier interiors, better panel fit, and stronger long-term preservation. The essential steps are consistent across body styles: diagnose the real source of leaks or noise, order model-correct seals from reputable suppliers, remove the old material carefully, repair any rust or surface damage underneath, and install the new seals without stretching or over-gluing them. After installation, verify compression, test for water entry systematically, and make any needed adjustments to strikers, hinges, or side glass using the factory service manual. Those details separate a temporary fix from a restoration-grade result.
The broader benefit is that this job strengthens every other maintenance investment. Good weather stripping protects carpet, seat foam, wiring, paint edges, and trunk floors, while also making the car feel more solid and refined. It belongs at the center of any serious set of DIY restoration guides because sealing affects comfort, corrosion control, and drivability all at once. If your classic has wind noise, damp carpets, a musty trunk, or doors that never close quite right, inspect the seals before chasing more complex problems. Start with one opening, use quality parts, document what you learn, and build from there into the rest of your restoration plan.
Frequently Asked Questions
How do I know when the weather stripping on a classic car needs to be replaced?
There are usually several clear signs that the original weather stripping has reached the end of its usable life. The most obvious indicators are water leaks, increased wind noise, musty interior smells, rattles, and doors or trunk lids that no longer close with the solid, cushioned feel they had when the car was new. On many classic cars, old seals become hard, cracked, flattened, brittle, shrunken, or sticky. You may also notice sections pulling away from the body, missing corners, torn vent window seals, or glass channel material that no longer supports the window properly.
It is also important to look beyond obvious leaks. A classic car can have weather stripping that appears intact at first glance but has lost its elasticity after decades of heat, UV exposure, and compression. When that happens, the seal may no longer spring back against the door, glass, or trunk opening, which allows air, dust, and moisture to get inside. A simple inspection test is to check whether the rubber still feels flexible and whether it compresses and rebounds. If it feels stiff or remains flattened, replacement is usually the right move.
Another strong clue is damage to surrounding materials. Damp carpet, rust beginning around floor pans or trunk seams, stained headliners, warped door panels, and fogging or condensation inside the cabin can all trace back to failed sealing. On a classic car, replacing worn weather stripping is not just about comfort. It is preventive maintenance that helps protect hard-to-find interior parts, painted surfaces, and body structure from long-term moisture damage.
What types of weather stripping are commonly replaced on a classic car?
Classic cars use several different kinds of sealing materials, and each one serves a specific purpose. The most commonly replaced pieces are door weather stripping, trunk seals, hood-to-cowl seals, roof rail seals, window felts or fuzzies, vent window seals, windshield and rear glass gaskets, and window channel liners. Some cars also use seals around quarter windows, convertible tops, T-top panels, tailgate openings, and firewall pass-through points.
Door weather stripping is typically the first place owners notice problems because it affects cabin noise, water intrusion, and how the door closes. Trunk seals are another high-value replacement item because they help prevent water from collecting in the trunk, where it can quietly destroy spare tire wells, jack storage areas, and lower quarter panels. Roof rail and window channel seals are especially important on hardtops, coupes, and convertibles, where proper glass-to-seal contact is essential for reducing wind noise and leaks.
It is also worth understanding that not all sealing materials are the same. Some are molded to fit specific corners and contours, while others come as extruded lengths that are cut to size. Materials may include rubber, EPDM, foam, or felt-lined channels depending on location and function. On a classic car restoration, using the correct profile matters just as much as replacing the old part. A seal that is too thick, too soft, or shaped incorrectly can create fit problems, make doors hard to latch, or leave gaps where leaks can still occur.
What tools and materials do I need to replace classic car weather stripping correctly?
The exact list depends on the area you are working on, but most weather stripping jobs require a manageable set of tools and supplies. In general, you will want the replacement seals, the correct adhesive if the application calls for it, adhesive remover, wax and grease remover or an appropriate surface cleaner, plastic scrapers, clean rags, masking tape, small rollers or hand pressure tools, trim removal tools, scissors or a sharp utility blade, and possibly weatherstrip clips if the original hardware is damaged or missing. For channels and glass-related work, a pick set, small screwdrivers, and patience are often just as important as any specialty tool.
Adhesive selection is critical. Not every seal uses glue, but when adhesive is required, use an automotive weatherstrip adhesive designed for rubber-to-metal applications. The bonding surfaces must be completely clean and dry before installation. Leftover old glue, rust scale, paint overspray, dirt, or silicone residue can prevent the new seal from seating correctly and may cause it to peel up later. Taking extra time to prepare the flange, channel, or mounting surface is one of the biggest differences between a quick repair and a durable restoration-grade result.
Reference material is also a tool. Factory service manuals, assembly manuals, and supplier installation guides can save you from installing a seal backward or placing the seam in the wrong location. If possible, compare the new part to the original before removing everything, and take photos during disassembly. On a classic car, small details such as clip spacing, molded corners, drain slot orientation, and seam placement can make a big difference in fit and appearance.
What is the best process for installing new weather stripping without causing fit or sealing problems?
The best approach is slow, methodical, and area-specific rather than trying to replace every seal at once without testing fit. Start by confirming that the replacement part matches the vehicle year, body style, and exact application. Then remove the old weather stripping carefully so you do not bend mounting flanges, damage painted edges, or lose attachment clips. Clean the mounting surface thoroughly, repair any rust or corrosion you uncover, and test-fit the new seal dry before applying adhesive. This step helps you verify orientation, length, molded corner placement, and how the seal lays naturally around the opening.
When adhesive is needed, apply it sparingly and in sections instead of trying to glue the entire seal all at once. Follow the adhesive manufacturer’s instructions for tack time, then press the seal into place evenly without stretching it. Stretching is one of the most common mistakes because the seal may look fine during installation but later shrink at the corners and leave gaps. Work from a known reference point, keep the seal relaxed, and use masking tape to hold difficult sections until the adhesive cures. Pay special attention to corners, ends, and seams, since those areas are most likely to lift or leak if rushed.
After installation, test the operation of the door, window, trunk, or hood before assuming the job is complete. New weather stripping is often firmer than the compressed original, so doors and lids may need a little time to settle. However, they should still align properly and latch without being slammed excessively. If a panel suddenly sits proud, requires too much force, or binds in one spot, check for incorrect seal placement, excessive adhesive buildup, or the wrong seal profile. A successful installation should improve closure feel, reduce noise, and create a uniform seal contact pattern rather than introducing new adjustment problems.
Can I replace weather stripping myself, or is it better to hire a professional for a classic car?
Many classic car weather stripping jobs are realistic do-it-yourself projects, especially basic door seals, trunk seals, and some hood seals. If you are patient, organized, and willing to spend time on surface prep and test-fitting, you can often get excellent results at home. The key is understanding that weather stripping replacement is less about brute mechanical skill and more about attention to detail. Clean surfaces, correct part selection, proper adhesive use, and careful alignment matter far more than speed.
That said, some jobs are more challenging and may justify professional help. Windshield and rear glass gasket installation, vent window rebuilds, convertible top side seals, and complicated glass channel work can be frustrating without experience. These areas often involve trim pieces, delicate glass, regulator adjustments, alignment-sensitive components, or body tolerances that vary from car to car. On a valuable classic, one mistake can damage fresh paint, chip glass, or create sealing issues that are harder to fix later. A professional installer or restoration shop may be the better choice when the work intersects with glass removal, major trim disassembly, or show-quality fit expectations.
A practical middle ground is to handle the straightforward seals yourself and outsource the specialized ones. That approach still captures much of the cost savings while protecting the more complex parts of the restoration. Whether you do it yourself or hire a professional, replacing weather stripping is one of the highest-value improvements you can make to a classic car. It enhances comfort, protects the interior, reduces leaks and noise, and restores the solid, properly sealed feel that makes an older car more enjoyable to drive and preserve.




