
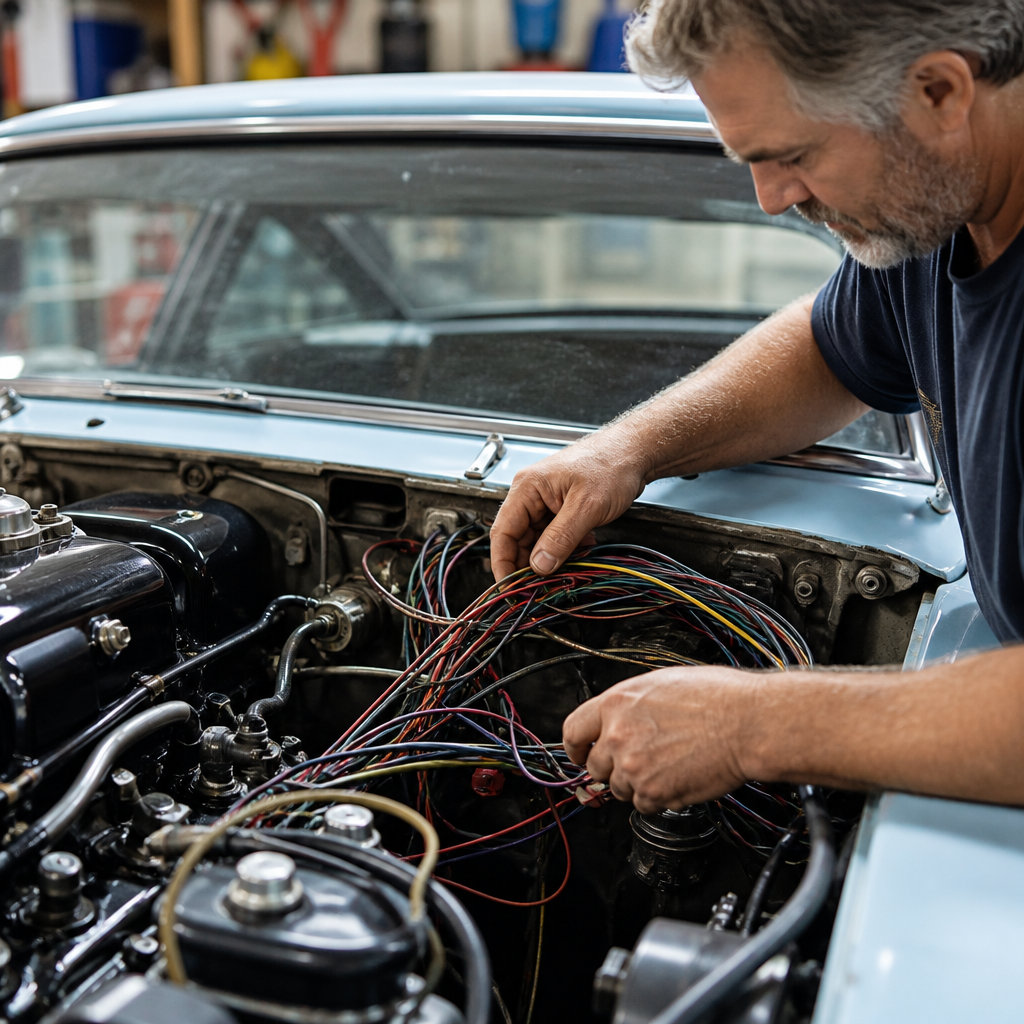
Replacing classic car wiring is one of the most important jobs in any restoration because brittle insulation, corroded terminals, and decades of amateur repairs can turn a beautiful vehicle into an unreliable fire risk. In restoration shops, I have seen perfectly rebuilt engines sidelined by a single cracked wire hidden behind a dashboard, and I have also seen modest drivers transformed simply by installing a clean, correctly routed harness. For anyone tackling DIY restoration guides, wiring deserves a central place because it affects starting, charging, lighting, gauges, accessories, and safety.
Classic car wiring refers to the vehicle’s electrical harnesses, connectors, grounds, switches, relays, and protective devices that distribute power from the battery to every electrical load. In many cars built from the 1940s through the 1980s, original wiring used PVC or cloth-covered insulation that hardens with heat and age. Previous owners often added stereos, trailer plugs, electric fans, and aftermarket ignition systems by splicing into factory circuits. The result is voltage drop, intermittent faults, blown fuses, and circuits that no longer match the wiring diagram. Replacing the harness restores electrical integrity and provides a reliable foundation for every other restoration and maintenance task.
This guide explains how to replace classic car wiring step by step while serving as a hub for DIY restoration guides under restoration and maintenance. It covers planning, tool selection, harness removal, installation, testing, and common mistakes, while also showing where related jobs fit into the larger restoration sequence. If you are rebuilding a muscle car, British roadster, vintage truck, or full-size cruiser, the principles are the same: document everything, use the correct gauge and protection, establish clean grounds, and verify each circuit before final assembly. Done carefully, a rewired classic starts easier, charges properly, and becomes far more dependable on the road.
Assess the car before you order parts
The first step in replacing classic car wiring is deciding whether to restore the original layout or upgrade it. If the car is a concours restoration candidate, a reproduction harness from suppliers such as M&H Electric Fabricators, Rhode Island Wiring Service, or American Autowire may be the right choice because wire colors, connectors, and branch lengths match factory specifications. If the car will be driven regularly with electric cooling fans, halogen headlamps, fuel injection, or audio equipment, a modern universal harness with additional fused circuits and relays usually makes more sense. I always advise owners to write a complete electrical equipment list before spending money, because that list determines fuse count, wire gauge, and routing needs.
During assessment, inspect the battery cables, starter feed, engine ground strap, firewall pass-throughs, bulkhead connectors, fuse panel, and every visible splice. Look for melted insulation near exhaust manifolds, green corrosion at copper strands, brittle sections under dash supports, and signs of overfusing such as foil-wrapped glass fuses or oversized blade fuses. A digital multimeter can confirm voltage drop, but visible condition tells most of the story on an unrestored car. Also note whether the vehicle remains positive ground, common on some British and pre-1960 systems, or has already been converted to negative ground. That detail affects gauges, charging system components, and accessory compatibility.
Good assessment also places wiring inside the broader restoration plan. If the body is off the frame, routing rear harnesses and fuel sender leads is easier before brake and fuel lines are finalized. If the dash is coming out for repainting or heater box rebuilding, wire replacement should happen at the same time. This hub page connects naturally to DIY restoration guides on instrument cluster restoration, charging system upgrades, starter troubleshooting, ignition tune-up, headlight relay installation, and dashboard refurbishment. Wiring is not an isolated task; it is the electrical backbone that supports every other restoration and maintenance decision.
Gather the right tools, references, and materials
A professional result depends on using proper tools instead of improvising with pliers and household connectors. At minimum, you need a factory service manual or accurate wiring diagram, masking tape for labels, a digital multimeter, a test light, wire strippers sized for automotive conductors, open-barrel and insulated-terminal crimpers, heat-shrink tubing, harness tape, rubber grommets, star washers, and quality terminals. I also recommend a Power Probe, non-adhesive harness wrap, split braided loom for hidden protection, and a terminal release kit if your car uses Packard 56, Weather Pack, bullet, or multi-pin connectors. These tools pay for themselves the first time you avoid chasing an intermittent connection behind the dash.
Material choice matters. Automotive primary wire should be GPT, GXL, or TXL grade, not generic household wire. GXL and TXL have thinner cross-linked insulation, better heat resistance, and are easier to route through congested classic dashboards. Match wire gauge to current load and run length: headlights, heater blowers, and electric fans need heavier conductors than dash illumination or sender wires. Use relays for high-draw accessories so switches carry control current rather than full load. For protection, modern blade-style fuse panels are easier to service than old glass fuses, but if originality matters, reproduction fuse blocks can still work well when circuits are sized correctly.
| Component | Best choice for stock restoration | Best choice for driver upgrade | Why it matters |
|---|---|---|---|
| Main harness | Vehicle-specific reproduction harness | Universal 12 to 21 circuit harness | Determines fit, fuse capacity, and future expandability |
| Wire insulation | Cloth-look or OEM-style PVC | GXL or TXL cross-linked wire | Heat resistance and durability affect long-term reliability |
| Connectors | Factory-style bullets, Packard, ring terminals | Weather-sealed connectors where exposed | Correct connectors reduce resistance and moisture intrusion |
| Circuit protection | Original fuse block or breaker layout | Modern blade fuses and relays | Proper protection prevents harness damage and electrical fires |
One rule I follow on every project is to buy more wire, terminals, and loom than the estimate suggests. Routing changes, hidden damage, and accessory additions are common once the old harness is removed. Keep a notebook with circuit names, terminal types, and wire colors as you work. That record becomes invaluable later when you troubleshoot a non-working fuel gauge or add an electric choke. Accurate documentation is one of the habits that separates successful DIY restoration guides from frustrating trial-and-error projects.
Remove the old harness without losing your roadmap
Before disconnecting anything, disconnect the battery and verify there is no residual power from chargers or auxiliary batteries. Then photograph every section of the car: engine bay, firewall, fuse panel, steering column, under-dash brackets, headlamp buckets, trunk, tail lamp housings, and ground points. I label each connector pair with matching numbers using masking tape flags, even when I know the entire harness is being replaced, because physical reference beats memory every time. Many classics have subtle routing paths around parking brake assemblies, heater ducts, cowl braces, and sharp body seams. Those details matter later when your new harness appears two inches too short because it took a less efficient path.
Removal should be methodical rather than destructive. Start at accessible endpoints such as tail lamps, sending units, horn leads, and front lighting sockets, then work inward toward the fuse panel and firewall. If the dash harness is intertwined with heater controls or gauge capillary tubes, free those systems first to avoid damage. On some GM, Ford, and Mopar vehicles, the bulkhead connector can be depinned and reused; on others, replacing the whole section is easier. Do not yank branches through holes until all clips, straps, and retainers are removed. Broken original retainers should be documented so replacements can be sourced during reassembly.
As the old harness comes out, compare it to the diagram and note deviations. You may find abandoned alarm wiring, bypassed ammeter leads, alternator conversions, or ignition feed changes to support HEI distributors. This is the moment to decide which modifications stay. For example, many owners of 1960s muscle cars choose to bypass the original full-current ammeter and install a voltmeter for safety, since bulkhead resistance and ammeter shunt circuits are common heat sources. British car restorers often add dedicated relays for headlamps to reduce switch stress. The point is not blind originality; it is building a system that is safe, serviceable, and appropriate for how the car will be used.
Install the new wiring harness step by step
Begin installation with the fuse panel or central distribution point because every branch references that location. Mount it securely, check clearance behind the panel, and ensure fasteners will not interfere with steering components or fresh-air ducts. Feed major branches loosely into place before making final terminations. I usually route the rear body harness first, then the dash harness, then front lighting and engine wiring, because that sequence reduces congestion. Use factory clips where possible and add abrasion protection anywhere the harness passes through sheet metal, across inner fenders, or near pedal brackets. Every firewall penetration should use a correctly sized grommet, never bare metal.
Make grounds a priority rather than an afterthought. Many classic electrical problems are ground problems disguised as component failures. Tail lamps dimly glowing, gauges fluctuating, and starter solenoids clicking can all result from weak or corroded grounds. Run heavy battery-to-engine and engine-to-body ground straps, clean paint from grounding points, use star washers to bite into metal, and seal exposed connections with dielectric grease after tightening. Fiberglass-bodied classics require especially careful bonding because lights and senders cannot rely on body panels for return paths. When I wire a restored car, I add dedicated ground leads to rear lamps and dash clusters even if the factory relied on housing contact, because it improves reliability immediately.
Terminate circuits carefully and consistently. A correct crimp made with the right die is mechanically strong and electrically sound; a poor crimp creates resistance, heat, and future failure. Solder can be useful in select low-vibration repairs, but on full harness builds I prefer high-quality crimps with adhesive-lined heat shrink because they remain flexible and serviceable. Follow wire color codes from the harness instructions or your own documented scheme. Leave service loops where components may need future removal, such as instrument clusters and front clip lighting. Separate low-current signal wiring from high-heat zones and ignition noise sources whenever possible, particularly on cars with electronic ignition or aftermarket EFI conversions.
Test every circuit before final trim goes back on
Testing is where a rewiring job becomes trustworthy. Before reconnecting the battery, use a multimeter to check continuity to ground on circuits that should not be grounded and confirm expected resistance on sender and lamp circuits. Install the correct fuse rating in every position; never “temporarily” substitute a larger fuse. If available, power the system first with a fused jumper or current-limited power supply so a mistake does not melt fresh wiring. Then test in sequence: parking lamps, headlamps high and low beam, brake lamps, turn signals, horn, wipers, heater blower, ignition feed, charging system, gauges, interior lights, and any accessory circuits. Document any issue immediately instead of assuming you will remember it later.
Voltage-drop testing is especially valuable on classic cars. For example, if sealed-beam headlights look yellow, measure voltage at the battery and then at the headlamp connector with lights on. A drop of more than about 0.5 volt on the feed side indicates excessive resistance in switches, connectors, or wire length, which is why relay upgrades make such a noticeable improvement. Charging systems deserve equal attention: verify alternator output voltage, check for heat at the main charge wire, and confirm that the ammeter or warning light circuit behaves correctly. On fuel, oil, and temperature gauges, confirm sender compatibility before blaming the new harness, since many reproduction gauges and senders use different resistance ranges.
Only after all circuits pass should you reinstall kick panels, carpets, under-dash liners, and trim. During final assembly, secure the harness so it cannot chafe against sharp brackets or sag onto pedals and linkage. Add labels at hidden junctions if the car has custom circuits, and store a printed diagram in the glovebox. That simple step saves hours for the next owner or for you five years later. Replacing classic car wiring is painstaking, but the payoff is immediate: reliable starts, brighter lights, steadier gauges, and far less chance of roadside electrical drama. If your project car still runs on brittle original wires or mystery splices, make wiring the next job in your restoration and maintenance plan.
Frequently Asked Questions
1. How do I know whether my classic car needs a full wiring replacement or just a few repairs?
A full replacement is usually the smarter choice when the existing wiring shows widespread age, heat damage, corrosion, or evidence of repeated patchwork repairs. In many classic cars, the original harness has been exposed to decades of engine heat, moisture, vibration, and owner modifications. If you see brittle or cracked insulation, hardened wire jackets, melted sections, green corrosion at terminals, non-factory splices, mismatched wire colors, or blown fuses with no obvious cause, those are strong signs the electrical system is no longer trustworthy. Intermittent problems such as flickering lights, gauges that work only sometimes, hard starting related to poor voltage delivery, or accessories cutting in and out also point to deeper wiring issues rather than isolated faults.
Minor repairs may be enough if the car has one clearly damaged branch circuit, such as a single headlight lead or a localized section affected by abrasion. But in most restorations, once you start uncovering one bad section, you often find several more hidden behind the dash, under the carpet, or in the engine bay. That is why many restorers prefer replacing the full harness during a rebuild. It gives you a clean baseline, improves reliability, reduces fire risk, and makes future diagnosis much easier. If the car’s wiring history is unknown and the harness has already been modified several times, a full replacement is often more efficient than chasing one problem after another.
2. What tools, supplies, and preparation do I need before replacing classic car wiring?
Preparation is what separates a smooth wiring job from a frustrating one. Before removing anything, gather the factory wiring diagram or a high-quality reproduction specific to your year, make, and model. If you are using an aftermarket harness, read the manufacturer’s instructions fully and compare them with the original schematic. You will also want masking tape, wire labels, a notebook or phone for photos, zip bags for hardware, and a marker so every connection can be identified as it comes apart. Good documentation saves hours during reassembly, especially behind dashboards and around switches where several similar wires may converge.
For tools, have a quality wire stripper, ratcheting crimper, multimeter, continuity tester, terminal release tools if needed, heat gun for heat-shrink tubing, side cutters, screwdrivers, socket set, and a bright work light. Use proper automotive-grade wire, terminals, loom, grommets, and fuse protection rather than generic household electrical materials. Soldering can be useful in select situations, but many professional restorers rely primarily on high-quality crimped connections because they are durable and less prone to vibration-related failure when done correctly. It is also wise to disconnect and remove the battery before starting, inspect grounding points, and plan the routing path of the new harness in advance. Classic car wiring is not just about connecting wires; it is about protecting them from heat, sharp edges, moving parts, and moisture for the long term.
3. What is the safest step-by-step approach to removing the old harness and installing the new one?
The safest approach starts with complete documentation. Disconnect the battery first, then photograph every area before disassembly, including the firewall, fuse box, ignition switch, gauge cluster, lighting connections, engine bay, and rear body wiring. Label wires and connectors even if you believe the new harness will be straightforward. Next, remove trim panels and access covers carefully so you can expose the harness without damaging original interior parts. Detach the old wiring methodically, section by section, rather than ripping it out in one pull. This lets you compare the old harness to the replacement and identify any non-factory changes that may need to be corrected.
When installing the new harness, begin by loosely routing the main sections through the vehicle before making final connections. Do not fully tighten clamps or wrap everything immediately. Start with major anchor points such as the fuse panel, bulkhead pass-through, rear body run, and engine bay branches. Then connect systems in a logical order: power feed, grounds, ignition, charging, lighting, instruments, and accessories. Make sure every wire is routed away from exhaust manifolds, steering linkages, pedal assemblies, and any area where chafing can occur. Use grommets where the harness passes through metal panels, and support the loom with proper clips instead of leaving it to hang freely. Once connected, test each circuit individually before final wrapping and securing. This staged process makes troubleshooting far easier than finishing the whole installation and then trying to find one missed connection buried deep in the dash.
4. What are the most common mistakes people make when rewiring a classic car?
The most common mistake is assuming wire color alone is enough to identify a circuit. On older vehicles, previous repairs may have changed colors, and aftermarket harnesses may not match the factory scheme exactly. Always verify each circuit by diagram and function. Another frequent error is using the wrong wire gauge. Undersized wire can overheat, cause voltage drop, and create serious safety hazards. Oversized wire is less dangerous electrically, but it can make routing and termination more difficult if used thoughtlessly. Poor grounds are another major issue. Many classic car electrical problems are not power-side failures at all, but weak or corroded ground paths between the battery, engine, body, frame, and accessories.
Other mistakes include using cheap crimp connectors, skipping fuse protection, failing to install grommets through sheet metal, and routing wires too close to heat sources. People also get into trouble when they tighten and wrap the harness before testing. That can turn a simple correction into a major teardown. Some restorers overlook the charging and starting circuits, focusing only on visible dash and lighting wiring, even though those heavy-current pathways are critical for reliability. Another big one is not accounting for added accessories such as electric fans, upgraded stereos, fuel pumps, or modern lighting. These components often require relays, dedicated fused feeds, or alternator upgrades. A clean-looking installation is important, but electrical integrity matters more. In classic cars, neat routing, proper support, and correct circuit protection are what make a harness safe and dependable.
5. After the new wiring is installed, how do I test it properly and make sure it stays reliable?
Once installation is complete, resist the urge to reconnect the battery and hope for the best. First, inspect every connection visually. Confirm that all grounds are clean, tight, and attached to bare metal where required. Verify fuse values, check that no wires are pinched under brackets or trim, and make sure the harness is secured away from heat and moving parts. Before applying full power, use a multimeter to check continuity on key circuits and confirm there are no obvious shorts to ground where there should not be. Some restorers also use a fused jumper or circuit-safe power supply for the first energizing step to reduce the risk of damaging the new harness if something is miswired.
After that, test one system at a time. Start with basic power distribution, then move to ignition, charging, exterior lighting, dash illumination, gauges, horn, wipers, heater blower, and any accessories. Watch for dimming, excessive heat at connectors, blown fuses, smoke, or unusual voltage drops. With the engine running, verify charging voltage and make sure the harness remains clear of engine movement and vibration. Reliability over time comes from more than the initial install. Recheck fasteners and clamps after a few drives, especially in the engine bay. If the car will be driven regularly, keep battery terminals clean, inspect grounds periodically, and address any electrical issue early before it causes heat damage elsewhere in the system. A properly wired classic car should not just work on the day it leaves the garage; it should remain stable, predictable, and safe for years to come.




