
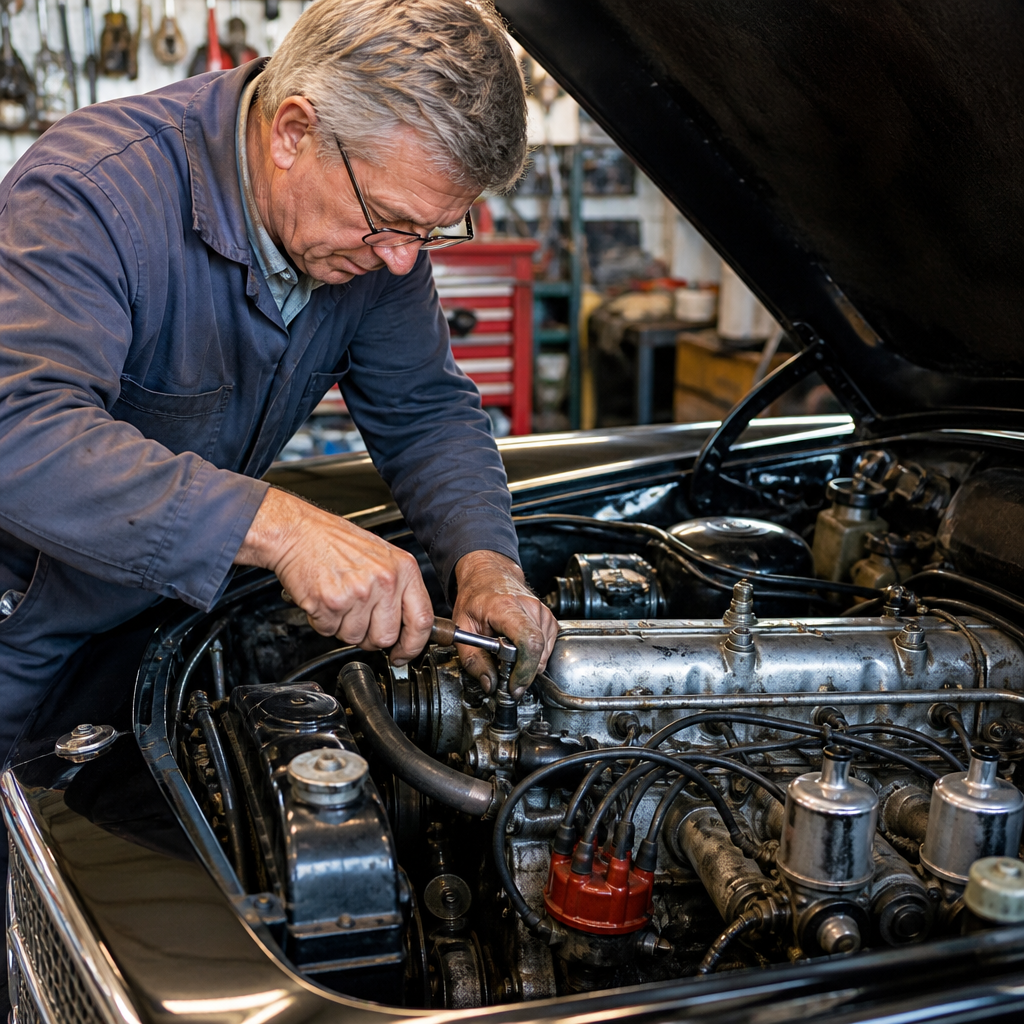
Restoring a classic car engine is the most technical and rewarding part of any vintage vehicle build because it combines diagnosis, machining, careful parts selection, and methodical assembly into one process that directly determines how the car starts, idles, pulls, and survives long term. In practical terms, a classic car engine restoration means returning an older internal combustion engine to reliable operating condition while preserving the character, specifications, and drivability that made the vehicle worth saving in the first place. This hub page for DIY restoration guides explains the full sequence, from planning and teardown to machine work, reassembly, break-in, and maintenance, so you can understand where each specialist task fits before turning a wrench. When I have helped owners revive small-block Chevrolets, Ford flatheads, B-series engines, and old Chrysler slant-sixes, the biggest problems were rarely dramatic failures; they were mismatched parts, poor measurements, skipped cleaning, and unrealistic budgets. That is why a step-by-step guide matters. A classic engine may look complete from the outside yet hide cylinder taper, worn cam bearings, cracked exhaust seats, sludge-filled oil galleries, or years of incorrect fasteners. If you approach the job in order, document everything, and use factory specifications with modern measurement tools, you reduce expensive mistakes and improve the odds of a first-start success. For anyone exploring restoration and maintenance, engine work also connects to related DIY restoration guides such as fuel system rebuilding, cooling system restoration, ignition tuning, engine bay detailing, and post-restoration storage practices, making this article the central reference point for the entire subtopic.
Set the Restoration Goal Before You Remove a Single Bolt
The first decision is not mechanical; it is strategic. You need to define whether the engine restoration is for factory-correct originality, reliable weekend driving, touring, or mild performance improvement. That choice affects machining tolerances, camshaft profile, compression ratio, carburetor calibration, ignition advance curve, and even which gaskets and finishes you buy. A numbers-matching muscle car usually rewards a conservative rebuild that preserves castings and original stampings, while a driver-grade classic may justify hardened valve seats, improved rear main sealing, and upgraded ignition for easier ownership. Start by recording casting numbers, head codes, date stamps, and any existing modifications. Buy the factory service manual, the parts catalog, and where possible a period assembly guide. Photograph hose routing, bracket locations, and fastener styles. Label electrical connections and bag hardware by component. In every successful restoration shop workflow I have used, documentation starts before disassembly and continues until final timing adjustment.
Budgeting is equally important. A do-it-yourself engine rebuild saves labor but not necessarily machine-shop expense, which often determines quality. Common line items include hot tanking or thermal cleaning, magnaflux inspection for cast iron, pressure testing for heads, boring and honing with torque plates, deck resurfacing, crankshaft polishing or grinding, connecting rod resizing, valve guides, valve job, balancing, and replacement of core plugs and cam bearings. Prices vary by region, but machining and parts can easily exceed the purchase price of the project car. Build a written plan with target horsepower, target usage, originality requirements, and a realistic cost range. If you do this upfront, you avoid the common trap of buying pistons before the block is measured or ordering standard bearings for a crank that needs undersize journals.
Safe Removal, Organized Teardown, and Initial Inspection
Once the goal is clear, remove the engine carefully and create an organized teardown area. Use an engine hoist rated for the load, a leveler for angle control, and an engine stand that supports the block securely. Drain oil and coolant first, then remove ancillary systems in a sequence that prevents damage: battery, radiator, fan shroud, exhaust connections, fuel lines, linkage, wiring, and transmission fasteners. During teardown, resist the urge to work fast. Watch for evidence that tells the engine’s story. Milky residue suggests coolant contamination. Copper in rod bearings points to wear through the overlay. Heavy ridge at the top of the cylinder indicates wear and possible rebore. Burned valves, collapsed lifters, and broken ring lands reveal operating history more accurately than the seller ever will.
A disciplined inspection helps you decide what can be reused. Measure crank endplay, camshaft lobe wear, cylinder taper, out-of-round, piston-to-wall clearance, and connecting rod side clearance before sending parts out. Check the block for freeze cracks around water jackets and lifter valley areas. Inspect cylinder heads for cracks between seats, especially on engines known for thermal stress. On old flat-tappet engines, look closely at lifter faces and cam lobes because modern oil chemistry makes break-in more sensitive than it was decades ago. This is also the right stage to inspect related systems. If the engine failed from overheating, clogged radiators, weak water pumps, or retarded timing may be part of the cause. As a hub for DIY restoration guides, this step links naturally to cooling, ignition, and fuel restoration projects because engine longevity depends on all three.
Cleaning, Measuring, and Deciding What the Machine Shop Must Do
Cleaning is not cosmetic; it is foundational. Sludge, rust scale, blasting media, and old gasket material can destroy a fresh engine in minutes. After teardown, degrease parts and remove core plugs so every oil gallery and coolant passage can be cleaned. Never assume a used block is ready for assembly because it looks clean externally. I have seen fresh builds lose oil pressure because debris remained behind gallery plugs. Precision measuring comes next. Use a dial bore gauge, outside micrometers, straightedge, feeler gauges, and plastigage only as a rough check, not a substitute for proper instruments. Compare every measurement to factory specifications and to the intended piston and bearing sizes from your parts supplier.
The machine shop should be selected for experience with older engines, not just modern aluminum work. Ask whether they use torque plates when honing, whether they can check main bore alignment, and whether they balance rotating assemblies dynamically. Flathead, overhead valve, and overhead cam engines each have quirks, and classics often use obsolete seals, unusual bearing arrangements, or scarce valve train geometry. Give the shop your intended use. A stock rebuild for a 1966 Mustang six-cylinder needs different priorities than a high-compression Pontiac V8. If originality matters, discuss whether deck height, chamber volume, and surface finish will remain within correct limits. If drivability matters most, ask about hardened exhaust seats for unleaded fuel, improved valve stem seals, and compatible ring materials for modern honing patterns.
| Component | What to Check | Typical Restoration Decision |
|---|---|---|
| Block | Cracks, bore wear, deck flatness, main alignment | Bore/hone, deck, install cam bearings and core plugs |
| Crankshaft | Journal wear, taper, scoring, straightness | Polish if in spec; grind undersize if worn |
| Connecting rods | Big-end roundness, twist, bushing wear | Resize rods, fit new bolts, rebush small ends |
| Cylinder heads | Cracks, guide wear, seat condition, warpage | Pressure test, valve job, guides, surface if needed |
| Camshaft and lifters | Lobe wear, pitting, taper, lifter crown | Replace as a matched set on most builds |
| Pistons and rings | Skirt wear, ring land clearance, fit to bore | Replace after final bore measurements |
Parts Selection: Originality, Reliability, and Compatibility
Choosing parts for a classic car engine restoration is where many DIY projects quietly succeed or fail. Order parts only after machining decisions are final. Pistons must match finished bore size, bearings must match journal sizes, and ring type must match the hone finish. For a stock or near-stock rebuild, buy from established suppliers such as Sealed Power, Mahle, Clevite, ACL, Melling, Cloyes, Fel-Pro, and Victor Reinz, depending on the engine family. If the engine uses a flat-tappet camshaft, select break-in lubricant with adequate zinc and phosphorus and verify spring pressures are appropriate for the cam. If you are restoring a British or European classic, source marque-specific gaskets, timing components, and oil seals because generic kits often fit poorly. Compatibility matters as much as quality. A modern composite head gasket may seal better, but only if surface finish and torque procedure suit the material.
Balance authenticity against upgrades carefully. Some improvements are nearly invisible yet valuable: neoprene rear main seals for engines that originally used rope seals, hardened exhaust seats for regular unleaded use, stainless valves when originals are unavailable, and electronic ignition modules hidden inside stock distributors. Other upgrades can undermine the character of the car or create tuning complexity, such as oversized carburetors, aggressive cams, or compression increases unsupported by fuel quality and cooling capacity. When owners ask where to spend money, I advise them to prioritize oiling, cooling, and ignition stability before chasing horsepower. An accurately rebuilt stock engine usually feels stronger than a poorly matched modified one. This is especially true in heavy classics where low-end torque, vacuum for accessories, and heat control matter more than peak dyno numbers.
Engine Assembly: Precision, Torque, and Patience
Assembly is where preparation becomes reliability. Before installing anything, wash the block, crank, rods, pistons, and heads again using hot soapy water where appropriate, then dry immediately and oil bare machined surfaces to prevent flash rust. Clean threaded holes with the correct chaser, not an aggressive cutting tap unless threads are damaged. Dry-fit components to verify clearances, piston orientation, ring gap, crank rotation, and timing set alignment. Use assembly lube on bearings, cam lobes, and lifter faces as specified by the manufacturer. Torque fasteners with a calibrated torque wrench, following factory sequence and any lubricant-specific correction from the fastener supplier. On some engines, especially those using aftermarket head studs or main studs, published torque values can differ from original manual specs because friction changes dramatically with lubricant type.
Pay close attention to details that first-time builders miss. Verify bearing shell tang placement, thrust bearing orientation, ring end-gap position, oil pump pickup clearance to the pan, and distributor drive indexing. Degreeing the camshaft is worthwhile even on a stock build because timing sets and keyways are not always exact. Check piston-to-valve clearance whenever cam profile, deck height, head milling, or gasket thickness changes. Prime the oil system before startup using a drill-driven priming tool where applicable, or by packing the pump and cranking with ignition disabled on engines that require it. Pre-fill the oil filter if the mounting angle allows. Static-time the ignition, set valve lash or preload correctly, and fill the cooling system with the proper corrosion-inhibiting mix. These are not optional finishing touches; they determine whether the engine fires cleanly and receives immediate lubrication.
First Start, Break-In, and Long-Term Maintenance
The first start of a restored classic car engine should be treated like a controlled test, not a celebration. Have fuel, cooling, ignition timing, and leak-check plans ready before turning the key. Keep a mechanical oil-pressure gauge visible if the dash unit is questionable. For flat-tappet camshafts, follow the cam maker’s break-in guidance closely, commonly running the engine at elevated rpm for the initial period to protect lobes and lifters. Watch coolant temperature, verify charging voltage, and inspect for fuel, oil, and coolant leaks immediately. If the engine does not start within a short, deliberate series of attempts, stop and diagnose rather than flooding cylinders or wiping cam lube with repeated cranking. After reaching operating temperature, retorque components where required by the manufacturer, adjust timing and idle mixture, and verify total advance with a timing light.
Break-in continues after the driveway test. Vary engine speed and load during the first several hundred miles, avoid long idling sessions, and change oil and filter early to remove assembly debris and wear particles. Cut the filter open if you want the clearest picture of internal health; fine metallic sheen may be normal, but flakes and magnetic chunks are not. Recheck valve lash, ignition dwell or module operation, carburetor settings, belt tension, and coolant level after the first heat cycles. Long-term maintenance keeps the restoration from becoming another short-lived rebuild. Use fuel stabilizer if the car sits, keep cooling systems full of proper inhibitor, and run the engine often enough to evaporate moisture. As the hub for DIY restoration guides under restoration and maintenance, this article should lead you naturally into related jobs such as carburetor rebuilding, distributor restoration, radiator recoring, and exhaust manifold repair. Take the next step by creating a written plan for your engine, gathering manuals and measuring tools, and tackling the project one verified specification at a time.
Frequently Asked Questions
What are the first steps in restoring a classic car engine?
The first steps are inspection, documentation, and planning. Before turning a wrench, identify the exact engine, casting numbers, date codes, and major components so you know whether you are working with the original numbers-matching engine or a period-correct replacement. This matters because it influences everything from restoration goals to parts selection and machine work decisions. Once identified, perform a full visual and mechanical assessment. Look for obvious cracks, oil leaks, coolant contamination, missing hardware, stripped threads, broken mounts, and signs of previous poor-quality repairs.
After the initial inspection, test what you can before disassembly. Compression and leak-down tests, oil pressure readings, spark plug condition, and coolant condition can reveal a lot about internal health. If the engine runs, listen for knocks, valvetrain noise, smoke, uneven idle, and overheating tendencies. These clues help you understand whether the engine needs a basic refresh or a complete rebuild. The next step is to document everything thoroughly with photos, labels, notes, and bagged fasteners. A classic engine restoration can involve dozens of small brackets, spacers, clips, and fittings that are easy to forget months later.
From there, set a clear objective. Some owners want a factory-correct restoration, while others prioritize reliability with subtle upgrades such as hardened valve seats, improved gaskets, or electronic ignition hidden inside a stock-looking setup. Establish a parts budget, machine shop budget, and timeline early. A successful restoration starts with patience and a realistic plan, because tearing down an engine without a measurement strategy or sourcing plan often leads to delays, extra cost, and avoidable mistakes.
How do you know whether a classic car engine needs a rebuild or just a refresh?
The difference comes down to wear, damage, and intended use. A refresh usually means replacing service items such as gaskets, seals, timing components, water pump, hoses, ignition parts, and possibly bearings or piston rings if inspection supports it. A full rebuild is necessary when the engine has significant internal wear, poor oil pressure, cylinder taper, crankshaft damage, worn cam lobes, cracked heads, excessive blow-by, or contamination from overheating or bearing failure. If the engine has been sitting for many years, a complete teardown is usually the smarter choice even if it appears complete from the outside.
The only reliable way to decide is through measurement. Once the engine is disassembled, the block, crankshaft, rods, pistons, cylinder heads, camshaft, and valvetrain should be cleaned and inspected. Cylinder bores are checked for taper and out-of-round, crank journals are measured for wear and scoring, deck surfaces are examined for warping, and valve guides and seats are checked for play and sealing quality. These measurements determine whether the engine can stay near standard dimensions or whether it needs boring, honing, grinding, decking, align honing, or replacement components.
Usage also affects the decision. If the car is going to be driven regularly, including highway use and hot-weather cruising, reliability should outweigh the temptation to reuse marginal parts. On the other hand, if the goal is a highly original show car that sees limited operation, preserving correct components may carry more importance. In most cases, a classic engine that is already out of the car deserves a careful, comprehensive inspection because labor is too significant to risk reassembling worn internals that may fail shortly after startup.
What machine work is usually required during a classic engine restoration?
Machine work is often the difference between an engine that merely runs and one that runs smoothly, holds oil pressure, and lasts. The most common services include hot tanking or thermal cleaning, crack inspection, cylinder boring and honing, crankshaft polishing or grinding, connecting rod resizing, block decking, and cylinder head resurfacing. Depending on engine condition, the shop may also install cam bearings, freeze plugs, valve guides, hardened exhaust seats, and thread repairs. Older engines frequently suffer from corrosion, worn sealing surfaces, and tolerances that are no longer acceptable for reliable service.
Cylinder heads deserve particular attention because they control compression, sealing, cooling, and valvetrain stability. A proper valve job includes inspecting springs, retainers, valves, seats, and guides, then machining as needed to restore correct geometry and sealing. On many vintage engines, adding hardened valve seats is a wise upgrade if the car will be driven on modern unleaded fuel. The rotating assembly may also need balancing, especially if new pistons, rods, or a replacement crank are being used. Balancing improves smoothness and can reduce stress on bearings and main caps over time.
Just as important as the machining itself is choosing a shop that understands older engines. Classic blocks and heads often have quirks that differ from modern designs, including unusual oiling systems, rope seals, non-adjustable valvetrains, or obsolete hardware. A good machine shop will not simply cut everything to generic specs; it will work from factory service data, verify clearances against the actual parts being installed, and communicate any concerns before material is removed. Precision here protects originality, performance, and long-term durability.
How do you choose the right replacement parts while keeping the engine true to the car?
Start by deciding how original the restoration needs to be. For a factory-correct build, focus on OEM-style replacement parts, original casting-compatible components, correct finishes, and stock specifications for compression, cam profile, carburetion, and ignition. For a driver-quality restoration, it often makes sense to use modern equivalents where they improve reliability without changing the character of the engine. Examples include better gasket materials, upgraded rear main seal solutions where available, improved timing sets, modern oil pumps from reputable suppliers, and concealed electronic ignition for easier starting and more stable spark.
Fit and quality matter more than brand reputation alone. Many classic car restorers have learned that not all reproduction parts are equal, and some cheaper kits introduce problems with poor machining, incorrect dimensions, or weak materials. Always compare new parts to original components, verify part numbers, and measure critical items such as bearings, rings, pistons, pushrods, and valve springs before installation. Never assume a part is correct simply because the catalog says it fits. On older engines, small specification differences can affect oil clearance, compression ratio, piston-to-valve clearance, and valvetrain geometry.
It is also wise to think in terms of systems instead of individual parts. A stock camshaft should be matched with springs and lifters appropriate to that grind. Pistons should match the desired compression and the chamber volume of the heads. Bearings should be selected after machine work measurements are finalized, not before. Carburetion, ignition timing, and cooling components must support the rebuilt engine as a whole. The best restorations preserve the feel of the original powerplant while quietly improving the weak points that caused trouble decades ago.
What are the biggest mistakes to avoid when reassembling and starting a restored classic car engine?
The biggest mistake is rushing. Cleanliness, measurement, and procedure are everything during assembly. Every oil passage, bolt hole, gasket surface, and internal part must be completely clean before assembly begins. Dirt, leftover blasting media, lint, or machining debris can destroy fresh bearings and cam surfaces within minutes. Dry-fitting and checking clearances is equally important. Main and rod bearing clearances, ring end gaps, piston-to-wall fit, thrust clearance, camshaft end play where applicable, lifter movement, and valve-to-piston clearance should all be verified. Following torque specs and tightening sequences is non-negotiable, especially on main caps, rod bolts, heads, and intake manifolds.
Another common mistake is using the wrong lubricants or failing to prime the oiling system. Assembly lube should be applied to bearings, cam lobes, lifter faces where required, and other critical contact points. Before first startup, the oil system should be primed so oil reaches bearings and valvetrain components before the engine fires. Ignition timing and fuel delivery should also be close enough to allow immediate startup. Excessive cranking on a fresh engine is hard on new parts and can wash cylinders with fuel. On flat-tappet cam engines in particular, proper break-in procedure is critical to camshaft survival.
Finally, do not treat first startup as the end of the process. It is the beginning of final validation. Watch oil pressure, coolant temperature, fuel leaks, charging voltage, and exhaust behavior immediately. Recheck timing, adjust carburetor idle mixture if applicable, and listen for any abnormal noise. After initial run-in, inspect for leaks, retorque components if the engine design calls for it, cut open the oil filter after early mileage if practical, and change oil and filter according to break-in requirements. A carefully restored classic engine rewards patience, and the best results come from treating assembly, startup, and post-start inspection as one continuous process.




