
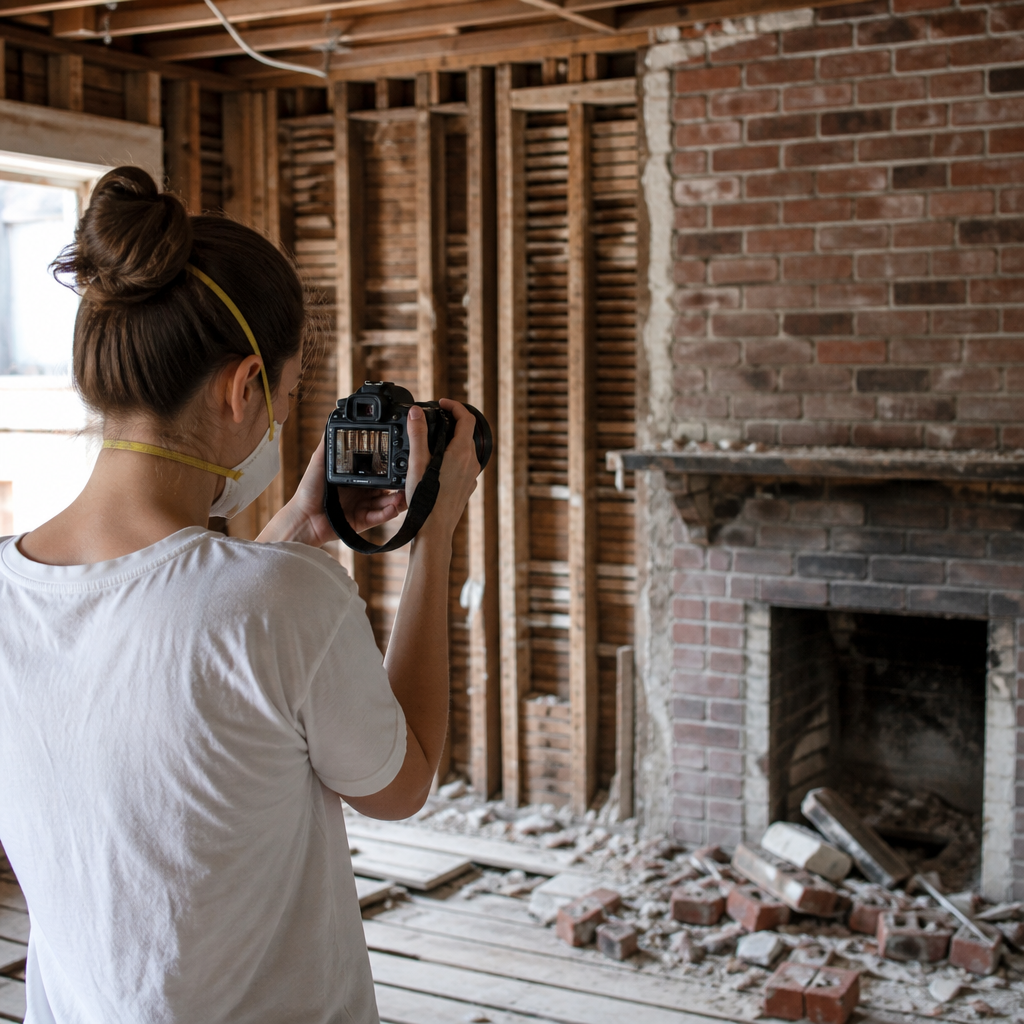
Documenting a restoration process is the difference between a project that teaches you for years and one that leaves you guessing about what worked, what failed, and what the item is actually worth when finished. In restoration basics, documentation means creating a clear record of the object’s starting condition, every intervention you make, the materials and tools you use, the decisions behind those choices, and the final outcome. I have seen excellent metal, furniture, vehicle, and architectural restorations lose much of their practical value because the owner relied on memory instead of records. Good documentation protects provenance, supports resale, improves safety, guides maintenance, and makes future repairs faster and more accurate.
For readers building a restoration and maintenance system, this article serves as the hub for restoration basics because nearly every specialized task depends on reliable records. Whether you are stripping paint from a door, stabilizing rust on a tool chest, rebuilding an engine component, or repairing veneer on a cabinet, the same principles apply. You need a repeatable method for photos, notes, measurements, condition reports, parts tracking, finish schedules, and post-project care. Professionals in conservation, auto restoration, museum collections, and facilities management all document this way because restoration is not just making something look better. It is managing evidence, preserving original character where possible, and creating a verifiable history of work.
The core terms are straightforward. A condition assessment is the baseline description of damage, wear, alterations, missing pieces, and risks before work begins. An intervention log records each action, from surface cleaning to structural repair. Provenance is the known ownership or historical background that helps establish authenticity and significance. Materials documentation lists products such as solvents, adhesives, primers, oils, waxes, rust converters, or replacement hardware, ideally with brand, formula, and date. Maintenance documentation captures what should happen after restoration, including cleaning methods, environmental limits, lubrication intervals, and inspection schedules. If you learn these basic categories and apply them consistently, you can scale from a simple household repair to a museum-grade restoration file.
Why does this matter so much? Because restoration decisions are cumulative. One unlabeled fastener bag, one missing reference photo, or one undocumented coating can create hours of avoidable rework. Documentation also reduces irreversible mistakes. Before I remove original finish, disassemble trim, or replace a worn but historic part, I document enough detail to justify the choice and retrace my steps if needed. That habit matters even more when a project has financial, historic, or safety implications. Insurance claims, appraisals, estate transfers, warranty disputes, and regulatory reviews often depend on records. At a practical level, good restoration documentation turns a messy project into a controlled process, which is the foundation of restoration basics.
Start With a Baseline Condition Report
The first rule of documenting your restoration process is simple: record the object before you touch it. Your baseline condition report should identify the item, its location, approximate date or model, dimensions, materials, known history, visible damage, previous repairs, and immediate risks. In furniture restoration, that might include wood species, joinery type, finish condition, veneer loss, insect activity, water staining, and replaced hardware. In vehicle restoration, it might include VIN, engine number, rust zones, paint layers, fluid leaks, wiring modifications, and non-original components. In building restoration, it could include substrate type, moisture readings, cracking patterns, corrosion, failed sealants, and code-related concerns.
Write the report in plain language but use precise terms when they matter. “Crack at left rear leg joint, open approximately 1.5 millimeters under light pressure” is better than “leg is loose.” “Surface oxidation concentrated on lower door skin and inner seam, with perforation near drain channel” is better than “rust at bottom.” Specificity helps you compare before and after conditions honestly. It also keeps you from overstating damage and replacing original material unnecessarily. If a flaw is cosmetic, say so. If it affects structure or safety, classify it clearly. Many restorers use a severity scale such as monitor, repair, stabilize, or replace, which makes planning easier.
Photographs belong inside the baseline report, not as an afterthought. Capture wide shots, medium shots, and close-ups with consistent lighting. Include a ruler, color card, or known reference object for scale where appropriate. Photograph labels, serial plates, maker’s marks, hidden stampings, unusual fasteners, and evidence of earlier repairs. Take photos before disassembly, during disassembly, and after each major phase. I recommend numbering image folders by date and stage, such as 01-intake, 02-disassembly, 03-cleaning, 04-repair, 05-finishing, and 06-final. That sequence creates an internal linking signal within your own files because each image set corresponds to a phase in the written log and makes retrieval fast later.
Build a Repeatable Documentation Workflow
The best restoration documentation system is the one you will use every time, so keep it structured and repeatable. Create one project folder with subfolders for intake photos, reference research, measurements, parts lists, receipts, intervention logs, and final deliverables. Use a standard file naming convention such as project-name_date_stage_description. Add a master document that acts as the project index. This should summarize the object, goals, deadlines, stakeholders, budget range, and links to every supporting file. In larger shops, that index often lives in Airtable, Notion, Trello, Asana, or a digital asset management platform. For solo restorers, a spreadsheet and cloud storage can work perfectly well if naming conventions are disciplined.
Your intervention log should answer four questions every time you work: what was done, why it was done, what materials were used, and what happened next. For example, “Removed non-original latex overcoat from test area using denatured alcohol poultice after solvent spot tests indicated original shellac below; neutralized residue; allowed 24 hours drying; no color transfer from base layer.” That single entry tells a future restorer far more than “stripped finish.” Direct, complete entries also help if a project stalls for weeks. When you return, you can see where you left off without repeating tests or exposing the object to unnecessary handling.
Use a simple table to track the information that is most often lost mid-project: parts, materials, and status.
| Record Type | What to Capture | Example | Why It Matters |
|---|---|---|---|
| Part | Location, orientation, condition, bag number | Left door hinge, upper, original brass screws, Bag B3 | Prevents mix-ups during reassembly |
| Material | Brand, product line, batch, date opened | Osmo Polyx-Oil Satin, opened 2026-09-10 | Supports repeatability and troubleshooting |
| Finish Test | Area tested, solvent used, result | Underside rail, mineral spirits, no reaction | Guides safe cleaning and coating removal |
| Measurement | Dimension, tolerance, tool used | Panel width 412 mm, caliper verified | Improves fit and authenticity |
| Decision | Chosen action and rationale | Stabilize original finish rather than strip to preserve patina | Creates accountability and future context |
A repeatable workflow should also include version control. If you revise a condition report after discovering hidden damage, do not overwrite the earlier record without noting the change. Date the revision and explain what new evidence changed your assessment. This is standard practice in conservation and facilities work because original observations still have value. They show what was visible before removal, cleaning, or dismantling altered access. The same principle applies to estimates and scope. If the project moves from cosmetic touch-up to structural restoration, document the trigger for that change, such as rot uncovered under a threshold or frame distortion measured during alignment checks.
Document Disassembly, Testing, and Treatment Decisions
Most restoration errors happen between disassembly and treatment, which is why this stage deserves meticulous records. As you remove components, photograph each part in place, then again once removed, then once labeled. Bag hardware in small batches and mark each bag with orientation, location, and sequence. On complex projects, add hand sketches that show fastener lengths, shim positions, wire routing, or stacked washer order. Phones make this easy, but do not rely on camera roll chaos. Transfer files the same day. In my experience, unlabeled hardware becomes expensive confusion faster than almost any other restoration mistake.
Testing should be documented before full treatment begins. This includes solvent tests, finish adhesion tests, moisture meter readings, pH checks, rust depth assessment, compression readings, or wood hardness probes, depending on the object. The goal is to prove that the chosen method matches the actual condition. If you are cleaning painted architectural trim, write down where each cleaner was tested, dwell time, agitation level, and result. If you are reviving metal, note whether corrosion is active, stable, or structural. If you are reglueing loose joinery, record the original adhesive if known, because hide glue, PVA, epoxy, and polyurethane each require different preparation and reversal strategies.
Treatment decisions should always connect action to evidence. A strong entry sounds like this: “Consolidated friable lower sash rail with low-viscosity epoxy after moisture content stabilized below 15 percent and probing confirmed loss of compressive strength beyond filler-only repair.” This language matters because it explains not only what you did but why less invasive options were rejected. Balance is essential. Restoration basics are not about replacing everything old with something new. In fact, the best restorations usually preserve more original material than amateurs expect. Documenting your reasoning keeps the project aligned with authenticity, function, budget, and long-term maintenance instead of impulse decisions.
Track Materials, Standards, and Maintenance Requirements
A restoration file is incomplete if it stops at the reveal photos. Long-term value comes from documenting exactly what was introduced into the object and how it should be maintained. Record finishes, adhesives, consolidants, sealants, fillers, abrasives, lubricants, and replacement parts by full product name. Include technical data sheets and safety data sheets when relevant, especially for coatings and solvents. If color matters, save formula numbers, sample cards, or spectrophotometer data. For wood, note species and cut for replacement stock. For metals, identify alloy where possible. For mechanical projects, capture torque values, gasket materials, fluid types, and break-in procedures. These details prevent incompatible future repairs.
It also helps to align your records with recognized standards and tools. Conservators often use reversible treatment principles where practical. Building professionals may reference ASTM test methods, moisture meters from Protimeter or Wagner, and infrared imaging for hidden moisture. Furniture restorers may rely on shellac flakes cut by weight, viscosity notes, and humidity readings because environmental conditions affect application and cure. Vehicle restorers frequently use factory service manuals, parts books, and paint code references. Naming the source of your decisions strengthens the file and makes it more credible if a buyer, client, insurer, or future craftsperson needs to rely on it.
Finally, close the loop with a maintenance plan. State what the object needs next month, next season, and next year. List cleaning products that are safe, conditions to avoid, inspection points, and signs of renewed deterioration. For example, a restored cast-iron tool chest may need quarterly wax inspection in humid environments. A repaired wood window may need paint film checks every spring on the sill and lower rail. A revived leather seat may require pH-appropriate cleaning and controlled humidity rather than frequent conditioning. Good restoration documentation does not end when the project looks finished. It continues until the owner knows how to preserve the work you completed.
Common Documentation Mistakes and How to Avoid Them
The most common mistake is inconsistency. Restorers start with careful notes, then skip entries once the project gets busy. Fix that by using short templates and filling them out at the bench, not at the end of the week. Another frequent problem is vague language. Terms like cleaned, repaired, treated, or refinished are too broad unless paired with methods and materials. Missing scale in photos is another issue, especially when cracks, gaps, and losses are part of the condition story. I also see people fail to document what they chose not to do. That omission matters because restraint is often a deliberate, skilled restoration decision.
Another avoidable mistake is separating receipts, product labels, and photos from the main project file. Keep everything tied to one index so future users are not hunting across phones, email, paper notebooks, and random boxes of hardware. If the project has historical significance, document provenance carefully and distinguish verified history from family stories or seller claims. Accuracy builds trust. The best restoration and maintenance records are organized enough that another competent person could continue the work, maintain it responsibly, or evaluate it years later without guessing. That is the real standard for restoration basics, and it applies whether the project is a cherished household heirloom or a high-value collectible.
Documenting your restoration process turns craft into a disciplined system that protects quality, value, and future decision-making. Start with a baseline condition report, use organized photos, maintain a daily intervention log, record tests before treatment, label every part during disassembly, and save exact material data for anything you introduce. Just as important, explain your reasoning. Restoration basics are not only about technique; they are about evidence, traceability, and care over time. When your records are complete, you can defend the choices you made, repeat successful methods, and hand the object to the next owner or restorer with confidence.
As the hub for restoration basics within a broader restoration and maintenance strategy, this approach supports every specialized topic that follows, from cleaning and stabilization to refinishing, parts replacement, and preventive care. Strong documentation reduces mistakes, preserves authenticity, and makes maintenance realistic long after the project ends. If you are starting your next restoration, build the file before you pick up the first tool, and update it every session. That one habit will improve the result more than most people expect.
Frequently Asked Questions
Why is documenting a restoration process so important?
Documentation is what turns restoration from a series of tasks into a repeatable, defensible process. At the most basic level, it gives you a reliable record of the object’s original condition, the work performed, the materials used, and the reasoning behind each decision. That matters because restoration projects often stretch over weeks, months, or even years, and memory is never as accurate as a written and visual record. Without documentation, it becomes difficult to remember which finish was removed first, what fasteners were original, where corrosion was most severe, or which repair methods produced the best result.
Good documentation also protects the historical, practical, and financial value of the item. If you are working on furniture, metal objects, vehicles, or architectural elements, future owners, appraisers, insurers, or collaborators may want proof of what was original, what was repaired, and what was replaced. A clear restoration record can support authenticity, justify valuation, and show that work was carried out responsibly rather than cosmetically. It is especially useful when a project includes rare parts, structural repairs, finish matching, or conservation-sensitive decisions where every step affects long-term value.
Just as importantly, documentation helps you learn. Restoration is full of trial, observation, and adjustment. When you record products, settings, methods, drying times, failures, and outcomes, you build a reference library for future projects. Over time, your notes reveal patterns: which rust treatments hold up, which adhesives fail under stress, which cleaning methods are too aggressive, and which repairs remain stable. In that sense, documentation is not paperwork for its own sake. It is one of the most valuable tools a restorer has for quality control, accountability, and continuous improvement.
What should I include when documenting a restoration project from start to finish?
A complete restoration record should begin with the item’s identity and starting condition. That means noting what the object is, its approximate age, maker or manufacturer if known, dimensions, materials, construction details, provenance, and any identifying marks such as serial numbers, stamps, labels, signatures, or casting marks. Then document the object’s condition before any work begins. Describe wear, corrosion, cracks, missing parts, previous repairs, finish loss, structural instability, water damage, rot, distortion, contamination, or any modifications made over time. This establishes a baseline and prevents confusion later about what damage existed originally versus what was discovered during disassembly.
Photographs are essential at every stage. Start with overall views from multiple angles, then take close-ups of damaged areas, joints, hardware, finishes, and any unusual details. If the object is being disassembled, photograph each step before and after parts are removed. Label or number components and connect those labels to your written notes. Alongside photos, keep a written log that includes dates, observations, measurements, sketches if needed, and the sequence of work performed. If a particular area required extra care or changed your plan, record that decision and why you made it.
You should also track every intervention in practical detail. Note the tools used, products applied, dilution ratios, grit sequences, welding or soldering methods, wood species for patches, coating types, curing times, torque values, finish formulas, and replacement part sources. If you tested multiple techniques, record what was tried and what happened. Finally, close the project with after-photos, a summary of completed work, any unresolved issues, maintenance recommendations, and a list of original parts retained or archived. A strong final record tells the full story of the restoration, not just the polished end result.
How do I organize photos, notes, and records so they are actually useful later?
The best system is the one you will consistently use, but it needs to be structured enough that you can find information quickly months or years later. Start by creating a dedicated project folder, whether digital, physical, or both. Use clear file naming conventions such as date, project name, and stage of work. For example, organize folders into sections like intake, condition photos, disassembly, cleaning, repairs, finishing, reassembly, and final documentation. That simple structure makes it much easier to reconstruct the project timeline later than if images and notes are stored in one large unsorted archive.
For photos, keep both wide shots and close-up detail shots, and rename key files so they describe what they show. Instead of leaving a file as a generic camera number, label it with something meaningful like “drawer-front-crack-before-repair” or “left-fender-primer-test-area.” If parts are removed, use tags, numbered bags, or trays and photograph them with those numbers visible. Then refer to those same numbers in your notes. This creates a direct link between the physical pieces, the images, and the written record, which is invaluable during reassembly or when revisiting the project later.
For written records, use a restoration log that captures dates, actions, materials, and observations in sequence. Some restorers prefer notebooks, while others use spreadsheets, project management apps, or templates. Any of those can work if they remain consistent. Include receipts, product data sheets, paint codes, supplier information, and sketches in the same system. Back up digital files in at least two places, such as cloud storage and an external drive. If the project has legal, insurance, museum, or client significance, keep a printable master file as well. A well-organized record is not just easier to reference; it can save time, reduce errors, and make your work far more credible.
What are the biggest mistakes people make when documenting restoration work?
The most common mistake is starting too late. Many people begin documenting only after cleaning, sanding, partial disassembly, or emergency stabilization has already happened. That creates a gap at the most important moment: the original condition. Once a surface has been cleaned or a part has been removed, you cannot truly recreate the exact evidence of how it looked before intervention. Even a quick set of intake photos and initial notes is far better than relying on memory. If there is any chance a project has historical, sentimental, or monetary value, documentation should begin before the first tool touches it.
Another major mistake is being too vague. Notes like “repaired leg,” “treated rust,” or “refinished top” do not tell you enough later. Useful documentation explains what was done, how it was done, and with what materials. For example, instead of simply saying a crack was repaired, record whether it was glued, pinned, clamped, filled, or reinforced, which adhesive was used, and how the area was prepared. The same applies to finishes, metal treatments, mechanical repairs, and structural work. Specific details are what make documentation valuable for repeatability, troubleshooting, and future evaluation.
People also often overlook failures, reversals, and decision changes. They document only the successful steps and final beauty shots. In reality, the failed solvent test, the mismatched stain sample, the coating that reacted badly, or the replaced repair strategy may be the most educational parts of the whole project. Not recording those moments means losing hard-won knowledge. Finally, poor file management can undermine otherwise excellent records. Scattered photos, unlabeled parts, missing dates, and no backup copy can make a project nearly impossible to interpret later. Good documentation does not have to be fancy, but it does have to be timely, specific, and organized.
How detailed should my documentation be if I am restoring something for personal use rather than resale or professional work?
Even for a personal project, your documentation should be detailed enough that you could stop work for six months, return to it, and still understand exactly what happened. That does not mean every hobby restoration requires museum-level reports, but it does mean you should capture the essentials with discipline. At a minimum, record the item’s condition before work, take photos throughout the process, keep track of disassembly order, note the products and techniques used, and summarize the final results. If a future repair is needed, those records will save enormous time and frustration.
Personal projects also have a way of becoming more important over time. A family piece of furniture, a classic vehicle, an old tool chest, or an architectural salvage element may later be sold, inherited, insured, or professionally evaluated. When that happens, a documented restoration history adds clarity and credibility. It can show which elements are original, which were sympathetically repaired, and which were replaced for function or safety. That information is useful not only for value, but also for maintenance. A future owner or even your future self will benefit from knowing the exact finish, fastener type, patch material, or protective coating used.
The practical rule is simple: document enough that someone else could understand your process without you standing there to explain it. If you can provide before-and-after images, a sequence of key steps, material lists, and short notes about why important decisions were made, you are already far ahead of most restorers. For personal work, useful documentation is less about formality and more about clarity. A modest but complete record will make your restoration smarter, easier to maintain, and far more meaningful in the long run.




